
Build a Pottery Barn Inspired Reed Wall Desk
An Easy to Build Free-Standing Desk
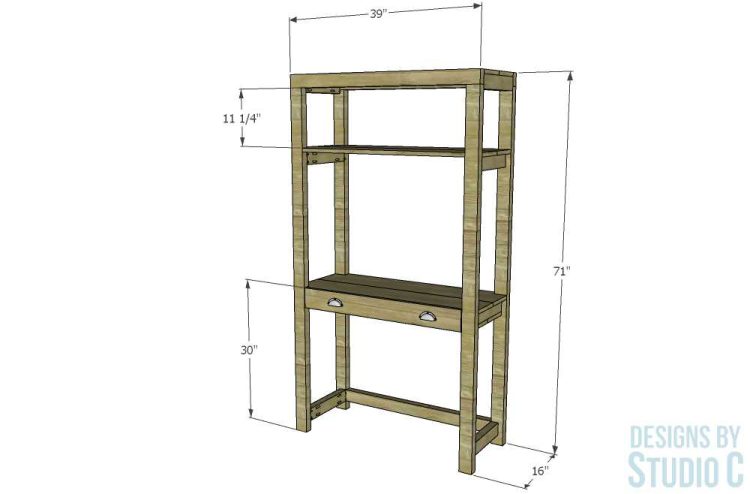
This easy to build Reed wall desk, inspired by Pottery Barn, uses off-the-shelf lumber and features a drop-front cubby for storing essentials. There are also two shelves, including the top, for extra storage! This super-simple plan can be completed in a weekend!
Materials:
- 1-1/2″ screws (<– affiliate link!)
- 2-1/2″ pocket hole screws
- 2″ brad nails
- Piano hinge (or other small hinges) to attach cubby front (<– affiliate link!)
- Two magnetic catches for cubby front
- Drawer handles of choice
- Wood glue
- Sandpaper (80, 120, 220 grits)
- Finishing supplies (stain and sealer or paint)
Lumber:
- 7 – 2×3 at 8′ (or rip a 2×4 to 2-1/2″ wide)
- Scrap of a 1×3 at 13-3/4″ long
- 5 – 1×10 at 8′
Cut List:
- 4 – 2×3 at 68-1/2″ – Frame Legs
- 2 – 2×3 at 39″ – Upper Frame Stretcher
- 2 – 2×3 at 34″ – Back Frame Stretchers
- 8 – 2×3 at 13″ – Side Stretchers
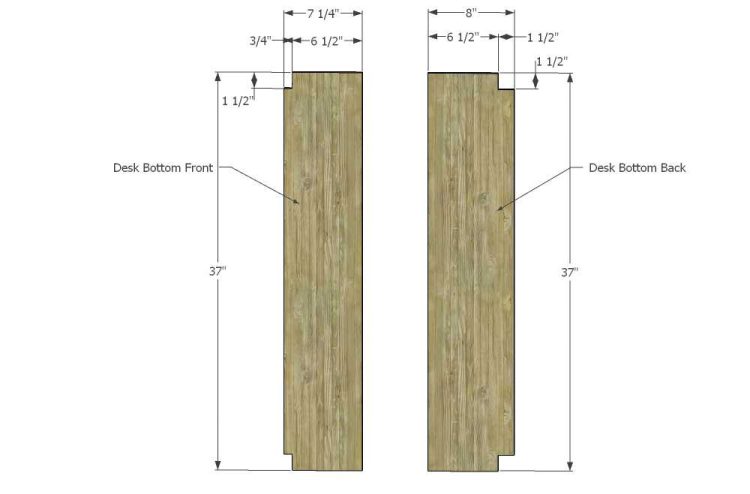
- 2 – 1×10(one ripped to 7-1/4″ wide, the other ripped to 8″ wide) at 37″ – Desk Bottom
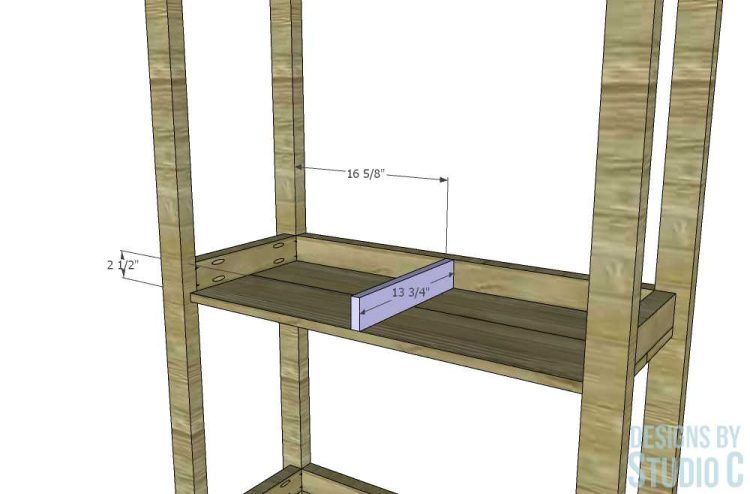
- 1 – 1×3 at 13-3/4″- Desk Divider
- 2 – 1×10(one ripped to 7-1/4″ wide, the other ripped to 8″ wide) at 39″ – Desk Top
- 1 – 1×10(ripped to 4″ wide) at 33-3/4″ – Desk Front
- 2 – 1×10(ripped to 8″ wide) at 39″ – Lower Shelf
- 2 – 1×10(ripped to 6-1/2″” wide) at 39″ – Upper Shelf
Notes about the Project:
- Sand all pieces prior to assembly (this makes finishing quick and easy!)
- Cut the notches in the pieces for the desk top and bottom, and shelving using a jigsaw.
- Mark and pre-drill the holes for the piano hinge screws. This will keep the lumber from splitting!
- Eye bolts and decorative chain can be used inside the cubby and door for the ability to use the door as an extra surface (or to keep it from dropping all the way open)
Other Desk Plans That May Be Of Interest:
Step One
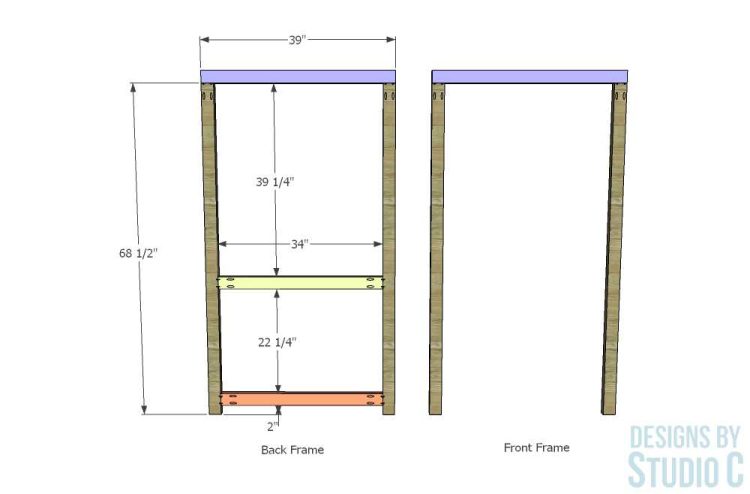
Cut the pieces for the legs, the top framing pieces and the side stretchers to length. With the pocket hole jig set for 1-1/2″ material, drill two pocket holes in one end of each leg, as well as each end of the side stretcher pieces. Assemble the front and back frames as shown in the drawing below, using glue and 2-1/2″ pocket hole screws.
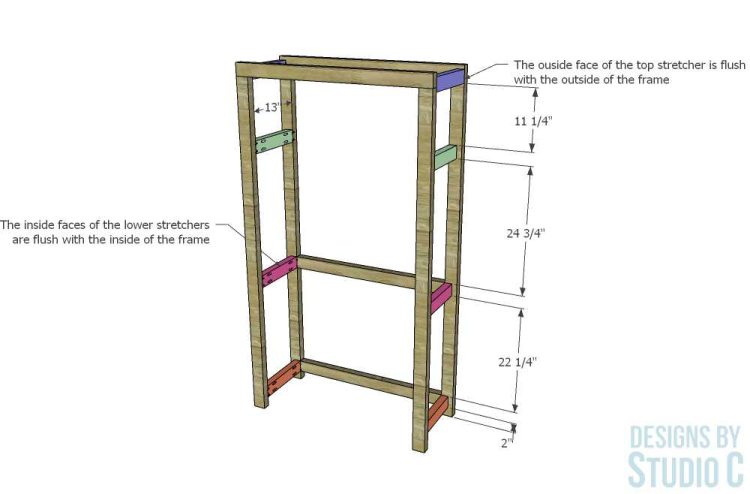
Secure the side stretchers to the frames to join them together using glue and 2-1/2″ pocket holes. Note that the outside faces of the top stretchers are flush with the outside faces of the legs while the inside faces of the remaining stretchers are flush with the inside of the legs.
Step Two
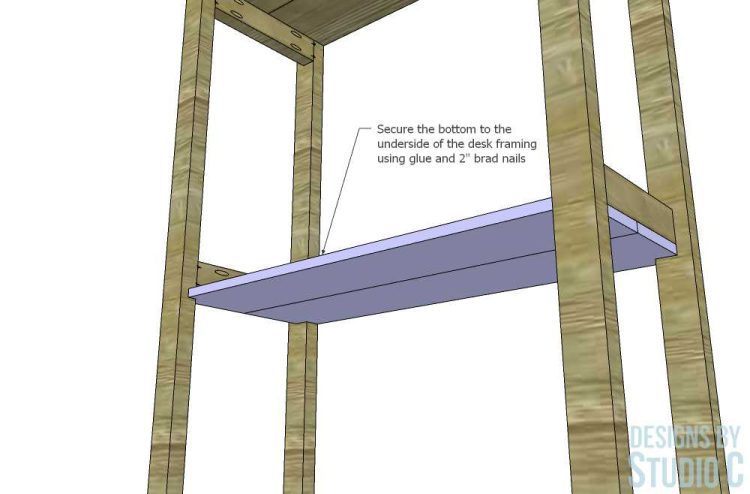
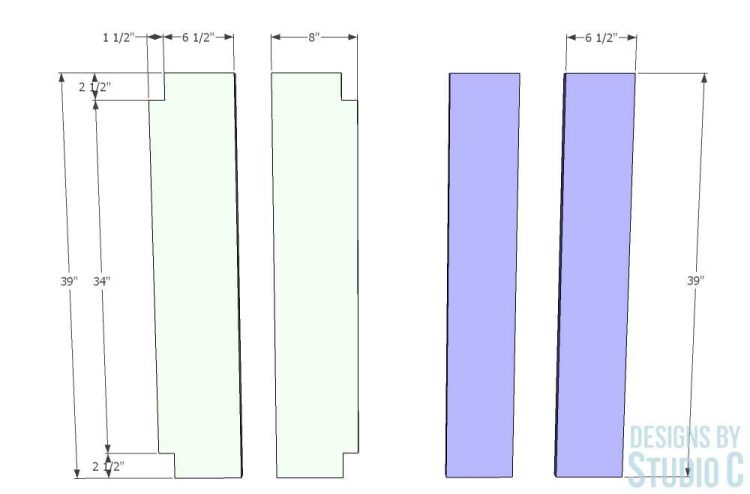
Cut the pieces for the desk bottom to length, then rip to the width as outlined in the the cut list using a circular saw or table saw. Cut the notches in the pieces using a jigsaw. Secure the pieces to the underside of the second stretcher (from the bottom) and the corresponding back stretcher, as shown in the drawing, using glue and 2″ brad nails.
Cut the piece for the desk divider. Secure to the center of the top of the boards for the desk bottom using glue and 2″ brad nails (drive the nails from the underside).
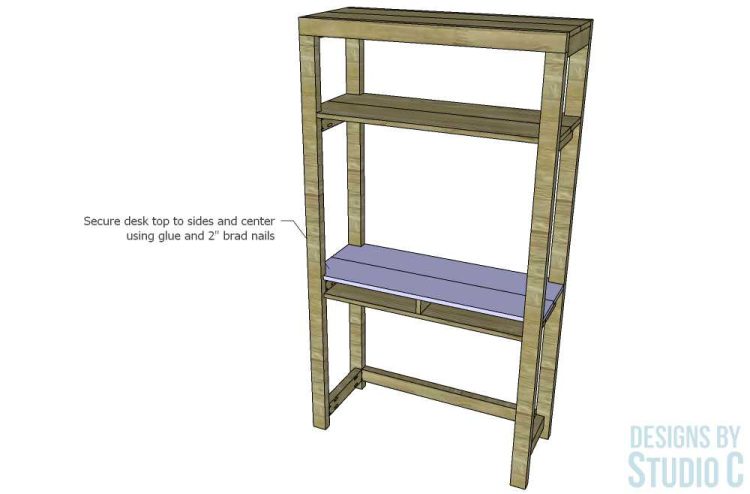
Cut the pieces for the desk top in the same manner as the desk bottom. Secure to the top of the second stretcher and the back stretcher, and desk divider using glue and 2″ brad nails.

Step Three
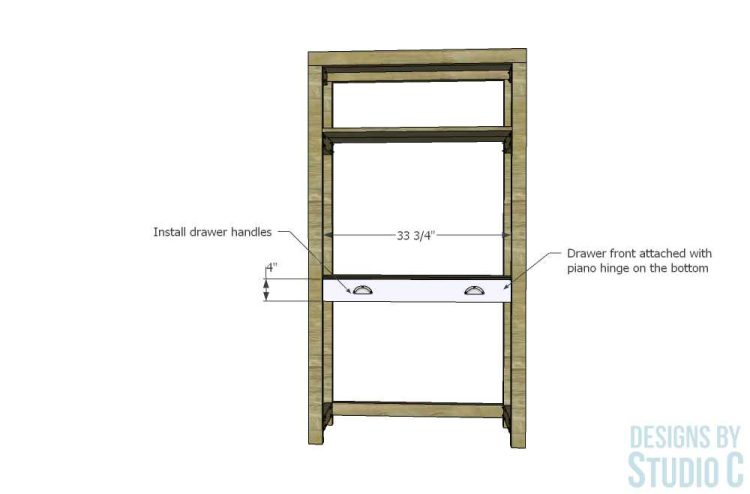
Cut the piece for the desk front. Secure the piano hinge (or other small hinges) to the bottom front of the desk cubby, then position the door front and secure the hinge to it. Install the magnetic catches (to hold the door closed) according to the manufacturer’s instructions.
Step Four
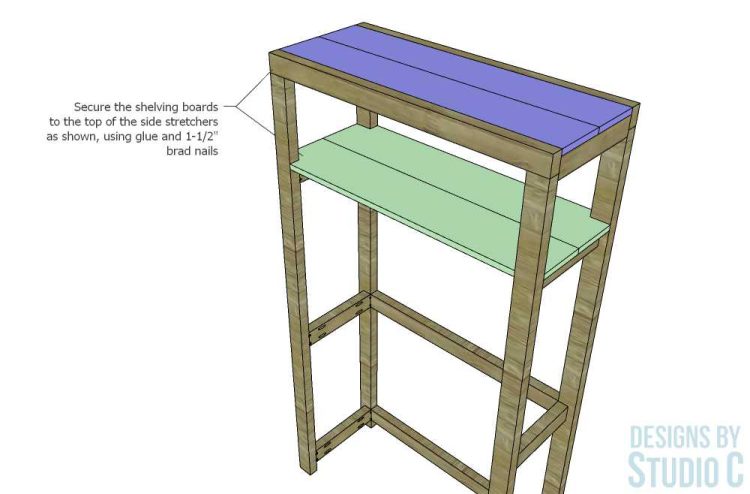
Cut the pieces for the upper and lower shelves in the same manner as the desk top and bottom. Secure the pieces to the corresponding stretchers as shown in the drawing using glue and 2″ brad nails.
Finish as desired.
For safety, secure the desk to the wall using a metal angle bracket fastened to the top of the desk and to a wall stud to keep it from tipping over!
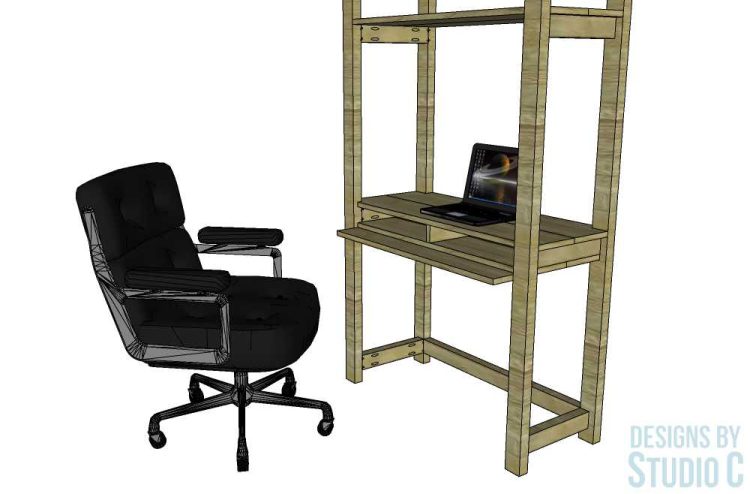
The easy to build Reed wall desk is perfect for any skill level, and adds a fabulously simple workspace to any room! Have questions? Leave a comment below!
