
Build an Otto Seven Drawer Dresser
Transform Your Space with a Custom-Built 7-Drawer Dresser: Free DIY Plans!
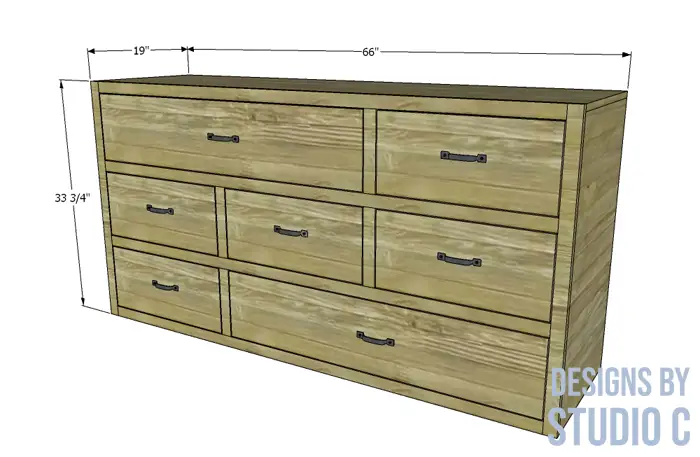
This dresser is awesome and the perfect project for those new to furniture-building. The DIY plans to build an Otto seven drawer dresser feature a simple shape with tons of storage in a plan that can be completed over a couple of weekends. What are you waiting for? Let’s get started!
Materials:
- 1-1/4″ pocket hole screws
- 1-1/4″ brad nails
- 2″ brad nails
- 1-1/4″ screws
- Edge banding, optional
- 7 sets of 18″ drawer slides (<– affiliate link!)
- 7 drawer pulls
- Sandpaper (80, 120, 220 grits)
- Finishing supplies (stain and sealer or primer and paint)
Lumber:
- 6 – 1×2 at 8′
- 2 – 4′ x 8′ sheets of 1/4″ plywood
- 4 – 4′ x 8′ sheets of 3/4″ plywood
Cut List:
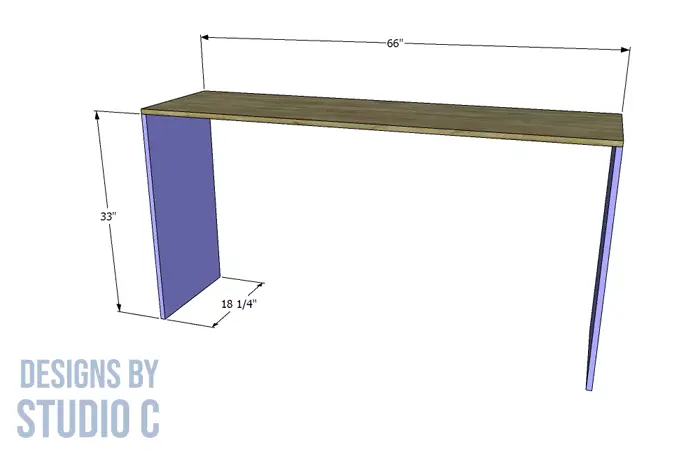
- 2 – 3/4″ plywood at 18-1/4″ x 33″ – Sides
- 1 – 3/4″ plywood at 18-1/4″ x 66″ – Top
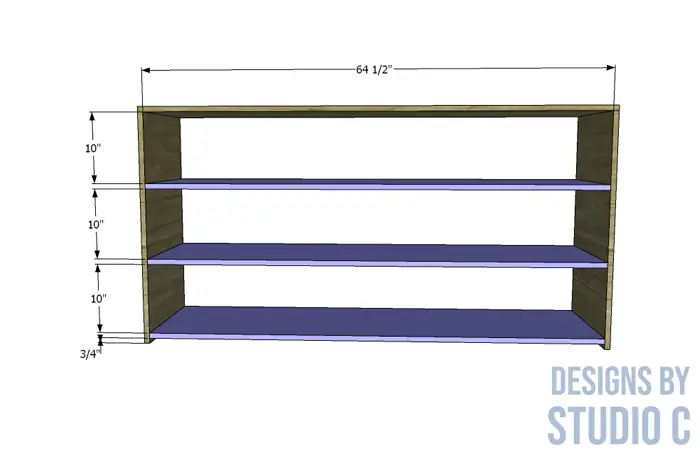
- 3 – 3/4″ plywood at 18-1/4″ x 64-1/2″ – Shelves
- 4 – 3/4″ plywood at 18-1/4″ x 10″ – Dividers
- 1 – 1/4″ plywood at 32-1/4″ x 65-1/4″ – Back
- 2 – 1×2 at 33-3/4″ – Face Frame Sides
- 4 – 1×2 at 63″ – Face Frame Horizontal Pieces
- 4 – 1×2 at 9-1/4″ – Face Frame Dividers
- 10 – 1×2 at 18-1/4″ – Drawer Slide Spacers
- 14 – 3/4″ plywood at 8″ x 18″ – Drawer Box Sides
- 10 – 3/4″ plywood at 8″ x 17-1/2″ – Smaller Drawer Box Front/Back
- 4 – 3/4″ plywood at 8″ x 33″ – Larger Drawer Box Front/Back
- 5 – 1/4″ plywood at 18″ x 19″ – Smaller Drawer Box Bottom
- 2 – 1/4″ plywood at 18″ x 40-1/2″ – Larger Drawer Box Bottom
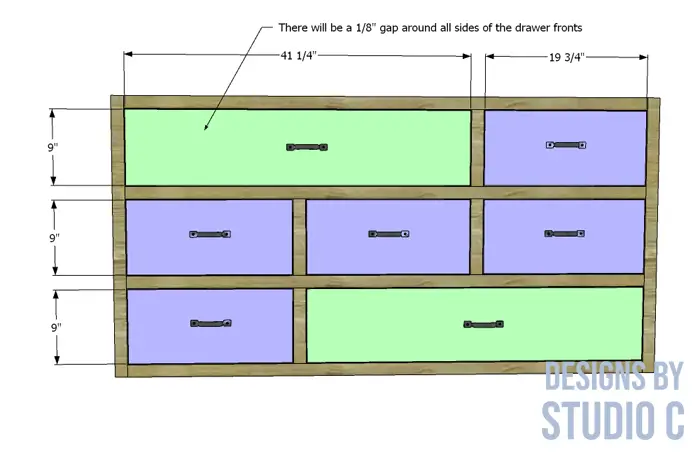
- 5 – 3/4″ plywood at 9″ x 19-3/4″ – Smaller Drawer Fronts
- 2 – 3/4″ plywood at 9″ x 41-1/4″ – Larger Drawer Fronts
Notes About the Project:
- The edge banding will be applied to the exposed edges of the plywood before assembly
- If painting, the edges of the plywood can be covered with spackling then sanded so that edge banding doesn’t need to be used
- Sand everything before putting the dresser together
- The plan is written for assembly using pocket holes but it can be assembled using countersunk screws or brad nails, if desired!
Step One
Cut the pieces for the sides, top and shelves. With the pocket hole jig set for 3/4″ material, drill pocket holes in the top edge of the side pieces, and each end of the shelf pieces. Secure the sides to the top using glue and 1-1/4″ pocket hole screws.
Then, secure the shelves to the sides using glue and 1-1/4″ pocket hole screws as shown in the drawing.
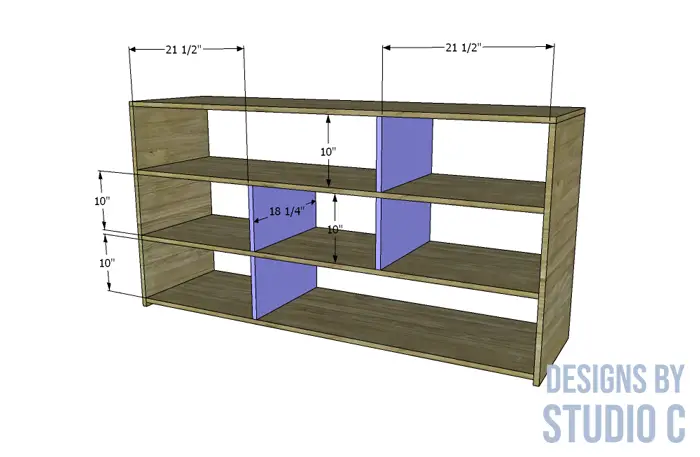
Step Two
Cut the pieces for the dividers and drill pocket holes in each of the longer edges. Secure the dividers to the shelves and top, as shown in the drawing, using glue and 1-1/4″ pocket hole screws.
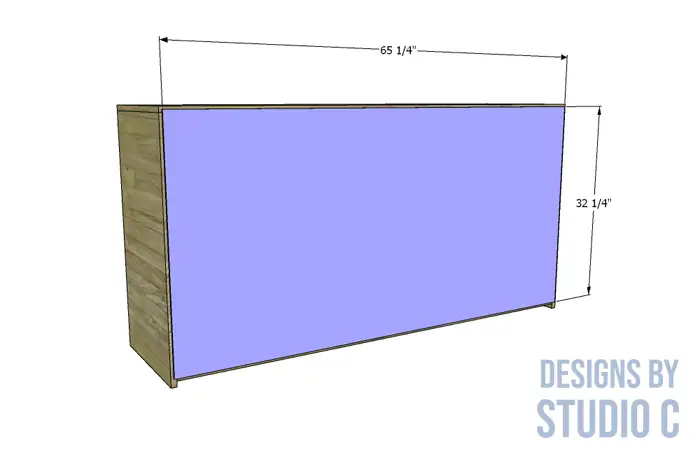
Step Three
Cut the piece for the back. Secure the back using glue and 1-1/4″ brad nails.
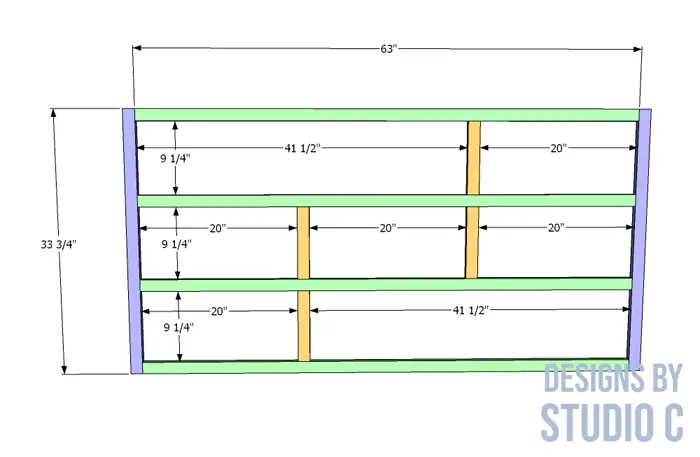
Step Four
Cut the pieces for the face frame. Drill pocket holes in each end of the horizontal frame pieces, as well as the frame dividers. Assemble the face frame as shown using glue and 1-1/4″ pocket hole screws.
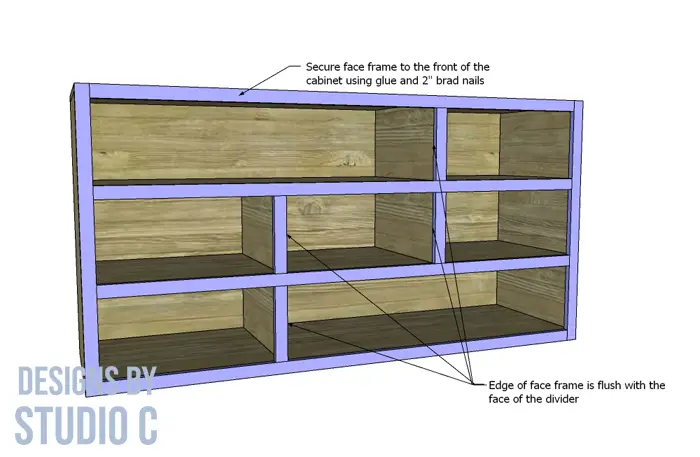
Secure the face frame to the cabinet using glue and 2″ brad nails. The outside edges of the frame will be flush with the outside faces of the cabinet. The upper edge of the lowest horizontal piece of the face frame will be flush with the lowest shelf. The inside edge of the frame dividers will be flush with the inside faces of the dividers as indicated on the drawing.
Step Five
Cut the pieces for the drawer slide spacers. Secure the spacers to the sides and the outer faces of the dividers as shown using glue and 1-1/4″ screws.
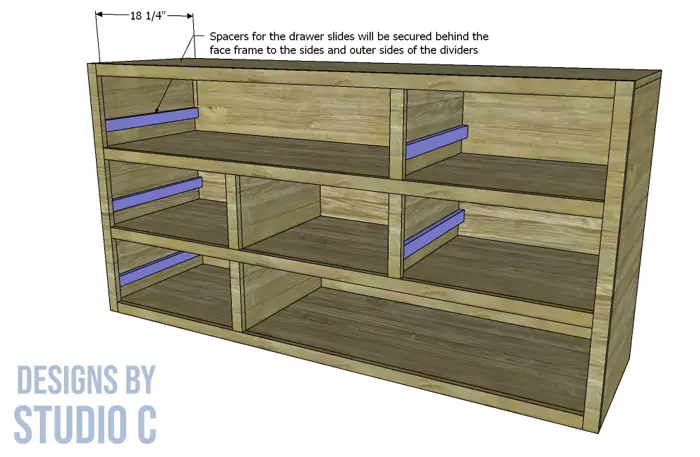
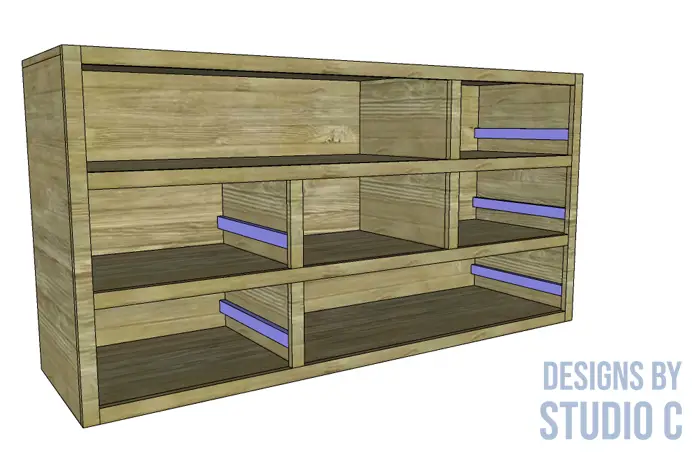
The spacers will allow the drawer slides to be installed and clear the face frame except for the areas where the frame is flush.
Step Six
Cut the pieces for the drawer boxes. Drill pocket holes in each end of the front and back pieces for each of the two drawer sizes. Assemble the drawer boxes using glue and 1-1/4″ pocket hole screws.
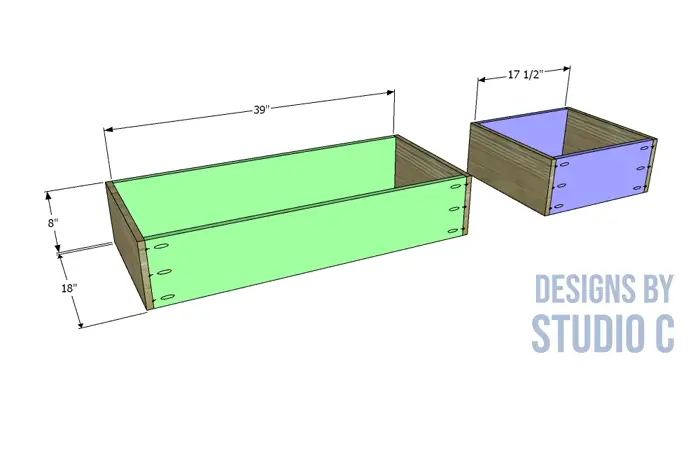
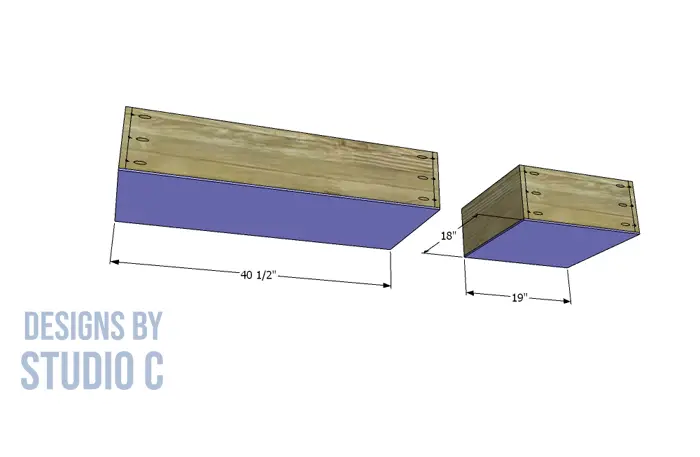
Cut the pieces for the drawer box bottoms. Secure the bottoms to the drawer boxes using glue and 1-1/2″ brad nails. There will be five smaller drawers and two larger drawers.
Install the drawer slides according to the manufacturer’s instructions. This tutorial on installing drawer slides will be really helpful!
Step Seven
Cut the pieces for the drawer fronts. Drill the holes for the drawer pulls, then shim the drawer fronts in place with a 1/8″ gap around all sides in the openings. Drive screws through the holes for the drawer pulls, into the drawer boxes then open the drawers and secure the drawer fronts to the drawer boxes from the inside. Remove the screws in the holes for the drawer pulls. Take a look at this tutorial on installing drawer fronts – it will help take the guesswork out of those perfect installs!
Finish drilling the holes for the drawer pulls and install the pulls.
Finish as desired!
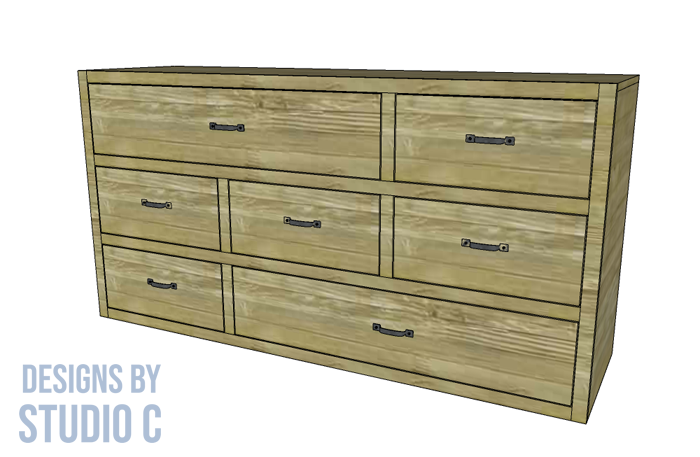
The dresser can be finished however you like! Paint, stain or a combo of both? Any finish would be fabulous! Have questions about the plans to build an Otto seven drawer dresser? Leave a comment below!
