
Build a Shelton Kitchen Island
An Easy to Build Island with a Chalkboard on the Front!
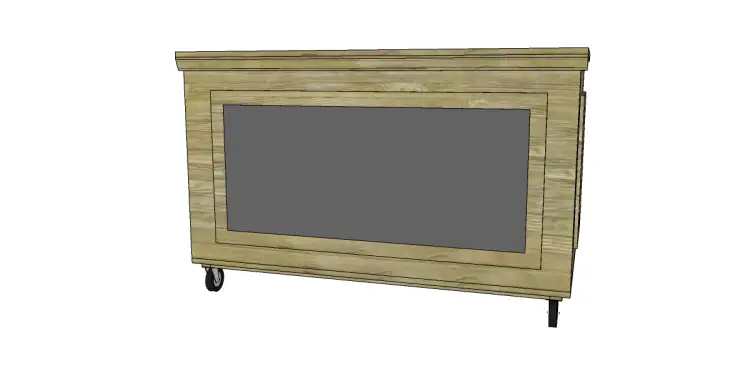
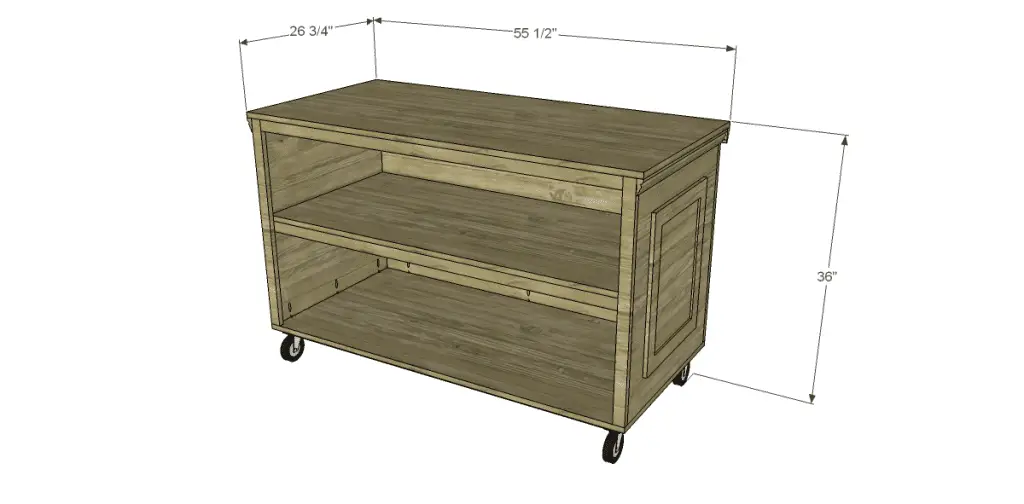
Today’s plans are for a spacious mobile work space sure to add much needed space and organization to any kitchen! It can be moved to any area thanks to the casters and can also be constructed from weather-resistant materials for outside use! Notes or recipes can be left on the chalkboard mounted to the front of the island (inspired by Pottery Barn). The chalkboard can be replaced with a dry erase board if desired!
Materials:
- 1-1/4″ pocket hole screws
- 3/4″ brad nails
- 1-1/4″ brad nails
- 1-1/4″ screws
- Four 4″ casters (<– affiliate link!)
- Finishing supplies
Lumber:
- 6 – 1×2 at 8′
- 3 sheets of 3/4″ plywood
- 2 – 8′ pieces of casing (trim under top)
- 1 – 2′ x 4′ chalkboard or dry erase panel
- Approximately 5 pieces of 8′ trim for the writing surface frame and side frames
Cut List:
- 2 – 1×2 at 24″ – Base Frame
- 2 – 1×2 at 49″ – Base Frame
- 2 – 1×2 at 21″ – Base Frame
- 1 – 3/4″ plywood at 26″ x 54″ – Bottom
- 2 – 3/4″ plywood at 24-1/2″ x 29-1/4″ – Sides
- 1 – 3/4″ plywood at 29-1/4″ x 54″ – Back
- 2 – 1×2 at 24-1/2″ – Shelf Frame
- 2 – 1×2 at 51″ – Shelf Frame
- 2 – 1×2 at 23″ – Shelf Frame
- 1 – 3/4″ plywood at 24-1/2″ x 52-1/2″ – Shelf
- 2 – 1×2 at 29-1/4″ – Front Body Frame
- 1 – 1×2 at 51″ – Front Body Frame
- 2 – 1×2 at 24-1/2″ – Top Supports
- 1 – 3/4″ plywood at 26-1/2″ x 55-1/2″ – Top
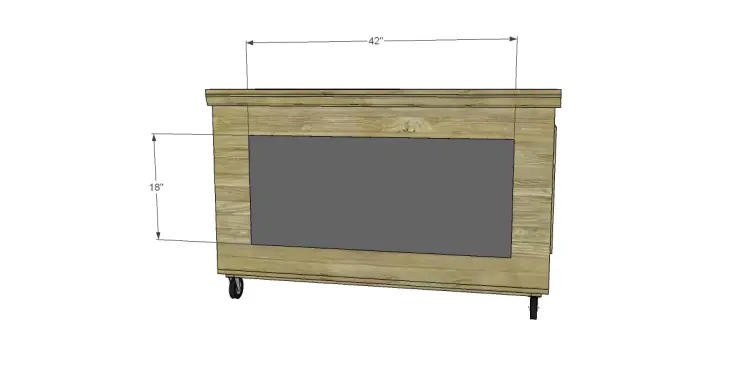
- 1 – Chalkboard or Dry Erase panel at 18″ x 42″
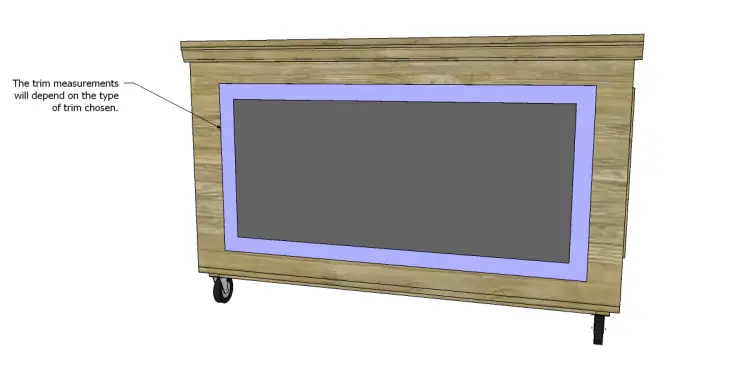
- Trim pieces for the front and sides – measurements will depend on the type of trim chosen
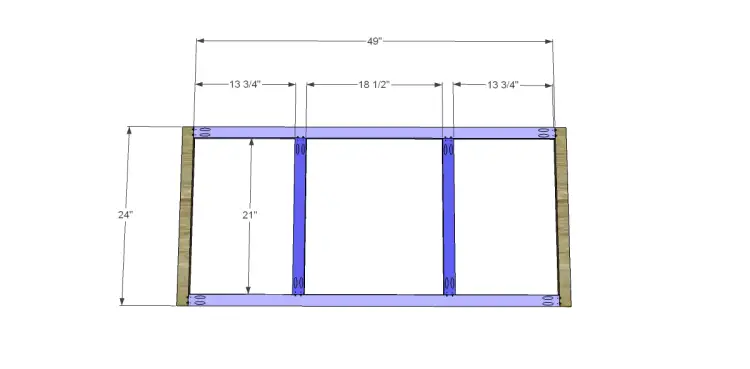
Step One
Cut the pieces for the base frame. Drill pocket holes in each end of the side pieces, as well as the center pieces. Assemble as shown using glue and 1-1/4″ pocket hole screws.
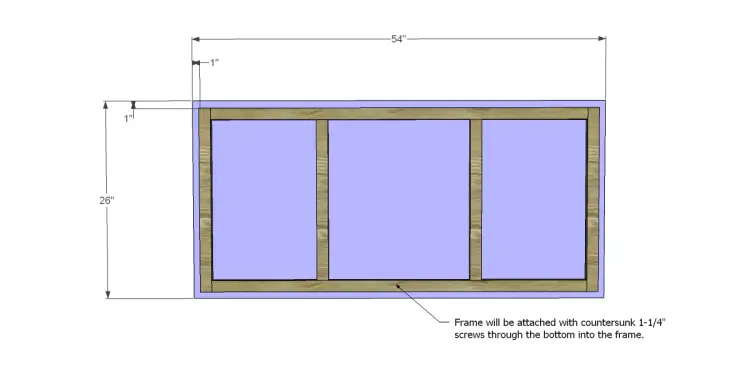
Step Two
Cut the piece for the bottom. Attach the frame using glue and countersunk 1-1/4″ screws through the bottom piece into the frame.
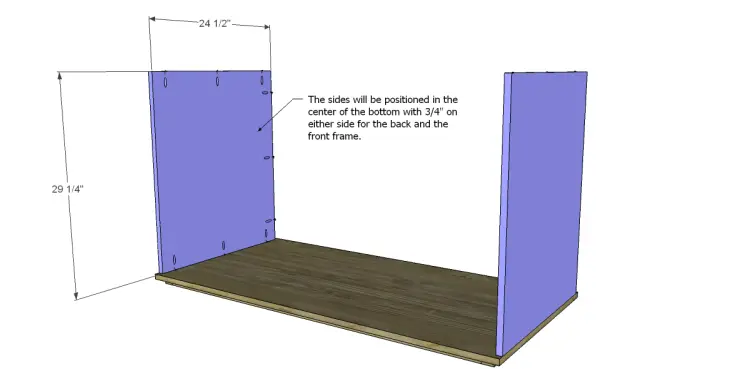
Step Three
Cut the pieces for the sides. Drill pocket holes as shown. Position the side pieces so it is centered on the bottom piece with 3/4″ of the bottom left on each side. Secure using glue and 1-1/4″ pocket hole screws.
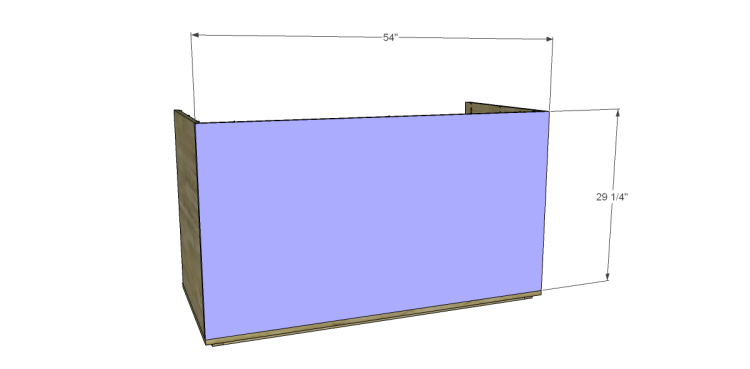
Step Four
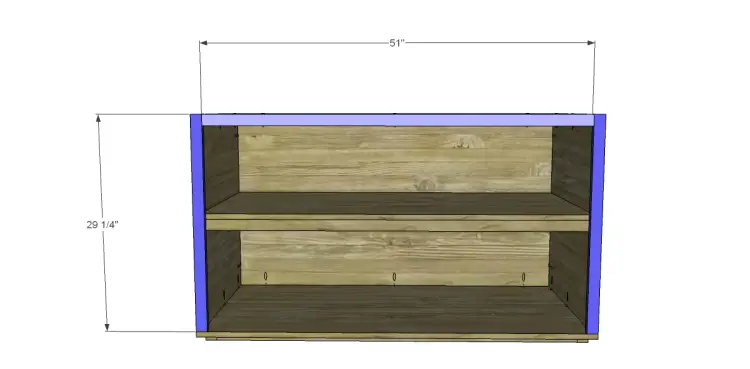
Cut the piece for the back. Drill pocket holes at the top and bottom edges. Position as shown and secure to the sides and bottom using glue and 1-1/4″ pocket hole screws.
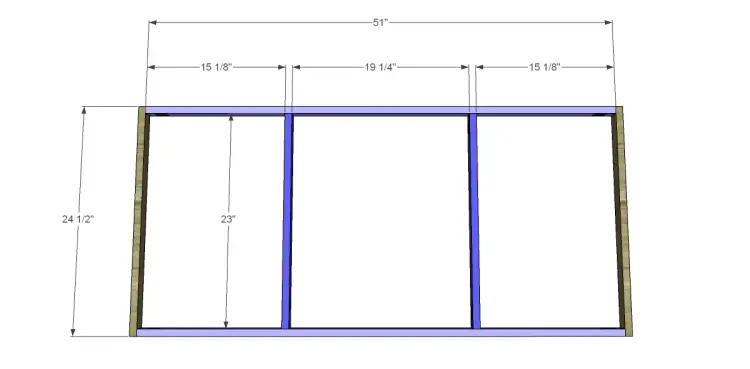
Step Five
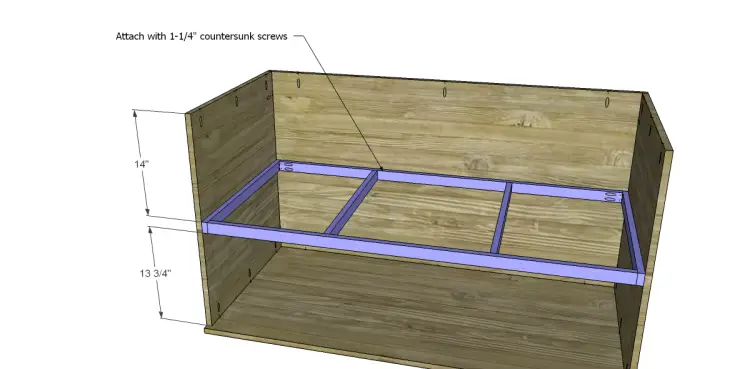
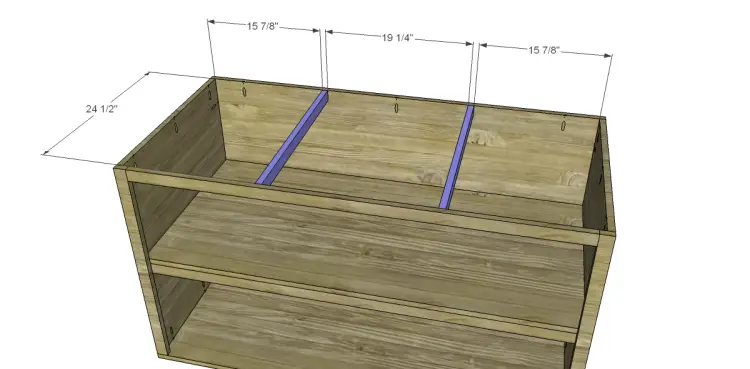
Cut the pieces for the shelf frame. Drill pocket holes in each end of the longer pieces as well as each end of the center support pieces. Assemble the frame using glue and 1-1/4″ pocket hole screws. Position the frame in the cabinet and secure using countersunk 1-1/4″ screws through the frame into the sides and back. The frame will be located 3/4″ back from the front edge of the sides.
Cut the piece for the shelf. Attach to the frame using glue and countersunk 1-1/4″ screws or 1-1/4″ brad nails.

Step Six
Cut the pieces for the front body frame. Drill pocket holes in each end of the upper frame piece. Secure the sides using glue and 1-1/4″ pocket hole screws. Secure the entire frame to the front of the cabinet using glue and 1-1/4″ brad nails.
Step Seven
Cut the pieces for the top supports and drill pocket holes in each edge. Position as shown then secure using glue and 1-1/4″ pocket hole screws.
Step Eight
Cut the piece for the top. Position on the cabinet and secure using glue and 1-1/4″pocket hole screws through the holes in the sides and back into the underside of the top. The top will overlap the sides and front by 3/4″.

Step Nine
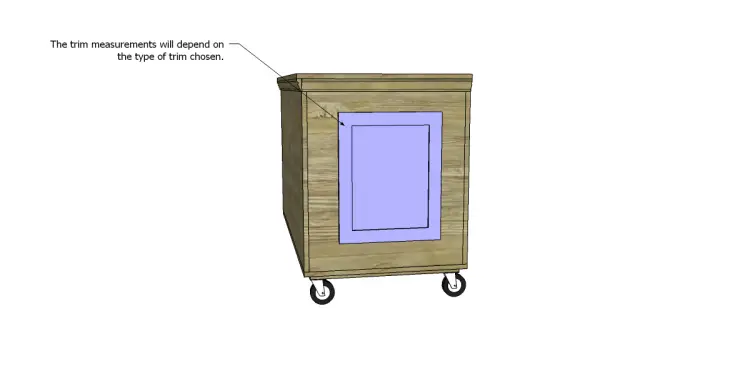
Cut the piece for the writing surface. Center it on the front and secure using 3/4″ brad nails. Cut the trim of your choice to make a frame around the writing surface and secure with 1-1/4″ brad nails.
Create the frames for the sides and secure using 1-1/4″ brad nails. Cut and apply the trim under the top starting with the sides, then add the front piece. Secure using 1-1/4″ brad nails.
Finish as desired and add the casters to the bottom.
Have questions about the plans to build the Shelton kitchen island? Leave a comment below!
Originally posted 2013-01-18 08:00:45.

totally awesome. I need to send my hubby to this site so he can download the plans!
by the way, found you on SITS. 🙂
Thank you so much! Stop by any time!!
[…] DIY Plans for the Shelton Kitchen IslandThis kitchen island is on castors and features a chalkboard on one side. Of course you can customize it any way you […]
[…] kitchen island is on castors and features a chalkboard on one side. Of course you can customize it any way you […]