
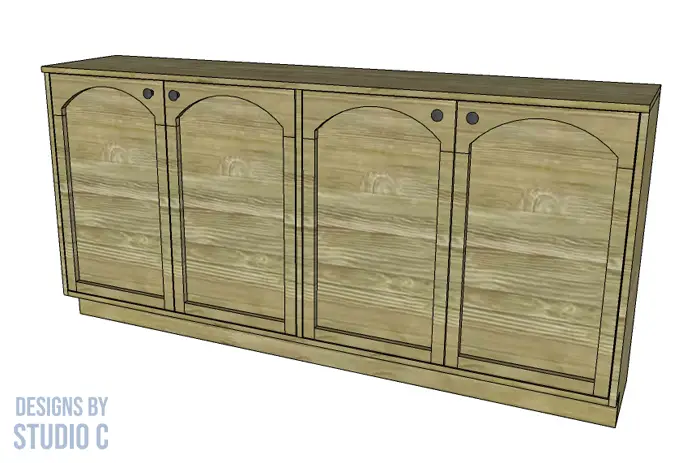
Build a Garbo Cabinet
An Easy to Build Console Cabinet with Arched Doors
The easy to build Garbo cabinet is a great storage piece for any room. It can be used as a media stand, a console table in the living room or dining room, or even as a storage chest for blankets in a bedroom. The doors are arched (templates included – see the Notes section!) with a shelf behind each one, and the main case is constructed out of plywood with edge banding covering the edges. This beauty can be finished in so many ways and if you’re especially adventurous, the shelves can be adjustable with the help of a shelf pin jig!

Materials:
- 1-1/4″ pocket hole screws
- 5/8″ brad nails
- 2″ brad nails
- Edge banding (<– affiliate link!)
- Four sets of hinges
- Four drawer pulls
- Wood glue
- Sandpaper (80, 120, 220 grits)
- Finishing supplies
Lumber:
- 3 – 1×2 at 8′
- 1 – 1×6 at 8′
- 2 – 4′ x 8′ sheets of 1/4″ plywood
- 2 – 4′ x 8′ sheets of 3/4″ plywood
Cut List:
- 2 – 3/4″ plywood at 15″ x 35-1/4″ – Sides
- 1 – 3/4″ plywood at 15″ x 72-1/2″ – Bottom
- 1 – 3/4″ plywood at 4″ x 11-1/4″ – Center Support
- 1 – 3/4″ plywood at 15″ x 30-1/2″ – Center Divider
- 2 – 3/4″ plywood at 2-1/2″ 35-7/8″ – Front Stretchers
- 2 – 3/4″ plywood at 14″ x 35-7/8″ – Shelves
- 1 – 3/4″ plywood at 4″ x 74″ – Kick Plate
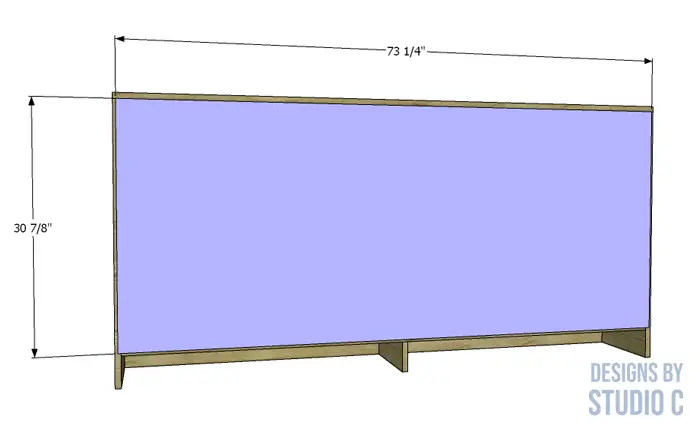
- 1 – 1/4″ plywood at 30-7/8″ x 73-1/4″ – Back
- 1 – 3/4″ plywood at 15-1/2″ x 74″ – Top
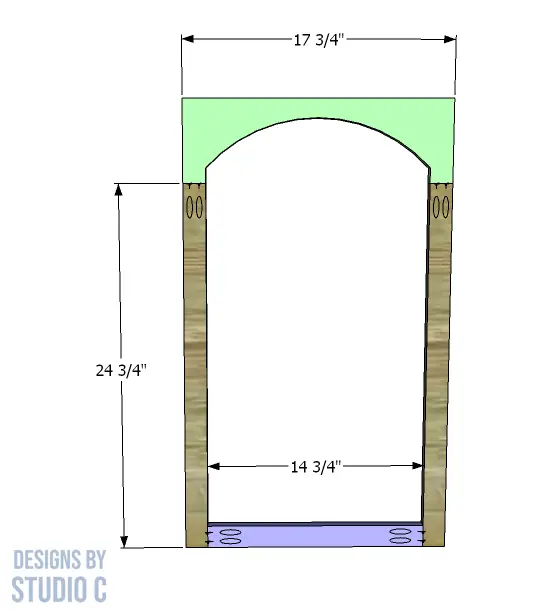
- 8 – 1×2 at 24-3/4″ – Door Frame
- 4 – 1×2 at 14-3/4″ – Door Frame
- 4 – 1×6 at 17-3/4″ – Door Frame
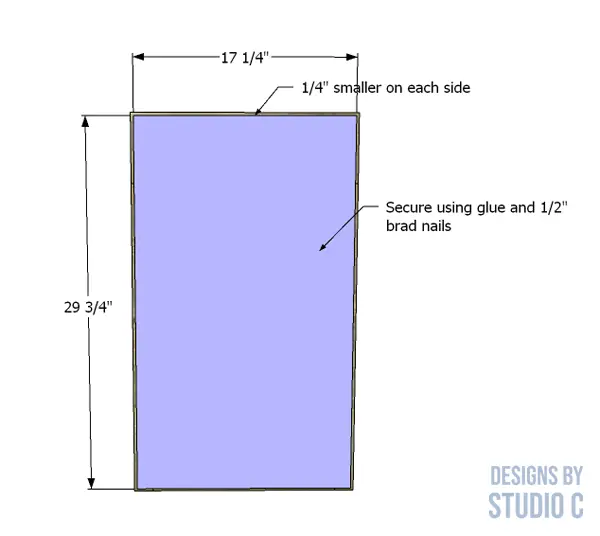
- 4 – 1/4″ plywood at 17-1/4″ x 29-3/4″ – Door Back
Notes About the Project:
- Print the template for the door
- Edge banding is applied to the exposed edges of the plywood before assembly
- Sanding each piece before putting everything together really helps with finishing!
- Plywood can be used rather than 1x lumber for the door frames
Step One
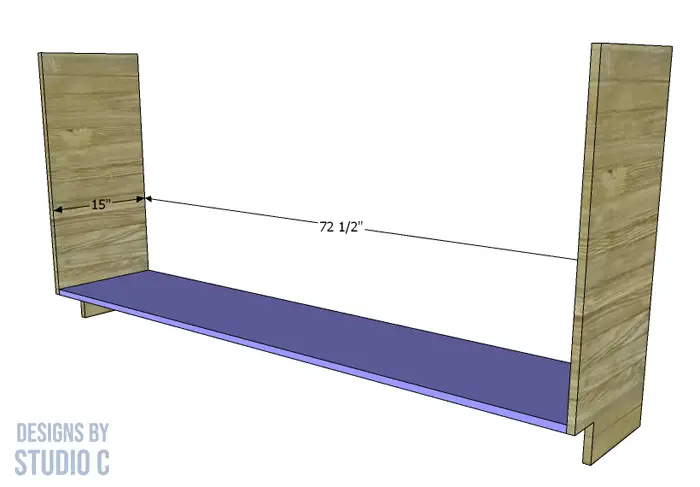
Cut the pieces for the sides and cut the notch using a jigsaw.

Step Two
Cut the piece for the bottom. With the pocket hole jig set for 3/4″ material, drill pocket holes in each end. Secure the bottom to the sides using glue and 1-1/4″ pocket hole screws. The bottom will be flush with the notch for the kick plate – see drawing!
Step Three
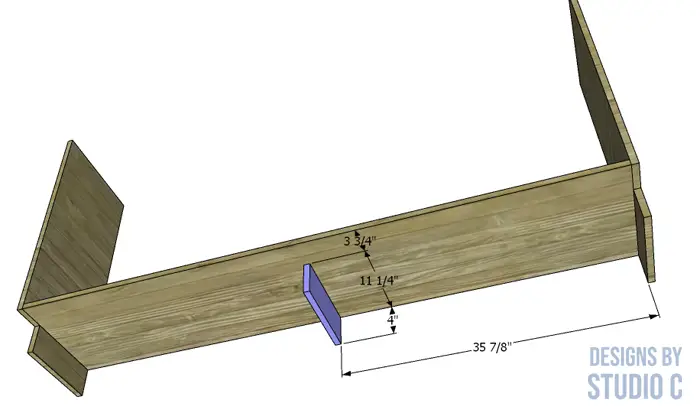
Cut the piece for the center support and drill pocket holes in one long edge. Secure the center support to the bottom using glue and 1-1/4″ pocket hole screws. The back edge of the support will be flush with the back edge of the bottom.
Step Four
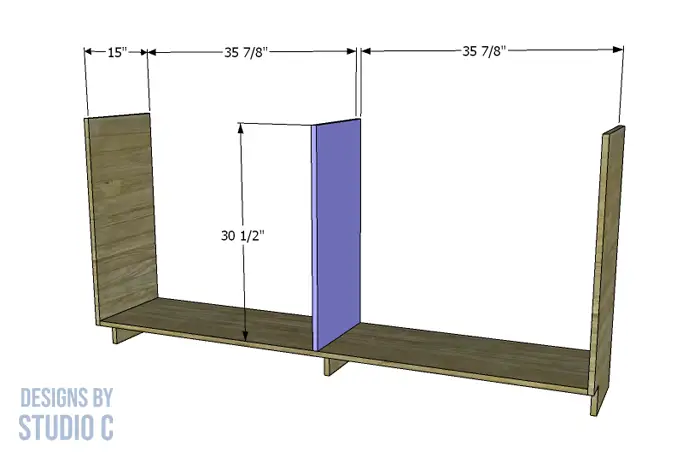
Cut the piece for the divider, and drill pocket holes in the lower edge only. Secure to the bottom using glue and 1-1/4″ pocket hole screws. The back edge of the divider will be flush with the back edge of the bottom.
Step Five
Cut the pieces for the shelves, and drill pocket holes in each shorter edge. Secure the shelves to the sides and divider using glue and 1-1/4″ pocket hole screws.
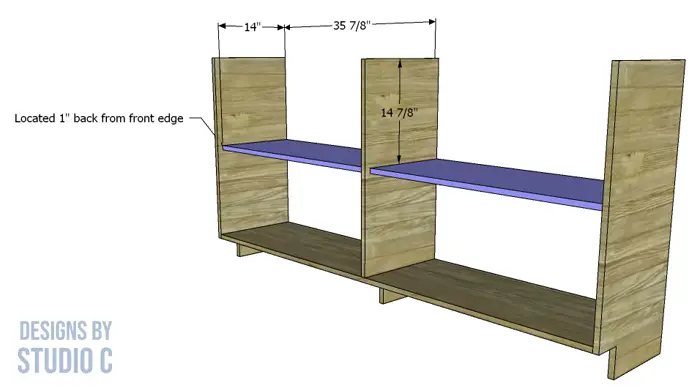
Step Six
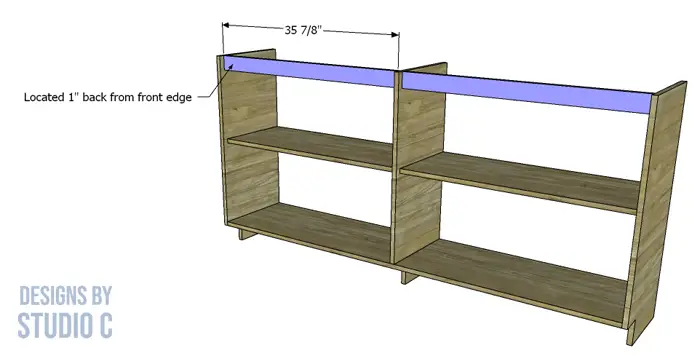
Cut the pieces for the front stretchers, and drill pocket holes in each end. Secure the stretchers to the sides and the divider, located 1″ back from the front edge, using glue and 1-1/4″ pocket hole screws.
Step Seven
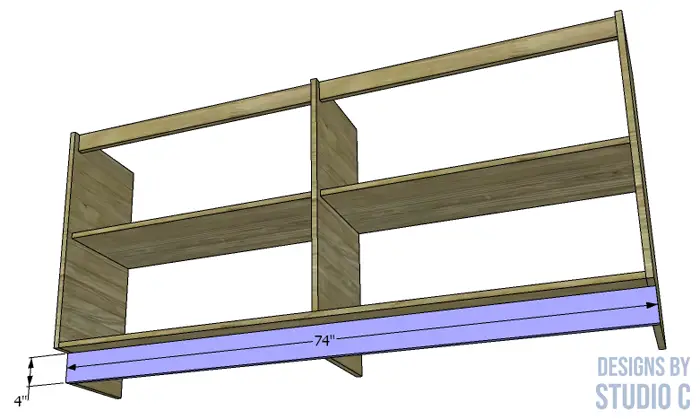
Cut the piece for the kickplate. Secure the kickplate under the bottom using 2″ brad nails through the kickplate into the sides and center support.
Step Eight
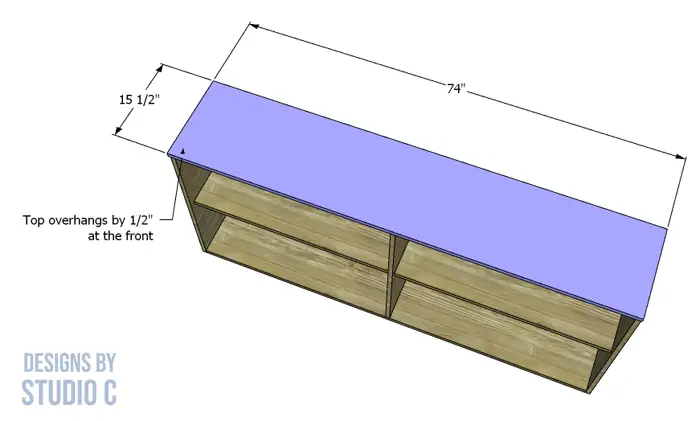
Cut the piece for the top. The top will overhang by 1/2″ at the front, and will be flush at the sides and back. Secure the top to the sides and divider using glue and 2″ brad nails.
Step Nine
Cut the piece for the back. Center the piece on the back of the cabinet and secure in place using 5/8″ brad nails.
Step Ten
Cut the pieces for the door frame. Assemble the template by aligning the registration marks and taping the sheets together. Use the template to cut the arch for the 1×6 piece on the door frame. The arch can be cut using a jigsaw or a bandsaw.
Drill pocket holes in each end of the shorter 1×2 framing piece, and one end only of each longer 1×2 framing piece. Assemble the frame using glue and 1-1/4″ pocket hole screws.
Step Eleven
Cut the pieces for the door back. Center the pieces on the frame (they are cut smaller than the frame on purpose so they don’t show as part of the door frame profile) and secure in place with glue and 5/8″ brad nails.
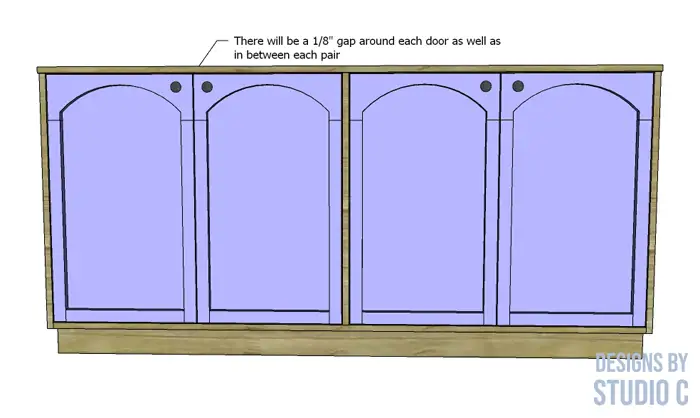
Step Twelve
Install the hinges on the doors, then install the doors in the cabinet. There will be a 1/8″ gap around all sides as well as in between the pairs of doors. Regular non-mortise hinges or hinges that secure to the outside of the door and cabinet can be used.
Install the cabinet pulls. As a side note, installing a magnetic cabinet latch (<– affiliate link!) on each door will help keep it closed!
Finish the cabinet as desired!
Decorative paper or punched aluminum can be added to the doors inside the arches. Have questions about the DIY console cabinet plans? Leave a comment below! I’m happy to help and I love reading your tips and ideas!
