
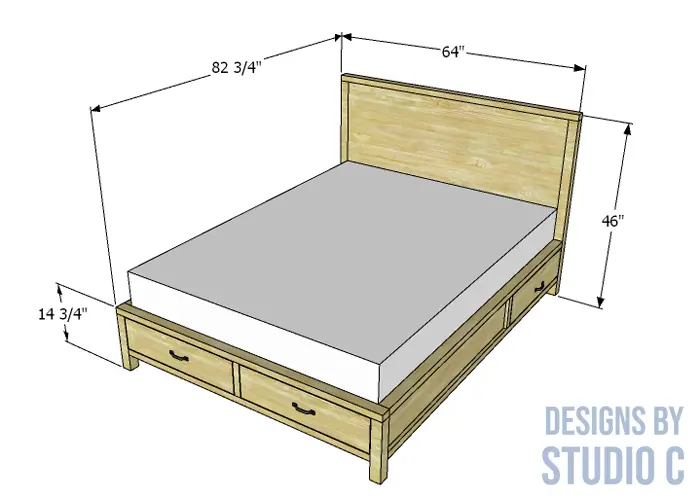
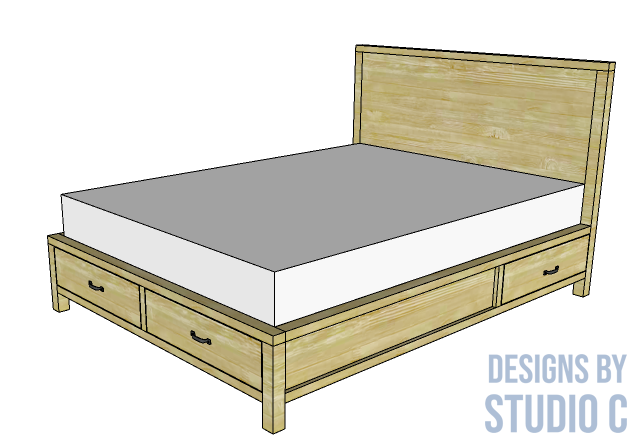
An Easy to Build Bed with Storage
This super-fabulous bed is actually at the top of my to-build list! The plans to build an Everley queen bed feature a plain headboard and four drawers underneath for storage! FOUR DRAWERS that are 28″ deep! That’s a win in my book! The headboard and a portion of the side rails have inset plywood panels, and the framing is built using 2x4s ripped to 2-1/4″ wide (or 2x6s ripped in half for a more economical choice!). The entire bed can be finished however you desire, and is an excellent project for any skill level.
Materials:
- 2-1/2″ pocket hole screws
- 2″ pocket hole screws
- 1-1/4″ pocket hole screws
- 3″ screws
- 1-1/4″ screws
- 1-1/4″ brad nails
- Four sets of 28″ ball-bearing drawer slides (<– affiliate link!)
- Four handles or knobs for the drawers
- Wood glue
- Wood filler of choice (<– affiliate link!)
- Sandpaper (80, 120, 220 grits)
- Finishing supplies
Lumber:
- 6 – 1×3 at 6′
- 2 – 2×2 at 8′
- 12 – 2×4 at 8′ OR
- 6 – 2×6 at 8′
- 2 – 4′ x 8′ sheets of 1/4″ plywood
- 3 – 4′ x 8′ sheets of 3/4″ plywood
Cut List:
- 2 – 2-1/4″ square (actual) pieces at 44-1/2″ – Headboard Legs
- 2 – 2-1/4″ square (actual) pieces at 13-1/4″ – Footboard Legs
- 2 – 2×4 ripped to 2-1/4″ wide at 64″ – Top of Headboard and Footboard Framing
- 2 – 2×4 ripped to 2-1/4″ wide at 59-1/2″ – Bottom of Headboard and Footboard Framing
- 1 – 2×4 ripped to 2-1/4″ wide at 7-3/4″ – Footboard Drawer Divider
- 1 – 3/4″ plywood at 39″ x 59-1/2″ – Headboard Panel
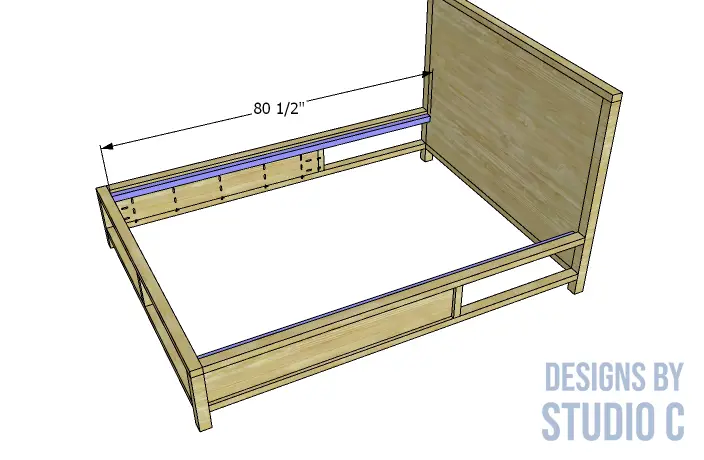
- 4- 2×4 ripped to 2-1/4″ wide at 80-1/2″ – Side Rail Framing
- 2 – 2×4 ripped to 2-1/4″ wide at 7-3/4″ – Side Rail Drawer Divider
- 2 – 3/4″ plywood at 7-3/4″ x 50″ – Side Rail Panel
- 2 – 2×2 at 80-1/2″ – Deck Supports
- 2 – 2×4 at 80-1/2″ – Center Supports
- 2 – 2×4 at 14″ – Center Support Legs
- 8 – 1×8 ripped to 6-1/2″ wide at 26-1/2″ – Drawer Box
- 8 – 1×8 ripped to 6-1/2″ wide at 29″ – Drawer Box
- 4 – 1/4″ plywood at 28″ x 29″ – Drawer Box Bottoms
- 2 – 2×4 at 29″ – Drawer Slide Supports
- 4 – 3/4″ plywood at 7-1/2″ x 28-3/4″ – Drawer Fronts
- 3 – 3/4″ plywood at 24″ x 59-1/2″ – Decking
Notes About the Project:
- Sand all pieces prior to assembly
- The headboard and footboard legs are made by gluing three 1x3s together, then ripping the stacked piece to 2-1/4″ wide to match the thickness
- DO NOT use glue to secure the side rails or the center support to the headboard or footboard!
- Bed rail hardware can be used to secure the side rails to the headboard and footboard
- Slats made using 1×3 boards can be used in place of the plywood decking but make sure to use a fabric or cardboard liner to keep debris and dust from the mattress from falling into the drawers
Step One
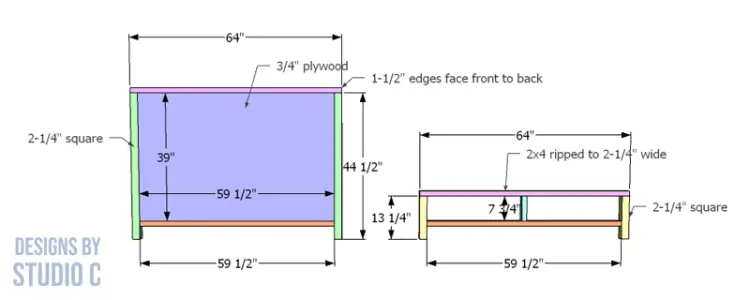
Cut the pieces for the headboard and the footboard framing. Assemble the headboard and footboard frames using glue and 3″ screws. See the drawing for board orientation.
Cut the plywood piece for the headboard, set the pocket hole jig for 3/4″ material and drill pocket holes in all four sides. Secure the plywood to the framing using glue and 1-1/4″ pocket hole screws. The front face of the plywood (without pocket holes) will be flush with the front face of the headboard frame.
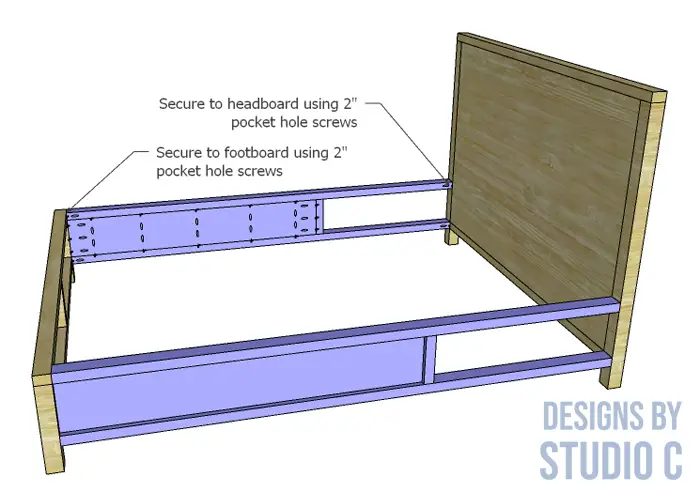
Step Two
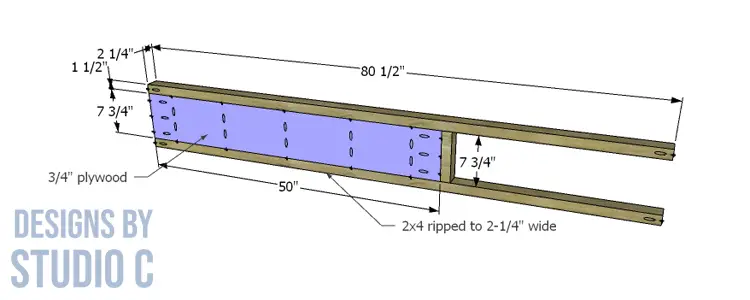
Cut the pieces for the side rails, the side rail drawer divider and the plywood inserts. Drill pocket holes in all four edges of the plywood inserts. Set the pocket hole jig for 1-1/2″ material and drill a pocket hole in each end of the longer framing pieces as shown in the drawing (a longer screw will be used to connect the rail to the headboard and footboard).
Secure the plywood panels to the framing using glue and 1-1/4″ pocket hole screws. The back face (with the pocket holes) of the panel will be flush with the inside faces of the framing.
Secure the rails to the headboard and footboard using 2-1/2″ pocket hole screws in the pocket holes on the framing, and 2″ pocket hole screws in the holes on the plywood insert (at the footboard). Do not use glue to secure the side rails so the bed can be dismantled as needed!
Step Three
Cut the pieces for the deck supports. Secure to the upper edge of the side rails, (located 3/4″ down from the top face to allow for the deck panels), using 3″ screws. Pre-drill the holes so that the wood doesn’t split!
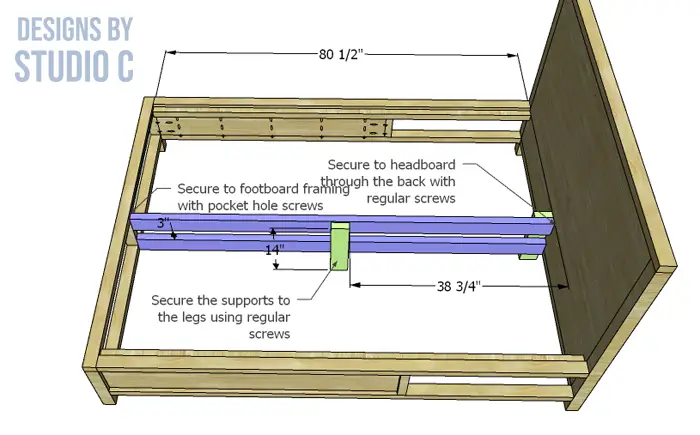
Step Four
Cut the pieces for the center support and legs, and drill pocket holes in the ends of the center support that will connect to the footboard.
Secure the legs to the supports as shown using glue and 3″ screws.
Secure the center support to the footboard drawer divider using 2-1/2″ pocket hole screws – the support assembly will be located 3/4″ below the top edge of the footboard and side rails. Secure the opposite end to the headboard using 3″ screws from the back side of the headboard into the ends of the supports.
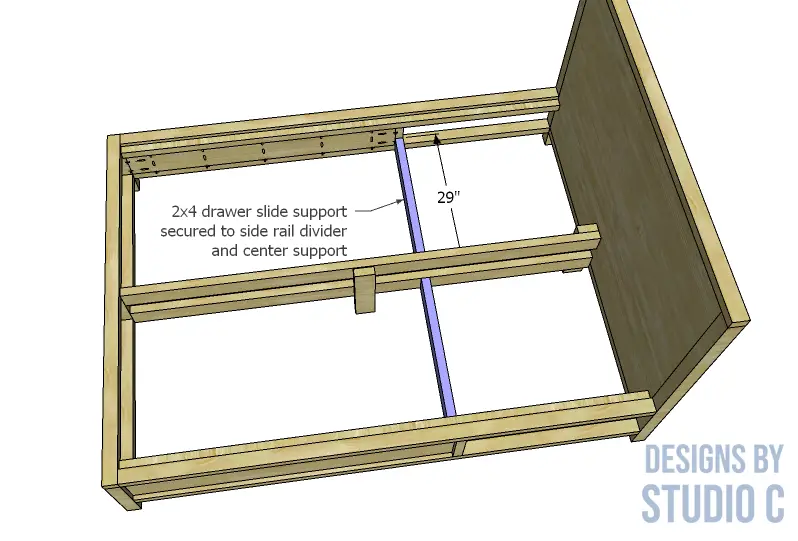
Step Five
Cut the pieces for the drawer slide supports and drill pocket holes in each end. Secure the supports to the side rail drawer divider and to the center support using 2-1/2″ pocket hole screws.
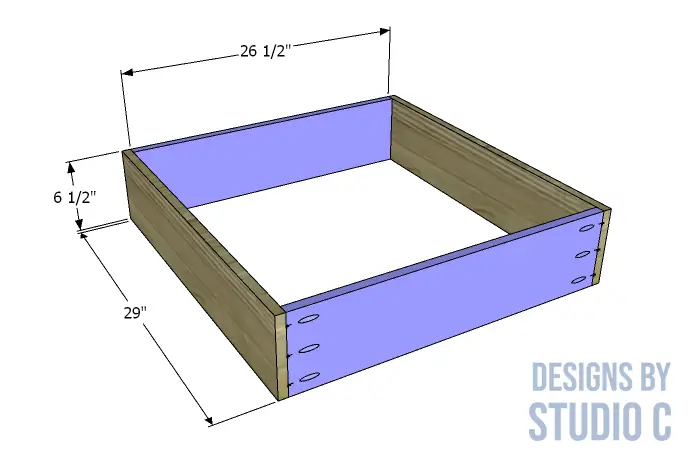
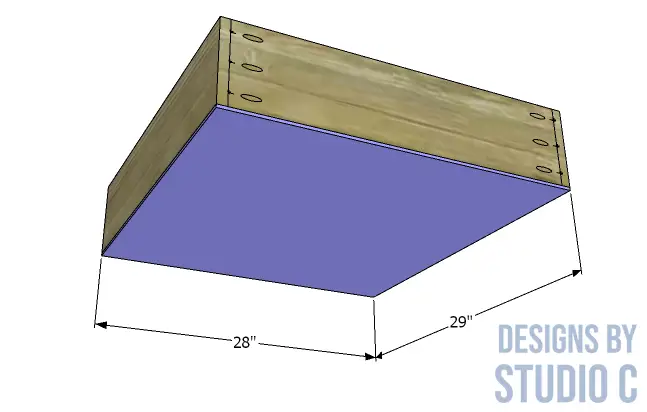
Step Six
Cut the pieces for the drawer boxes and the drawer bottoms. Assemble the drawers using glue and 1-1/4″ pocket hole screws. Secure the bottoms to the drawer boxes using 1-1/4″ brad nails.
Install the drawer slides according to the manufacturer’s installation instructions, locating them 3/4″ back from the front face of the opening. For an easy tutorial on installing drawer slides, click here!
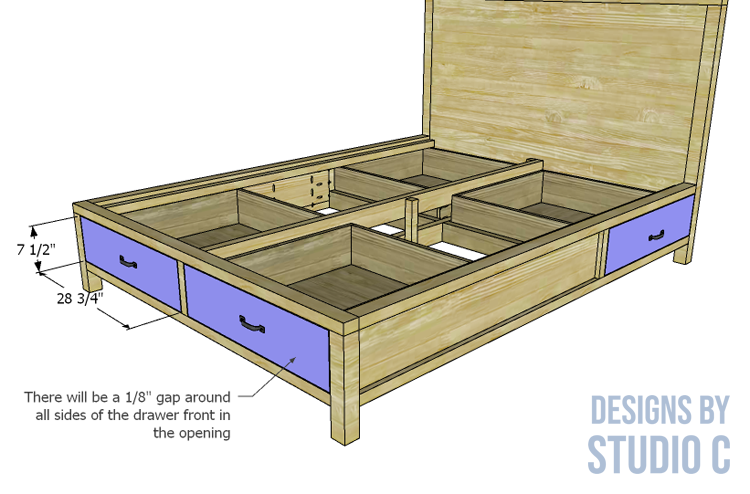
Step Seven
Cut the pieces for the drawer fronts. Mark the location of the handles or knobs, and drill the holes. Shim the fronts in the openings, then drive screws through the holes into the drawer box. Open the drawer box and secure the front from the inside using 1-1/4″ screws. For an easy tutorial in installing drawer fronts, click here.
Remove the screws in the holes for the handles and finish drilling the holes. Install the handles.
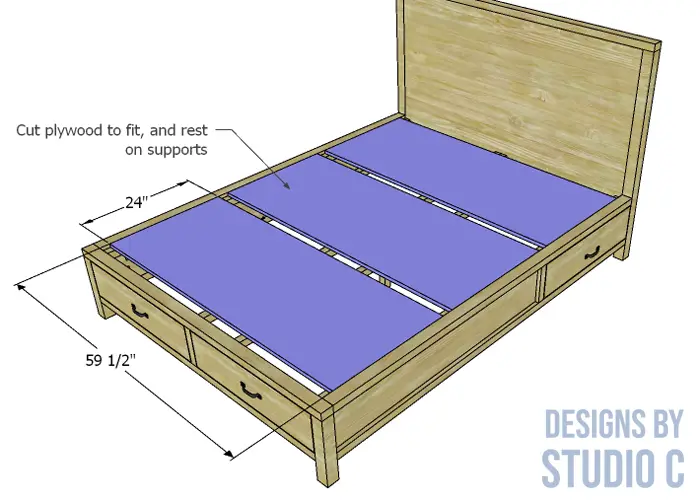
Step Eight
Cut the pieces for the decking. Place the decking on the side supports and center supports, spacing them apart to allow for air flow. There is no need to secure the decking to the supports unless desired.
Finish as desired!
Have questions about the plans to build and Everley queen bed with drawers? Leave a comment below!


Comments are closed.