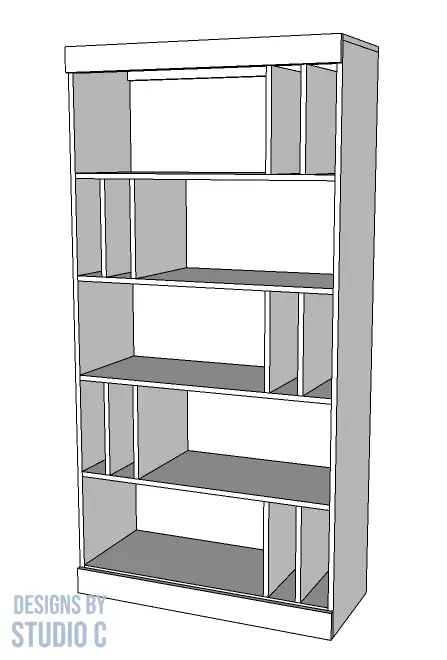
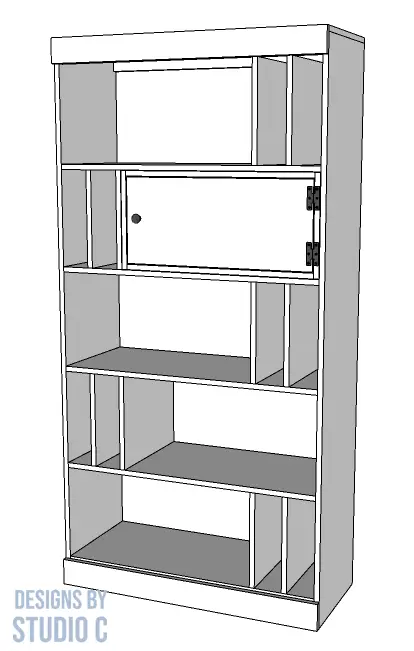
Build an Elwyn Bookcase with Optional Cubby
An Easy to Build Bookcase for Storage
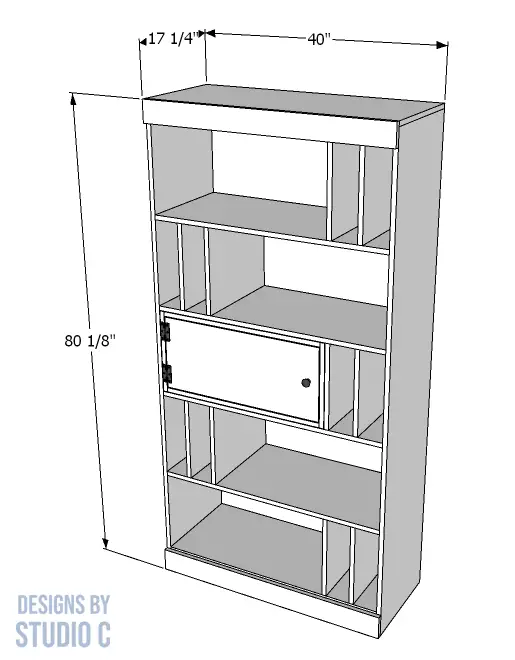
This easy to build project has a standard base and shelving with an optional cubby with a door that can fit on any shelf to suit your storage needs. One or more of the cubbies can be easily built, and they can be moved from shelf to shelf whenever it’s time to shake things up! The plans to build an Elwyn bookcase with optional cubby utilizes plywood for the entire project, with pocket holes and brad nails with glue for the joinery, and standard wide trim at the top and bottom. The sides are flush so that more than one can be built to fit an entire wall. The Materials and Lumber lists are to make ONE bookcase, and the lumber list for the cubby is listed separately in case you would like to build more than one!
Materials:
- 1-1/4″ pocket hole screws
- 1-1/4″ brad nails
- 2″ brad nails
- Edge banding (<– affiliate link!)
- One set of hinges (per cubby) (<– affiliate link!)
- One drawer pull or knob (per cubby)
- Wood glue
- Sandpaper (80, 120, 220 grit)
- Finishing supplies
Lumber:
For the Bookcase:
- 1 – 4′ x 8′ sheet of 1/4″ plywood
- 3 – 4′ x 8′ sheets of 3/4″ plywood
For the Cubby:
- 1 – 4′ x 4′ sheet of 3/4″ plywood
Cut List:
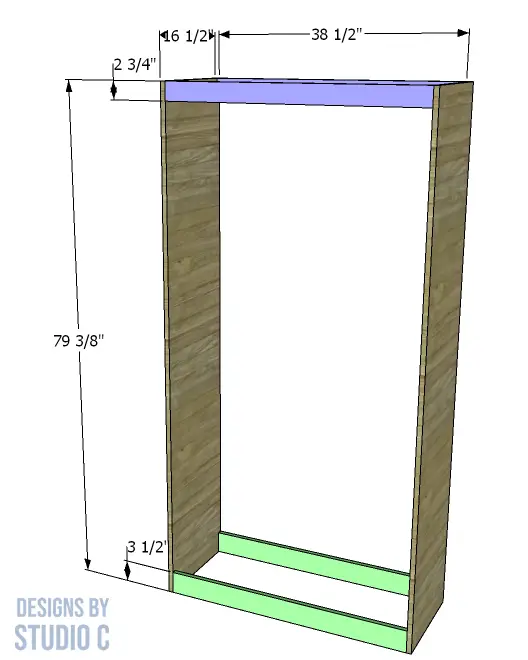
- 2 – 3/4″ plywood at 16-1/2″ x 79-3/8″ – Sides
- 2 – 3/4″ plywood at 3-1/2″ x 38-1/2″ – Lower Stretcher
- 2 – 3/4″ plywood at 2-3/4″ x 38-1/2″ – Upper Stretcher
- 5 – 3/4″ plywood at 16-1/2″ x 38-1/2″ – Shelves
- 1 – 3/4″ plywood at 16-1/2″ x 40″ – Top
- 10 – 3/4″ plywood at 13-7/8″ x 16-1/2″ – Dividers
- 1 – 1/4″ plywood at 38-1/2″ x 77-5/8″ – Back
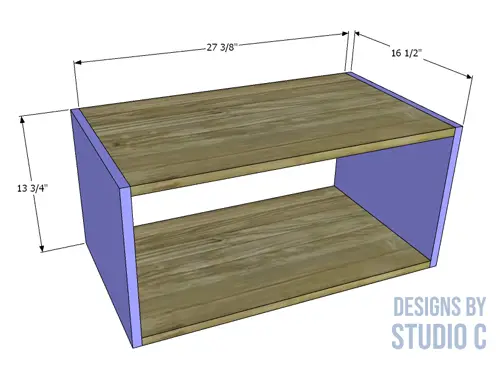
- 2 – 3/4″ plywood at 13-3/4″ x 27-3/8″ – Cubby Box Top and Bottom
- 2 – 3/4″ plywood at 13-3/4″ x 16-1/2″ – Cubby Box Sides
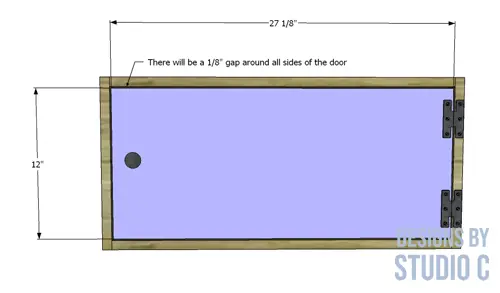
- 1 – 3/4″ plywood at 12″ x 27-1/8″ – Cubby Door
Notes About the Project:
- Apply edge banding to the exposed edges of the plywood prior to assembly
- Sand all of the pieces before assembly
- The cubby does not have a back because it doesn’t really need one (just a box with a door!)
Step One
Cut the pieces for the sides, the stretchers, the top, and all of the shelves. With the pocket hole jig set for 3/4″ material, drill pocket holes in each end of the shelf pieces (except one for the bottom!) as well as each end of the stretchers. Secure the stretchers to the sides using glue and 1-1/4″ pocket hole screws.
Step Two
Position the bottom on the top edge of the lower stretchers and secure in place using glue and 2″ brad nails through the bottom into the stretcher.
Step Three
Mark the position of the shelves, and secure them to the sides using glue and 1-1/4″ pocket hole screws.
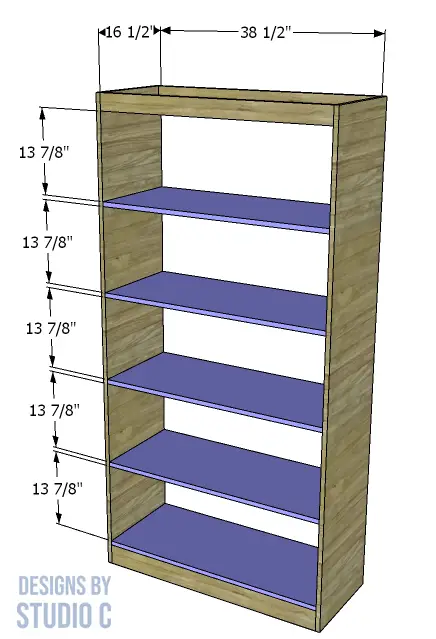
Step Four
Secure the top to the upper stretchers and sides using glue and 2″ brad nails. The top will be flush on all sides.
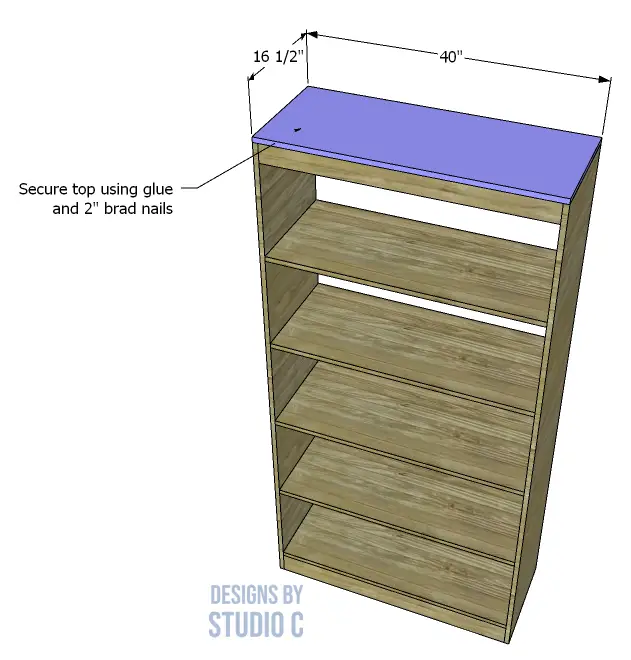
Step Five
Cut the piece for the back. Secure to the upper stretchers, sides, lower stretchers, and shelves using 1-1/4″ brad nails.
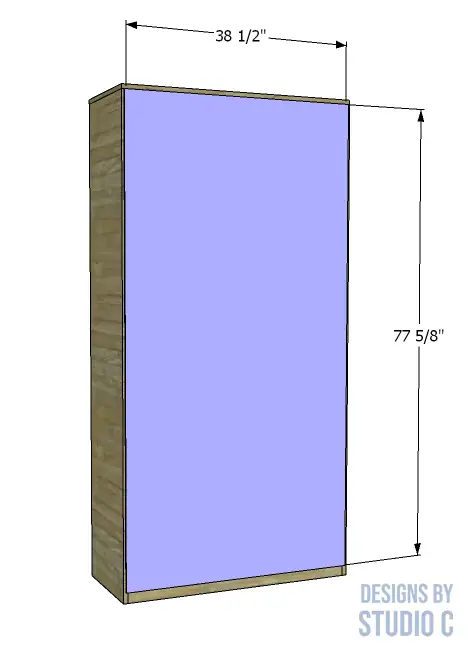
Step Six
Cut the pieces for the dividers. Secure the dividers to the shelves as shown (or opposite, if desired) using glue and 2″ brad nails through the shelves into the top or bottom of the dividers.
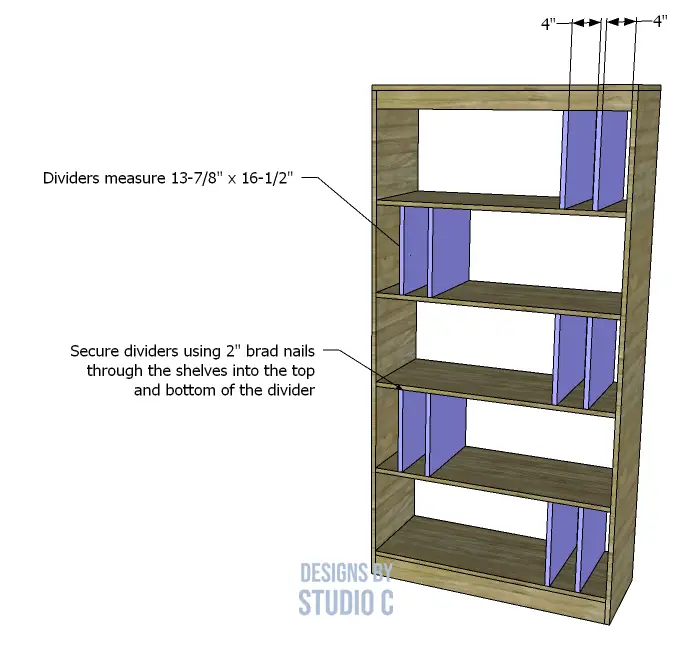
Step Seven
Cut the pieces for the cubby. Drill pocket holes in each end of the longer pieces. Assemble the box using glue and 1-1/4″ pocket hole screws, this time with the pocket holes facing to the outside rather than the inside. They will be hidden when the cubby is placed on the shelves and not visible from the inside.
Step Eight
Cut the piece for the cubby door. There will be a 1/8″ gap around all sides of the door in the opening. Install the hinges on the door, then install the door in the opening. Install the door handle or knob.
There will be enough of a gap that the cubby should easily slide between two of the shelves. Pro tip: apply a coat of paste wax to the outside of the cubby to allow it to slide easily if you plan on changing the location often!
Step Ten
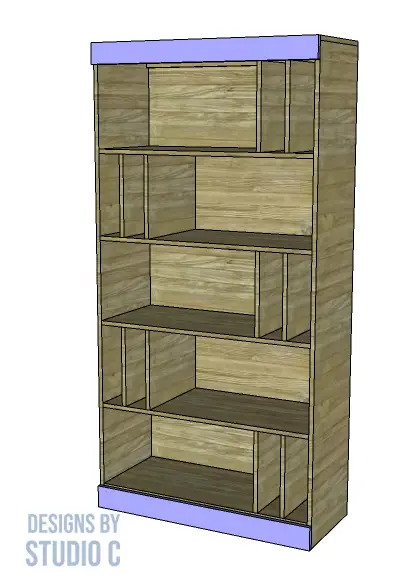
Cut the trim to length and secure to the top and bottom front using glue and 1-1/4″ brad nails.
Finish as desired.
Have questions about the plans to build an Elwyn bookcase with optional cubby? Leave a comment below!
Originally posted 2022-07-18 08:00:17.

