
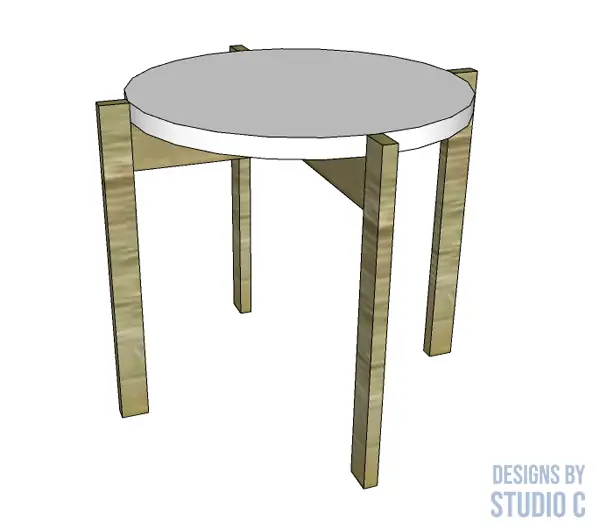
A Super-Simple Table for Indoors or Outdoors
The crazy-easy plans to build a Kivala end table utilize off the shelf boards and a pre-made wood round for the top (though you can totally cut your own with a jig!). The pieces for the base can be cut using a miter box and handsaw, or even at the place of purchase if they offer such services (ask them first!). The base is assembled using pocket holes and the top sits between the legs that extend upward. This plan is perfect for newbies and experts alike who want a simple weekend project!
Materials:
- 1-1/4″ pocket hole screws (<– affiliate link!)
- Wood glue
- 2″ edge banding and cutter (optional, if cutting the top from plywood!)
- Wood glue
- Finishing supplies (primer and paint, or stain and sealer)
Lumber:
- 1 – 1×2 at 8′
- 1 – 1×3 at 8′
- 18″ Wood round OR
- 1 – 2′ x 4′ sheet of 3/4″ plywood
Cut List:
- 4 – 1×2 at 18″ – Legs
- 4 – 1×3 at 18″ – Framing
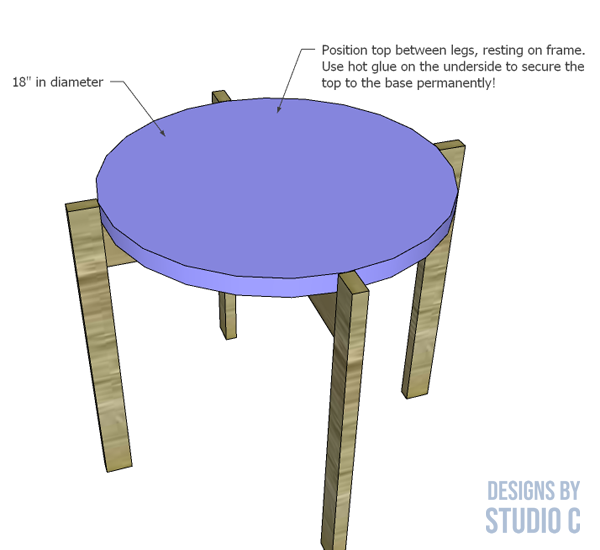
- Top – 18″ in diameter

Notes About the Project:
- Sand all pieces prior to assembly
- Apply edge banding to the edges of the top if cutting from plywood, then sand
- Consider stenciling a design on top for added interest!
- Use the proper sealer rated for indoor or outdoor use
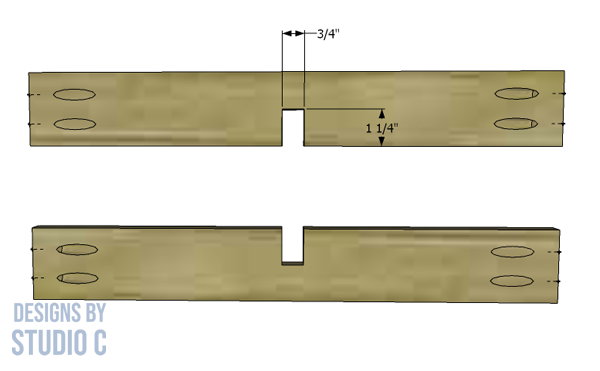
Step One
Cut the pieces for the frame. Mark the position of the notch (to join the leg assemblies) in the center of each piece as shown in the drawing. Cut the notch with a jigsaw.
With the pocket hole jig set for 3/4″ material, drill pocket holes in each end of the 1×3 pieces.
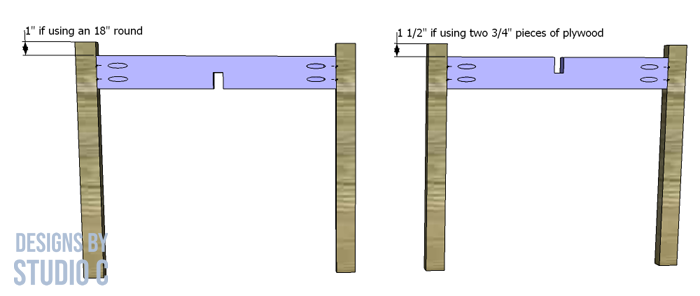
Step Two
Cut the pieces for the legs. Secure the frame pieces to the legs using glue and 1-1/4″ pocket hole screws as follows:
- If using an 18″ pre-made wood round, locate the top edge of the framing pieces 1″ (or equivalent to the thickness of the round) down from the top of the legs.
- If using two pieces of 3/4″ plywood, locate the top edge of the framing pieces 1-1/2″ down from the top of the legs.
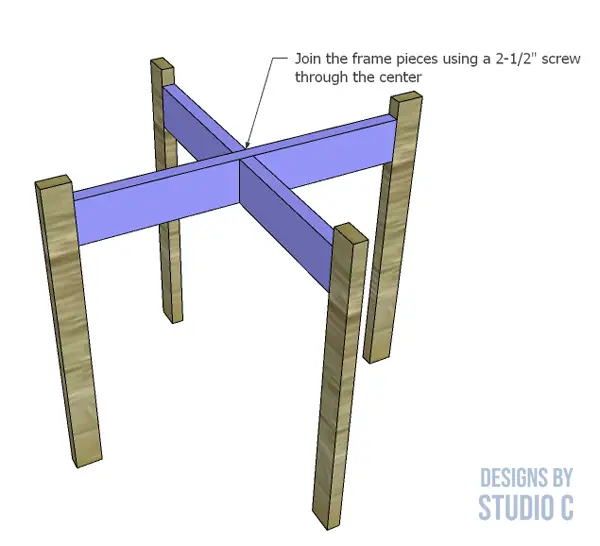
Step Three
Place one assembly on top of the other so that the notches fit together, then secure them by driving a 2-1/2″ screw through the center. Make sure the assemblies are perpendicular to each other so that the frame is square!
Step Four
If using a pre-made wood round, place the round on the frame between the legs, then finish as desired.
If using two 3/4″ pieces of plywood, cut the plywood into two pieces. Draw an 18″ circle on one piece using your favorite method. Apply glue to the face of one piece, spreading with a paint brush or your finger (peeling dried glue off your fingers is still fun!). Position the other piece on top and wiggle it a bit to create suction while aligning the pieces. Clamp the pieces together until dry.
Cut out the circle using a jigsaw or bandsaw, then apply edge banding if desired, and place the top on the frame between the legs.
The frame can also be constructed out of 2x2s for a chunkier look, without any alteration to the design or cut list. This round top end table would make a great plant stand, as well, and several can be made in a weekend!
Have questions about the plans to build a Kivala end table? Leave a comment below!
Originally posted 2022-05-23 08:00:46.


Comments are closed.