DIY Plans to Build a Raphael Dresser
An Awesome Dresser to Build with Chunky Curved Legs
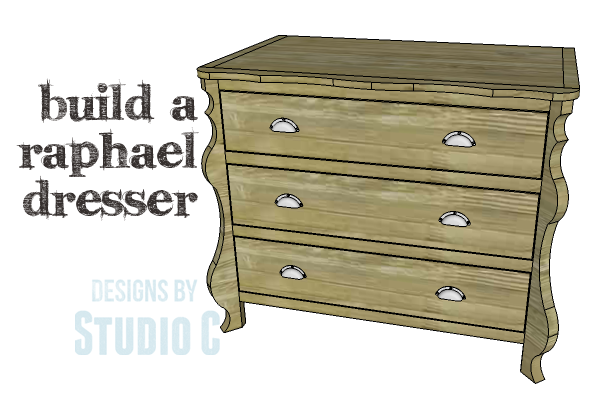
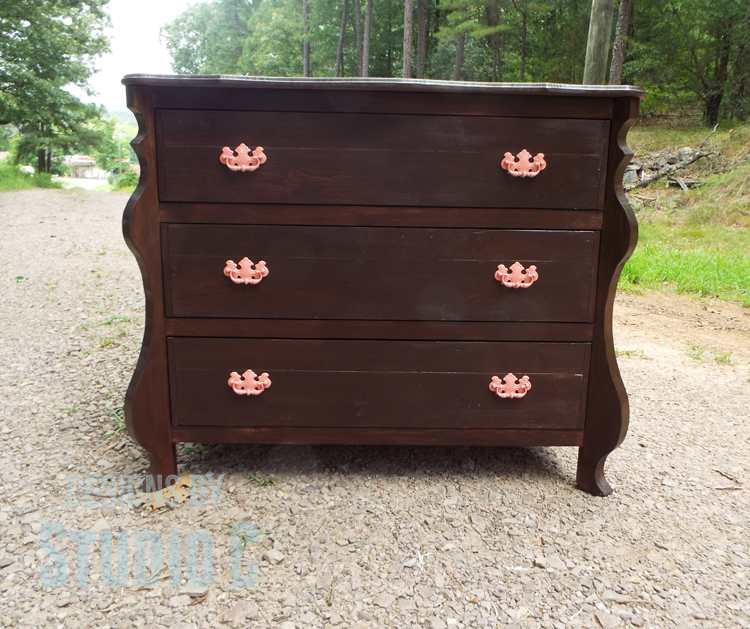
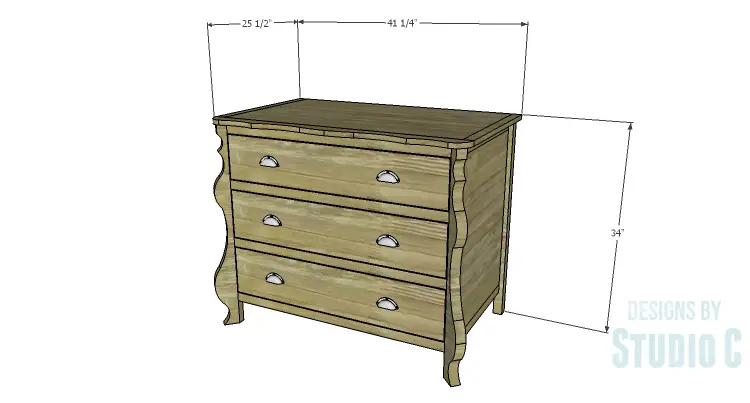
Wow, this dresser is absolutely amazing! I’m definitely adding it to my “to-build” list, and it might just make its way to the top! The DIY plans for the Raphael Dresser are fantastic, with chunky curved front legs (template included) and a beautifully curved front trim on the top (also with a template). And can we talk about the storage? Three large drawers that can hold an incredible amount of stuff!
Materials:
- 1-1/4″ pocket hole screws
- 5/8″ brad nails
- 1-1/4″ brad nails
- Edge banding, optional
- 3 sets of 20″ drawer slides (heavy duty, if possible!)
- Cabinet pulls
- Wood glue
- Sandpaper (100, 150, 220 grits)
- Finishing supplies (primer & paint, or stain, sealer)
Lumber:
- 6 – 1×2 at 8′
- 1 – 1×3 at 4′
- 1 – 1×6 at 6′
- 3 – 1×6 at 8′
- 1 – 2×2 at 6′
- 1 – 2×6 at 6′
- 1 – 2′ x 2′ sheet of 1/4″ plywood
- 1 – 4′ x 4′ sheet of 3/4″ plywood
- 1 – 4′ x 8′ sheet of 3/4″ plywood
Cut List:
- 2 – 2×6 at 33-1/4″ – Front Legs
- 4 – 1×2 at 21-1/2″ – Side Framing
- 2 – 2×2 at 33-1/4″ – Back Legs
- 2 – 3/4″ plywood at 21-1/2″ x 26-1/2″ – Side Panels
- 2 – 1×2 at 36-5/8″ – Back Framing
- 1 – 3/4″ plywood at 26-1/2″ x 36-5/8″ – Back Panel
- 4 – 1×2 at 36″ – Front Stretchers
- 6 – 1×2 at 21-13/16″ – Drawer Supports
- 6 – 1/4″ plywood at 21-1/2″ – Drawer Slide Spacers
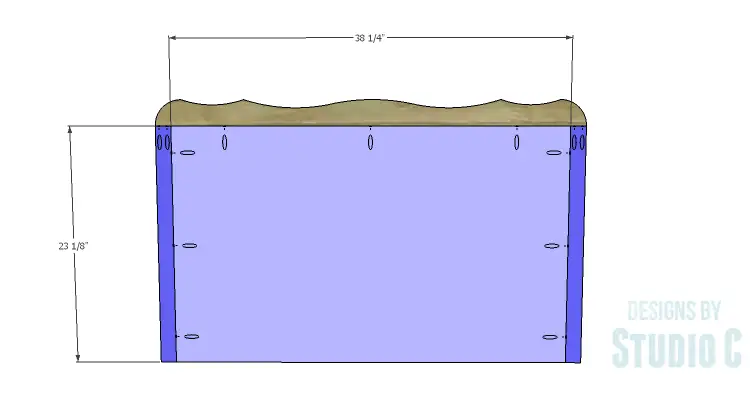
- 1 – 3/4″ plywood at 23-1/8″ x 38-1/4″ – Top Panel
- 2 – 1×2 at 23-1/8″ – Top Side Trim
- 1 – 1×3 at 41-1/4″ – Top Front Trim
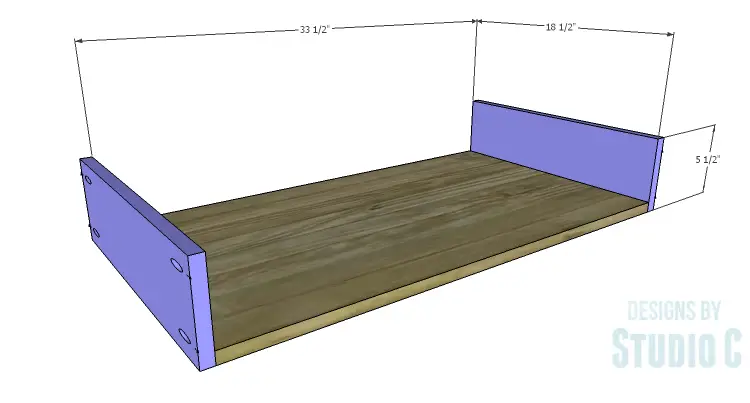
- 3 – 3/4″ plywood at 18-1/2″ x 33-1/2″ – Drawer Box Bottom
- 6 – 1×6 at 18-1/2″ – Drawer Box Sides
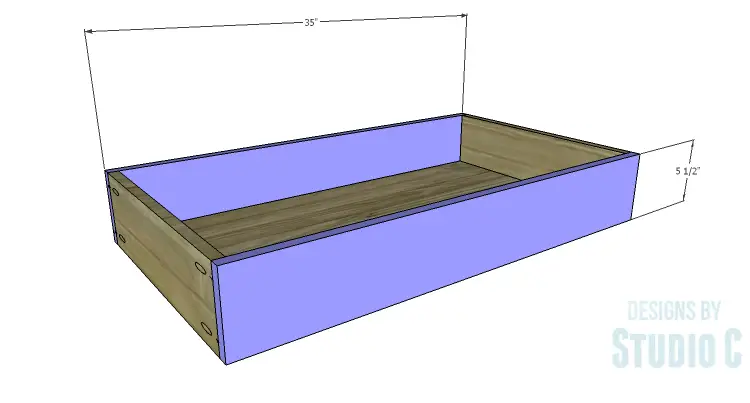
- 6 – 1×6 at 35″ – Drawer Box Front & Back
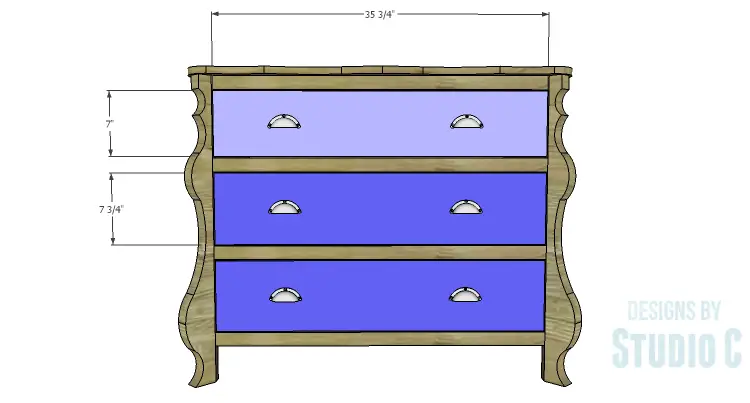
- 1 – 3/4″ plywood at 7″ x 35-3/4″ – Upper Drawer Fronts
- 2 – 3/4″ plywood at 7-3/4″ x 35-3/4″ – Mid and Lower Drawer Fronts
Step One
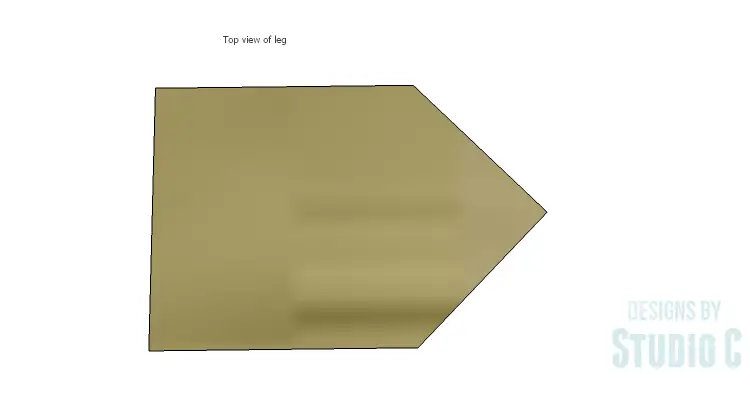
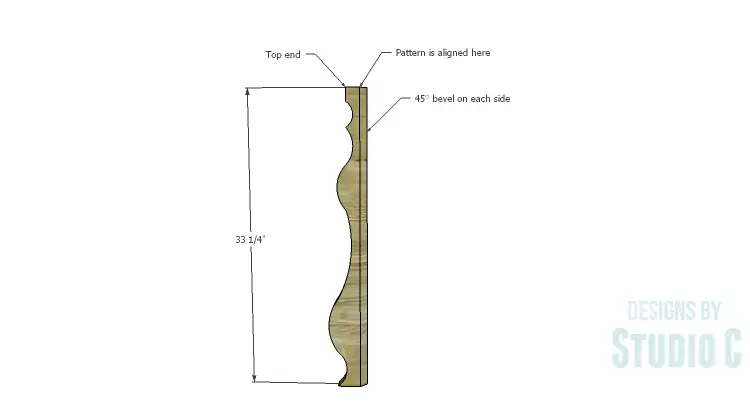
Cut the 2×6 pieces to length for the legs. Cut a 45° bevel on both sides of one long edge. The front legs are set at a 45° angle and will need a flat surface for the side assemblies and the front stretchers to attach.
Print the template and piece together the pattern by lining up the registration marks and taping the pages together. Cut out the template pattern. Align the straight edge of the pattern with the end of the bevel on one side of the leg piece – the pattern is not lined up with the outer edge of the bevel. Trace around the template and cut out the legs using a jigsaw or a bandsaw. The leg pieces can also be screwed together and cut as one piece on a bandsaw. a router with a small roundover bit can be used along the curves to soften the edges. For more clarification on cutting the legs, see my tutorial about how to cut legs using a template!
Step Two
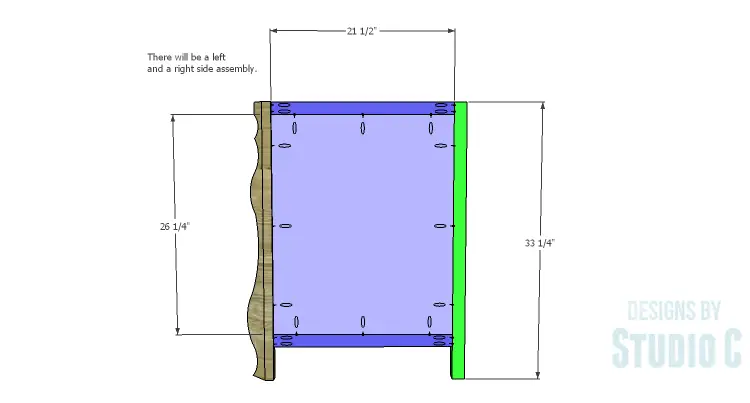
Cut the pieces for the back legs, side framing and side panels. With the pocket hole jig set for 3/4″ material, drill pocket holes in each end of the framing pieces, as well as all four edges of the panels. Secure the framing pieces to the panels using glue and 1-1/4″ pocket hole screws. Secure the panel assemblies to the back legs (treating the pieces as a left and a right) using glue and 1-1/4″ pocket hole screws. The back faces of the panel assemblies will be flush with the inside faces of the back legs.
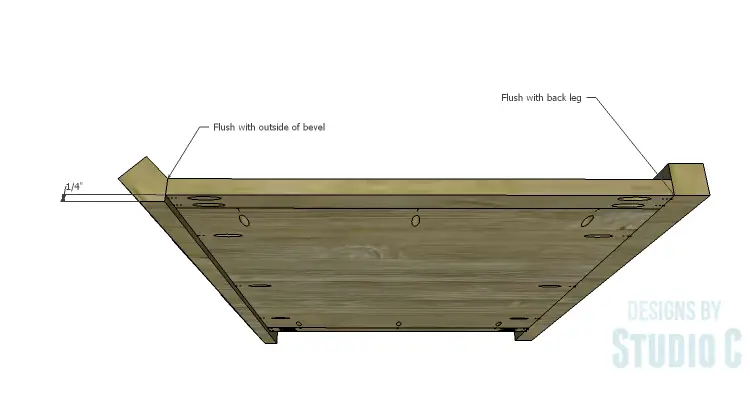
Secure the side assemblies to the front legs. The outside of the sides will be flush with the outside of the legs – see the drawing.
Step Three
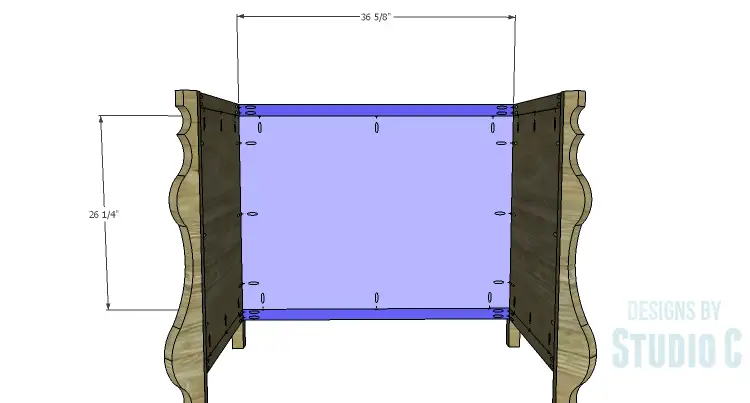
Cut the pieces for the back framing and the back panel. Drill pocket holes in each end of the framing pieces, as well as all four edges of the panel. Secure the framing pieces to the panel using glue and 1-1/4″ pocket hole screws. Secure the panel assembly to the back legs using glue and 1-1/4″ pocket hole screws. The back face of the panel assembly will be flush with the inside face of the back legs.
Step Four
Cut the pieces for the front stretchers and drill pocket holes in each end. Secure the stretchers to the front legs using glue and 1-1/4″ pocket hole screws. The front face of the stretchers will be flush with the front face of the legs, not the bevel point on the inside.
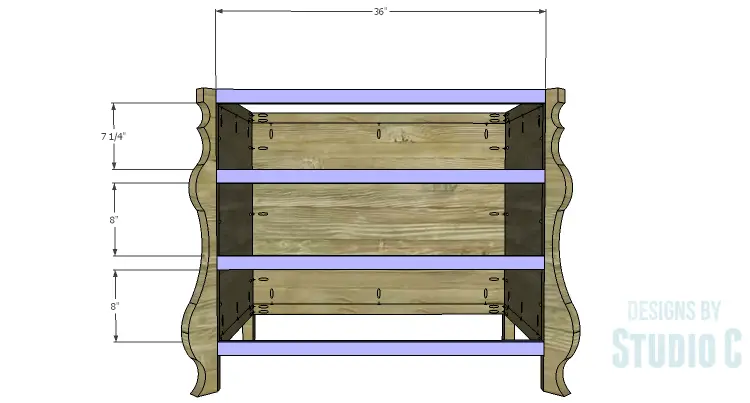
Step Five
Cut the pieces for the drawer supports and drill pocket holes in each end. Secure the supports to the front stretchers and the back panel as shown using glue and 1-1/4″ pocket hole screws.
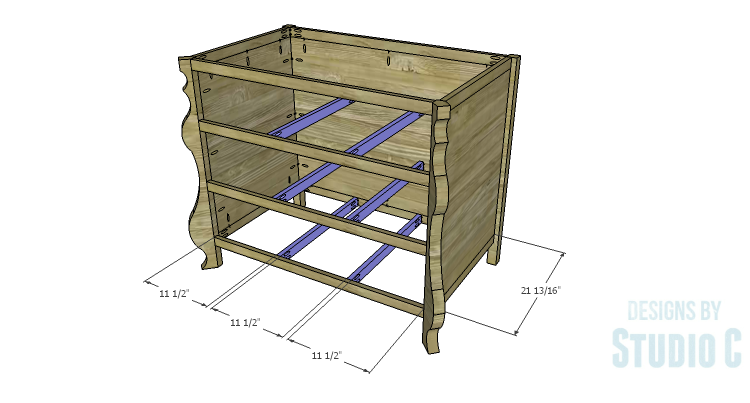
Step Six
Cut the pieces for the drawer slide spacers. Secure the spacers to the side panels just above the stretcher position using glue and 5/8″ brad nails.
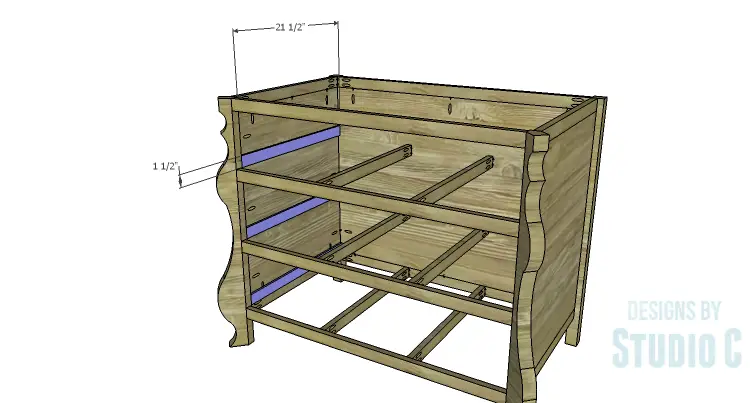
Step Seven
Cut the pieces for the top. Print and assemble the template for the top front trim. Align the template with one long edge of the front trim piece and cut the curves using a jigsaw or a bandsaw.
Drill pocket holes in one end of the side trim pieces as well as all four edges of the top panel. Assemble the top using glue and 1-1/4″ pocket hole screws.
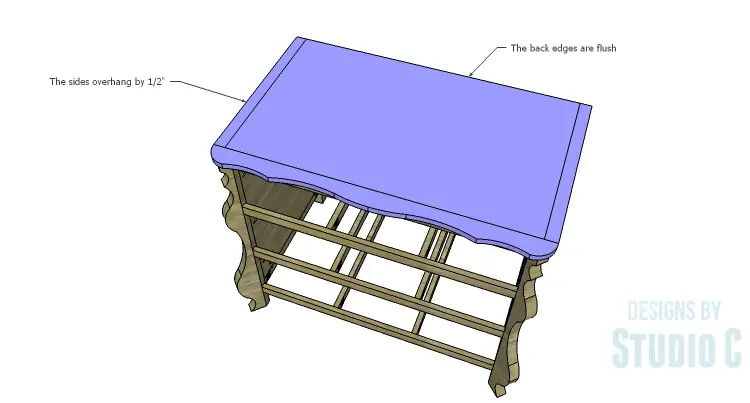
Position the top so that the back edge is flush with the back legs of the cabinet, and the sides overhang by 1/2″. Secure the top in place using glue and 1-1/4″ brad nails. A router with a decorative bit can be used to cut an edge on the top trim sides and front.
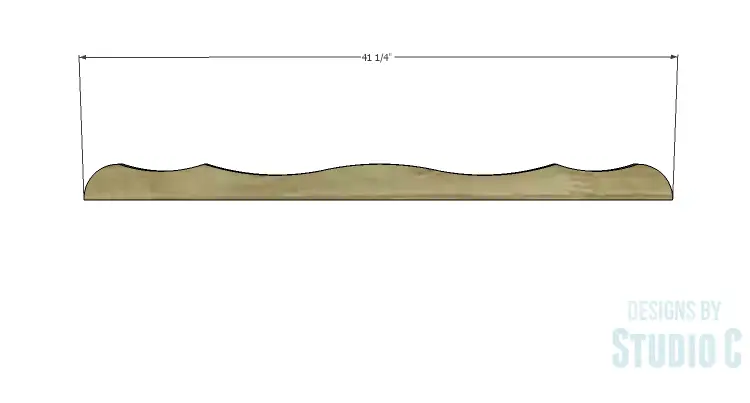
Step Eight
Cut the pieces for the drawer boxes. Drill pocket holes in all four edges of the bottom as well as each end of the sides. Assemble the drawer boxes as shown using glue and 1-1/4” pocket hole screws. Install the drawer slides according to the manufacturer’s installation instructions, locating them ¾” back from the front edge of the front legs. Take a look at this easy tutorial on installing drawer slides. Make any necessary adjustments.
Step Nine
Cut the pieces for the drawer fronts. Mark the position for the drawer pulls and drill the holes. Shim the drawer front in the opening – there will be a 1/8” gap around all sides – then drive screws through the holes for the drawer pulls into the drawer box. Open the drawer, and secure the drawer front using countersunk 1-1/4” screws from the inside. Remove the screws from the holes for the drawer pull then finish drilling the holes. Install the drawer pull. This tutorial on installing drawer fronts will be quite helpful.
Finish as desired.
This dresser would also be an awesome storage piece in a dining room or an entryway. The dresser would be fabulous in a variety of finishes, as well! Have any questions about the DIY plans to build a Raphael Dresser? Leave a comment below!

[…] I posted plans to build a dresser with chunky curved legs and I also mentioned that I was going to add it near the top of my “to build” list! […]
[…] I was drawing plans for the Raphael Dresser, I knew I wanted to build it – immediately!! The day after I posted it, I cut the legs from […]
[…] I’ve had this dresser for awhile and although it was covered with a heavy duty tarp (the kind that covers lumber when it is delivered to the home improvement store), the top veneer was heavily damaged. I’m almost ashamed to say that I built this dresser but it is what it is… Anyway, I had an idea to repair the top and add pieced trim to the edges in lieu of using edge banding, and I have to say this is probably my favorite project yet (next to this one)! […]
[…] I was drawing plans for the Raphael Dresser, I knew I wanted to build it – immediately!! The day after I posted it, I cut the legs from the […]
[…] I posted plans to build a dresser with chunky curved legs and I also mentioned that I was going to add it near the top of my “to build” list! The build […]