A Simple to Build Bench with Lots of Style!
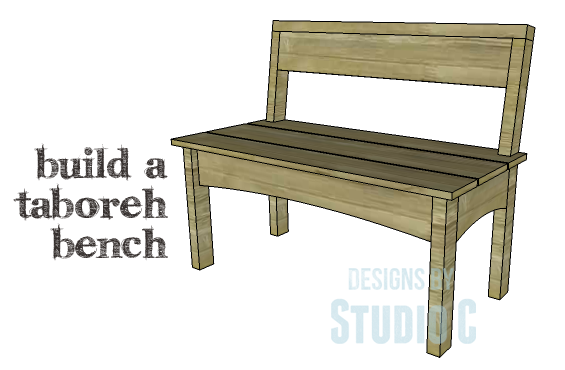
Building benches can be a really enjoyable project, especially since they can be placed anywhere in your home or even outside. The DIY plans for creating a Taboreh Bench are incredibly easy to follow. It features a strong 2x base, beautifully curved aprons, a simple seat (you can easily shape the outer edges with a router), and a plain back. You have the option to use plain pine boards if you plan to keep it indoors, or treated lumber if you want it to withstand outdoor conditions.
Materials:
- 1-1/4″ pocket hole screws (<– affiliate link!)
- 2-1/2″ pocket hole screws
- 1-1/2″ nails, screws, or brad nails
- 3″ screws
- Wood glue
- Sandpaper (100, 150, 220 grits)
- Finishing supplies (primer & paint, or stain, sealer)
Lumber:
- 1 – 1×6 at 4′
- 1 – 1×6 at 8′
- 1 – 1×8 at 4′
- 1 – 2×3 at 8′
- 1 – 2×4 at 4′
- 2 – 2×6 at 8′
Cut List:
- 2 – 2×6 at 31″ – Back Legs
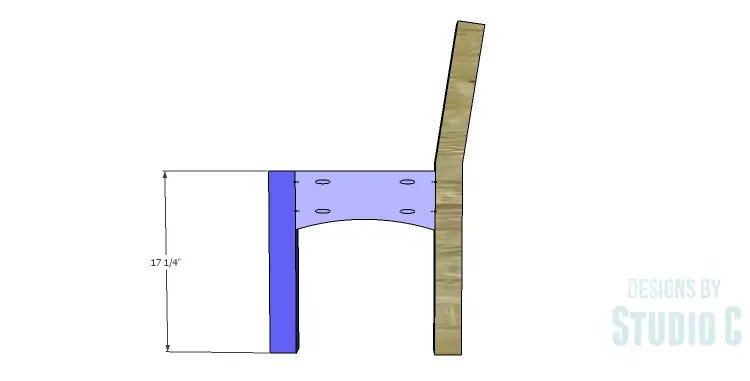
- 2 – 2×3 at 17-1/4″ – Front Legs
- 2 – 2×6 at 13″ – Side Stretchers
- 2 – 2×6 at 35″ – Front & Back Stretchers
- 2 – 2×4 at 13″ – Seat Supports
- 1 – 2×3 at 38″ – Back Top
- 1 – 1×6 at 35″ – Back
- 2 – 1×6 at 40″ – Seat
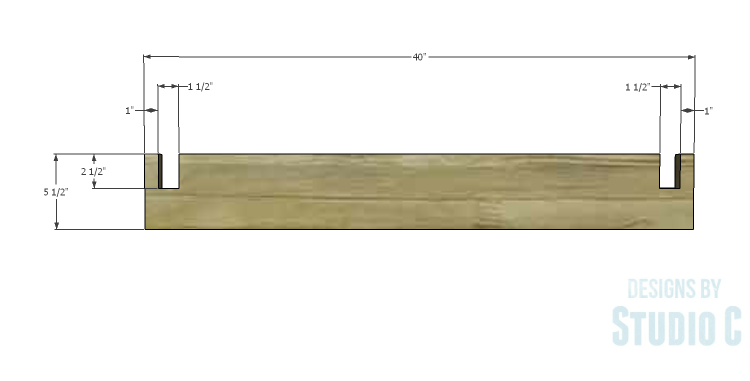
- 1 – 1×8 at – 40″ – Seat
Step One
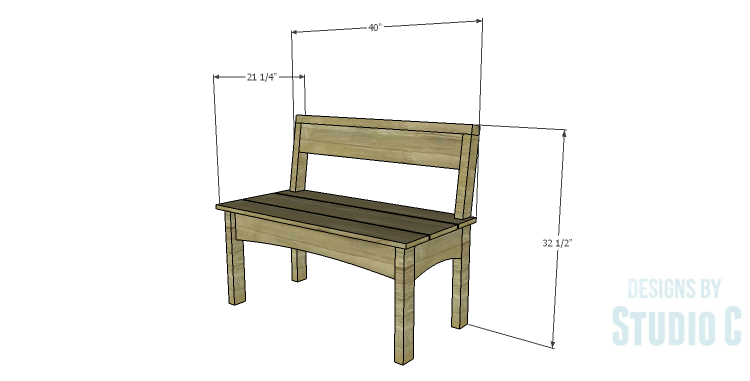
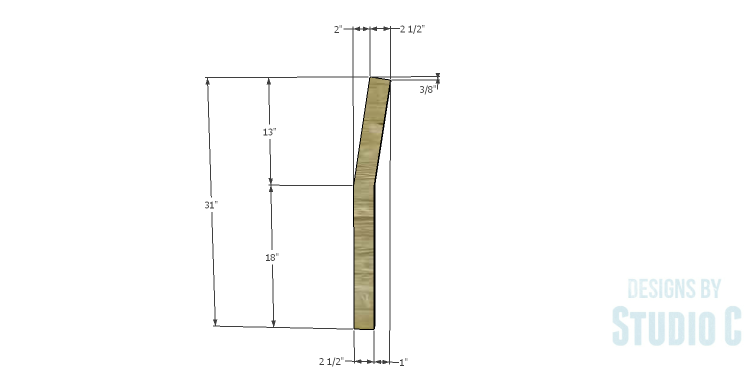
Cut the pieces for the back legs. Draw the legs on each of the 2×6 pieces according to the dimensions in the drawing. Cut the legs using a jigsaw or a bandsaw.
Step Two
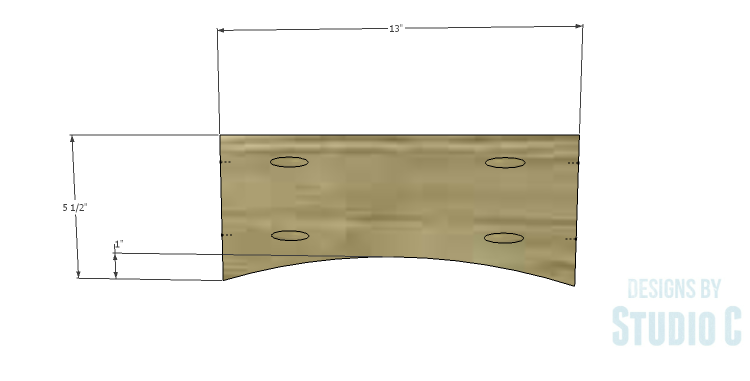
Cut the pieces for the front legs and the side stretchers. Draw the arc on the lower edge of the side stretchers and cut with a jigsaw or a bandsaw. Drill pocket holes in each end of each piece with a pocket hole jig set for 1-1/2″ material. Secure the side stretchers to the front and back legs using glue and 2-1/2″ pocket hole screws.
Step Three
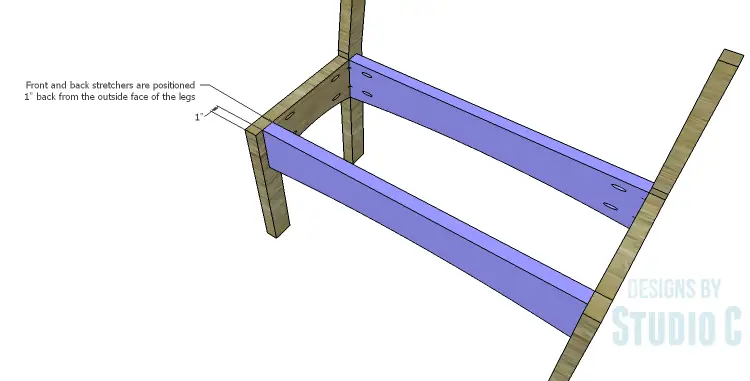
Cut the pieces for the front and back stretchers. Draw the arc on the lower edge of the front and back stretchers, and cut with a jigsaw or a bandsaw. Drill pocket holes in each end of each piece. Secure the stretchers to the legs (locating the pieces 1″ back from the outside edge of the legs) using glue and 2-1/2″ pocket hole screws.
Step Four
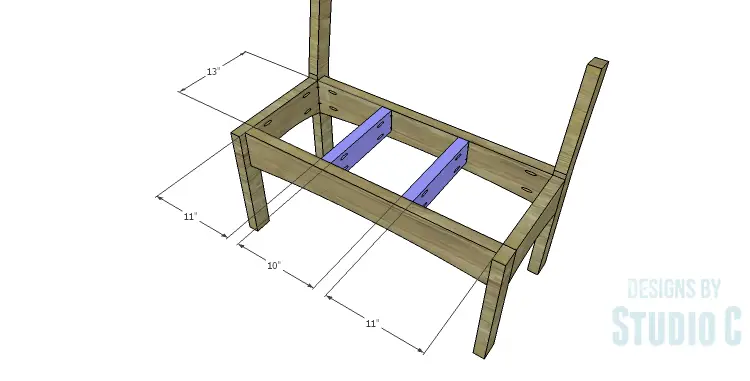
Cut the pieces for the seat supports and drill pocket holes in each end. Secure the supports to the front and back stretchers using glue and 2-1/2″ pocket hole screws. The top edge of the supports will be flush with the top edge of the stretchers.
Step Five
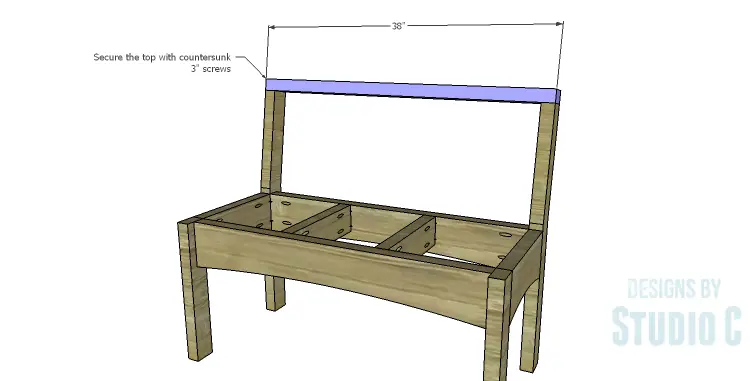
Cut the piece for the top back. Position the piece on the top of the back legs securing in place using glue and countersunk 3″ screws.
Step Six
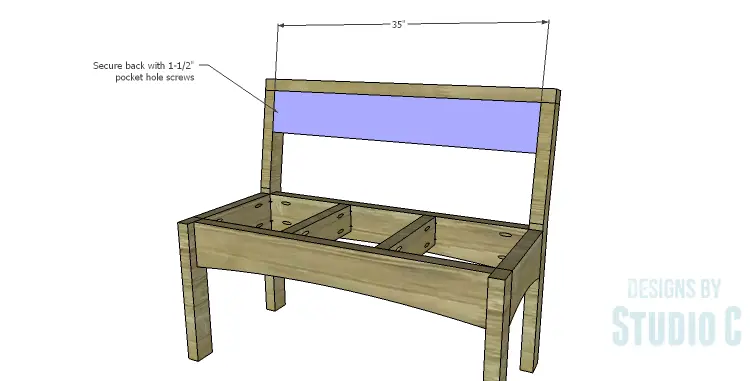
Cut the piece for the back. Set the pocket hole jig for 3/4″ material and drill pocket holes in each end as well as one long edge. Secure to the back legs and the underside of the top using glue and 1-1/2″ pocket hole screws.
Step Seven
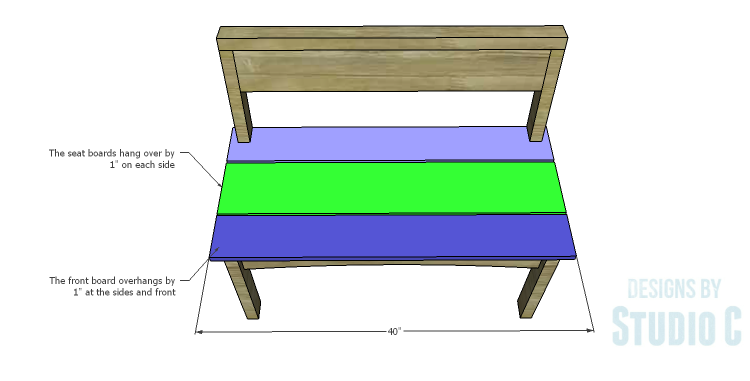
Cut the pieces for the seat. Cut the notches in one of the 1×6 seat pieces using a jigsaw or a band saw. Secure the board the bench frame using glue and 1-1/2″ nails, screws, or brad nails.
Secure the remaining seat pieces to the frame using glue and 1-1/2″ nails, screws, or brad nails spacing the pieces 1/2″ from each other. The pieces will overhang the sides by 1″, and the front 1×6 will also overhang the front by 1″.

Finish as desired.
The bench would be a fabulous option in any room or even on a porch or deck! There are so many ways to finish this little bench and I would love to see your hard work! Have any questions about the DIY plans to build a Taboreh Bench? Leave a comment below!


1 Comment
Pingback: Bench – Free Woodworking Plan.com