
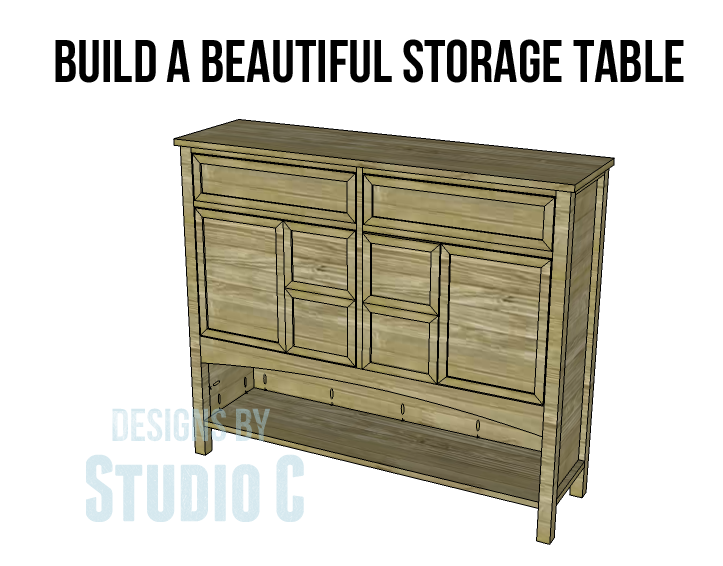
Yvette Console Table Plans
Build a Beautiful Storage Table with Plenty of Style and Storage!
I love the opening at the bottom of these Yvette Console Table plans… It adds such a unique touch to the perfect storage table! Featuring two drawers, two roomy cubbies, and the bottom shelf, it would be a fabulous addition to any décor!
Materials:
- 1-1/4” pocket hole screws
- 1-1/4” brad nails
- Edge banding, optional (<– affiliate link!)
- 2 sets of hinges
- 4 – Cabinet pulls
- Wood glue
- Sandpaper (100, 150, 220 grits)
- Finishing supplies (primer & paint, or stain, sealer)
- Paste Wax
Lumber:
- 2 – 1×2 at 8′
- 1 – 1×4 at 4′
- 2 – 2×2 at 8′
- 2 sheets of 3/4″ plywood
- 3 – 1/4″ x 1″ trim at 8′
Cut List:
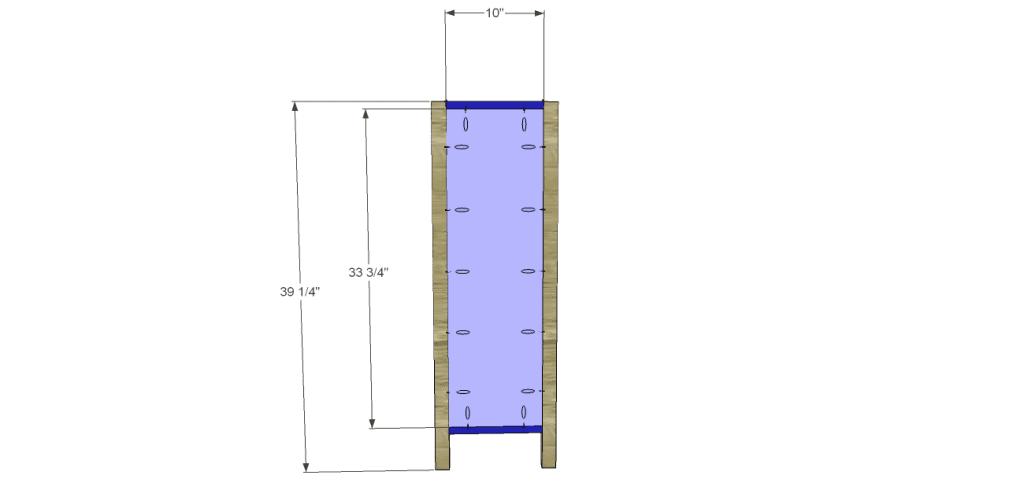
- 4 – 2×2 at 39-1/4″ – Legs
- 4 – 1×2 at 10″ – Side Frames
- 2 – 3/4″ plywood at 10″ x 33-3/4″ – Side Panels
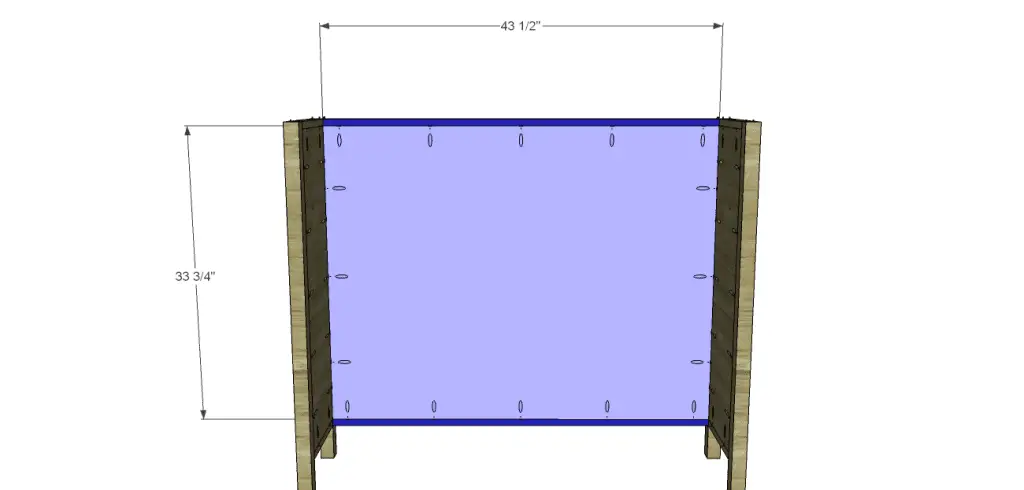
- 2 – 1×2 at 43-1/2″ – Back Frame
- 1 – 3/4″ plywood at 33-3/4″ x 43-1/2″ – Back Panel
- 1 – 3/4″ plywood at 11-1/2″ x 43-1/2″ – Lower Shelf
- 1 – 1×4 at 43-1/2″ – Cubby Shelf Trim
- 1 – 3/4″ plywood at 10-3/4″ x 43-1/2″ – Cubby Shelf
- 1 – 3/4″ plywood at 11-1/2″ x 23-1/4″ – Divider
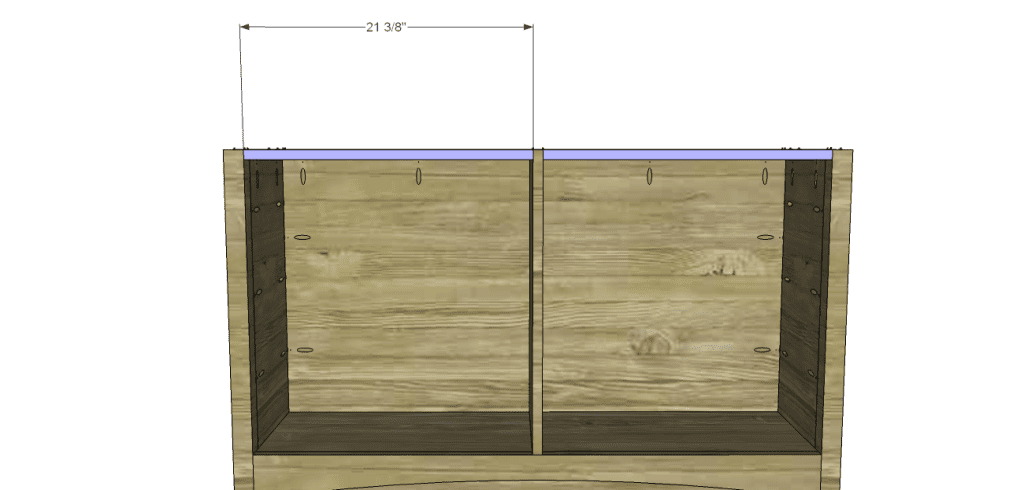
- 2 – 1×2 at 21-3/8″ – Stretchers
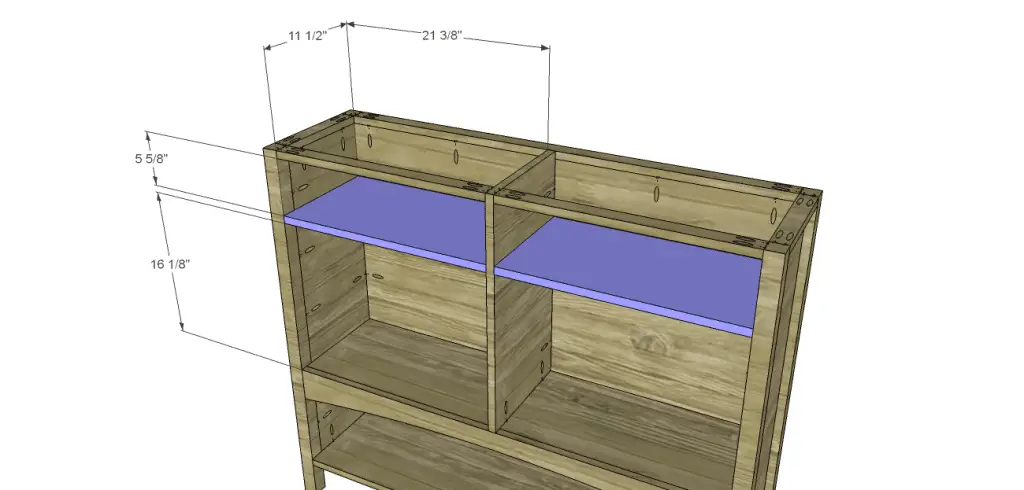
- 2 – 3/4″ plywood at 11-1/2″ x 21-3/8″ – Drawer Shelves
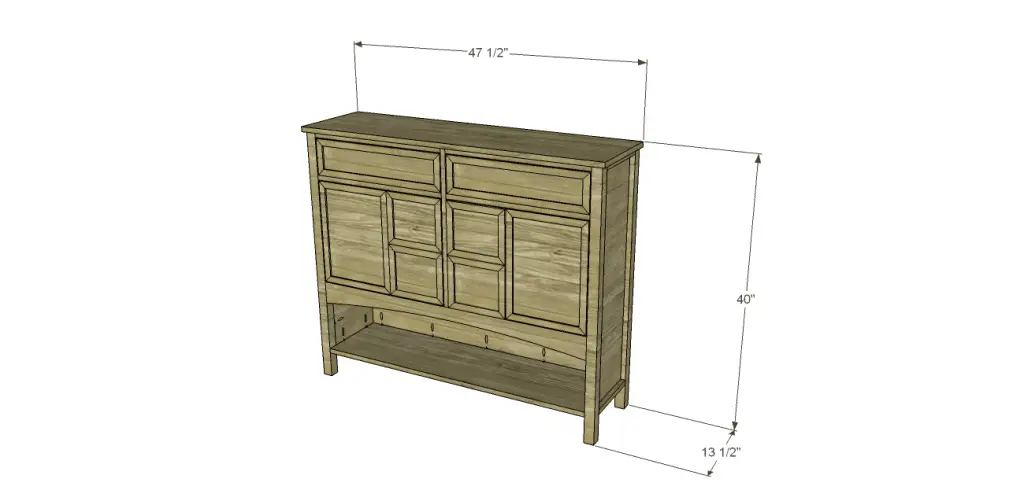
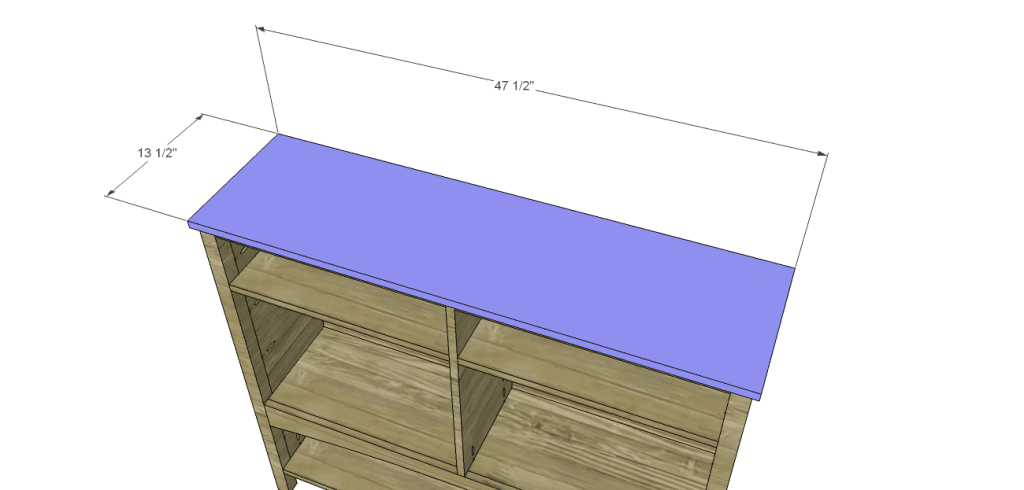
- 1 – 3/4″ plywood at 13-1/2″ x 47-1/2″ – Top
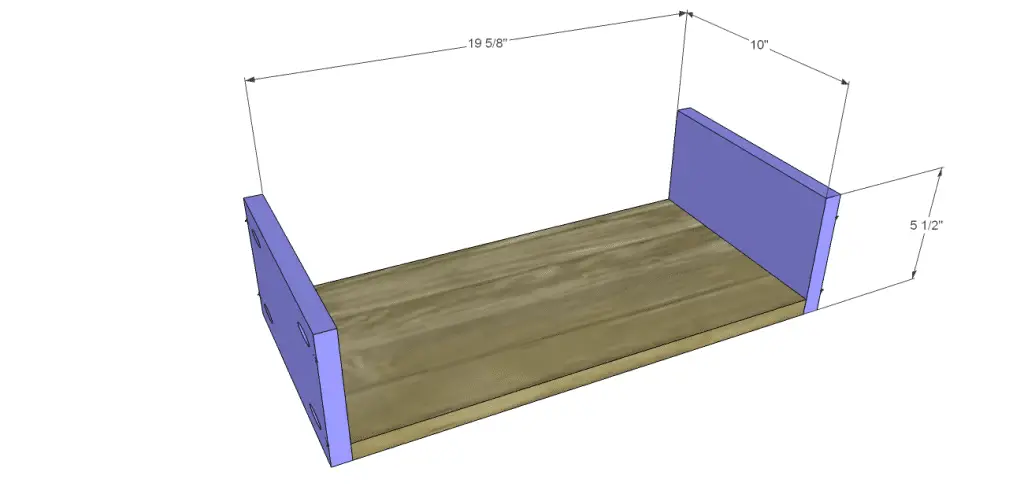
- 2 – 3/4″ plywood at 10″ x 19-5/8″ – Drawer Bottoms
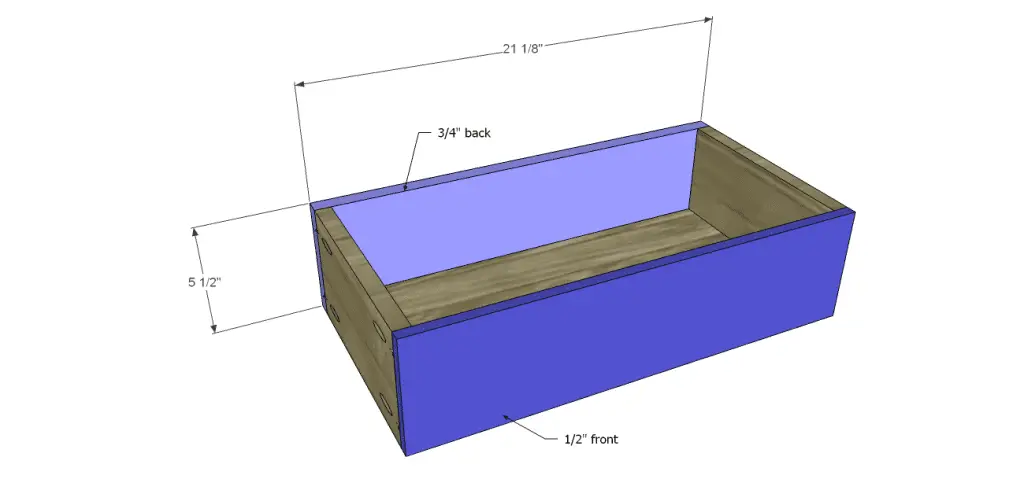
- 4 – 3/4″ plywood at 5-1/2″ x 10″ – Drawer Sides
- 2 – 3/4″ plywood at 5-1/2″ x 21-1/8″ – Drawer Back
- 2 – 1/2″ plywood at 5-1/2″ x 21-1/8″ – Drawer Front
- 4 – 1/4″ x 1″ trim at 5-1/2″ – Drawer Side Trim
- 4 – 1/4″ x 1″ trim at 21-1/8″ – Drawer Side Trim
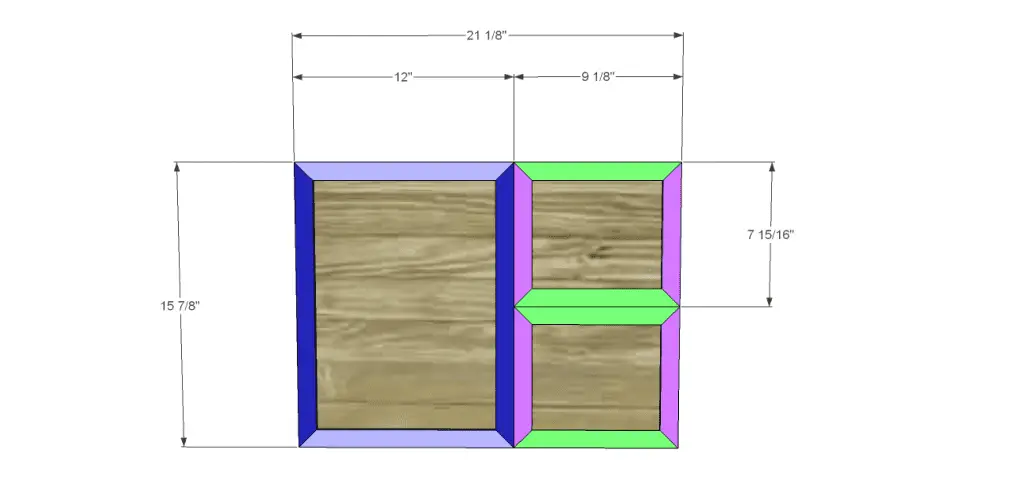
- 2 – 1/2″ plywood at 15-7/8″ x 21-1/8″ – Door Base
- 4 – 1/4″ x 1″ trim at 12″ – Door Trim
- 4 – 1/4″ x 1″ trim at 15-7/8″ – Door Trim
- 4 – 1/4″ x 1″ trim at 7 15/16″ – Door Trim
- 4 – 1/4″ x 1″ trim at 9-1/8″ – Door Trim
Notes About the Project:
Edge banding will be applied to the exposed edges of the plywood before assembly.
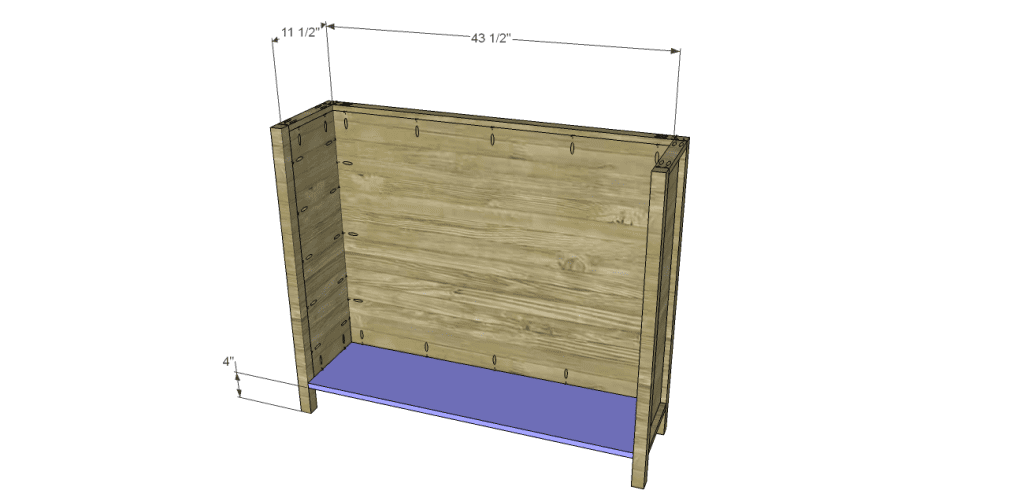
Step One
Cut the pieces for the legs, side frames, and side panels. With the pocket hole jig set for 3/4″ material, drill pocket holes in each end of the frame pieces as well as all four edges of the panels. Secure the frame pieces to the panels using glue and 1-1/4″ pocket hole screws. Secure the panel assembly to the legs using glue and 1-1/4″ pocket hole screws.
Step Two
Cut the pieces for the back frame and panel. Drill pocket holes in each end of the frame pieces as well as all four edges of the panel. Secure the frame pieces to the panel using glue and 1-1/4″ pocket hole screws. Secure the panel assembly to the legs using glue and 1-1/4″ pocket hole screws.
Step Three
Cut the pieces for the lower shelf. Drill pocket holes in each side edge as well as the back edge. Secure to the sides and back using glue and 1-1/4″ pocket hole screws.
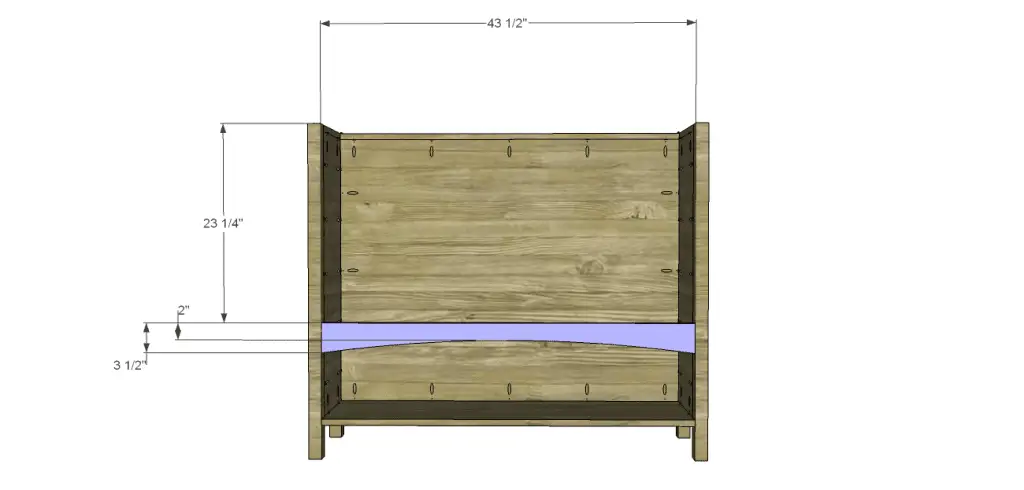
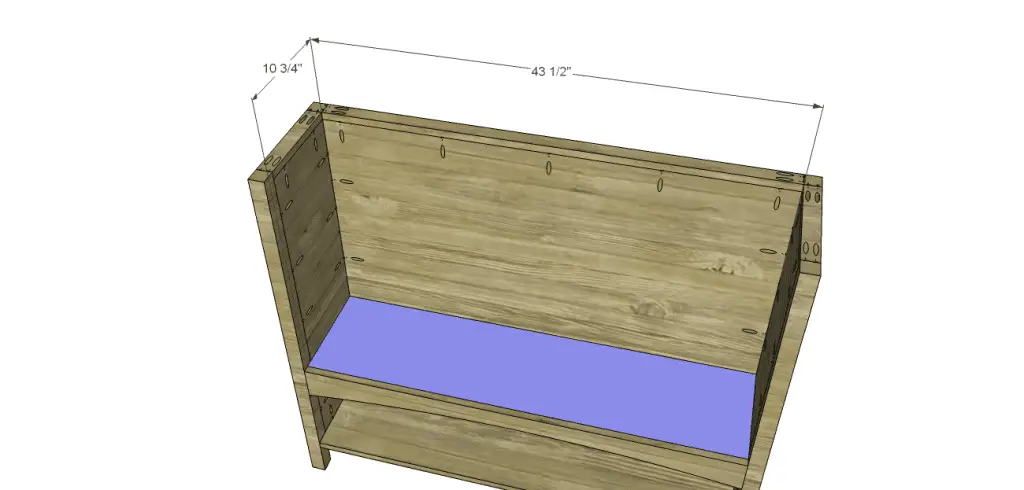
Step Four
Cut the piece for the cubby shelf trim and drill pocket holes in each end. Cut the arc in the piece using a jigsaw. Position the piece as shown, then secure using glue and 1-1/4″ pocket hole screws.
Cut the piece for the cubby shelf and drill pocket holes in all four edges. Secure to the sides, back, and trim using glue and 1-1/4″ pocket hole screws. The top of the shelf will be flush with the top of the trim.
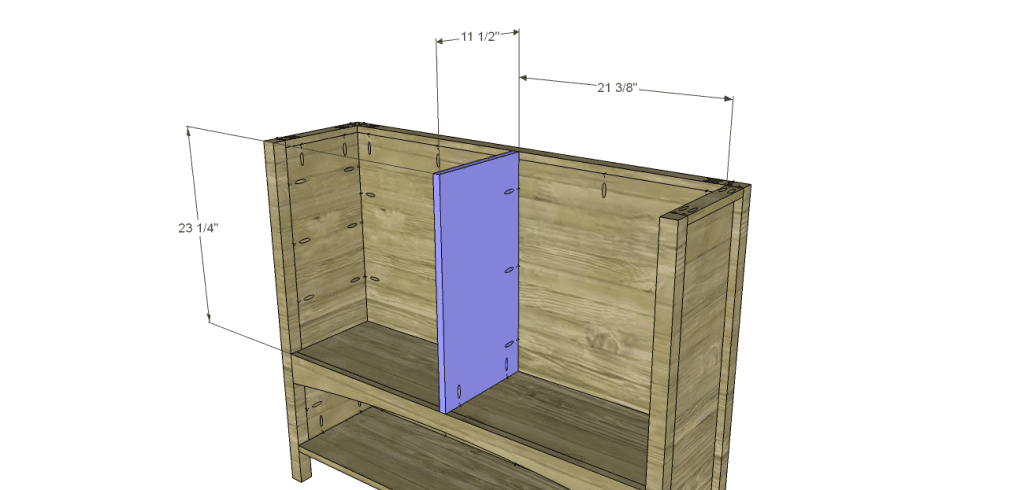
Step Five
Cut the piece for the divider and drill pocket holes in the bottom edge as well as the back edge. Position the piece as shown, then secure using glue and 1-1/4″ pocket hole screws.
Step Six
Cut the pieces for the stretchers and drill pocket holes in each end. Position the pieces as shown, then secure using glue and 1-1/4″ pocket hole screws.
Step Seven
Cut the pieces for the drawer shelves. Drill pocket holes in each side edge as well as the back edge. Secure to the sides and divider using glue and 1-1/4″ pocket hole screws.
Step Eight
Cut the piece for the top. The front and sides will overhang by 1/2″. Secure in place using glue and 1-1/4″ brad nails.
Step Nine
Cut the pieces for the drawer boxes. Assemble the drawer box as shown using glue and 1-1/4” brad nails.
Cut the trim pieces to length, then cut a 45 degree miter in each end. Secure to the front of the drawer boxes using glue and 1/2″ brad nails.

Step Ten
Cut the pieces for the doors. Cut the trim pieces to length, then cut a 45 degree miter in each end. Secure tot he front of the drawer boxes using glue and 1/2″ brad nails. Install the hinges on the door, then install the doors in the cabinet. Adjust if necessary, then install the cabinet pulls.
Finish as desired. Apply a coat of paste wax to the bottom of the drawers to help them slide smoothly on the shelves.
This table can finished in a number of ways – stencils on the doors and drawers, an aged and distressed look, etc. However you choose to do it, the Yvette console plans are easy and will have you creating a gorgeous piece of furniture very quickly! Need help or have a request? Contact me at cher {at} designsbystudioc {dot} com!
Originally posted 2013-12-13 08:00:06.
I could use plenty of storage lol.. seems like my stuff keeps growing and I have no way to put’em. Great idea, love it! Just curious? Where do you get your lumber from?
Awesome, Vinma! I usually buy everything I need at my local Home Depot (just my own personal preference). The materials should be available at any home improvement store. If you need help, let me know!
This is one pretty piece, really handy too!
Thank you, Elle! I still wish I could build every piece of furniture I draw but I’d have nowhere to put it!
I like this one because of all the little cubbies.
Thank you, Tammy!
Thinking of doing this using oak. Would you recommend using oak plywood or regular plywood?
Hi, Gabriel! I use oak plywood for projects like this all of the time! Oak edge banding (to cover the edges) is readily available at most home improvement stores. Solid wood can also be used. If you have any other questions, please feel free to ask! Thank you for stopping by!
[…] the Yvette Console Table with Free Plans.This condole table has plenty of storage since it has two drawers, two roomy cubbies, and the bottom shelf. Build it […]