Build a Slat Shelf Coffee Table
A Super Easy Coffee Table
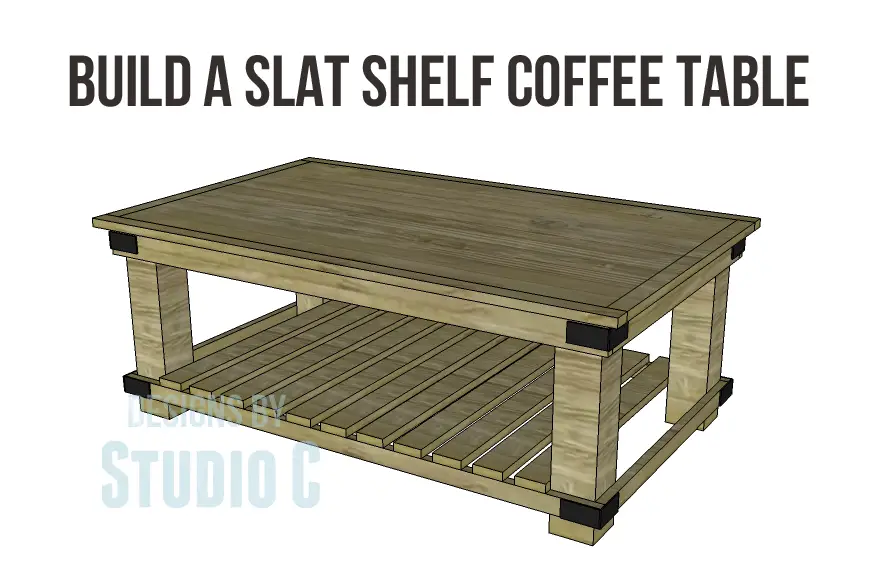
Today’s DIY plans are for a slat shelf coffee table… This table features a lower slatted shelf, a large roomy top, and metal bracket detail (which is completely optional). The top is also constructed with solid wood trim so that a decorative edge can be routed if desired.
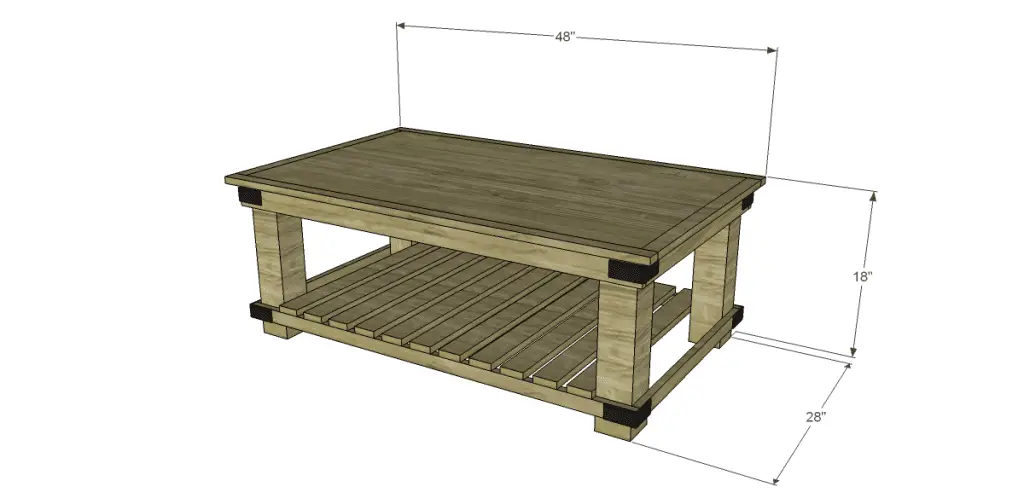
Materials:
- 1-1/2″ screws
- 1-1/4″ pocket hole screws
- 1-1/4″ brad nails
- 8 – Angle brackets
- Finishing supplies
Lumber:
- 3 – 1×2 at 8′
- 5 – 1×3 at 8′
- 1 – 4×4 post at 6′
- 1 Half sheet of 3/4″ plywood
Cut List:
- 4 – 4×4 posts at 17-1/4″ – Legs
- 2 – 1×2 at 26″ – Lower Frame Ends
- 2 – 1×2 at 46″ – Lower Frame Sides
- 11 – 1×3 at 27-1/2″ – Slats
- 2 – 1×3 at 26″ – Upper Apron Ends & Support
- 2 – 1×3 at 46″ – Upper Apron Sides
- 1 – 3/4″ plywood at 26-1/2″ x 45″ – Top
- 2 – 1×2 at 26-1/2″ – Top End Trim
- 2 – 1×2 at 48″ – Top Side Trim
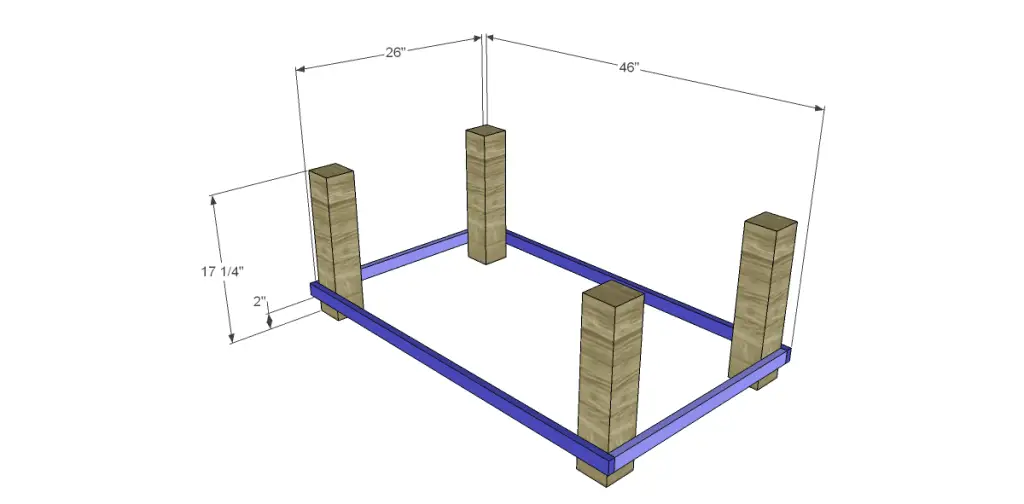
Step One
Cut the pieces for the legs and lower frame. Attach the lower frame ends to the legs as shown using glue and countersunk 1-1/2″ screws. Position the frame pieces so they are located 2″ from the bottom of the leg. Attach the side frame pieces in the same manner.
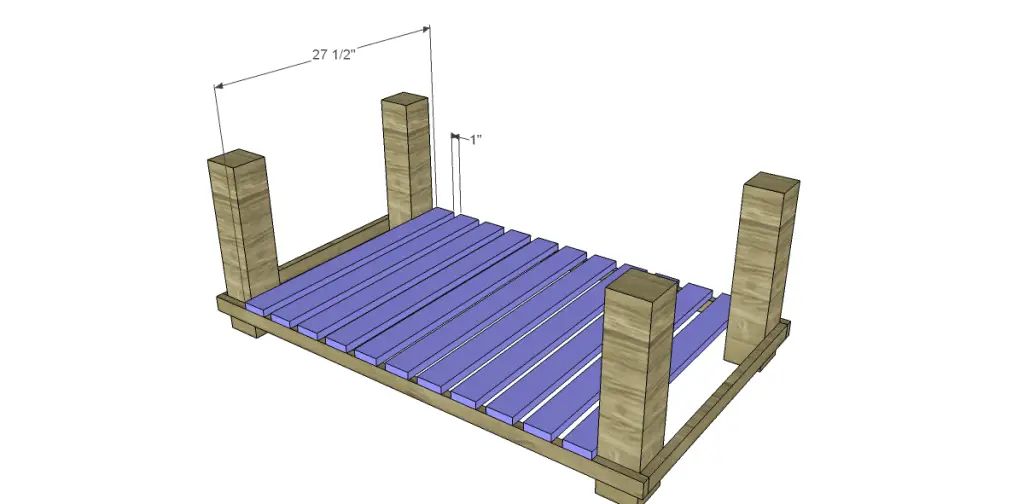
Step Two
Cut the pieces for the slats. Secure the slats to the frame as shown using glue and countersunk 1-1/2″ screws spacing them approximately 1″ apart.
Step Three
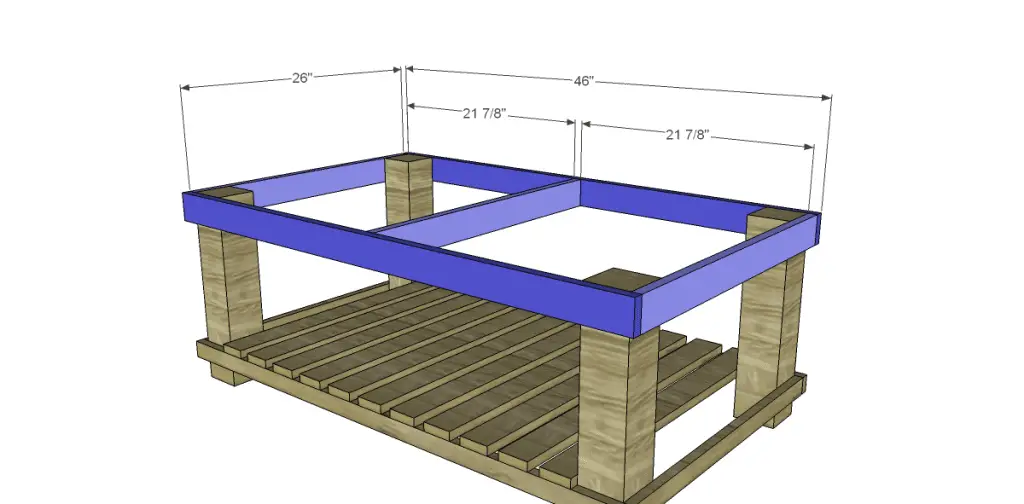
Cut the pieces for the upper aprons. Attach the end pieces to the legs using glue and countersunk 1-1/2″ screws. The top edge of the apron will be flush with the top edge of the leg. Attach the side pieces in the same manner. Attach the center support as shown using glue and countersunk 1-1/2″ screws through the side aprons.
Step Four
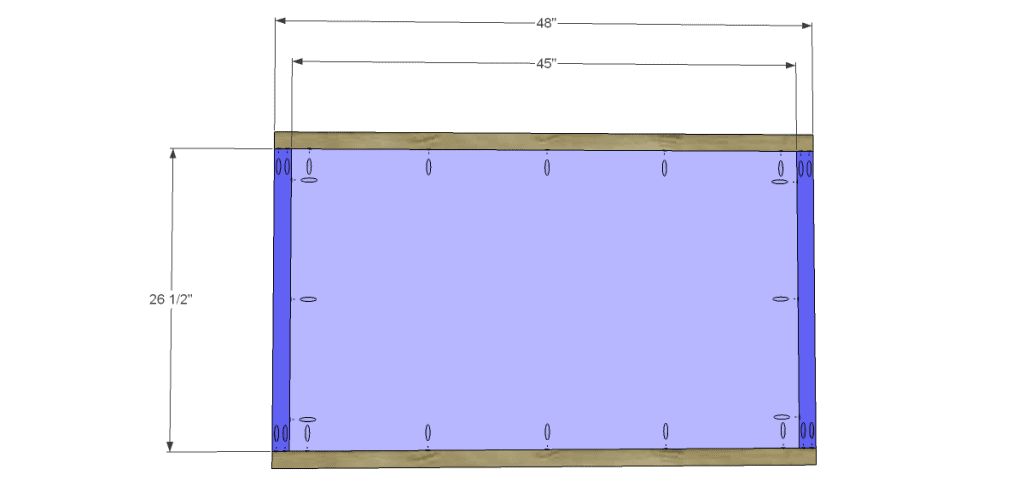
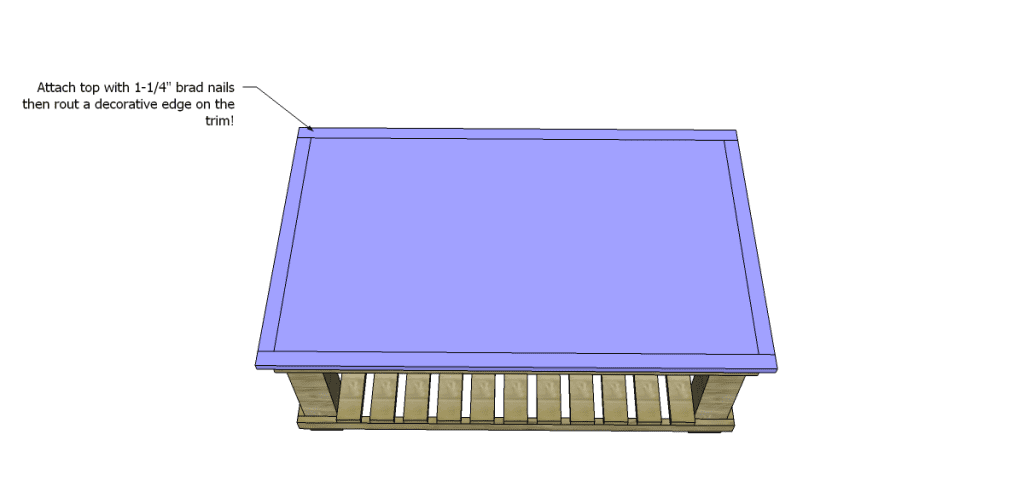
Cut the pieces for the top and the trim. Drill pocket holes in each end of the shorter trim pieces, as well as all four edges of the top. Attach the trim using glue and 1-1/4″ pocket hole screws. Position the top on the legs and frame with 1″ overlapping on all sides. Secure in place using glue and 1-1/4″ brad nails.
Step Five
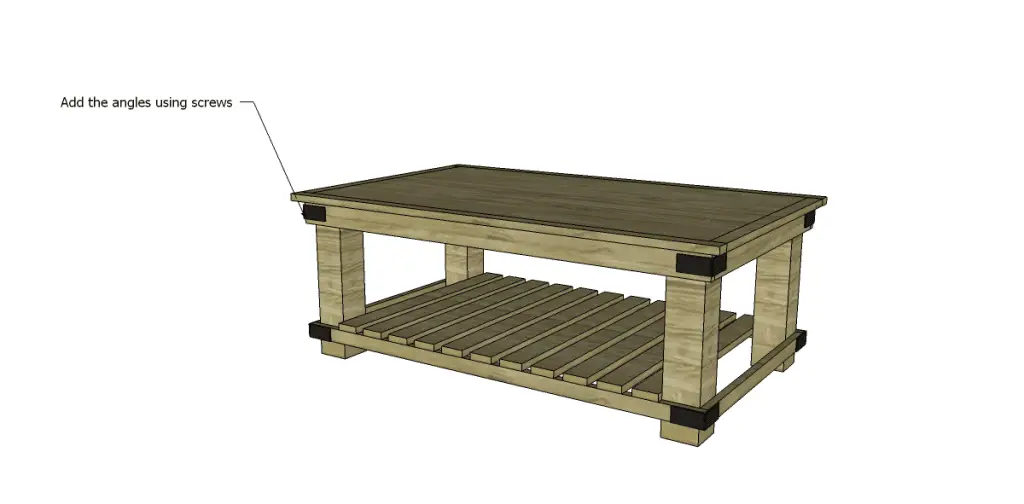
Finish as desired. Prime and paint the angle brackets and screws, if desired. Attach to the upper aprons and lower frame using the screws.
How’s that for plans for an awesome slat shelf coffee table? Have questions about the plans? Leave a comment below!


[…] Super-Easy Coffee Table […]