A Simple Sideboard for Any Space
Here are plans to build a slim sideboard which would be perfect in an area that can’t handle large furniture pieces. Don’t let the slimness fool you… There is plenty of storage with four drawers and a large cabinet area with a shelf!
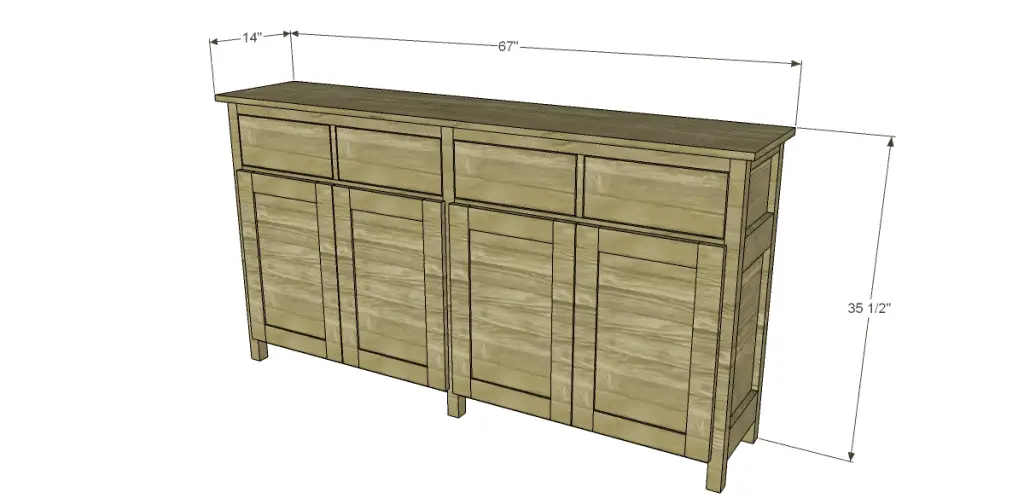
Materials:
- 1″ pocket hole screws
- 1-1/4″ pocket hole screws
- 2″ pocket hole screws
- 1-1/4″ brad nails
- Edge banding (<– affiliate link!) for plywood, if desired
- Four drawer pulls
- Four door handles or pulls
- Four sets of hinges (1/4″ overlay hinges would be perfect!)
- Finishing supplies
Lumber:
- Two full sheets of 3/4″ plywood
- One half sheet of 1/2″ plywood
- 5 – 2×2 at 8′
- 1 – 2×4 at 4′
- 2 – 1×2 at 8′
- 2 – 1×6 at 8′
- 1 – 1×6 at 4′
- 3 – 1×3 at 8′
Cut List:
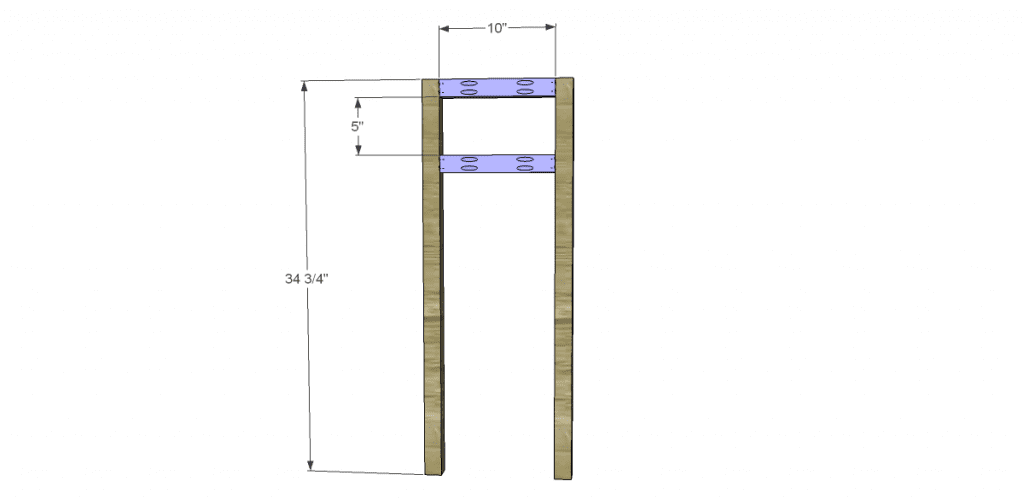
- 6 – 2×2 at 34-3/4″ – Legs
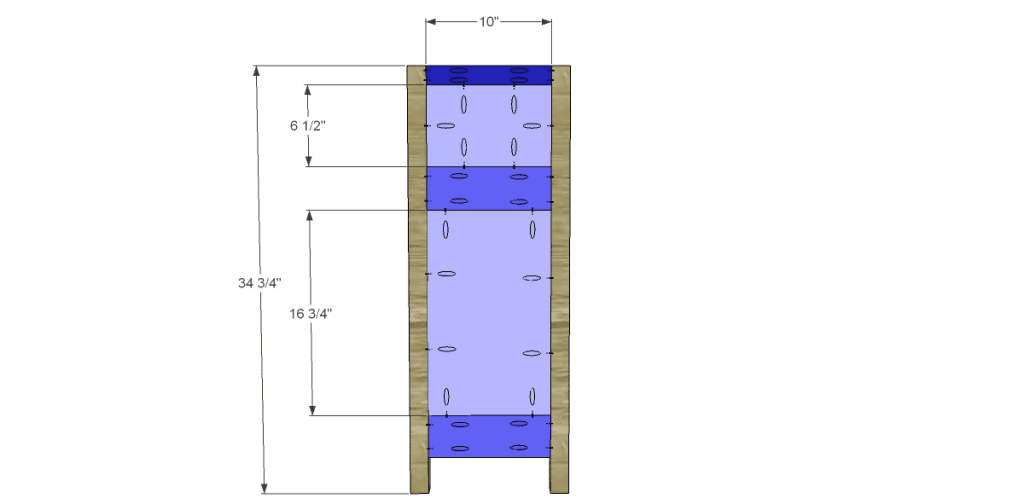
- 4 – 2×2 at 10″ – Side & Center Frames
- 4 – 2×4 at 10″ – Side Frames
- 2 – 3/4″ plywood at 6-1/2″ x 10″ – Side Frames
- 2 – 3/4″ plywood at 10″ x 16-3/4″ – Side Frames
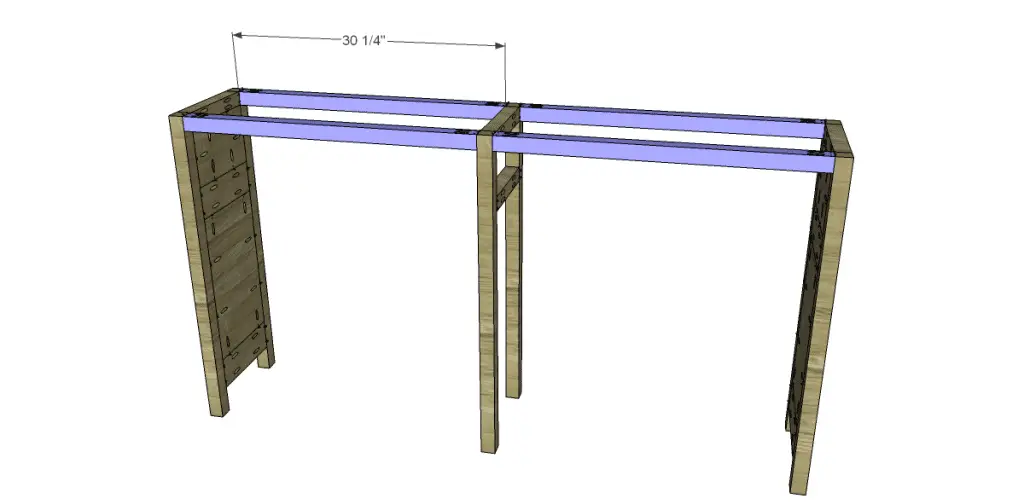
- 4 – 2×2 at 30-1/4″ – Aprons
- 6 – 1×2 at 30-1/4″ – Stretchers
- 2 – 3/4″ plywood at 29-1/2″ x 30-1/4″ – Back Panels
- 3 – 3/4″ plywood at 10″ x 63″ – Shelves
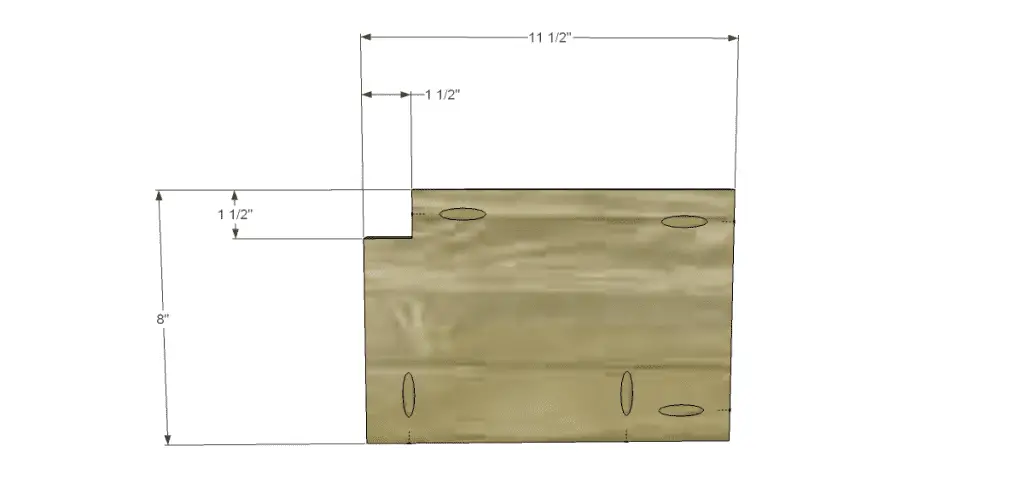
- 2 – 3/4″ plywood at 8″ x 11-1/2″ – Drawer Dividers
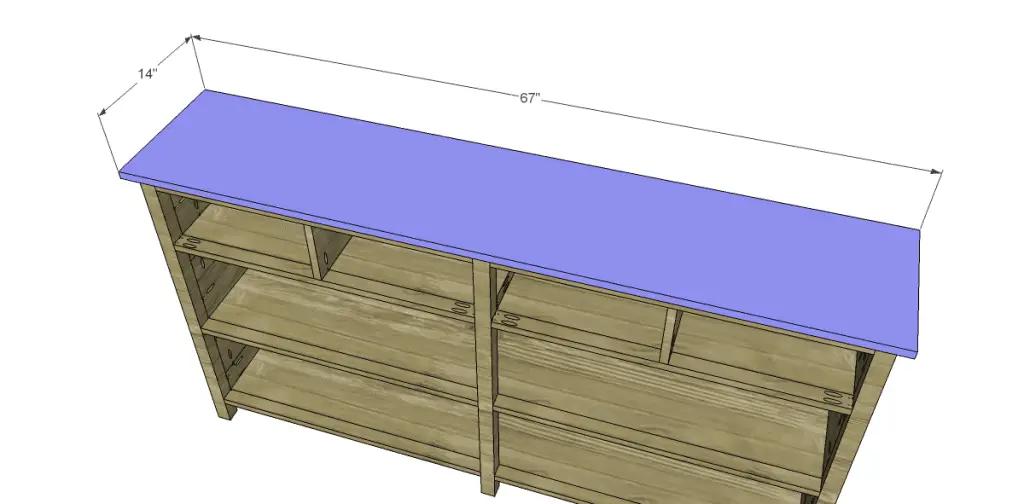
- 1 – 3/4″ plywood at 14″ x 67″ – Top
- 4 – 3/4″ plywood at 9-1/4″ x 13″ – Drawer Bottoms
- 8 – 1×6 at 10″ – Drawer Sides
- 8 – 1×6 at 14-1/2″ – Drawer Front & Back
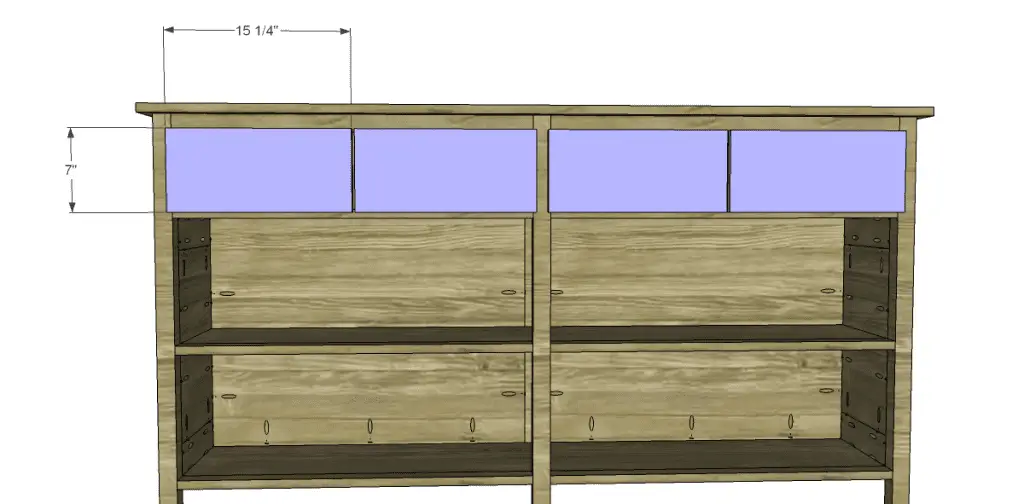
- 4 – 3/4″ plywood at 7″ x 15-1/4″ – Drawer Fronts
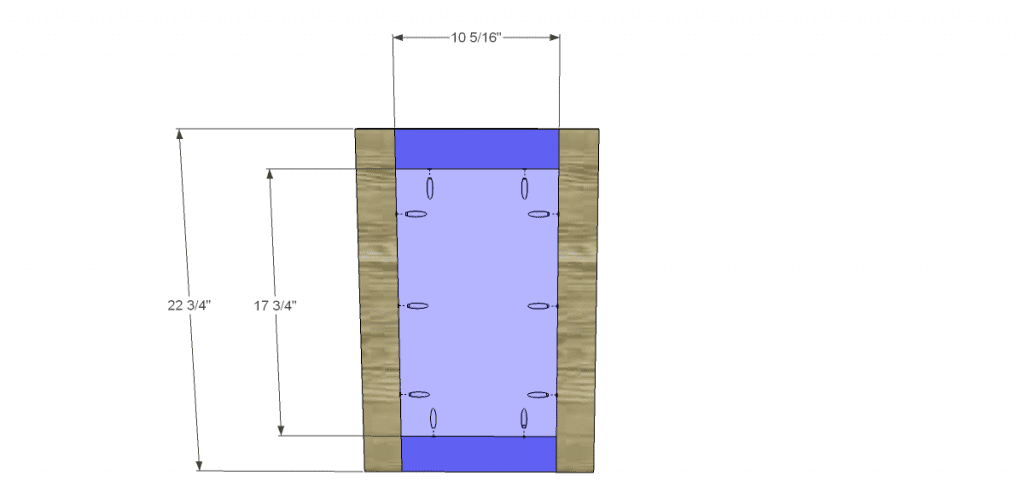
- 8 – 1×3 at 10-5/16″ – Door Frame
- 8 – 1×3 at 22-3/4″ – Door Frame
- 4 – 1/2″ plywood at 10-5/16″ x 17-3/4″ – Door Panels
Step One
Cut the pieces for the legs as well as the pieces for the frames and center frame. Drill pocket holes in each end of the frame pieces using the appropriate setting for the thickness of the lumber. Attach to the legs as shown using glue and 2″ pocket hole screws.
Step Two
Cut the pieces for the aprons and drill pocket holes in each end. Attach to the legs using glue and 2″ pocket hole screws. Orient the pocket holes so they are facing up and will be hidden by the top.
Step Three
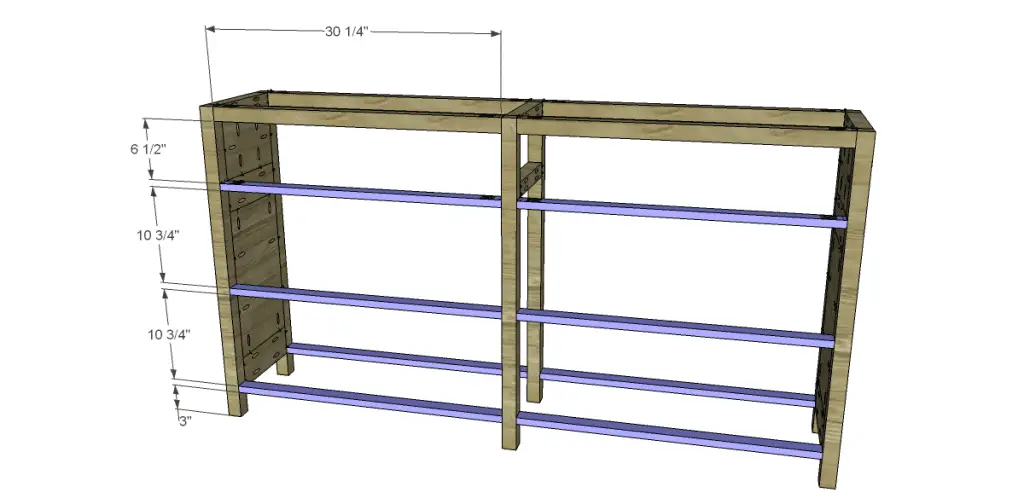
Cut the pieces for the stretchers and drill pocket holes in each end. Attach to the legs as shown using glue and 1-1/4″ pocket hole screws.
Step Four
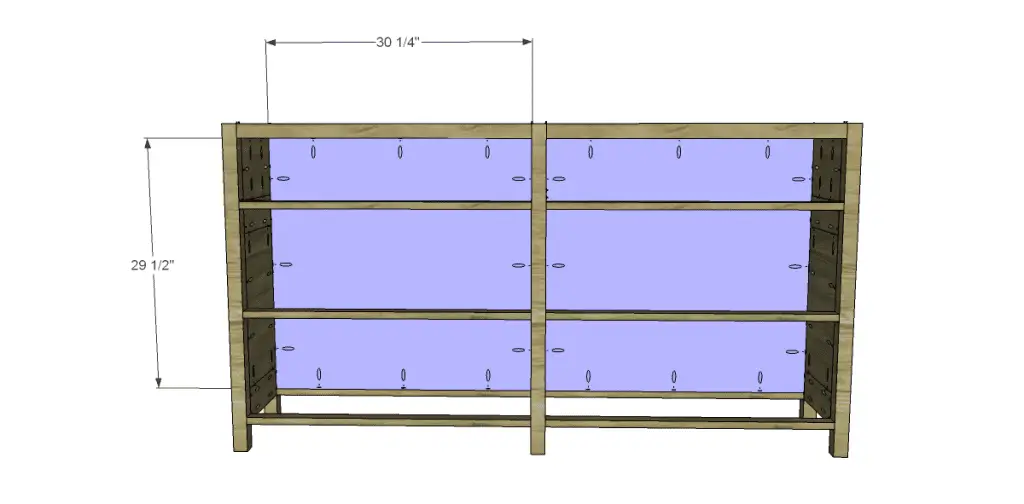
Cut the pieces for the back. Drill pocket holes in all four edges. Attach as shown using glue and 1-1/4″ pocket hole screws.
Step Five
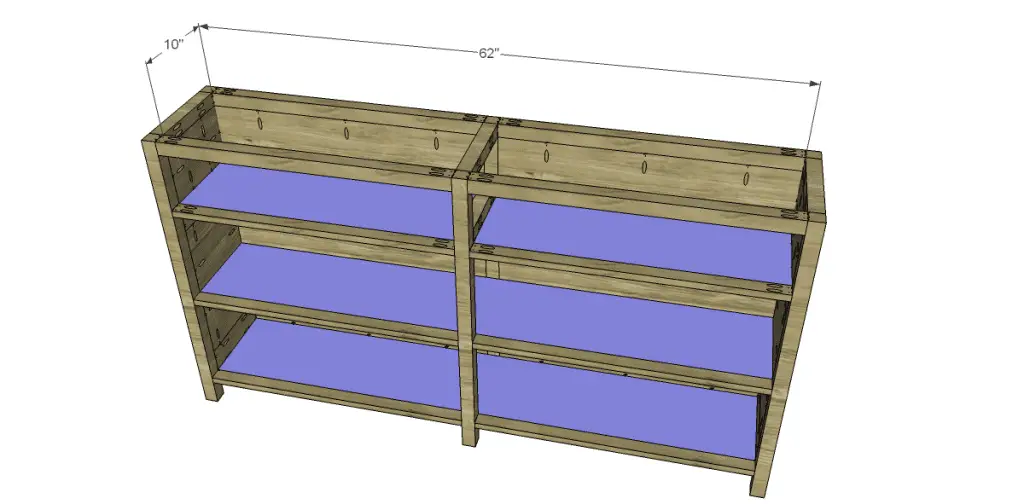
Cut the pieces for the shelves and drill pocket holes in each edge. Attach to the cabinet using glue and 1-1/4″ pocket hole screws. The top face of the shelves will be flush with the top face of the stretchers.
Step Six
Cut the pieces for the dividers. Cut the notch with a jigsaw and drill pocket holes as shown. Attach to the cabinet using glue and 1-1/4″ pocket hole screws.
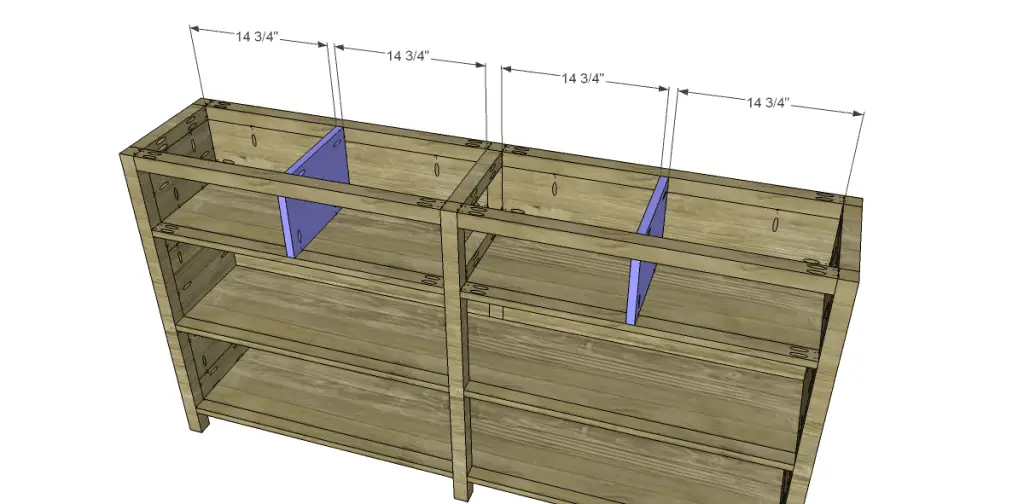
Step Seven
Cut the piece for the top. The top will overlap the sides and front by 1″. Attach to the cabinet using glue and 1-1/4″ brad nails through the top into the aprons, frames, and dividers.
Step Eight
Cut the pieces for the drawers. Drill pocket holes in all edges of the bottom, as well as the ends of the side pieces. Assemble by attaching the sides to the bottom first with glue and 1-1/4″ pocket hole screws, then attach the front and back using glue and screws.
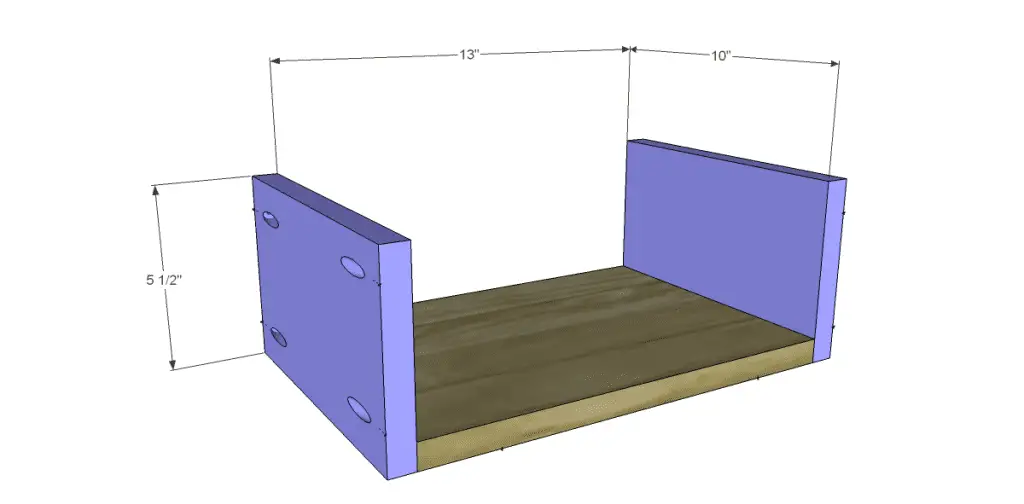
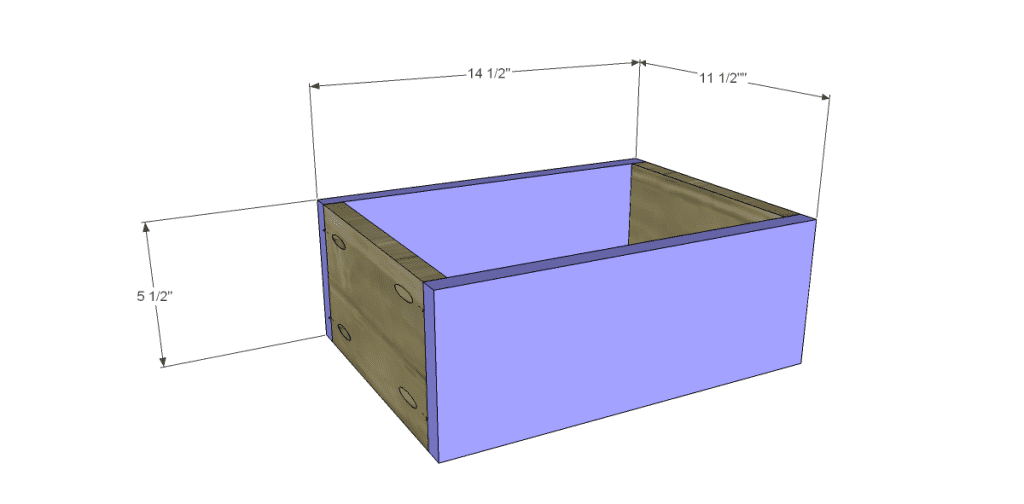
Step Nine
Cut the pieces for the drawer fronts. The doors will overlap by 1/4″ around all sides of the opening. Take a look at this easy tutorial on installing drawer fronts.
Step Ten
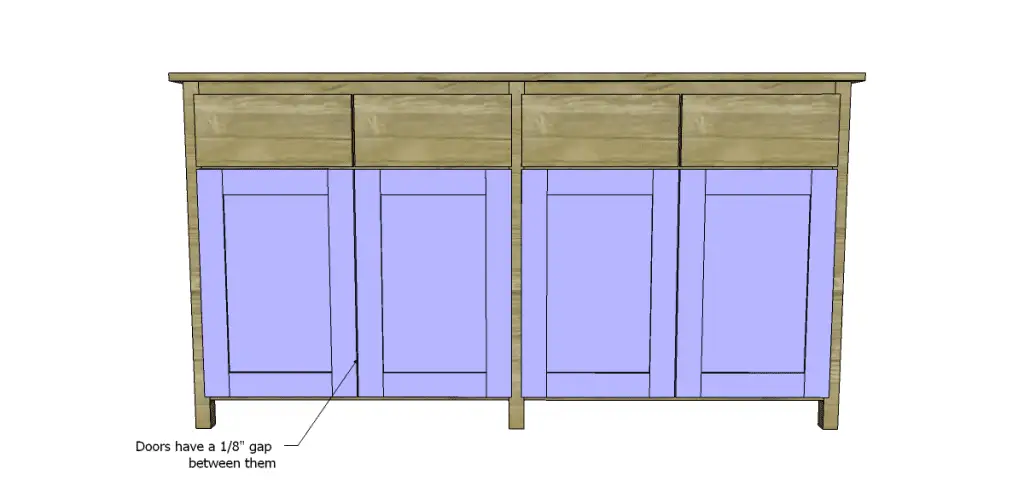
Cut the pieces for the doors. Assemble as shown using 1-1/4″ pocket hole screws to assemble the frame, and 1″ pocket holes to attach the panels. The doors will overlap the legs (including the center leg) and stretchers by 1/4″ with a 1/8″ gap in the center between them.
Have any questions about the plans to build a slim sideboard? Leave a comment below!



Comments are closed.