Perfect for Bath Storage!
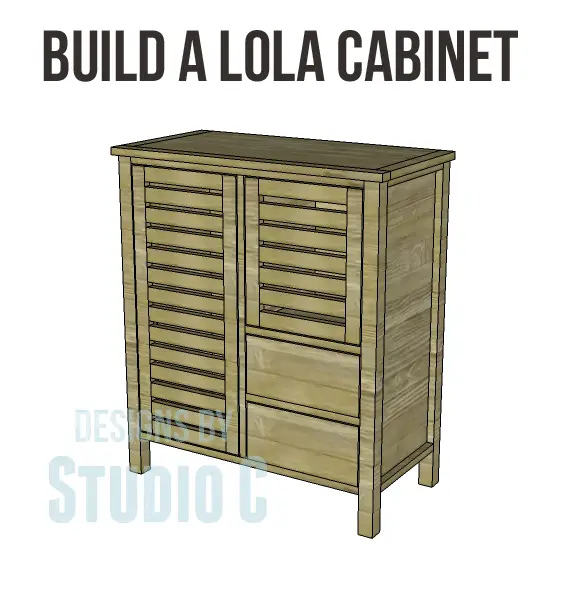
Hey there! Check out this awesome cabinet! It has a longer cubby with a shelf, a shorter cubby, and even two drawers. The best part? The DIY furniture plans to build it are super easy to follow, making it a perfect project for beginners in woodworking. Personally, I think it would look amazing in a bathroom – just imagine using the cubbies to store all your towels! But hey, you can use it however you want! The possibilities are endless.
Materials:
- 1-1/4″ pocket hole screws (<– affiliate link!)
- 1-1/4″ brad nails
- Edge banding, optional (<– affiliate link!)
- 4 – Cabinet pulls
- 2 sets of hinges
- Wood glue
- Sandpaper (100, 150, 220 grits)
- Finishing supplies (primer & paint, or stain, sealer)
Lumber:
- 6 – 1×2 at 8′
- 2 – 2×2 at 6′
- 1 half sheet of 3/4″ plywood
- 1 – full sheet of 3/4″ plywood
Cut List:
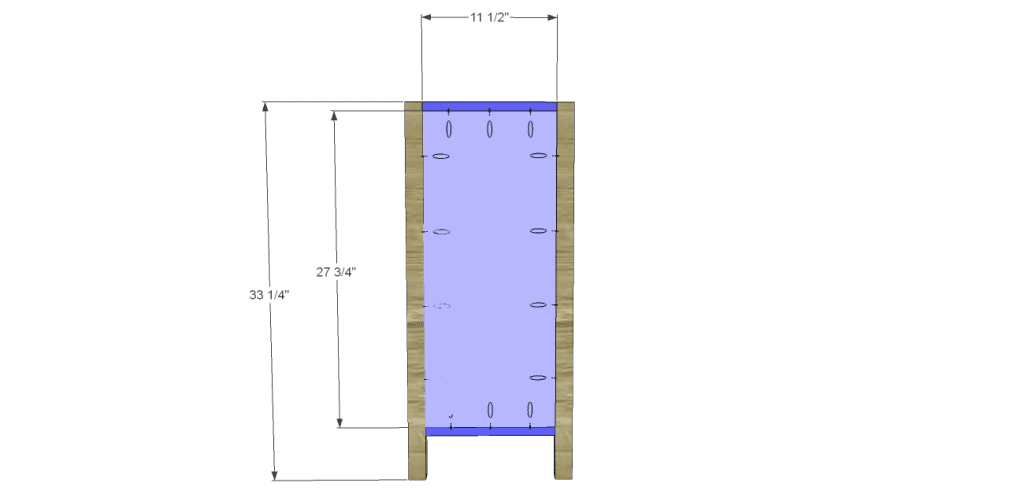
- 4 – 2×2 at 33-1/4″ – Legs
- 2 – 1×2 at 11-1/2″ – Side Frames
- 2 – 3/4″ plywood at 11-1/2″ x 27-3/4″ – Side Panels
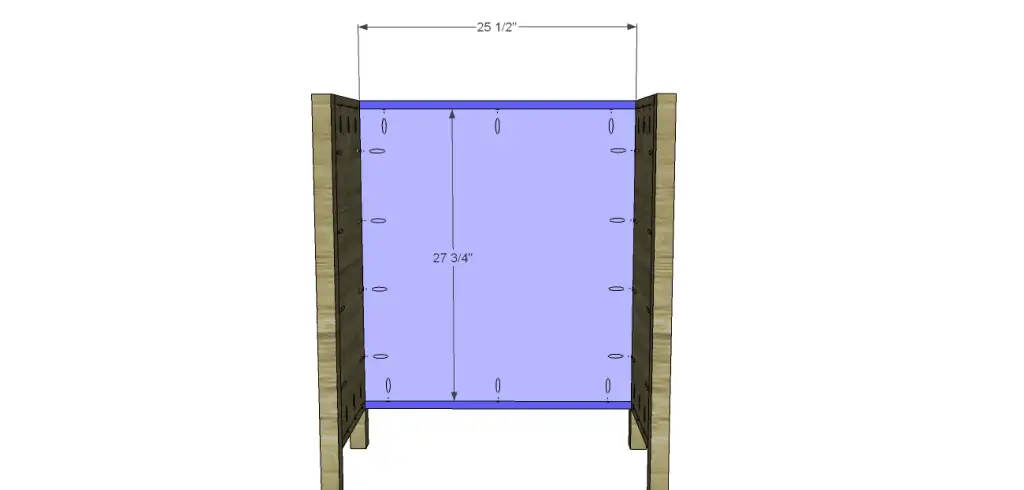
- 4 – 1×2 at 25-1/2″ – Back Frame & Front Stretchers
- 1 – 3/4″ plywood at 25-1/2″ x 27-3/4″ – Back Panel
- 1 – 3/4″ plywood at 11-1/2″ x 25-1/2″ – Bottom
- 1 – 1×2 at 27-3/4″ – Front Divider
- 1 – 3/4″ plywood at 11-1/2″ x 28-1/2″ – Divider
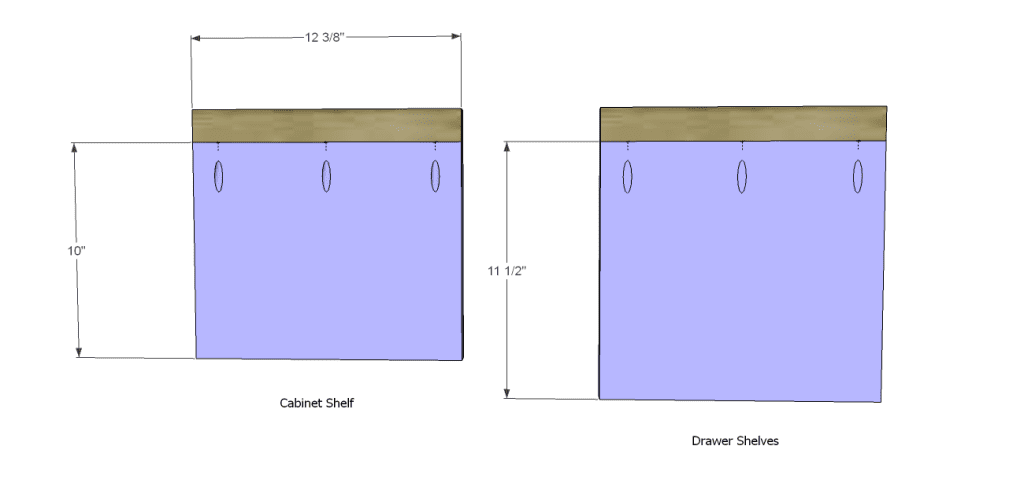
- 3 – 1×2 at 12-3/8″ – Shelf Trim
- 1 – 3/4″ plywood at 10″ x 12-3/8″ – Cubby Shelf
- 2 – 1×2 at 13-1/2″ – Top Side Trim
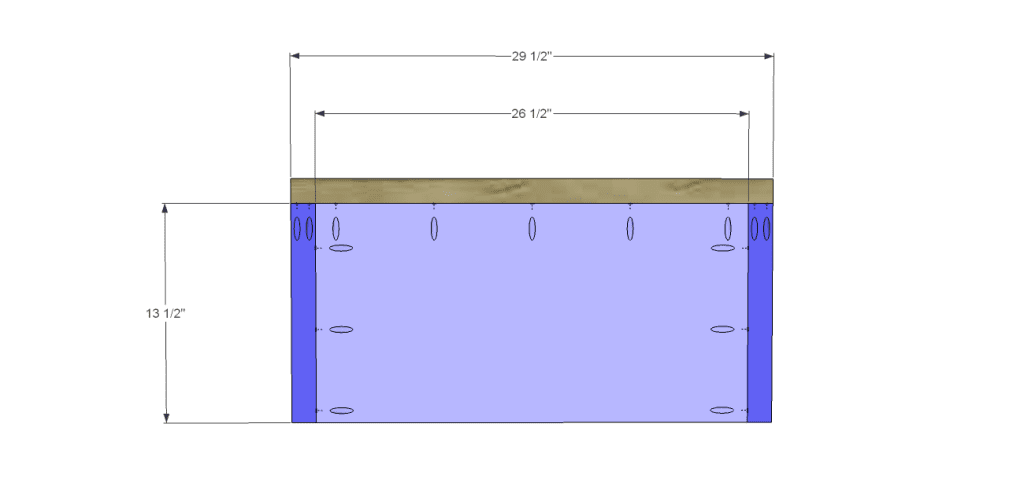
- 1 – 1×2 at 29-1/2″ – Top Front Trim
- 1 – 3/4″ plywood at 13-1/2″ x 26-1/2″ – Top
- 2 – 3/4″ plywood at 11-1/2″ x 12-3/8″ – Drawer Shelves
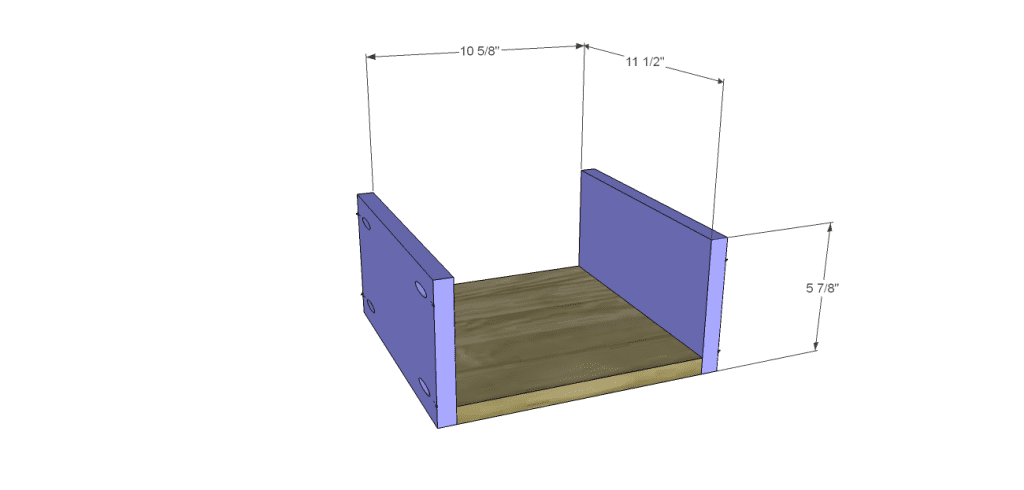
- 2 – 3/4″ plywood at 10-5/8″ x 11-1/2″ – Drawer Bottoms
- 4 – 3/4″ plywood at 5-7/8″ x 11-1/2″ – Drawer Sides
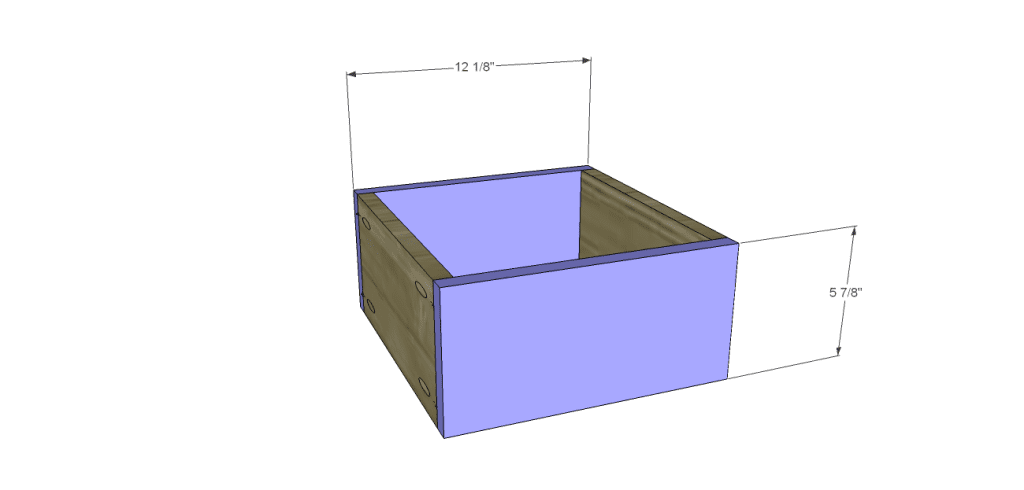
- 4 – 3/4″ plywood at 5-7/8″ x 12-1/8″ – Drawer Front & Back
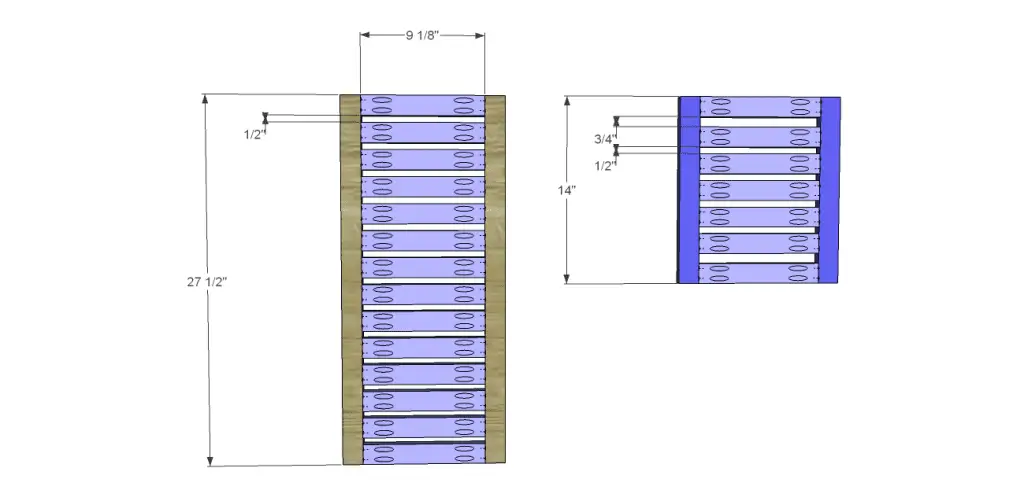
- 2 – 1×2 at 14″ – Shorter Door Stiles
- 2 – 1×2 at 27-1/2″ – Longer Door Stiles
- 21 – 1×2 at 9-1/8″ – Door Rails & Slats
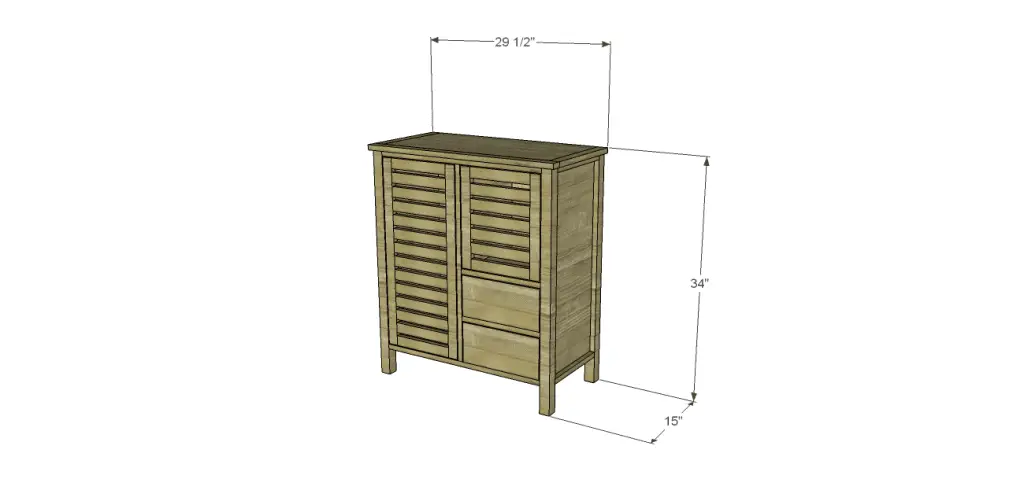
Step One
Cut the pieces for the legs, the side frames, and the side panels. With the pocket hole jig set for 3/4″ material, drill pocket holes in both ends of the frame pieces as well as all four edges of the panels. Secure the frame pieces to the legs using glue and 1-1/4″ pocket hole screws. Insert the panels and secure using glue and 1-1/4″ pocket hole screws. The back face of the panels will be flush with the back face of the frame assembly.
Step Two
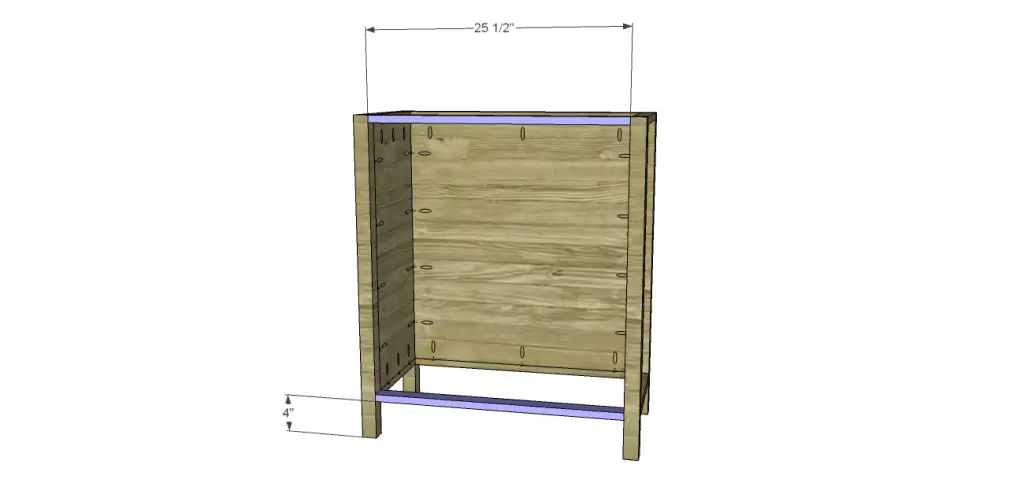
Cut the pieces for the front stretchers, back frame, and back panel. Drill pocket holes in each end of the stretchers and frame pieces as well as all four edges of the panel. Secure the frame pieces to the legs using glue and 1-1/4″ pocket hole screws. Insert the panel and secure using glue and 1-1/4″ pocket hole screws. The back face of the panel will be flush with the back face of the frame assembly.
Secure the front stretchers as shown using glue and 1-1/4″ pocket hole screws.
 Step Three
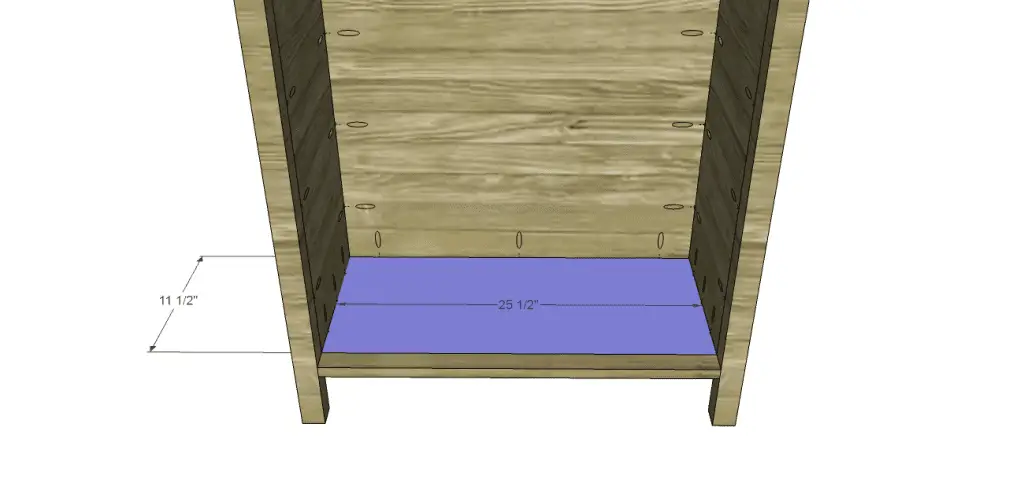
Cut the piece for the bottom and drill pocket holes in all four edges. Secure to the lower frame piece of the sides and back, as well as the lower front stretcher using glue and 1-1/4″ pocket hole screws.
Step Four
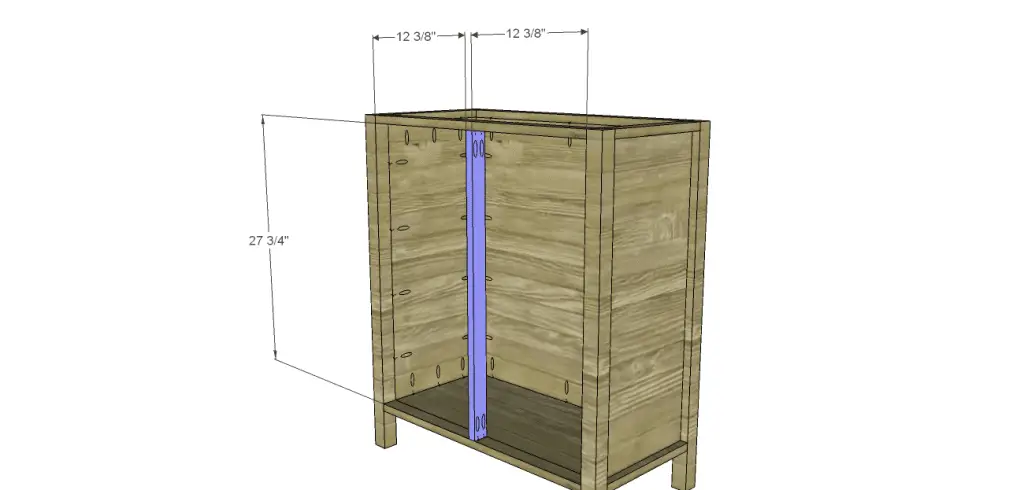
Cut the piece for the front divider and drill pocket holes in each end. Secure to the front stretchers as shown using glue and 1-1/4″ pocket hole screws.
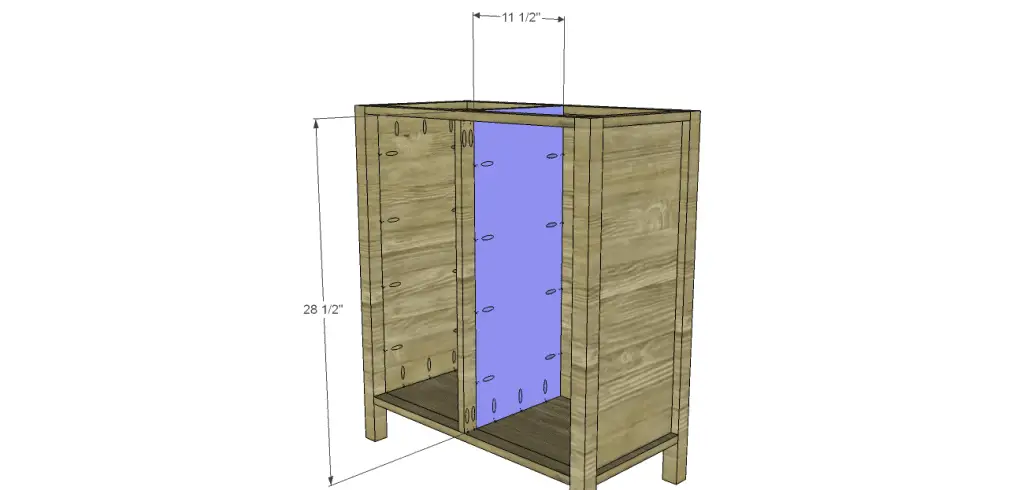
Cut the piece for the divider and drill pocket holes in each long edge as well as the bottom edge. Secure to the front divider, bottom, and back using glue and 1-1/4″ pocket hole screws.
 Step Five
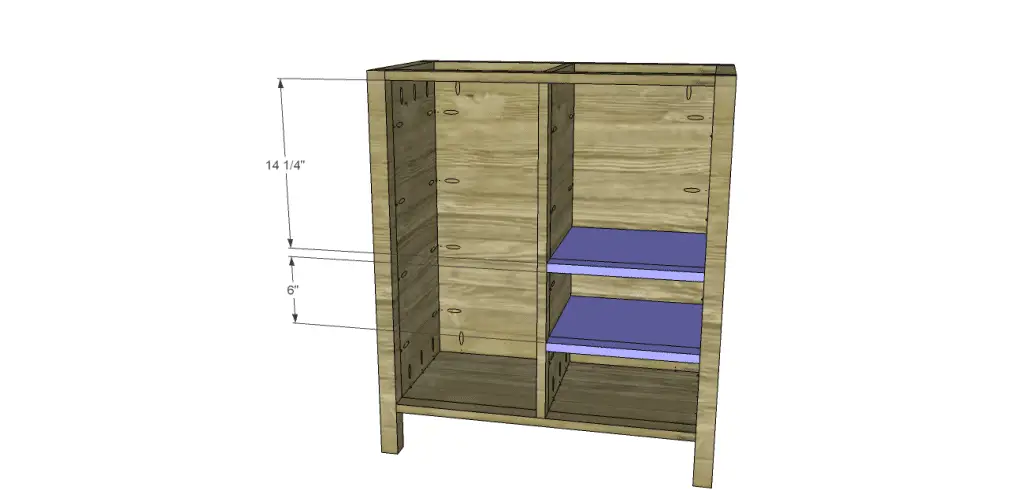
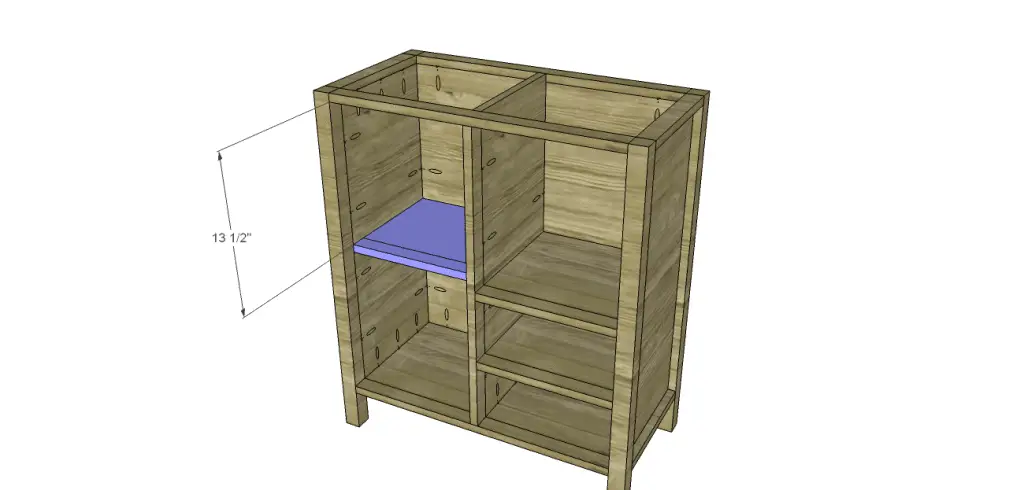
Cut the piece for the shelves and the shelf trim. Note that the cabinet shelf is shorter than the drawer shelves. Drill pocket holes in one end (12-3/8″) of each shelf and secure the front trim using glue and 1-1/4″ pocket hole screws.
Secure the shelves in the cabinet using glue and 1-1/4″ brad nails through the sides and dividers into the shelves.
 Step Six
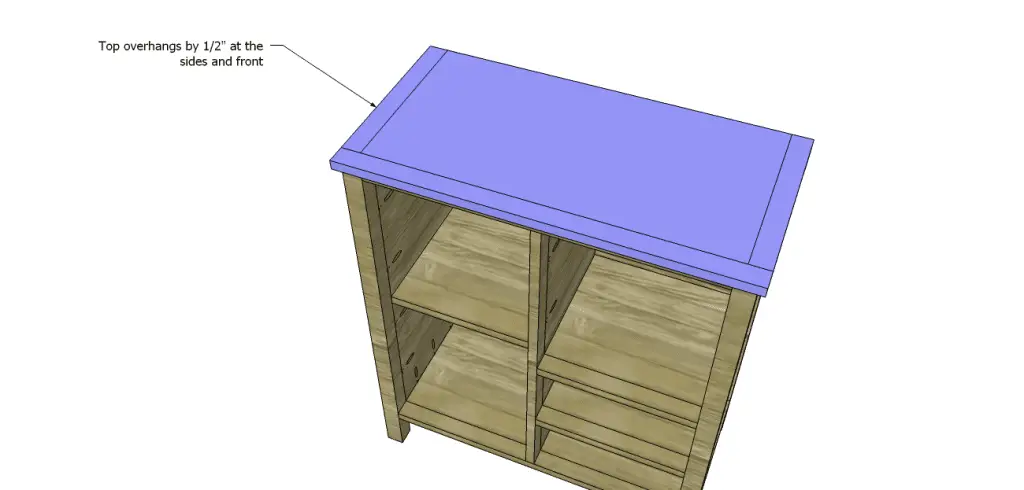
Cut the pieces for the top panel and the top trim. Drill pocket holes in one end of each side piece as well as the side and front edges of the panel. Secure the side trim pieces first using glue and 1-1/4″ pocket hole screws, then secure the front piece.
The front and sides of the top will overhang by 1/2″. Secure in place using glue and 1-1/4″ brad nails.
 Step Seven
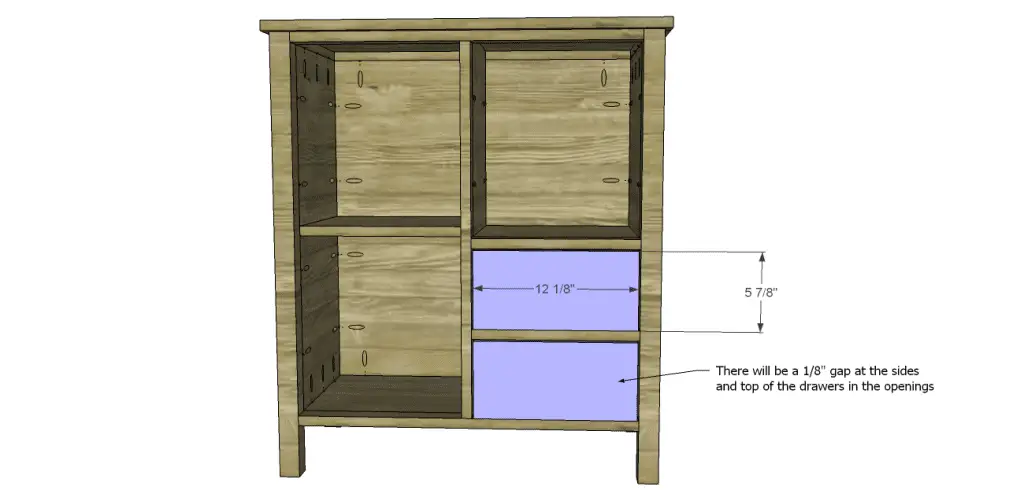
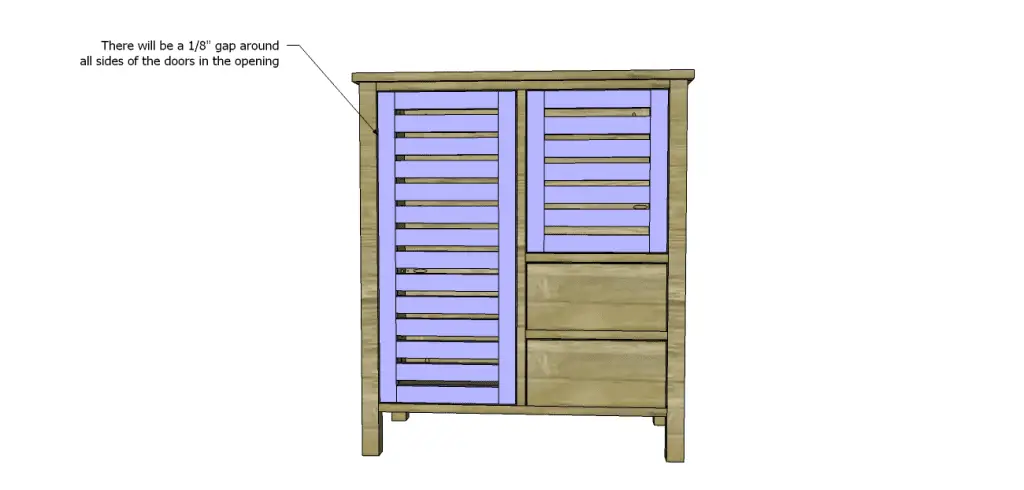
Cut the pieces for the drawer boxes. Drill pocket holes in all four edges of the bottom as well as each end of the sides. Assemble the drawer box as shown using glue and 1-1/4” pocket hole screws. There will be a 1/8″ gap at the sides and top of the drawers in the openings.
 Step Eight
Cut the pieces for the doors and drill pocket holes in each end of the rails and slat pieces. Assemble the doors using glue and 1-1/4″ pocket hole screws. The slats will be spaced 1/2″ apart except for the shorter door – the first slat and the last slat will be spaced 3/4″ from the rails while the remaining slats will be spaced at 1/2″.
Install the hinges on the doors, then install the doors in the cabinets. Install the cabinet pulls.
 Finish as desired, then apply a coat of paste wax to the bottom of the drawers so they slide smoothly in the opening.
If dust is a problem (like it is for me!), glass or plexiglas can be secured on the backside of the doors using mirror clips. Check out a couple of other options similar to the DIY furniture plans to build the Lola cabinet:
Have any questions about the DIY furniture plans to build a Lola cabinet? Let me know at cher {at} designsbystudioc {dot} com!
Originally posted 2014-04-14 08:00:11.

Comments are closed.