
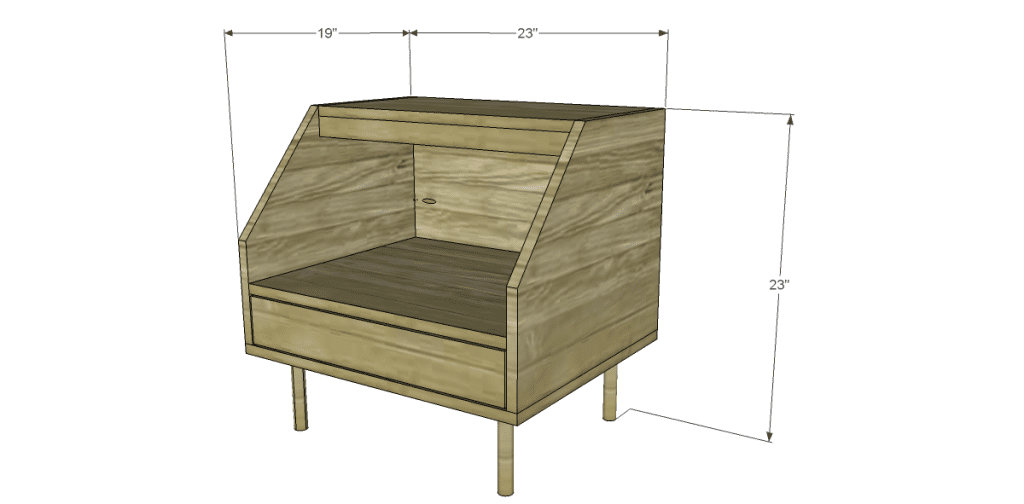
A DIY Modern End Table with Storage
Well, hello there! The free plans to build an Urban Outfitters Lydia End Table is a cool retro sort of end table… Perfect for an extra bit of storage with a cubby, drawer, and a slightly roomy top! The round dowel legs complete the “mod” vibe!
Materials:
- 1-1/4″ pocket hole screws
- 1-1/4″ brad nails
- 2″ screws
- Edge banding for the plywood, optional
- One set of 16″ drawer slides
- Drawer pull(s)
- Finishing supplies
Lumber:
- 1 – 1″ dowel at 3′
- 1 – scrap of 1×2 at 21-1/2″
- One sheet of 3/4″ plywood
Cut List:
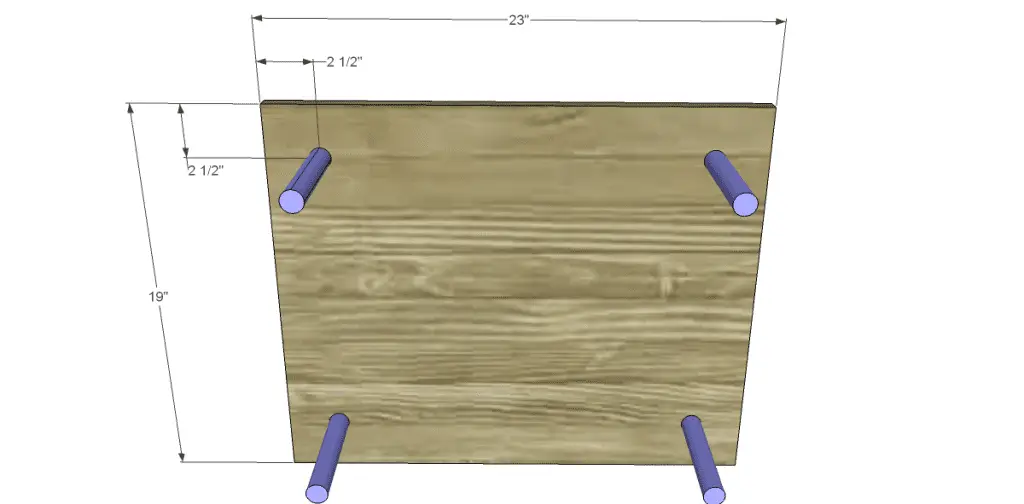
- 4 – 1″ dowel at 6-1/4″ – Legs
- 1 – 3/4″ plywood at 19″ x 23″ – Bottom
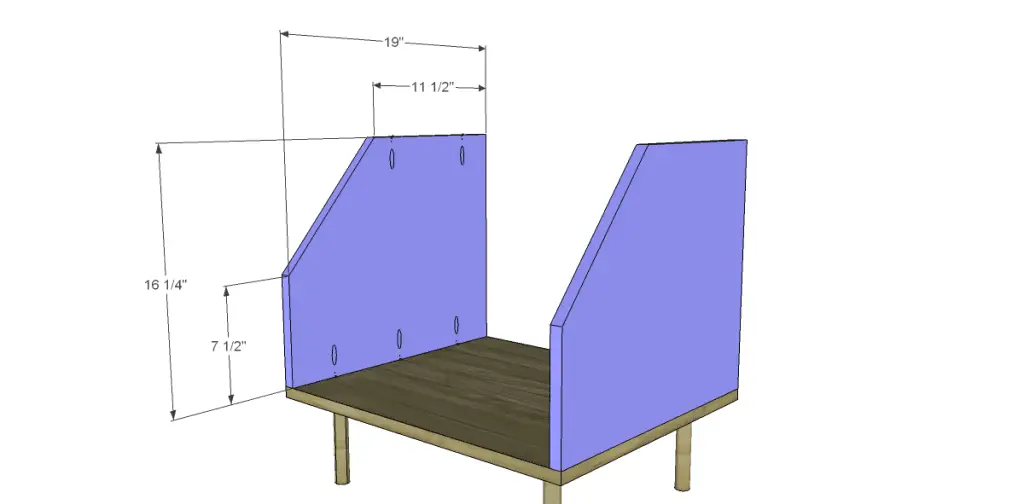
- 2 – 3/4″ plywood at 16-1/4″ x 19″ – Sides
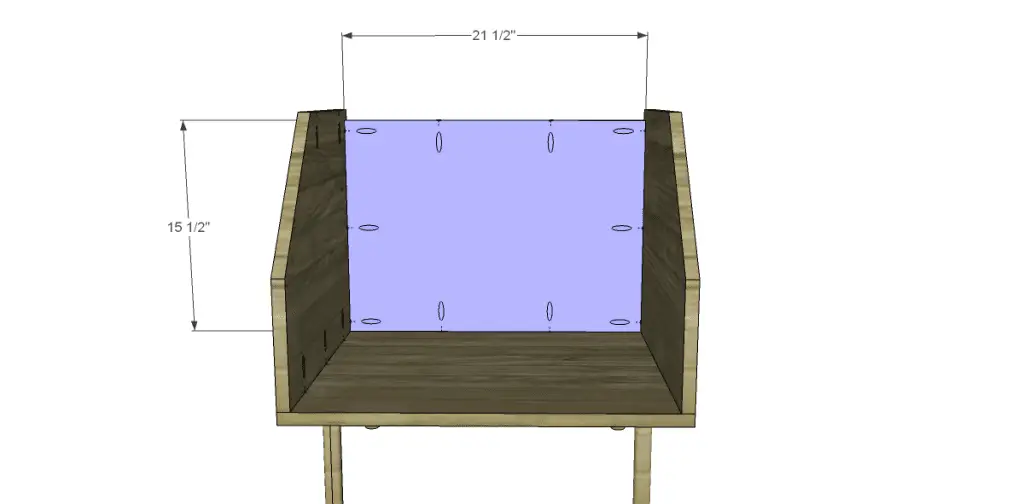
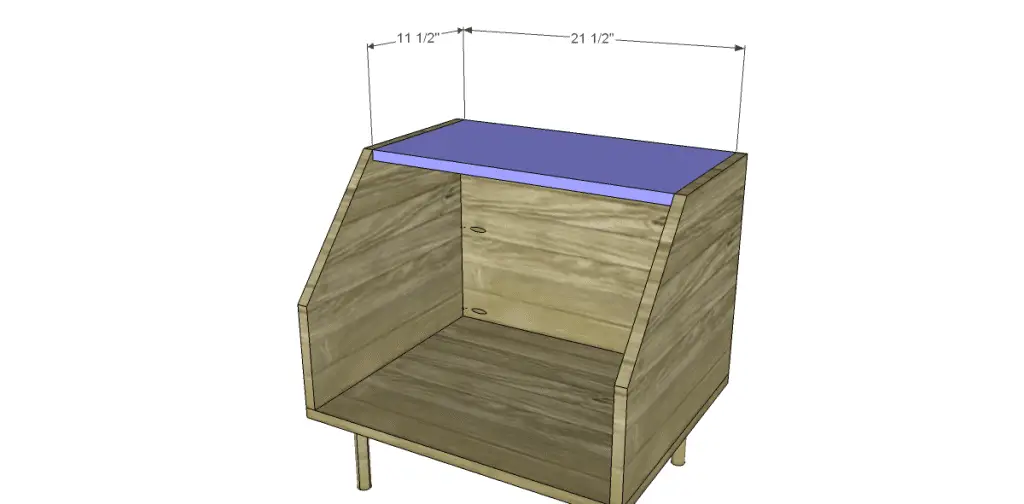
- 1 – 3/4″ plywood at 11-1/2″ x 21-1/2″ – Top
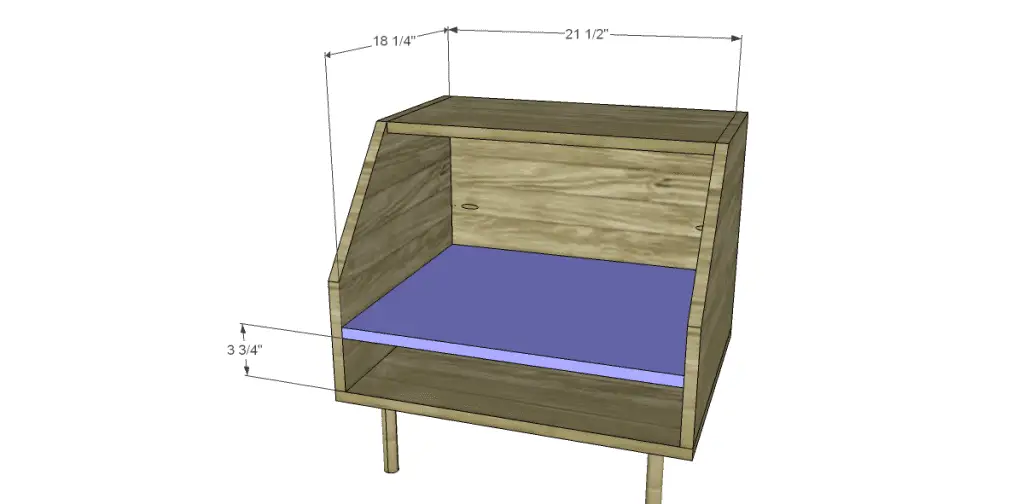
- 1 – 3/4″ plywood at 18-1/4″ x 21-1/2″ – Shelf
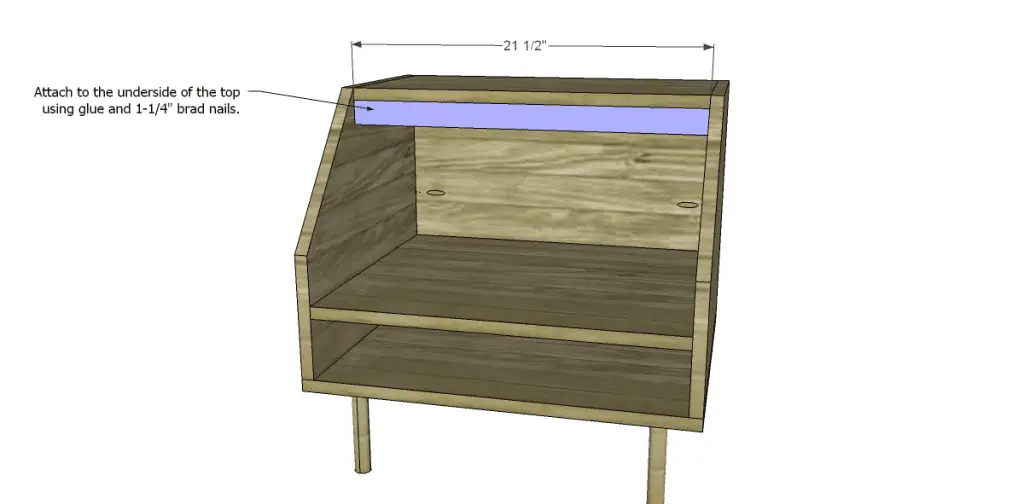
- 1 – 1×2 at 21-1/2″ – Top Apron
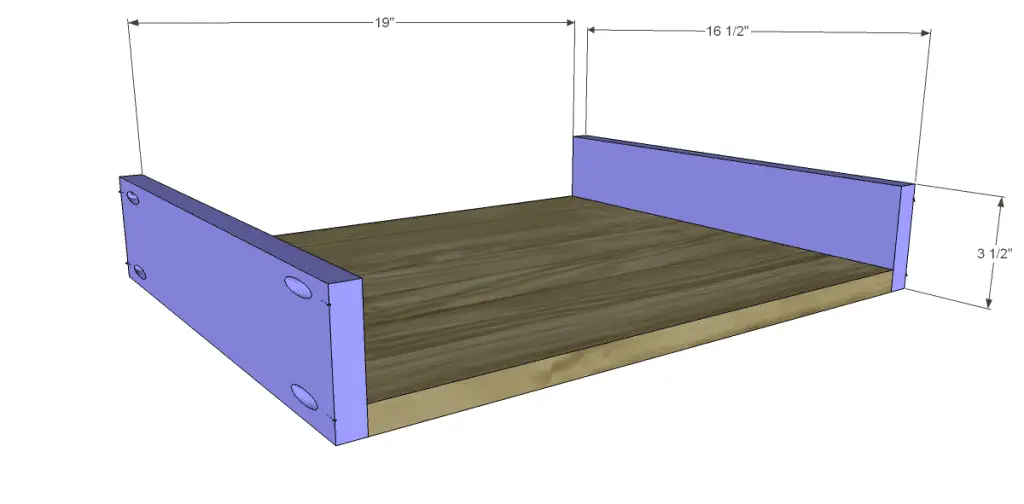
- 1 – 3/4″ plywood at 16-1/2″ x 19″ – Drawer Bottom
- 2 – 3/4″ plywood at 3-1/2″ x 16″ – Drawer Sides
- 1 – 3/4″ plywood at 3-1/2″ x 20-1/2″ – Drawer Back
- 1 – 3/4″ plywood at 3-1/2″ x 21-1/4″ – Drawer Front
Notes about the project:
If using edge banding, apply it to the exposed edges of the plywood before assembling the pieces.
Step One
Cut the pieces for the legs and the bottom. Use a 1″ hole saw, paddle bit, or forstner bit to drill four 1/4″ deep holes where the legs will be positioned as shown. Drill a pilot hole in the center of each hole all the way through the bottom. Place the legs in the holes with a little glue and drive a 2″ screw through the pilot hole in the bottom into the leg.
Step Two
Cut the pieces for the sides. Drill pocket holes to attach the sides to the bottom, as well as to secure the top. Make sure there is a left side and a right side piece! Attach to the bottom using glue and 1-1/4″ pocket hole screws.
Step Three
Cut the piece for the back. Drill pocket holes in all four edges as shown. The height of the back is 3/4″ shorter than the sides to allow for the top. Position the back and secure using glue and 1-1/4″ pocket hole screws.
Step Four
Cut the piece for the top. Secure to the sides and back using glue and 1-1/4″ pocket hole screws.
Step Five
Cut the piece for the shelf. Drill pocket holes in three edges and position as shown. Secure to the sides and back using glue and 1-1/4″ pocket hole screws.
Step Six
Cut the piece for the top apron. Position the piece under the front edge of the top then secure using glue and 1-1/4″ brad nails through the top and sides into the apron.
Step Seven
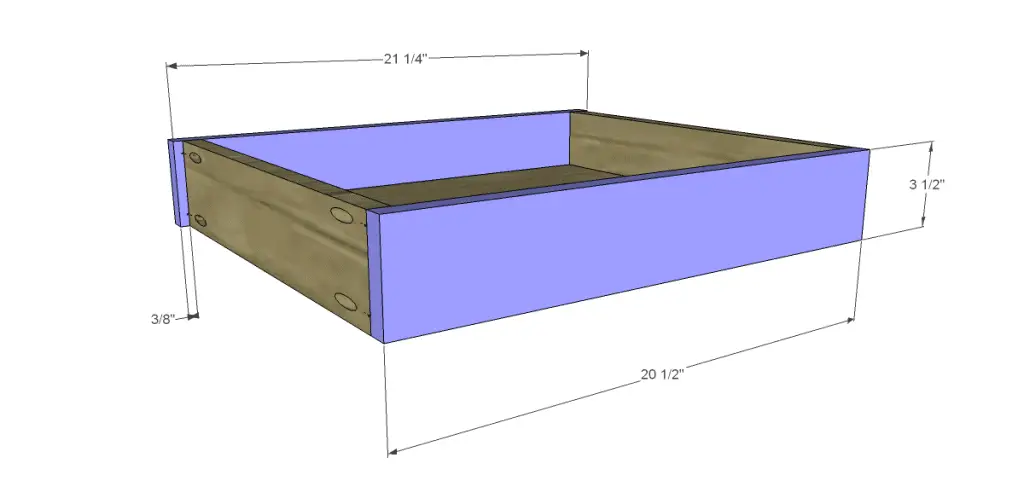
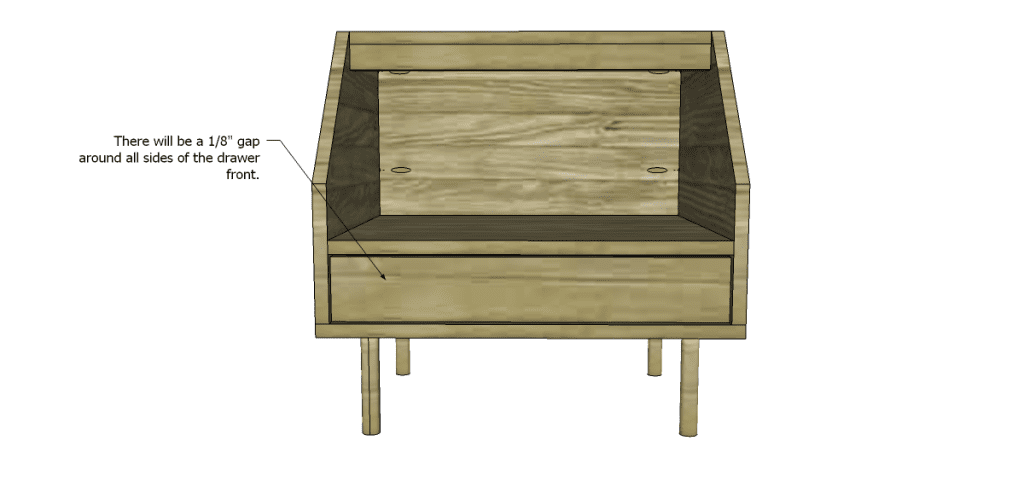
Cut the pieces for the drawer. Drill pocket holes in each end of the sides as well as all four edges of the bottom. Assemble as shown using glue and 1-1/4″ pocket hole screws. The front will overlap the box by 3/8″ on each side.
Install the drawer slides according to the manufacturer’s instructions. Refer to this easy tutorial on how to install drawer slides. Make any necessary adjustments.
Finish as desired and install the drawer pulls.
Have questions about the free plans to build an Urban Outfitters Lydia End Table? Leave a comment below!
Originally posted 2013-01-14 08:00:36.


Comments are closed.