Build a Teahouse Loveseat
An Easy to Build Loveseat with Upholstery
Sigh… I {heart} this loveseat so much and I want one… I say that about nearly every plan I create, don’t I? There are so many great designs for furniture out there and I’m so passionate about building furniture that – well – I can’t help but want it all!
I have a sofa that I built from different plans. For those of you who think it may be difficult or uncomfortable, it really isn’t! Even though there are no springs in the seat, high density foam and dacron upholstery batting make all the difference! The plans to build a Teahouse loveseat do require basic sewing skills because the cushions are just really large pillows and it is really easy, I swear!
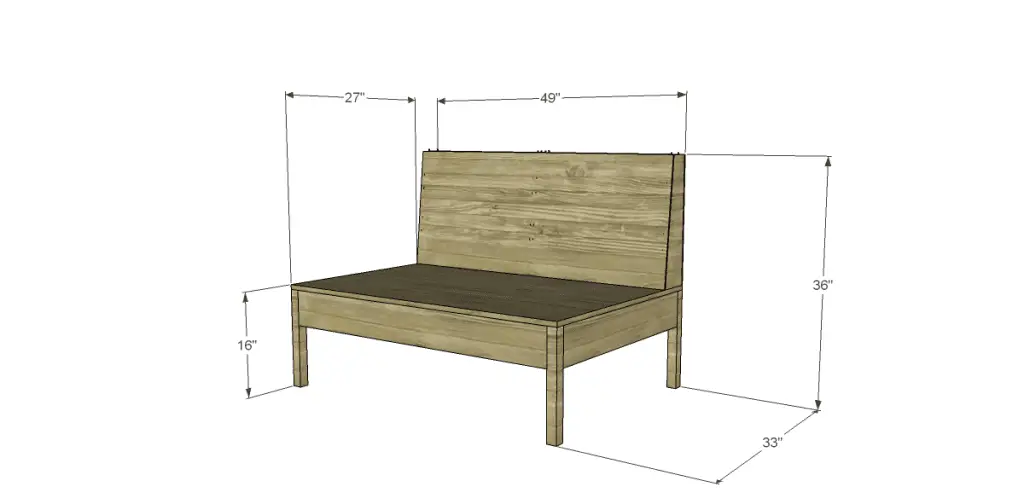
Materials:
- 1-1/4″ pocket hole screws
- 1-1/2″ screws
- 2-1/2″ screws
- 1-1/4″ brad nails
- Approximately 8 yds. upholstery or drapery fabric
- Hook & Loop tape
- 5″ high density foam
- Dacron upholstery batting
- Polyester fiberfill (stuffing)
- Finishing supplies
Lumber:
- 1 – 2×2 at 6′
- 2 – 1×4 at 8′
- 4 – 1×6 at 8′
- One half sheet of 1/4″ plywood
- One half sheet of 3/4″ plywood
Cut List:
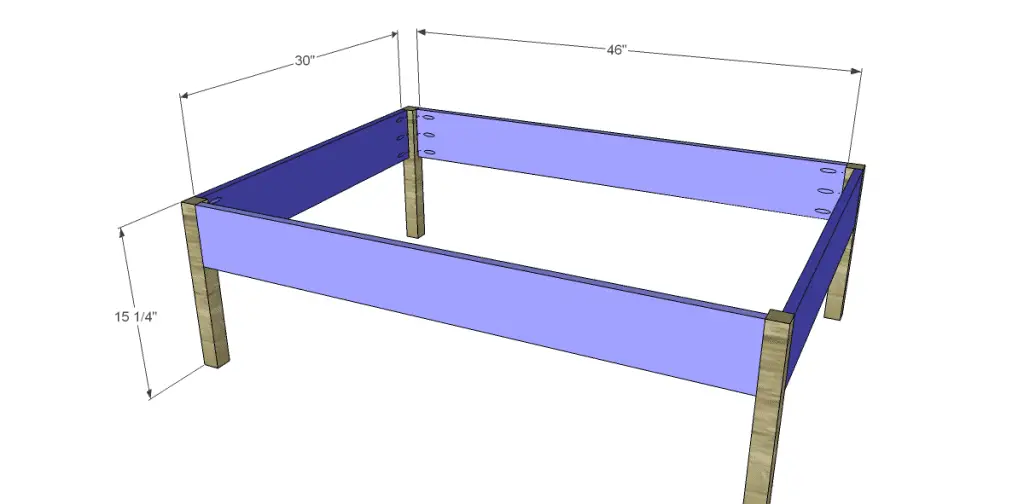
- 4 – 2×2 at 15-1/4″ – Legs
- 2 – 1×6 at 30″ – Side Aprons
- 2 – 1×6 at 46″ – Long Aprons
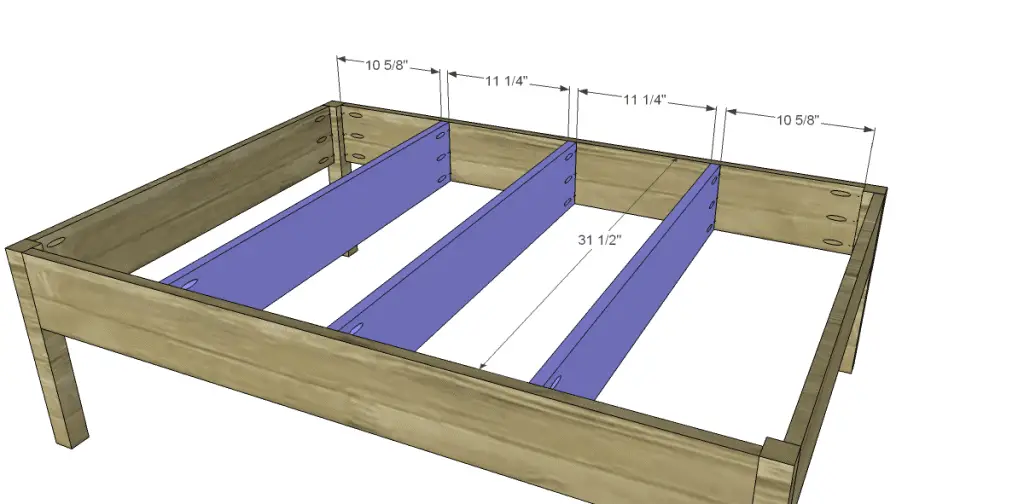
- 3 – 1×6 at 31-1/2″ – Seat Supports
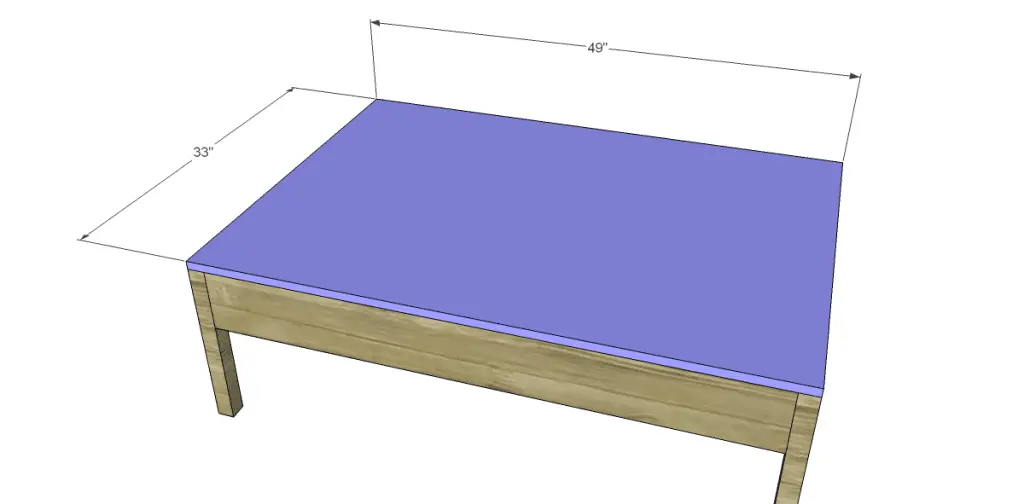
- 1 – 3/4″ plywood at 33″ x 49″ – Seat
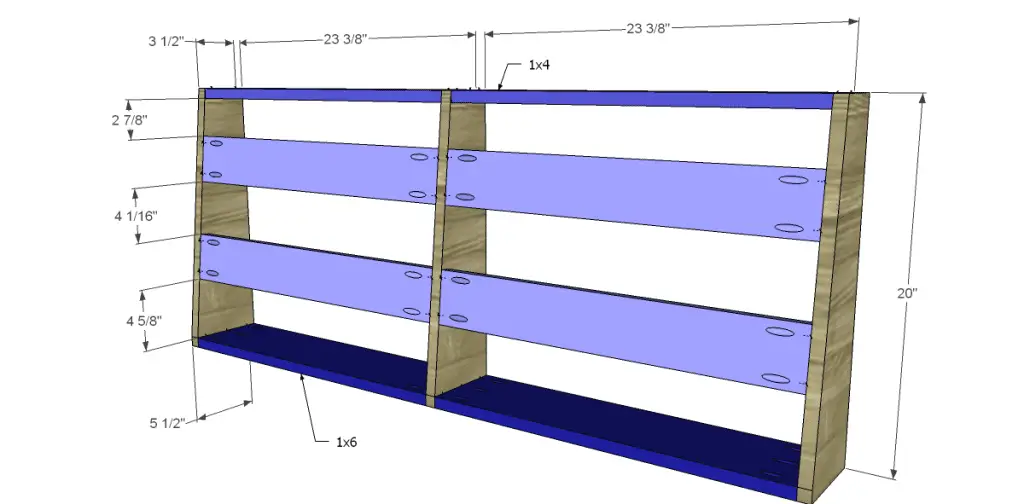
- 3 – 1×6 at 20″ – Back Frame
- 2 – 1×6 at 23-3/8″ – Back Frame
- 6 – 1×4 at 23-3/8″ – Back Frame
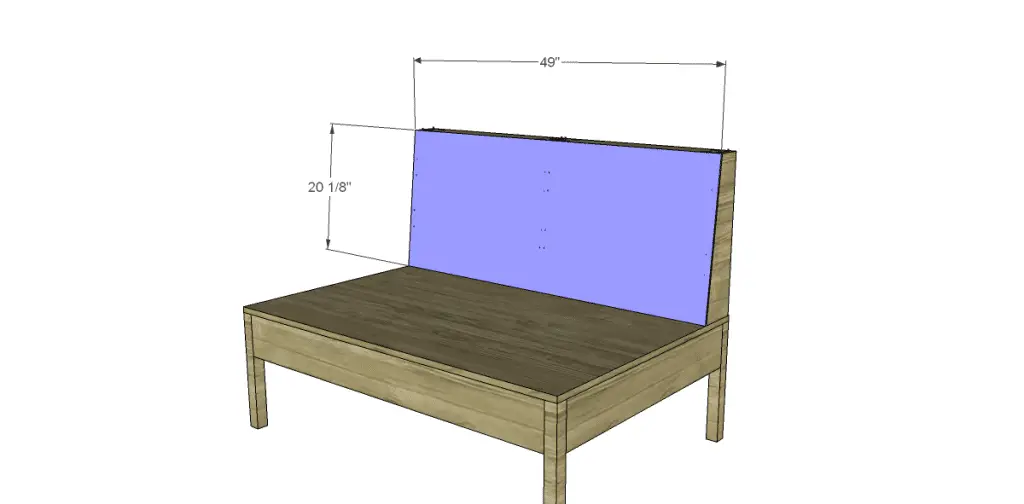
- 1 – 1/4″ plywood at 20-1/8″ x 49″ – Front of Backrest
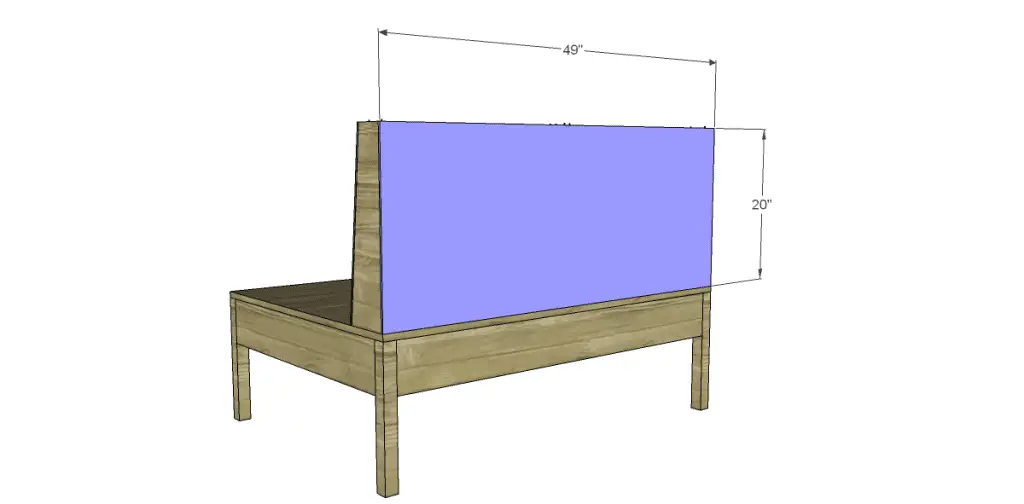
- 1 – 1/4″ plywood at 20″ x 49″ – Back of Backrest
Step One
Cut the pieces for the seat frame. Drill pocket holes in each end of the apron pieces. Secure to the legs using glue and 1-1/4″ pocket hole screws.
Step Two
Cut the pieces for the seat supports and drill pocket holes in each end. Secure tot he aprons as shown using glue and 1-1/4″ pocket hole screws.
Step Three
Cut the piece for the seat. Attach to the seat frame using glue and countersunk 1-1/2″ screws. Cover the aprons and seat with dacron and staple in place, then cover the aprons and seat with the fabric and secure to the underside of the aprons with staples.
Step Four
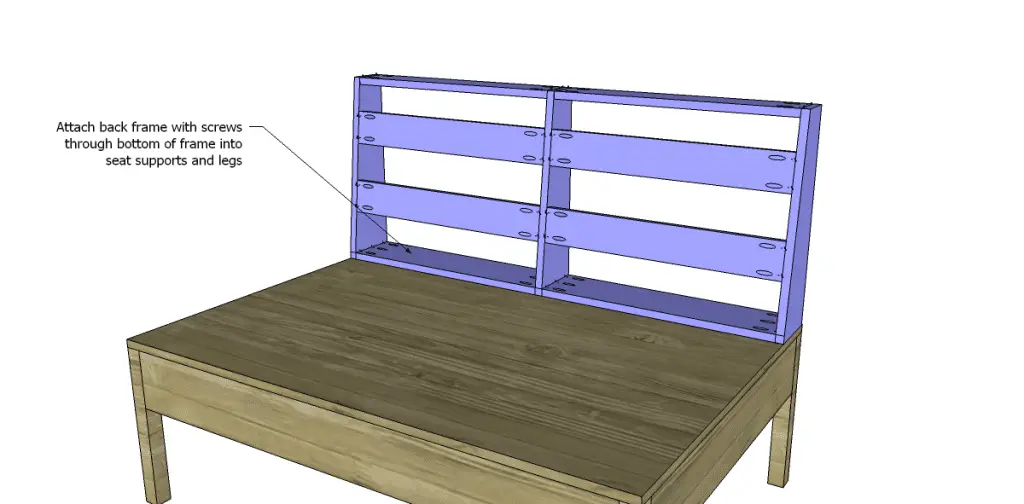
Cut the pieces for the back frame. Cut the angle in each of the vertical frame pieces using a jigsaw or circular saw. Trace the piece on newspaper and set aside. It will be used as a pattern for the upholstery. Drill pocket holes in each end of the horizontal pieces and assemble as shown. Position the back frame on the seat 1/4″ away from the back edge. Use 2-1/2″ screws to secure the frame to the seat placing the screws through the bottom of the frame into the legs (if possible) and seat supports.
Step Five
Cut the plywood pieces for the front and back of the backrest. Attach to the frame using glue and 1-1/4″ brad nails.
To create the upholstery:
I’m going to try to describe this the best I can… Its really not hard, I promise!
Using the pattern piece created by tracing the side frame piece, draw a 1/2″ border around the outside of the traced piece. With the wrong sides of the fabric together, pin the pattern piece on the fabric and cut out. There will be two pieces – a right and a left. Cut a piece of fabric measuring 44″ x 50″. Pin the large piece of fabric around the front, back, and top edges of the side piece that was just cut out. Sew together with a 3/8″ seam.
Cover the entire back frame of the loveseat with dacron, then slip the fabric cover over it. Staple in place at the bottom of the front and back. The staples can be covered with decorative trim if desired.
For the seat, a giant “pillow” will be created. Cut a piece of the foam at 27″ x 49″. Wrap the entire piece with dacron and tack in place with a needle and thread. Cut two pieces of fabric at 34″ x 56″ for the top and bottom of the cushion. Sew three edges of the fabric together with a 1/2″ seam leaving the back edge open. Insert the wrapped foam and use the fiberfill to stuff the corners of the cover. Sew the back edge closed by hand using a needle and upholstery thread.
Cut four pieces of fabric at 18″ x 25-1/2″. Sew three sides together, leaving one edge open. Stuff the covers firmly using the fiberfill. To avoid lumps, pull the fiberfill apart in little pieces – it is very time consuming but makes for a really nice pillow! Sew the edge closed using a needle and upholstery thread.
If you have any questions about the plans to build a Teahouse loveseat, leave a comment below!
Originally posted 2013-02-01 08:00:07.


[…] this loveseat with these free woodworking step-by-step plans. Even make your own […]