Build a Horchow Inspired Key Coffee Table
A Unique Coffee Table to Build
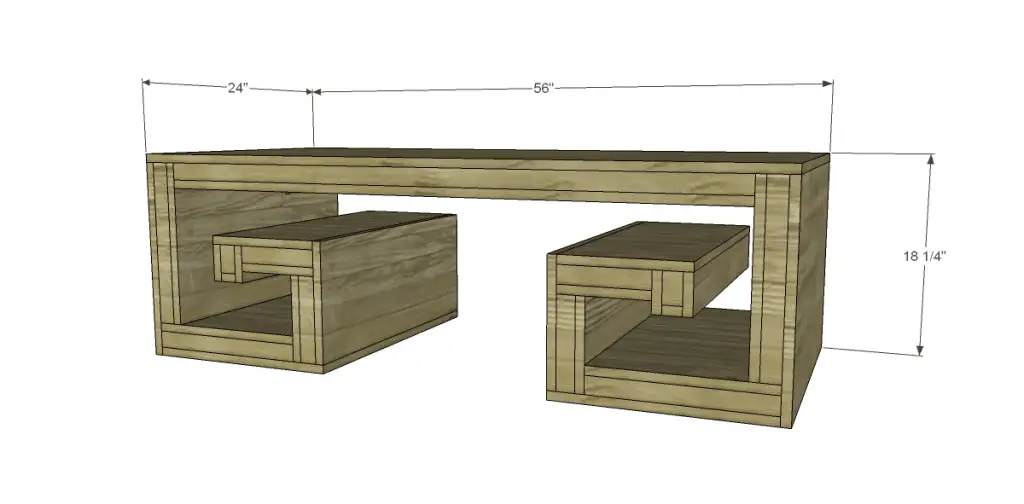
At first glance, this table looks difficult. It really isn’t, I swear! Though the construction method is a little different, this table is a super-quick build!
For the free plans to build a Horchow inspired Key coffee table, there is no cut list. The pieces are measured and cut as assembled. All of the plywood pieces will be 24″ wide. It will be easier to rip the plywood pieces in half lengthwise before beginning – this will make the pieces slightly less than 24″ wide. The length of all pieces, including the 1x2s will be noted in each step. The pieces are labeled by number as well as each assembly (see each step). The assemblies will be attached to each piece using glue and brad nails which are applied through the corresponding piece into the assembly.
Materials:
- 1-1/4″ pocket hole screws
- 1-1/4″ brad nails
- Finishing supplies
Lumber:
- 4 – 1×2 at 8′
- 2 sheets of 3/4″ plywood
Click on the drawings to enlarge them!
Step One
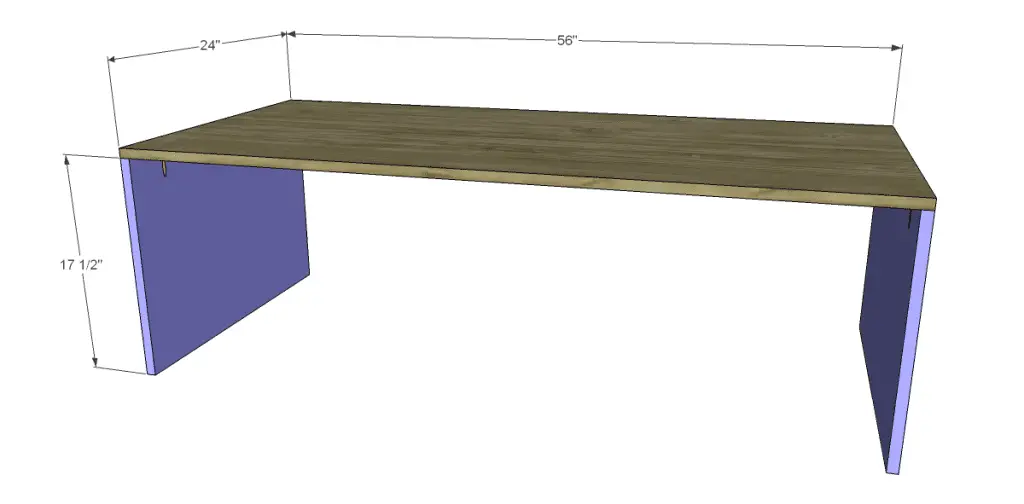
Cut the pieces for the top and sides. The top will measure 56″ long, and the sides will measure 17-1/4″ long. Drill pocket holes in one edge only of each side piece and attach to the top using glue and 1-1/4″ pocket hole screws.
Step Two
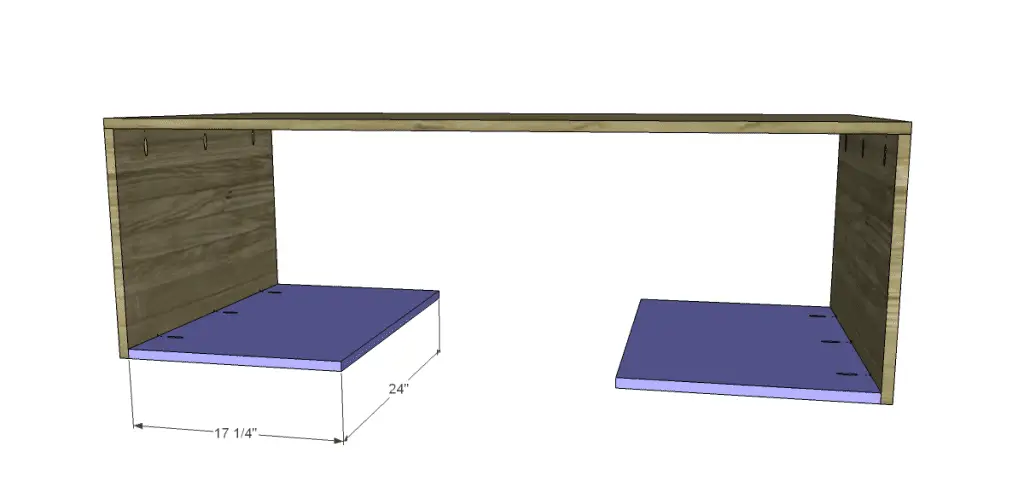
Cut the #2 pieces at 17-1/4″ long. Drill pocket holes in one edge only of each piece and attach to the sides using glue and 1-1/4″ pocket hole screws.
Step Three
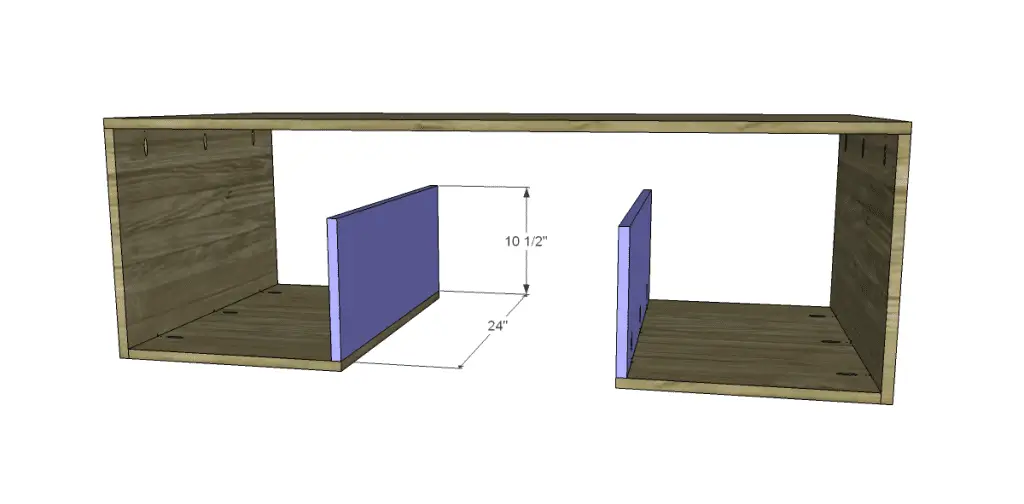
Cut the #3 pieces at 10-1/2″ long. Drill pocket holes in one edge only of each piece and attach to the #2 pieces using glue and 1-1/4″ pocket hole screws.
Step Four
Cut the #4 pieces at 10-1/4″ long. Drill pocket holes in one edge only of each piece and attach to the #3 pieces using glue and 1-1/4″ pocket hole screws.
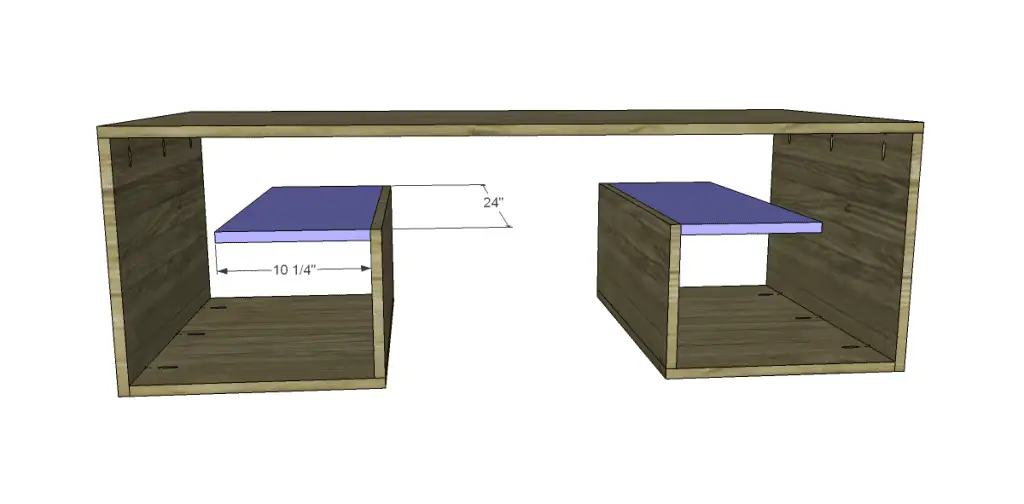
Step Five
Cut the pieces for the #1 assembly. Cut four plywood pieces at 3-1/4″ long. Cut four 1×2 pieces at 2-1/2″ and two at 24″ long (match the measurements to the exact width of the plywood). Assemble the pieces in a box as shown using glue and 1-1/4″ brad nails. Attach the box to the #4 pieces as shown using glue and 1-1/4″ brad nails.
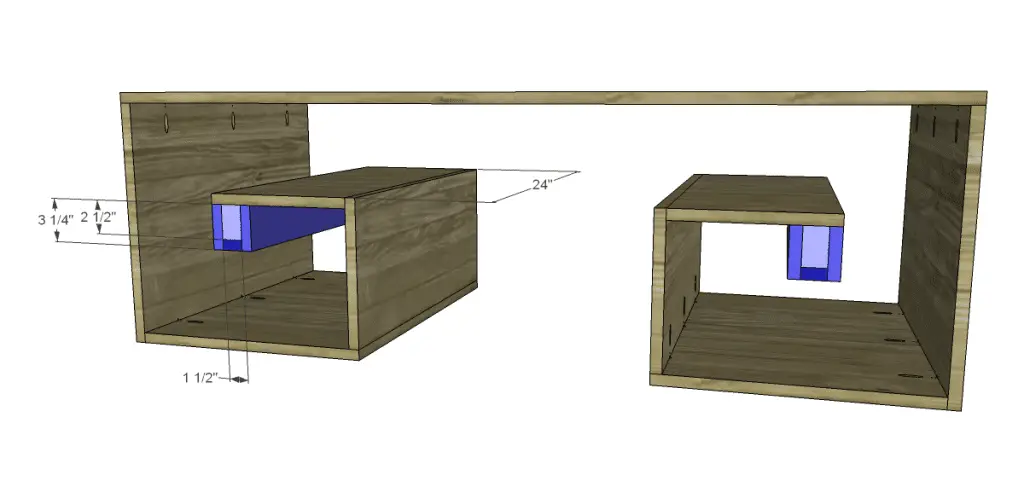
Step Six
Cut the pieces for the #2 assembly.Cut two plywood pieces at 7-1/4″ and four 1×2 pieces at 7-1/4″. Secure the 1x2s to each end of the plywood using glue and 1-1/4″ brad nails, then attach the entire assembly to the #4 pieces using glue and 1-1/4″ brad nails as shown.
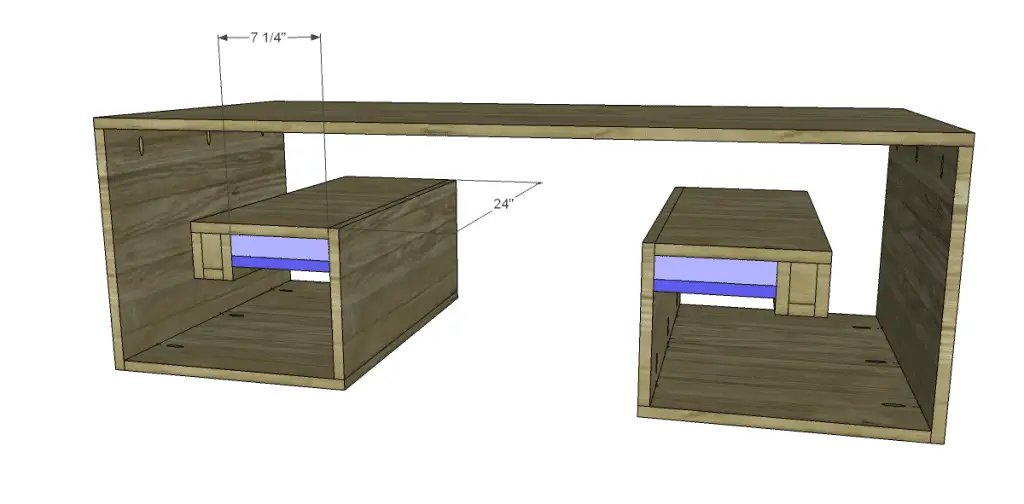
Step Seven
Cut the pieces for the #3 assembly. Cut two plywood pieces at 7-1/2″ and four 1×2 pieces at 7-1/2″. Secure the 1x2s to each end of the plywood using glue and 1-1/4″ brad nails, then attach the entire assembly to the #3 pieces using glue and 1-1/4″ brad nails as shown.
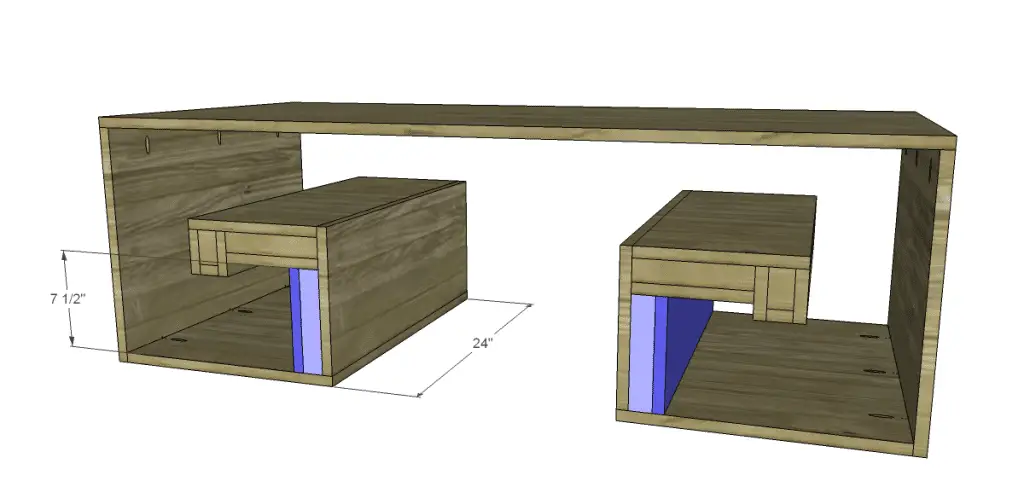
Step Eight
Cut the pieces for the #4 assembly. Cut two plywood pieces at 14-1/4″ and four 1×2 pieces at 14-1/4″. Secure the 1x2s to each end of the plywood using glue and 1-1/4″ brad nails, then attach the entire assembly to the #2 pieces using glue and 1-1/4″ brad nails as shown.
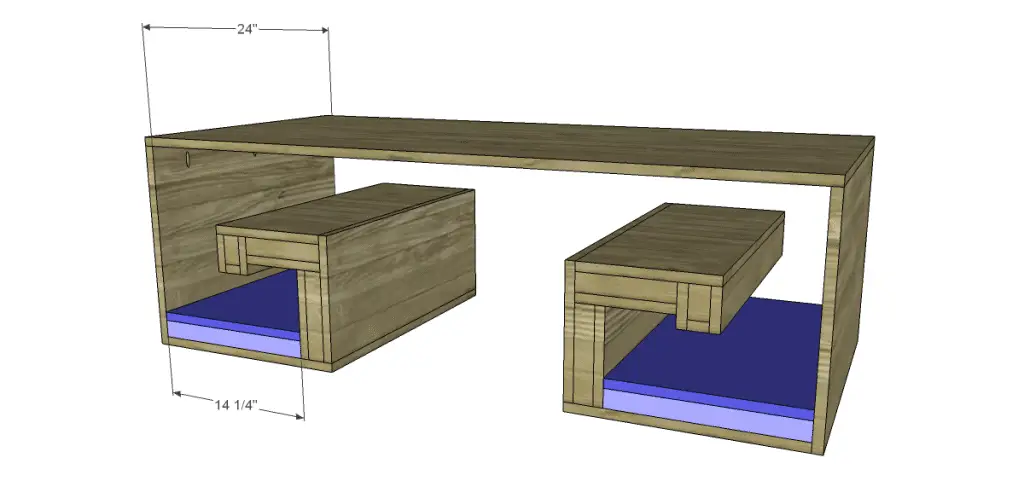
Step Nine
Cut the pieces for the #5 assembly. Cut two plywood pieces at 14-1/2″ and four 1×2 pieces at 14-1/2″. Secure the 1x2s to each end of the plywood using glue and 1-1/4″ brad nails, then attach the entire assembly to the side pieces using glue and 1-1/4″ brad nails as shown.
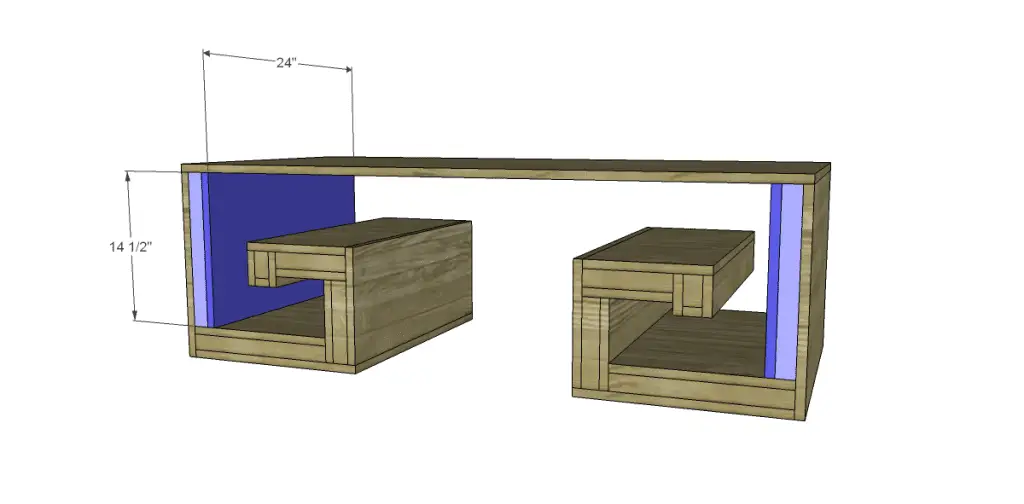
Step Ten
Cut the pieces for the #6 assembly. Cut one plywood piece at 50″ and two 1×2 pieces at 50″. Secure the 1x2s to each end of the plywood using glue and 1-1/4″ brad nails, then attach the entire assembly to the top piece using glue and 1-1/4″ brad nails as shown.
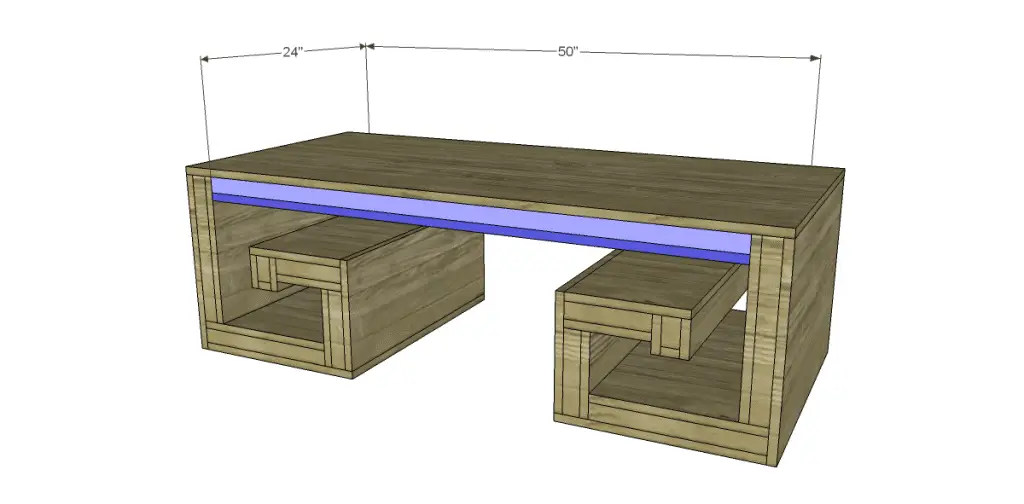
Finish as desired.
That wasn’t so bad, was it? Have questions about the free plans to build a Horchow inspired Key coffee table? Leave a comment below!
Originally posted 2013-01-11 08:00:17.

