Build a Saint-Emilion Tray
Free DIY Woodworking Plans to Build a Saint-Emilion Tray
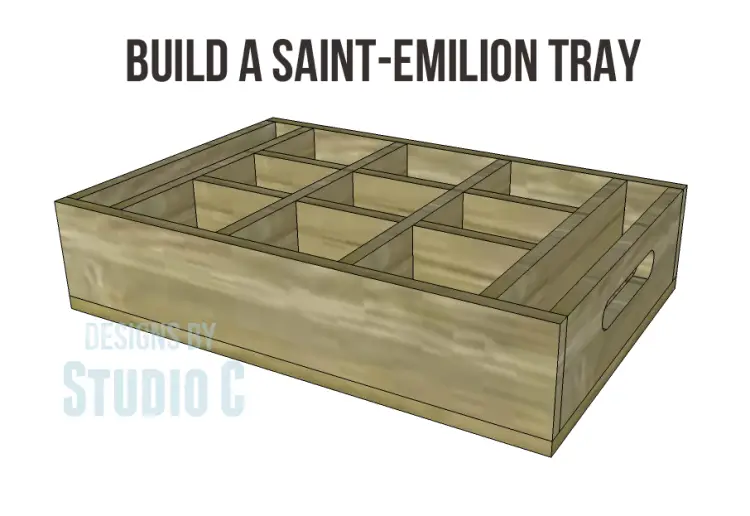
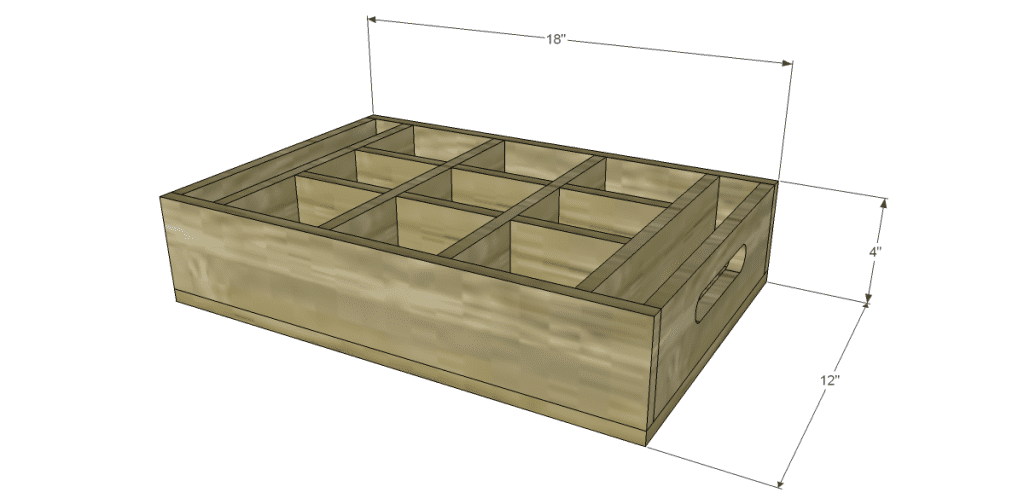
This easy to build wood tray has little compartments perfect for jars to hold all sorts of supplies! It could be used to hold napkins and utensils at an outdoor party, project supplies, tools, etc! The free DIY woodworking plans to build a Saint-Emilion Tray, finished with a weathered patina, would be great standing on its side and used as a knick-knack shelf!
Materials:
- 1-1/4″ brad nails (<– affiliate link!)
- Finishing supplies
Lumber:
- 1 quarter sheet of 1/2″ plywood (PureBond plywood would be perfect!)
Cut List:
- 2 – 1/2″ plywood at 3-1/2″ x 11″ – Ends
- 2 – 1/2″ plywood at 3-1/2″ x 18″ – Sides
- 2 – 1/2″ plywood at 11″ – Dividers
- 2 – 1/2″ plywood at 13″ – Dividers
- 2 – 1/2″ plywood at 11″ – Divider Ends
- 1 – 1/2″ plywood at 12″ x 18″ – Bottom
Notes About the Project:
- Sand all of the pieces prior to assembly
- If using edge banding, apply it before assembly – it may be best to cut strips of the plywood at the height needed, apply the edge banding along one edge, then cut the pieces to the size needed!
Step One
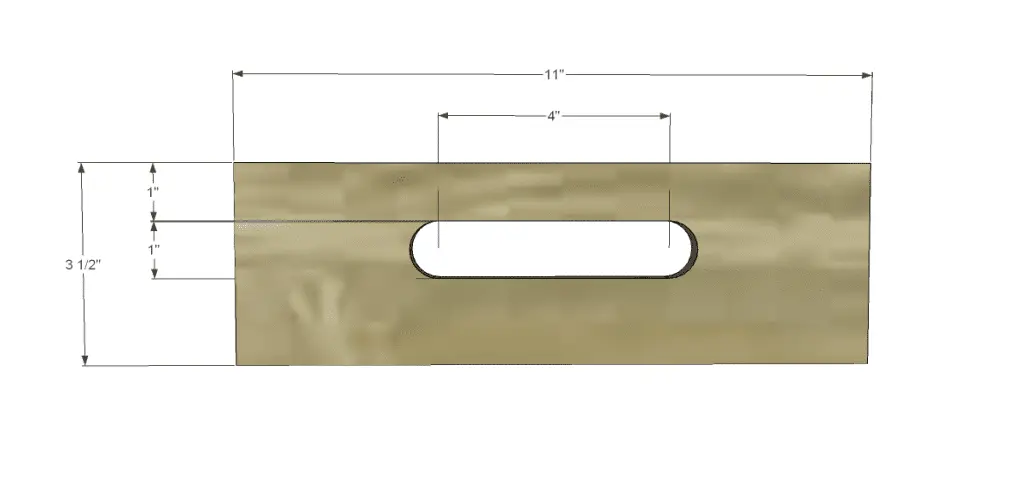
Cut the pieces for the ends. Mark the center of the holes for the handles as shown. Use a 1″ hole saw or paddle bit to cut the hole. Draw a line connecting the top of each hole and the bottom of each hole, then cut out with a jigsaw.
Step Two
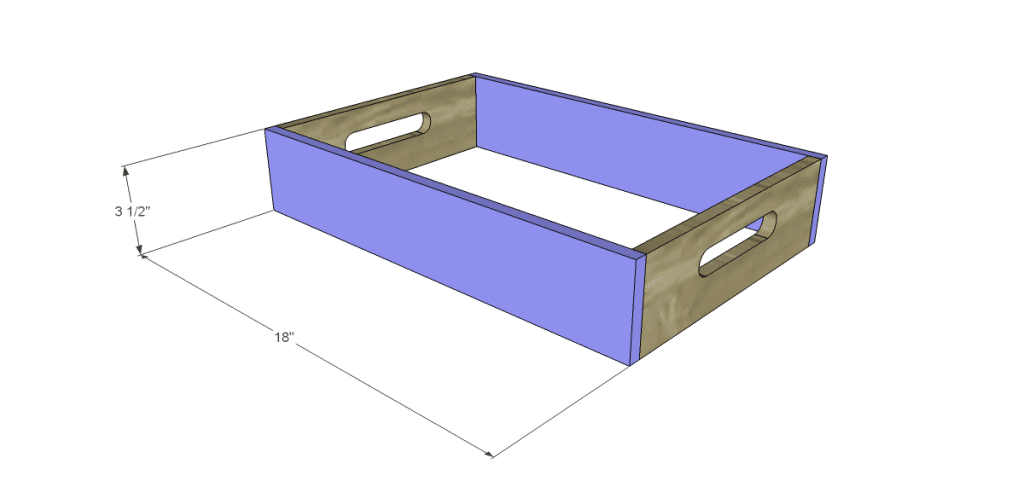
Cut the pieces for the sides then secure to the ends using glue and 1-1/4″ brad nails.
Step Three
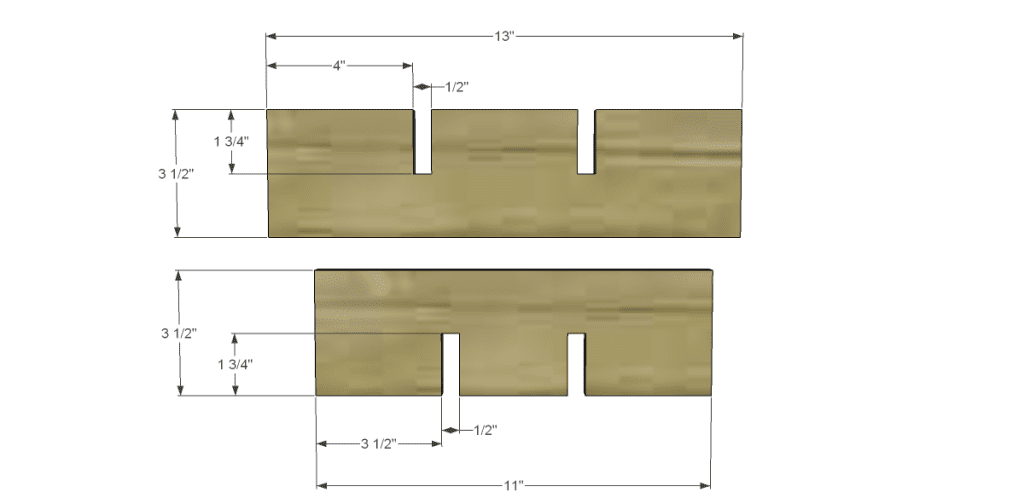
Cut the pieces for the dividers. Cut the notches as shown using a jigsaw or bandsaw.
Step Four
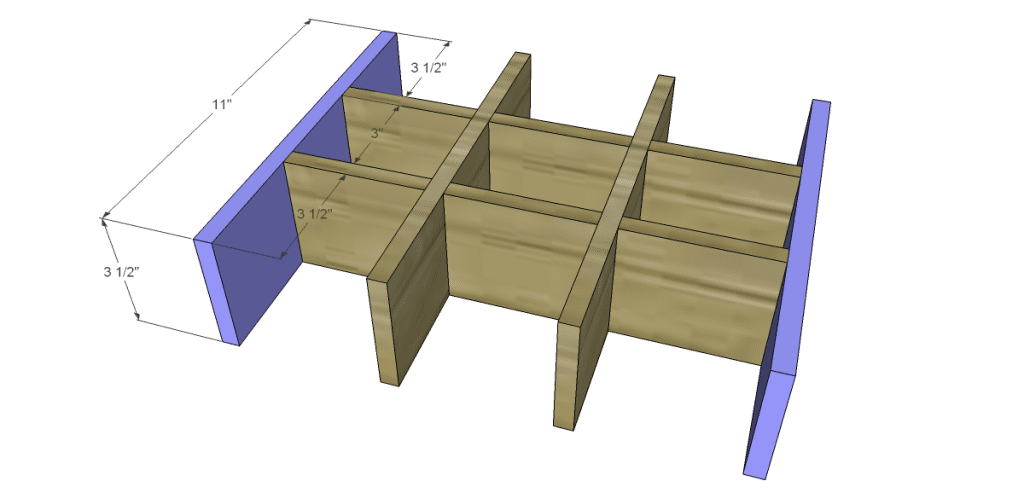
Assemble the dividers as shown (use a little glue to secure the notches). Attach the divider ends using glue and 1-1/4″ brad nails.
Step Five
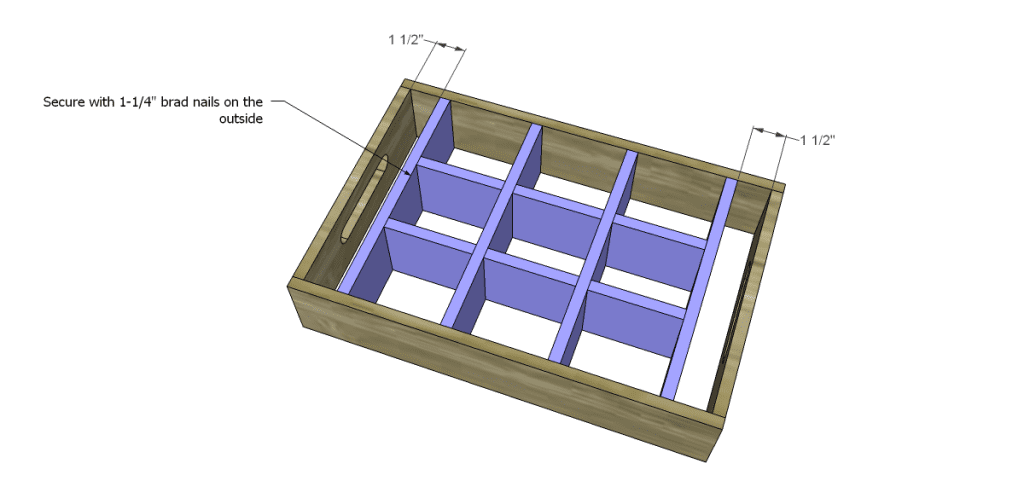
Insert the dividers into the box frame then secure using glue and 1-1/4″ brad nails.
Step Six
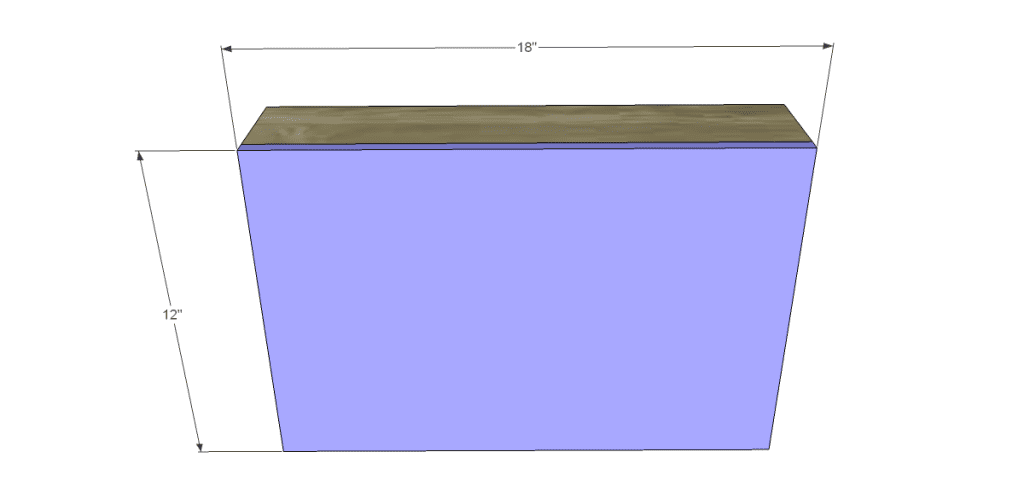
Cut the piece for the bottom. Secure to the box and dividers using glue and 1-1/4″ brad nails.
Finish as desired!
Have a request for a plan or a question about the plans to build a wooden tray? Leave a comment below!
Originally posted 2013-07-10 08:00:16.


And it can be used to organize that disorganized bathroom.
That is true! I’m so glad it is still working for you, Jake! Any suggestions for other projects?
[…] tray craft ideasBuild this compartment tray with handles using these free step-by-step woodworking […]
[…] pieces to build your crate or box. Great plans for boxes or crates can be found here, here, and here! Mark the position for the handle cutouts as indicated in the […]