
Free Plans Inspired by Joss & Main
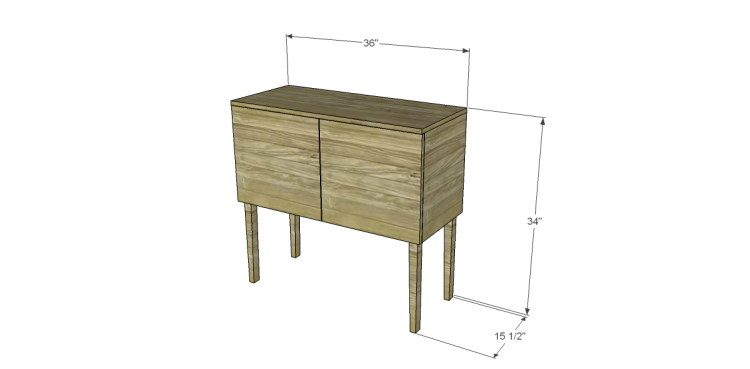
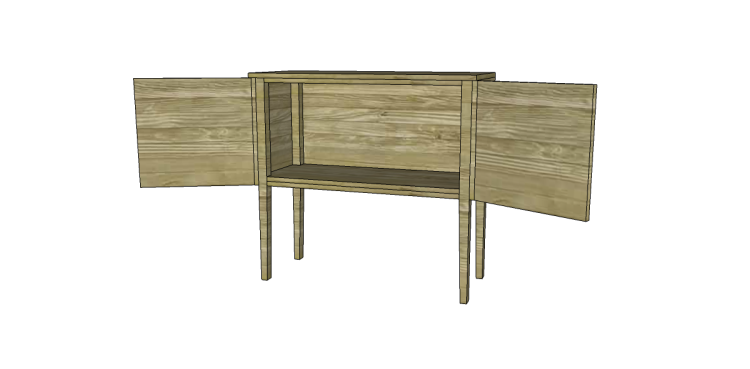
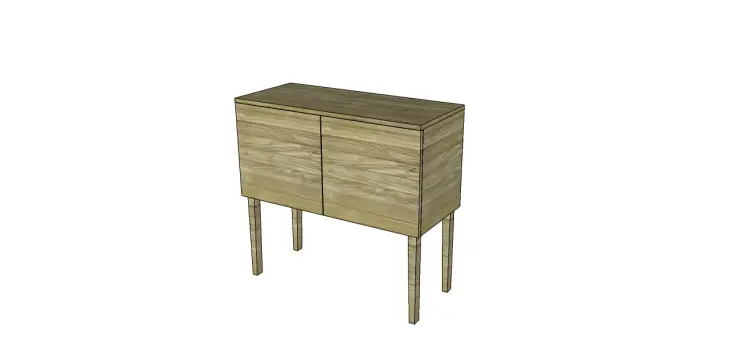
I love the simplicity of this piece! The plans to build a Claudia sideboard are super-easy and can be completed in a weekend. The interior of the wood sideboard is roomy enough to add a shelf, if desired, and the plain doors can be dressed up or down!
Materials:
- 1-1/4″ pocket hole screws (<– affiliate link!)
- 1-1/4″ brad nails (<– affiliate link!)
- 2 sets of hinges (<– affiliate link!)
- One set of door pulls
- Finishing supplies
Lumber:
- 2 – 1×2 at 8′
- 2 – 2×2 at 8′
- One sheet of plywood
Cut List:
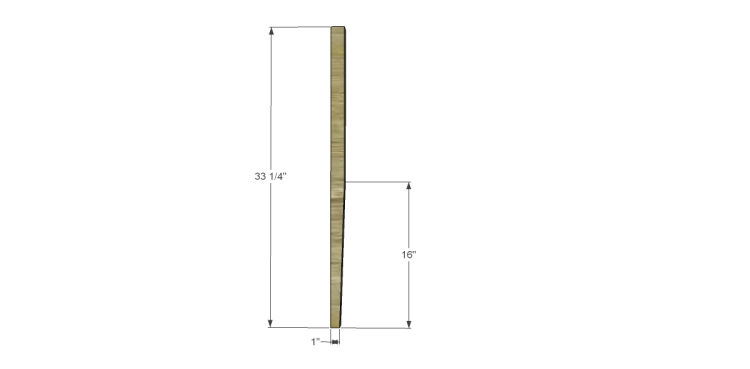
- 4 – 2×2 at 33-1/4″ – Legs
- 4 – 1×2 at 11″ – Side Frames
- 4 – 1×2 at 31-1/2″ – Stretchers
- 1 – 3/4″plywood at 14″ x 34-1/2″ – Shelf
- 1 – 3/4″ plywood at 17-1/4″ x 34-1/2″ – Back
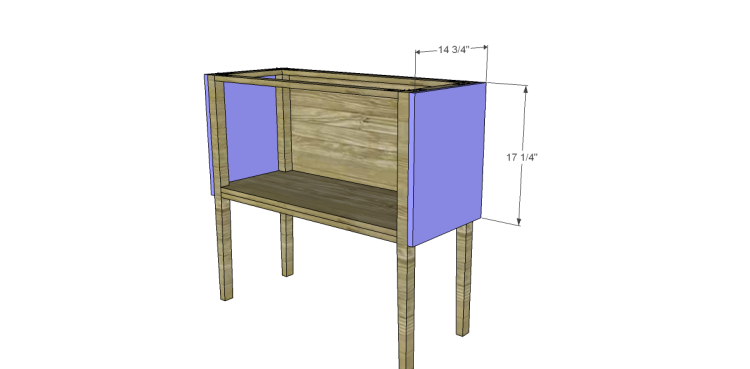
- 2 – 3/4″ plywood at 14-3/4″ x 17-1/4″ – Sides
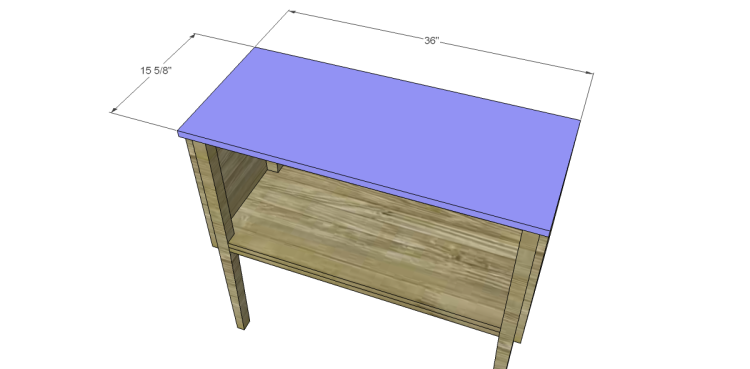
- 1 – 3/4″ plywood at 15-5/8″ x 36″ – Top
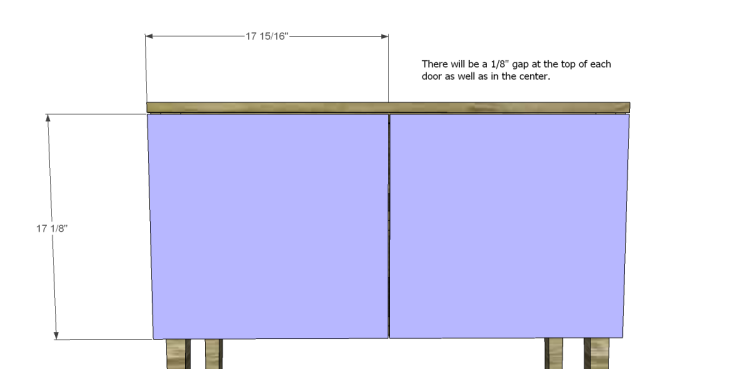
- 2 – 3/4″ plywood at 17-1/8″ x 17-15/16″ – Doors
Step One
Cut the pieces for the legs. Cut the taper with a jigsaw (optional). Cut the pieces for the side frames and drill pocket holes in each end. Orient the pocket holes in the upper pieces so they are facing up and facing down in the lower pieces. Assemble as shown using glue and 1-1/4″ pocket hole screws.

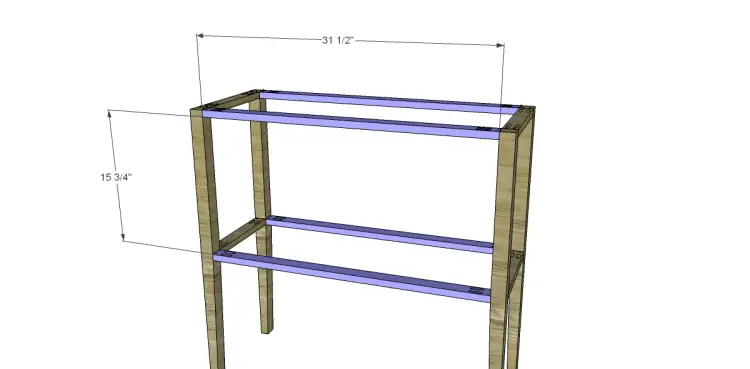
Step Two
Cut the pieces for the stretchers and drill pocket holes in each end. Orient the pocket holes in the upper pieces so they are facing up and facing down in the lower pieces. Assemble as shown using glue and 1-1/4″ pocket hole screws.
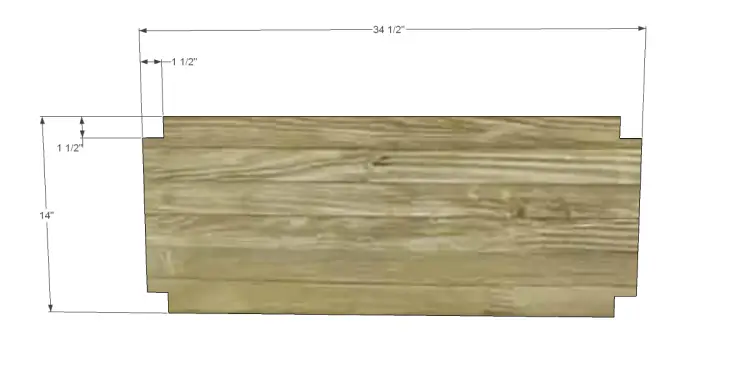
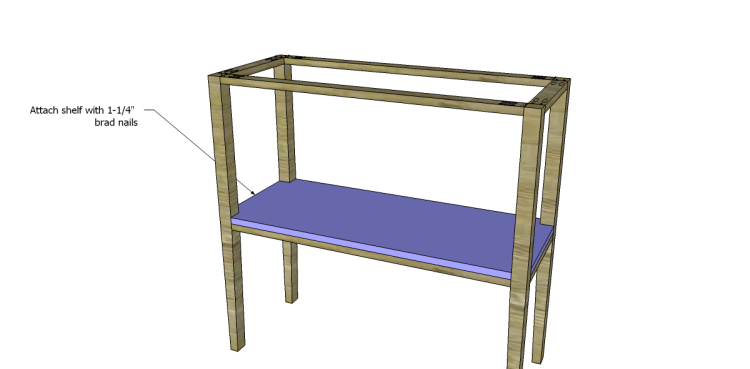
Step Three
Cut the piece for the shelf and cut the notches with a jigsaw. Position the shelf on the lower stretchers and secure using glue and 1-1/4″ brad nails.
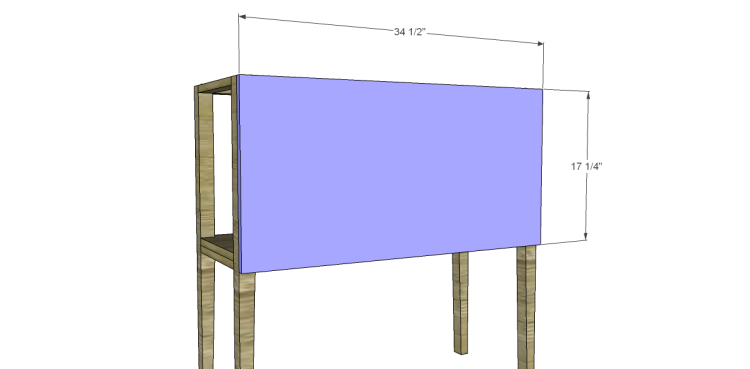
Step Four
Cut the piece for the back. Position as shown and secure using glue and 1-1/4″ brad nails.
Step Five
Cut the pieces for the sides. Position as shown and secure using glue and 1-1/4″ brad nails.
Step Six
Cut the piece for the top. The back will be flush with the back and sides, and the front will overlap by approximately 7/8″ to cover the doors and the gap created by the hinges. Secure using glue and 1-1/4″ brad nails.
Step Seven
Cut the pieces for the doors. Install the hinges on the doors, then attach the hinges to the cabinet. There will be a 1/8″ gap between each door as well as between the top and the upper part of the doors. Install the door pulls.
Finish as desired!
Have questions about the plans to build a Claudia sideboard? Leave a comment below!
Originally posted 2013-02-25 08:00:47.


3 Comments
good techniques provides here for the sideboards creation..
Thank you! If you build it, please share photos – I would love to see it!