
Power Tool Challenge – Anything Goes Edition
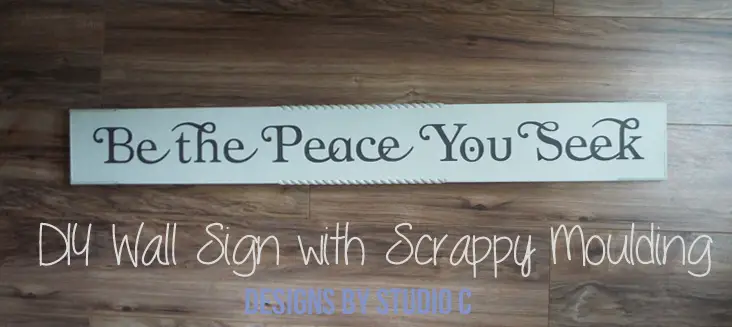
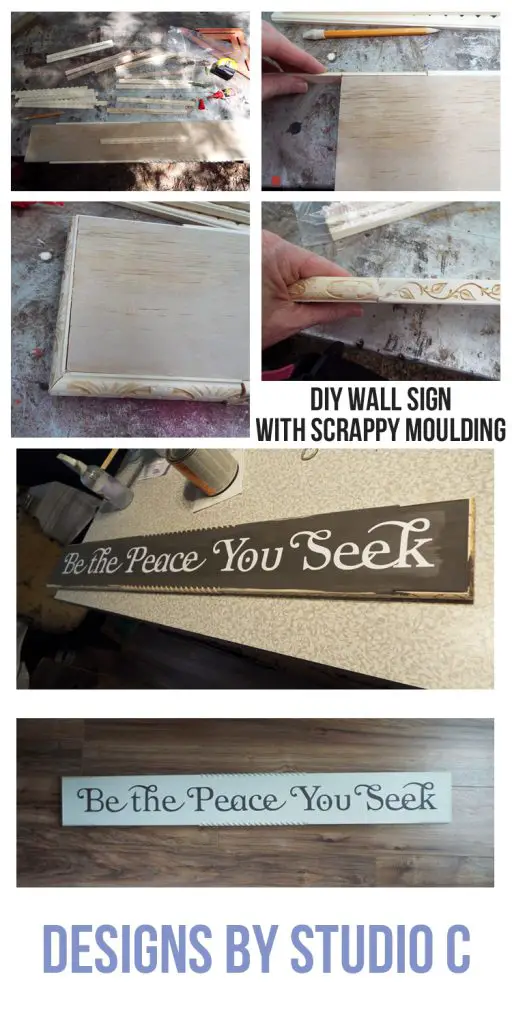
Hey there! Can you believe how quickly time is flying by? It’s already time for the Power Tool Challenge! This is a group of amazing bloggers, including myself, who create awesome projects using simple power tools. To be honest, I wasn’t sure if I would be able to participate this month because I have so much going on, but luckily I was able to whip up something really cool and easy! For this month’s challenge, I made a DIY wall sign using some scrap moulding and a reverse-stenciled quote on the front. It was super simple and turned out great! Trust me, you won’t find an easier project than this.
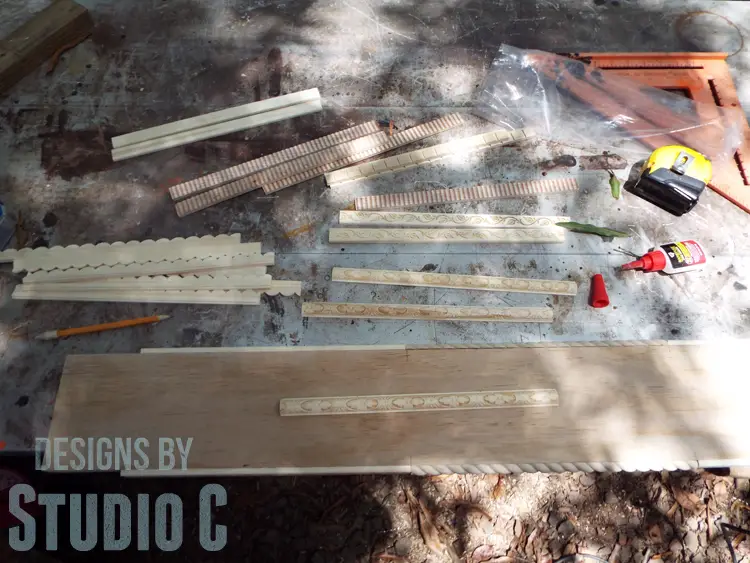
I already had strips of 3/4″ plywood that were offcuts from the round tables I built for the breakroom at work. The strips measure 5″ x 42″ which is the perfect size for a long sign!
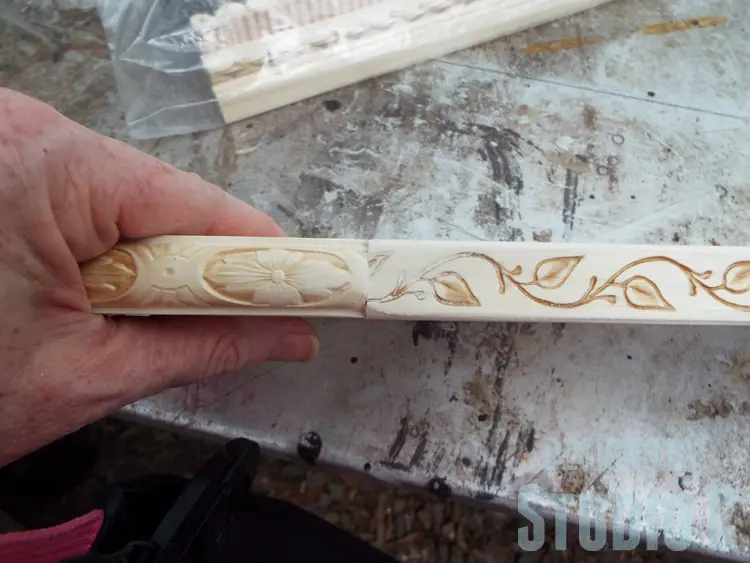
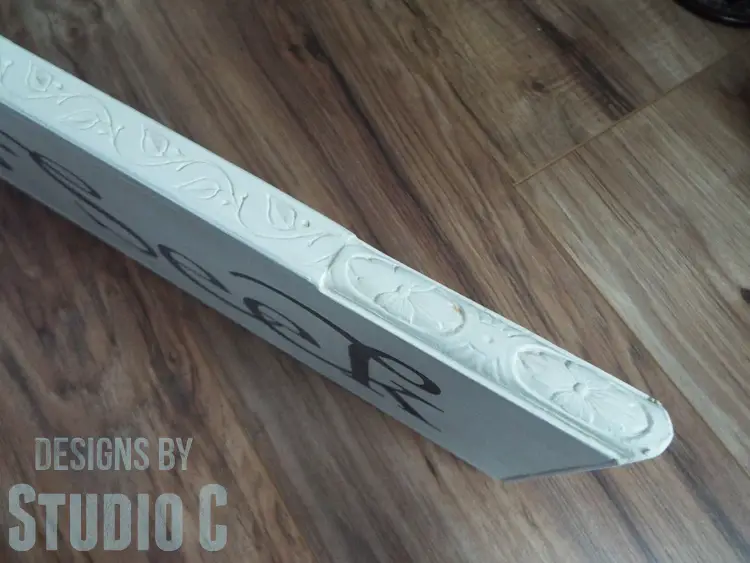
Previously, I shared a dresser where I repaired the damaged top and added small pieces of decorative moulding to the edges. I loved it so much, I wanted to use the same technique in other projects. I sanded the edges of the plywood, then added random strips of moulding to the edges secured with DAP® Weldwood Instant Adhesive (<– affiliate link!). The ends of the pieces were butted against one another. (I purchased the packages of moulding at Hobby Lobby.)
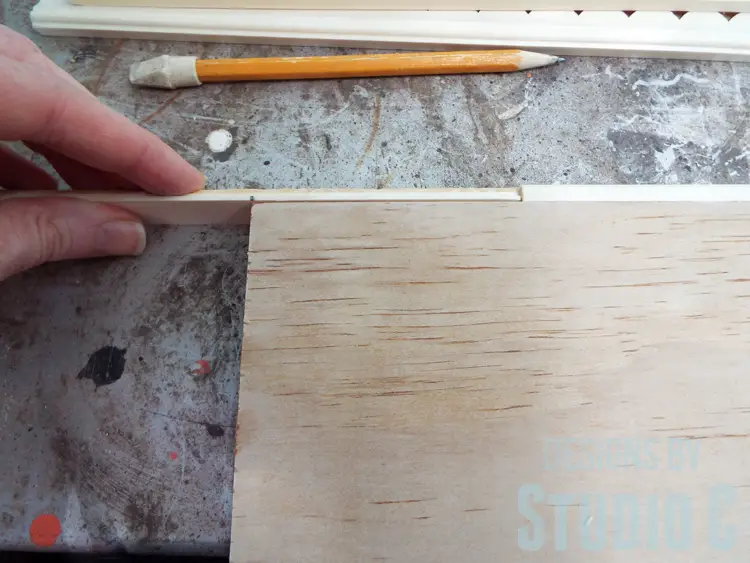
When I got to the corners, I marked the ends for miters and cut them on the miter saw. This is really easy to do since a spacer is used and the trim pieces are actually cut with the saw blade centered on the piece instead of on the upswing. I cut a piece with a miter in one end first, dry fit it to the miter on the piece already in place, then marked and cut the remaining miter.
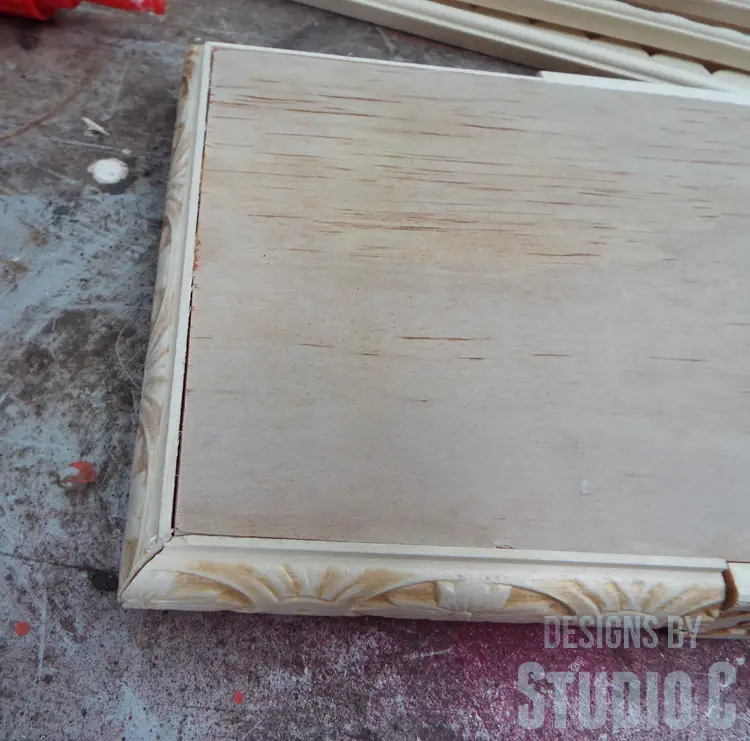
I also sanded the areas where the trim pieces meet to knock down any high spots and make the transition from piece to piece a bit nicer.
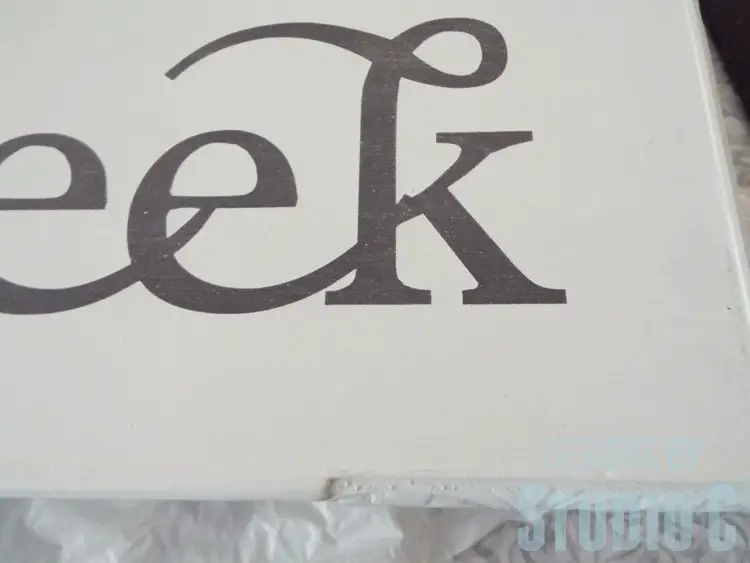
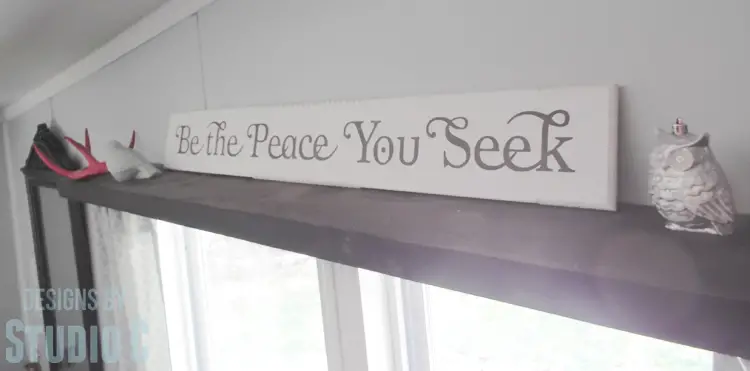
I applied a coat of dark gray chalk paint to the front of the piece, then I added a quote cut out of vinyl on top. I painted over the entire piece with three coats of white chalk paint, then removed the vinyl lettering to let the grey words show through.
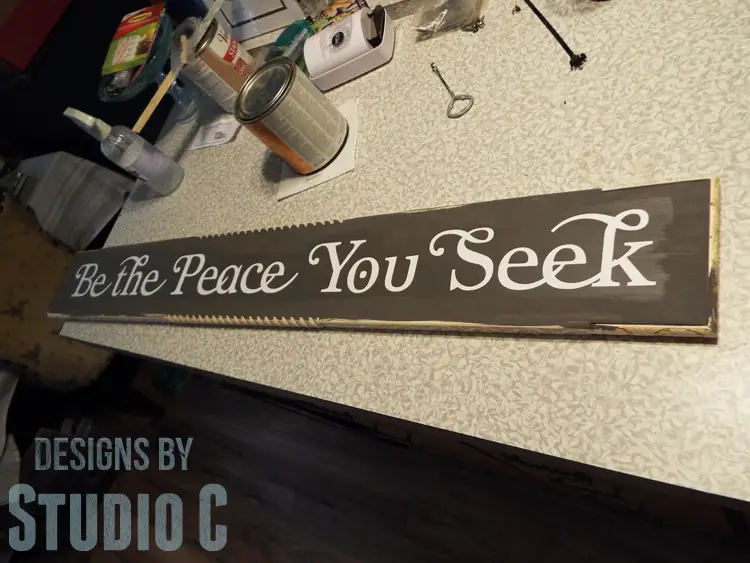
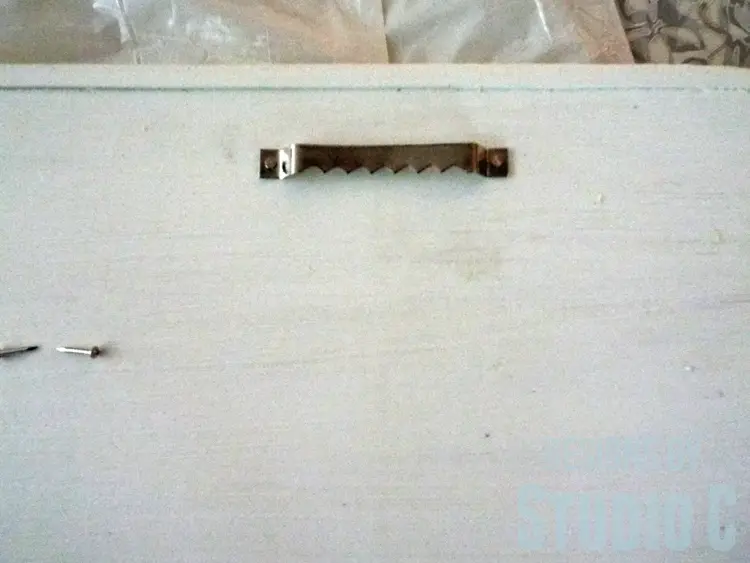
I applied a coat of wax then added two sawtooth hangers to the back to hang the sign.
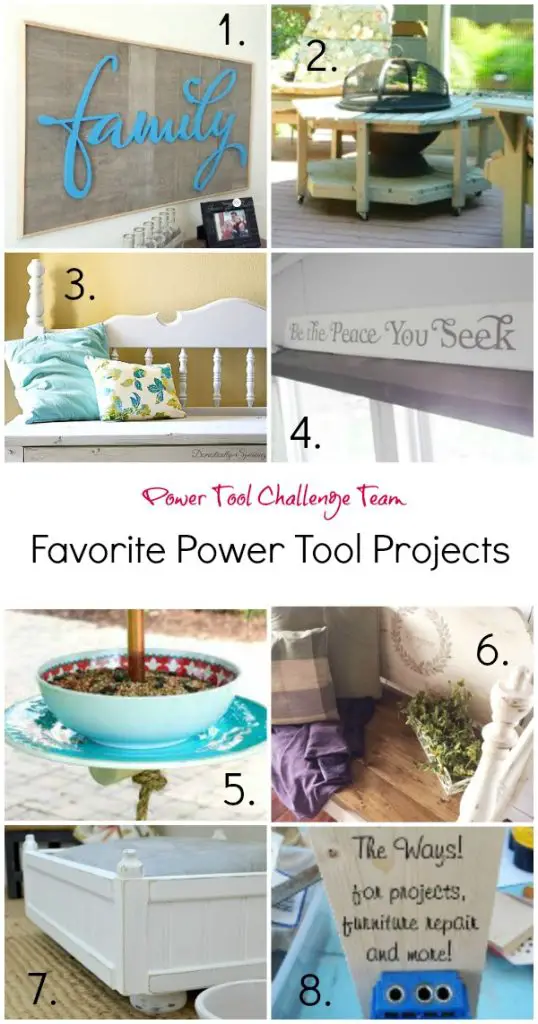
I think the sign is very swoon-worthy! Take a look at some of the fabulous other projects from my fellow bloggers:
DIY Family Sign by My Love To Create
DIY Aiderondack FireBowl Table by Interior Frugalista
DIY Headboard Bench by Domestically Speaking
DIY Wall Sign by Designs By Studio C
Easy Bird Feeder by Virginia Sweet Pea
DIY Headboard Bench by Designed Decor
DIY Small Pet Bed by H2OBungalow
How To Use A Kreg Jig by My Repurposed Life
This DIY wall sign with scrappy moulding would be perfect with a family name and “established date” on it for a gift or with a sweet quote on it and hung in a child’s room! Have any questions? Leave a comment below!


18 Comments
Pingback: Roadside DIY Headboard Bench - Domestically Speaking
Love the saying, love the sign! I’ve eyed that fun molding for the longest time knowing I could come up with a good project for it! Love your idea <3
Thank you so much, Wendi! I plan on using it on everything, ha ha!
awwww, so sweet Cher! I love your scrappy mouling sign! (I save all kinds of bits and pieces)
pinning!
gail
Thanks so much, Gail! They are really easy to use and I like the randomness (is that a word??) of the moulding!
“Be The Peace You Seek”, love that sentiment Cher and happens to be my mantra these days with all the chaos going on in the world these days. Love your sign and especially how you incorporated two different trim styles around the frame. Pinning to share 🙂
Thanks! You are absolutely right, Marie… This is a great quote!
Adding moulding to the side of the sign gives this piece a really pretty look. I love the quote you used!
Thank you so much, Paula! I love the quote, too!
I love this quote! I really like that you added the moulding around it and it makes it look more finished!
Thank you so much, DeDe! I love the way it looks!
I love the quote! And how fun are your scrap moulding pieces! They are so pretty!
Thank you, Mindi! I think using the scrap moulding is my new obsession!
What a great use of extra molding – so pretty!
Thank you so much, Maryann! I love using the smaller pieces to create something new!
Pingback: Repurposed Headboard French Bench ~- Designed Decor
Pingback: How to Use a Kreg Jig - My Repurposed Life™
Pingback: Repurposed Headboard French Bench - Designed Decor