DIY Vintage Table Plans
Build a Furniture Piece with Lots of Charm
Finding that perfect antique-style table is not always easy but with these DIY vintage table plans, you can build your own! This particular table is big on storage featuring two drawers and two cubbies perfect for storing books or displaying that perfect vase! However you choose to use it, it will be a fabulous addition to your decor!

Materials:
- 1-1/4” pocket hole screws
- 1-1/4” brad nails
- Edge banding, optional (<– affiliate link!)
- 2 – Cabinet pulls
- Wood glue
- Sandpaper (100, 150, 220 grits)
- Finishing supplies (primer & paint, or stain, sealer)
- Paste wax
Lumber:
- 1 – 1×2 at 6′
- 1 – 2×2 at 4′ (or scraps for legs)
- 1 sheet of 3/4″ plywood
Cut List:
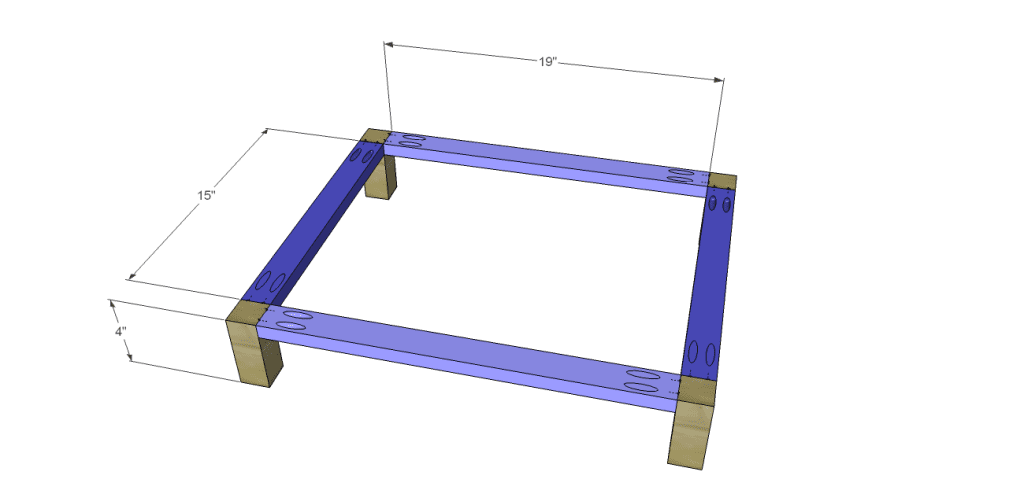
- 4 – 2×2 at 4″ – Base Legs
- 2 – 1×2 at 15″ – Base Frame
- 2 – 1×2 at 19″ – Base Frame
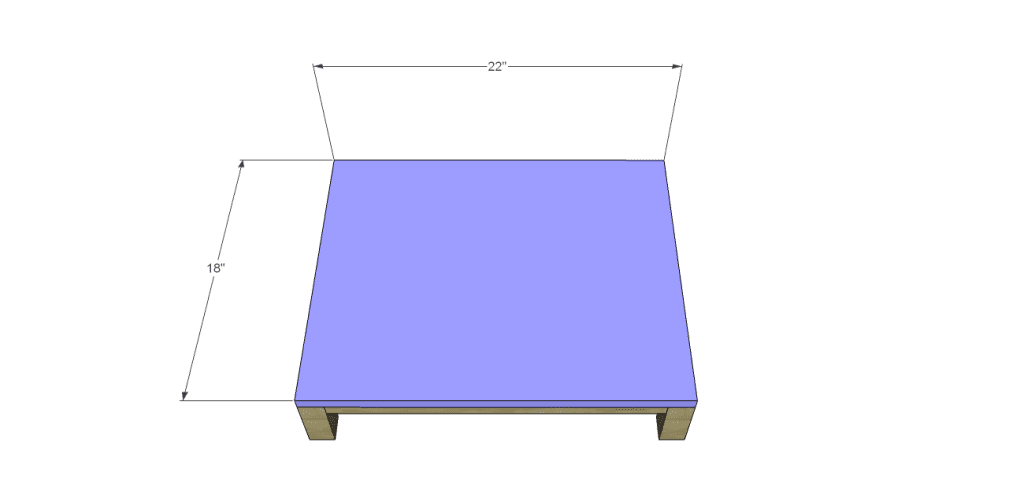
- 2 – 3/4″ plywood at 18″ x 22″ – Bottom & Top
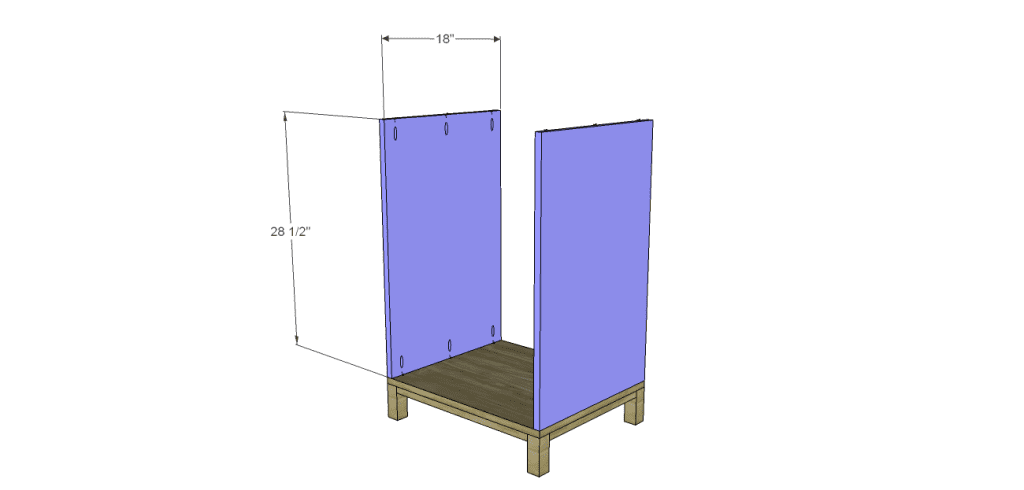
- 2 – 3/4″ plywood at 18″ x 28-1/2″ – Sides
- 1 – 3/4″ plywood at 20-1/2″ x 28-1/2″ – Back
- 1 – 3/4″ plywood at 15-1/2″ x 17-1/4″ – Divider
- 2 – 3/4″ plywood at 17-1/4″ x 20-1/2″ – Shelves
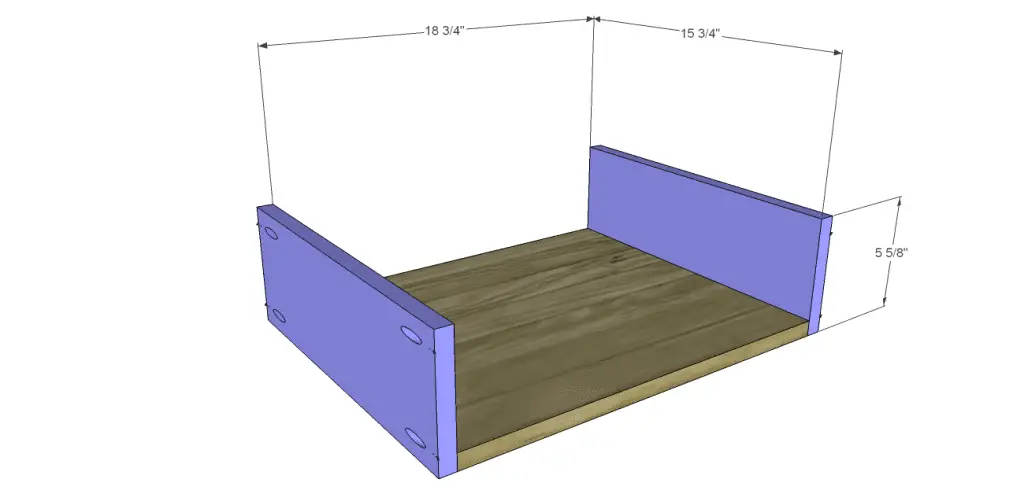
- 2 – 3/4″ plywood at 15-3/4″ x 18-3/4″ – Drawer Bottoms
- 4 – 3/4″ plywood at 5-5/8″ x 15-3/4″ – Drawer Sides
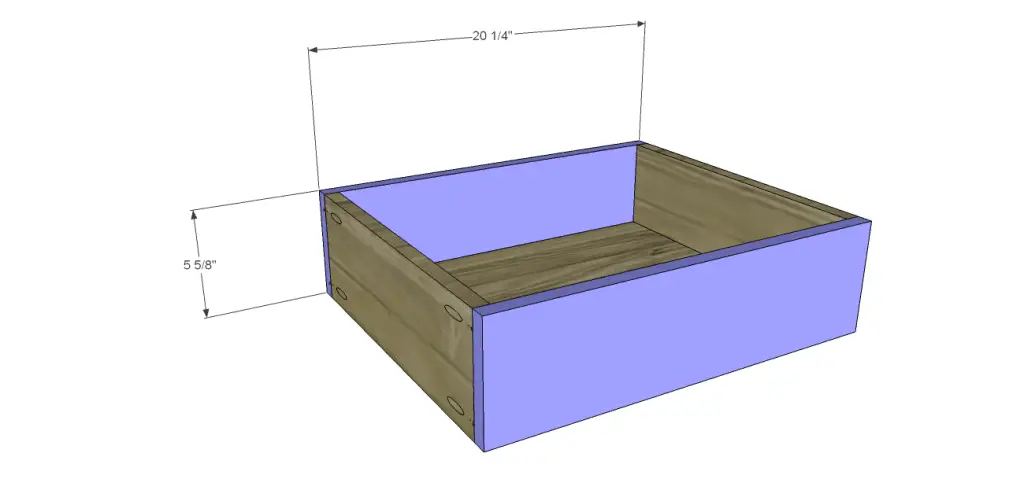
- 4 – 3/4″ plywood at 5-5/8″ x 20-1/4″ – Drawer Front & Back
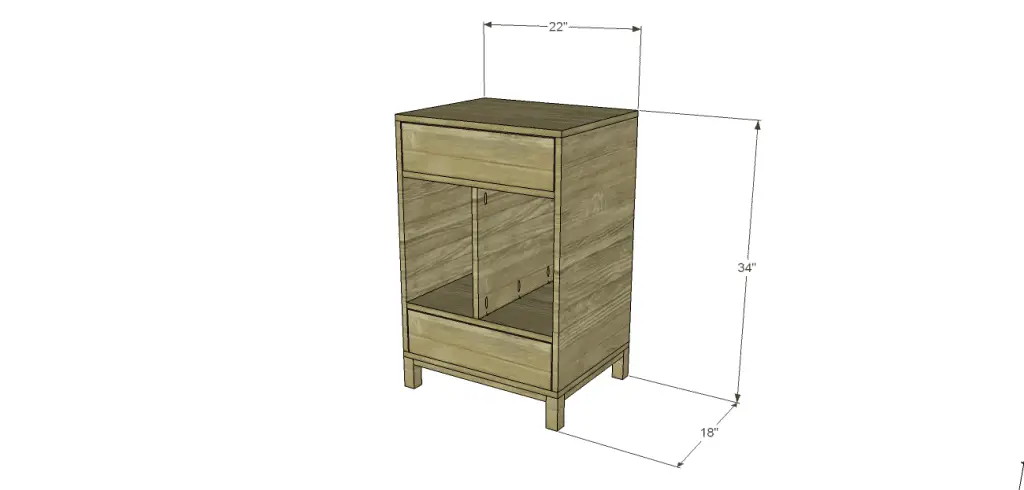
Notes About the Project:
If using edge banding, it will be applied to the exposed edges of the plywood prior to assembly. The finishing will be much easier if the pieces are thoroughly sanded prior to assembly. Any exposed pocket holes can be filled using wood filler or Dry Dex, then sanded smooth.
Step One
Cut the pieces for the base. With the pocket hole jig set for 3/4″ material, drill pocket holes at each end of the frame pieces. Attach the frame pieces to the legs using glue and 1-1/4″ pocket hole screws.
Step Two
Cut the piece for the bottom. Secure to the base frame using glue and 1-1/4″ brad nails.
Step Three
Cut the pieces for the sides and drill pocket holes in the top and bottom edges. Secure to the bottom using glue and 1-1/4″ pocket hole screws.
Step Four
Cut the piece for the back and drill pocket holes in all four edges. Secure to the sides and bottom using glue and 1-1/4″ pocket hole screws.
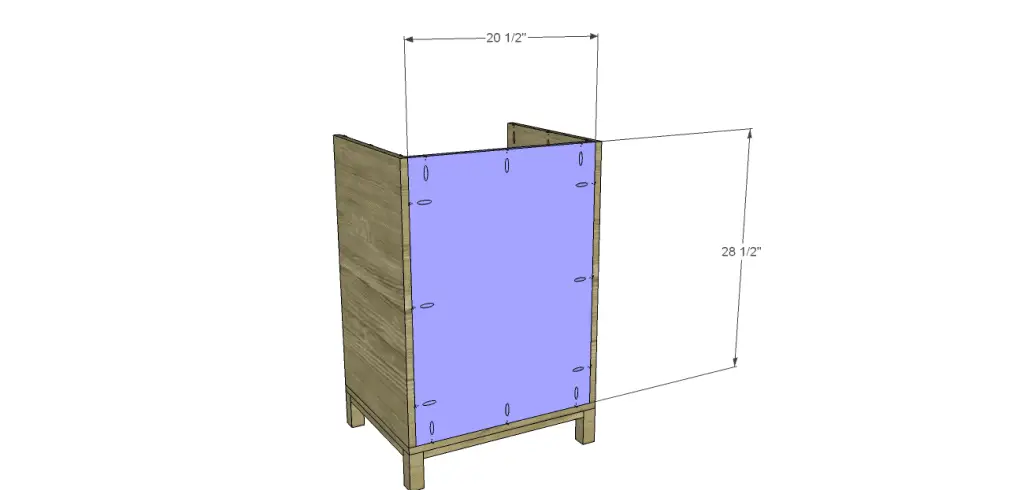
Step Five
Cut the piece for the top. Secure to the sides and back using glue and 1-1/4″ pocket hole screws.
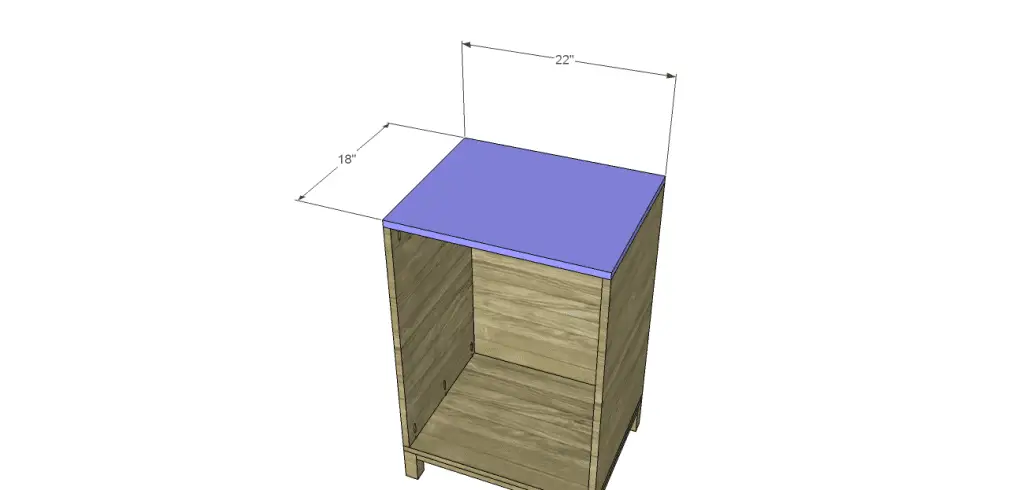
Step Six
Cut the pieces for the divider and shelves. Drill pocket holes in the top and bottom edges of the divider, as well as the sides and back of each shelf. Assemble the pieces as shown using glue and 1-1/4″ pocket hole screws. Position inside the cabinet as shown, then secure using glue and 1-1/4″ pocket hole screws.
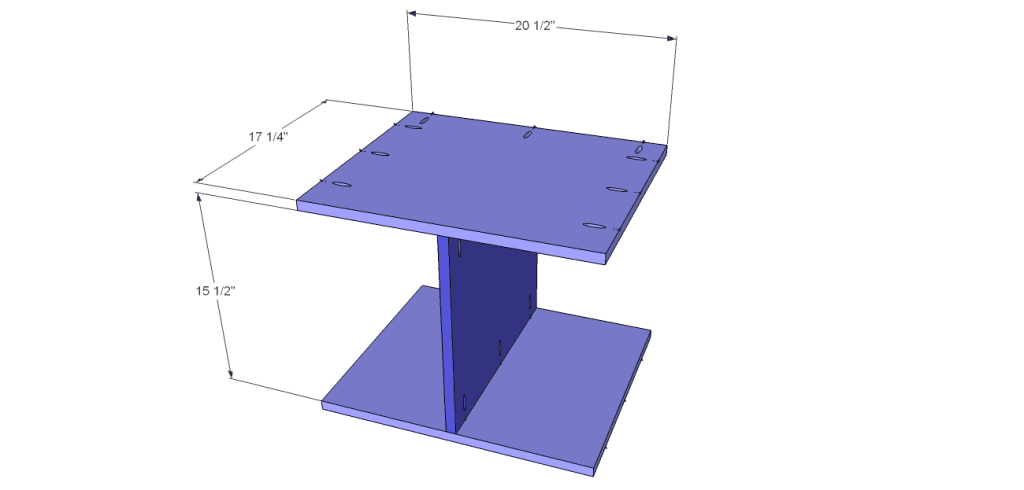
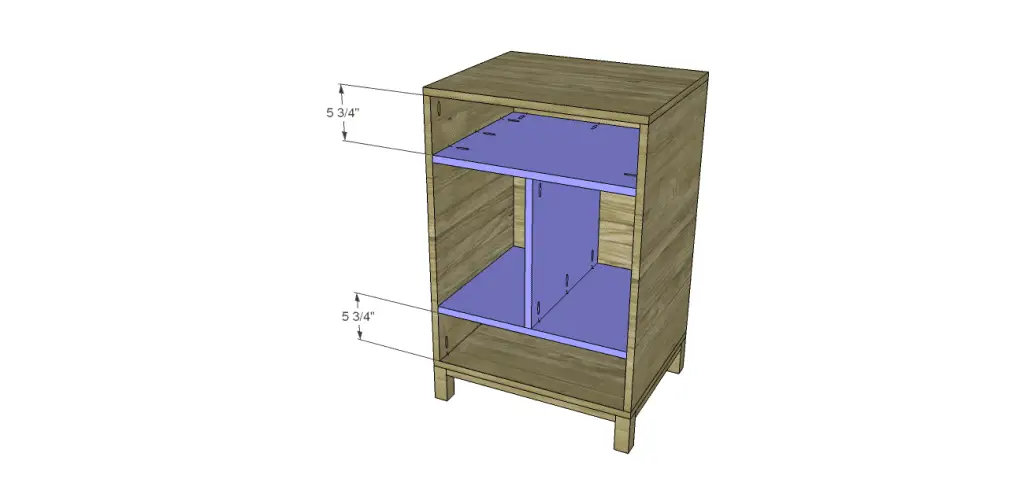
Step Seven
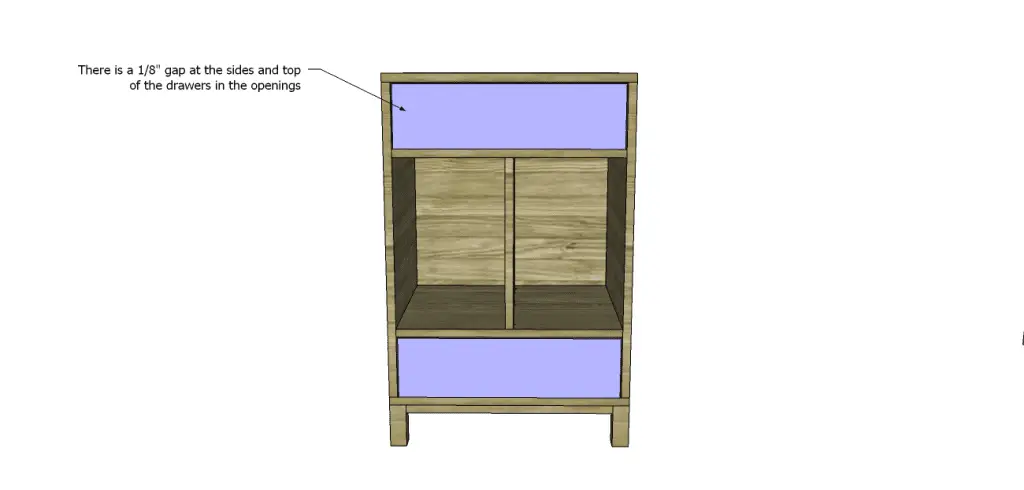
Cut the pieces for the drawer boxes. Drill pocket holes in all four edges of the bottom pieces, as well as each end of the sides. Assemble the drawers as shown. There will be a 1/8″ gap at the sides and top of the drawers in the openings.
Finish as desired. Apply a coat of paste wax to the bottom of the drawers so they will slide easily. Install the cabinet pulls.
Once again, these DIY vintage table plans are easy and perfectly suited for all skill levels from those who have just started woodworking to those who have been doing it forever! If you have questions or need help with the plans, contact me at cher {at} designsbystudioc {dot} com!
Originally posted 2013-10-30 08:00:22.


[…] this table is called a telephone table it has the perfect dimensions to be an end table. Build it using these free woodworking […]