DIY Plans to Build a Woodruff Cabinet
A Rustic Cabinet with Lots of Storage
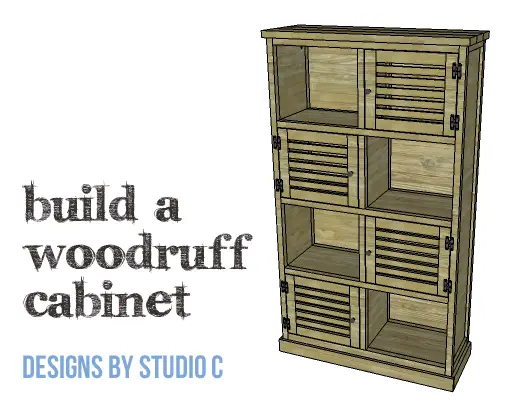
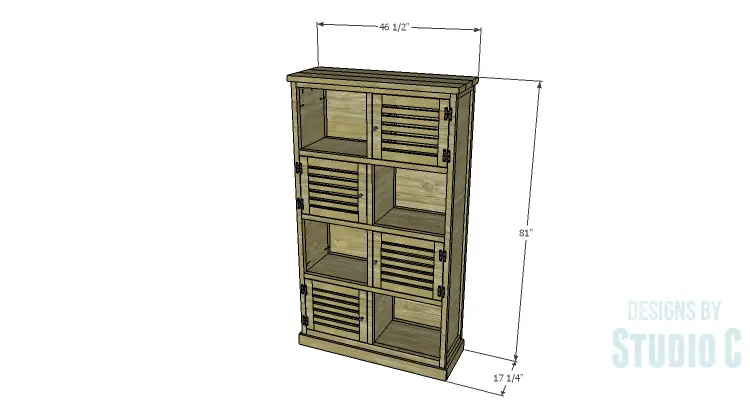
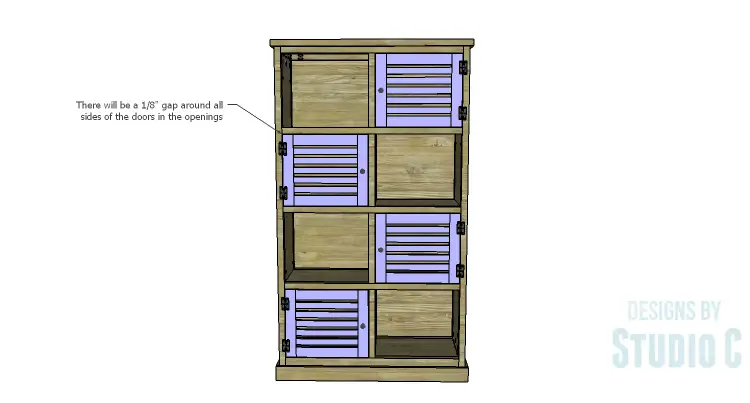
We can all use more storage, am I right? This cabinet will help solve any storage dilemma and keep it looking tidy in the process! The DIY plans to build a Woodruff Cabinet feature a total of eight cubbies – four with slatted doors – and a planked top with trim at the bottom. The doors can be installed on any of the cubbies desired: all on one side, all at the bottom or top, or staggered as shown in the image. Add a fabulous rustic finish and this will be a great piece for any room!
Materials:
- 1-1/4″ pocket hole screws (<– affiliate link!)
- 2-1/2″ pocket hole screws
- 1-1/2″ brad nails
- 2-1/2″ screws
- 8 sets of hinges
- 4 cabinet pulls
- Wood glue
- Sandpaper (100, 150, 220 grits)
- Finishing supplies (primer & paint, or stain, sealer)
Lumber:
- 1 – 1×2 at 4′
- 3 – 1×2 at 8′
- 4 – 1×3 at 6′
- 1 – 1×4 at 8′
- 8 – 2×2 at 8′
- 1 – 2×6 at 4′
- 1 – 2×6 at 8′
- 1 – 2×8 at 4′
- 2 – 2×8 at 8′
- 1 – 4′ x 8′ sheet of 1/4″ plywood
- 2 – 4′ x 8′ sheets of 3/4″ plywood
Cut List:
- 4 – 2×2 at 79-1/2″ – Legs
- 2 – 2×2 at 13-1/2″ – Upper Side Framing
- 2 – 2×6 at 13-1/2″ – Lower Side Framing
- 2 – 3/4″ plywood at 13-1/2″ x 72-1/2″ – Side Panels
- 8 – 2×2 at 42″ – Front & Back Stretchers
- 2 – 2×6 at 42″ – Lower Front & Back Stretchers
- 4 – 3/4″ plywood at 13-1/2″ x 42″ – Shelves
- 8 – 2×2 at 17″ – Front & Back Dividers
- 4 – 3/4″ plywood at 13-1/2″ x 17-3/4″ – Center Dividers
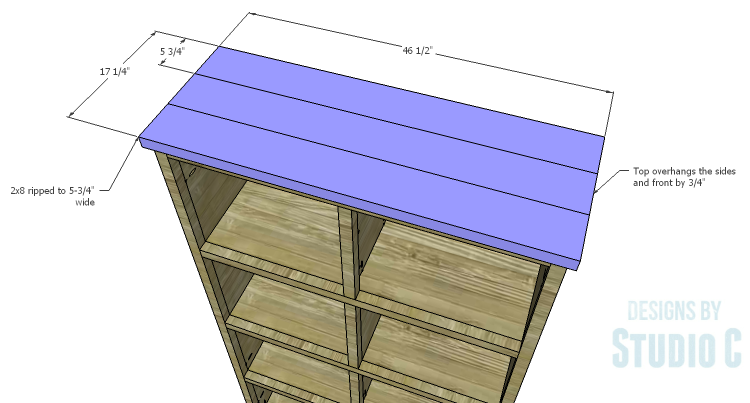
- 3 – 2×8 (ripped to 5-3/4″ wide) at 46-1/2″ – Top
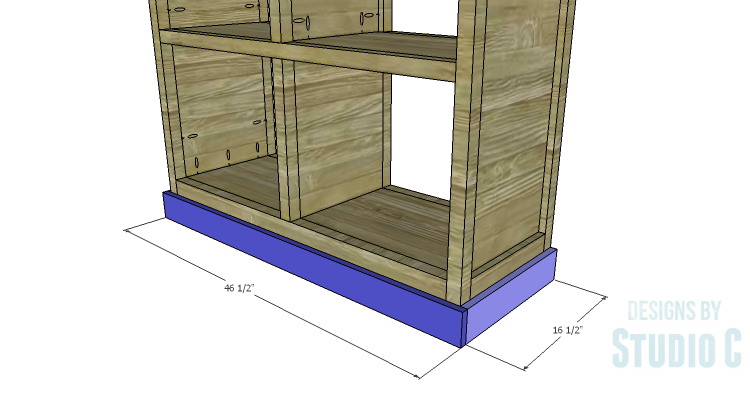
- 2 – 1×4 at 16-1/2″ – Lower Side Trim
- 1 – 1×4 at 46-1/2″ – Lower Front Trim
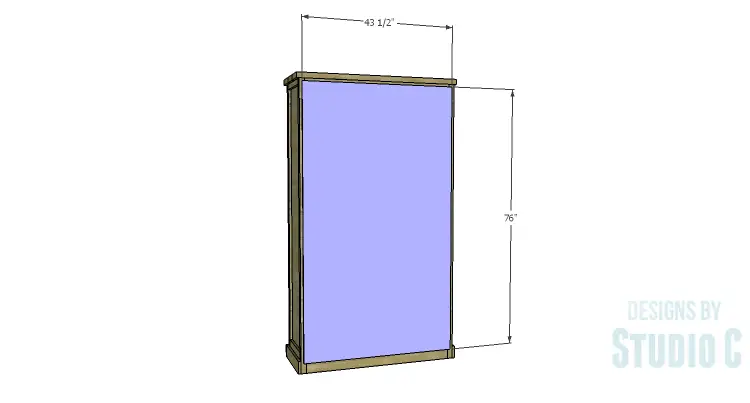
- 1 – 1/4″ plywood at 43-1/2″ x 76″ – Back
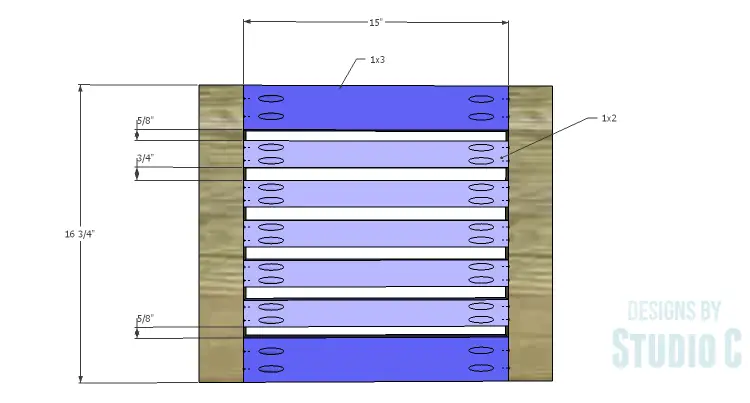
- 8 – 1×3 at 16-3/4″ – Door Stiles
- 8 – 1×3 at 15″ – Door Rails
- 20 – 1×2 at 15″ – Door Slats
Step One
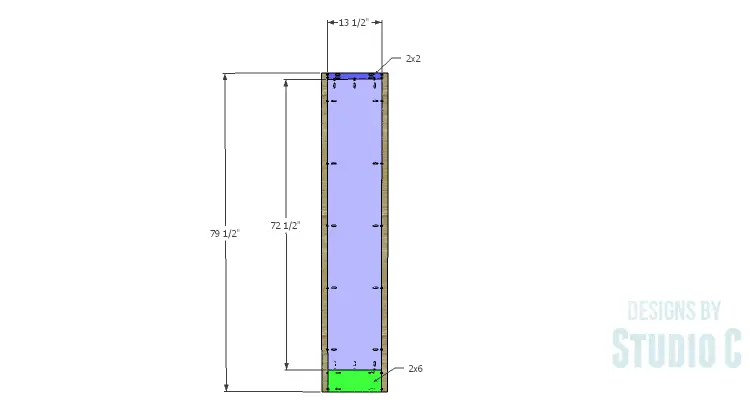
Cut the pieces for the legs, side framing and the side panels. With the pocket hole jig set for 1-1/2″ material, drill pocket holes in each end of the framing pieces. Secure the framing pieces to the legs using glue and 2-1/2″ pocket hole screws.
Set the pocket hole jig for 3/4″ material and drill pocket holes in all four edges of the side panels. Secure the panels inside the side frames using glue and 1-1/4″ pocket hole screws. The back faces of the panels will be flush with the inside faces of the side frames.
Step Two
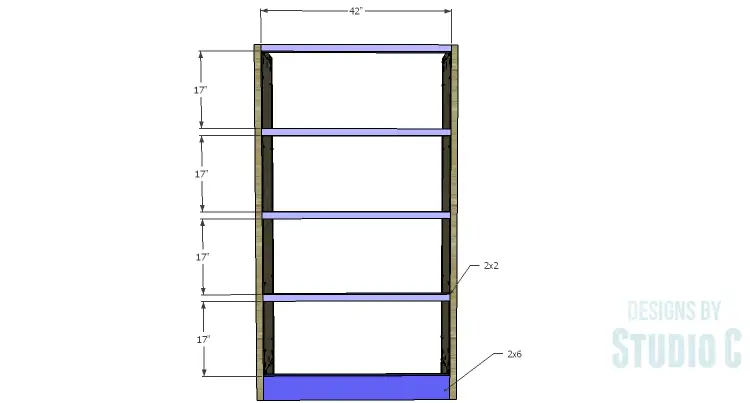
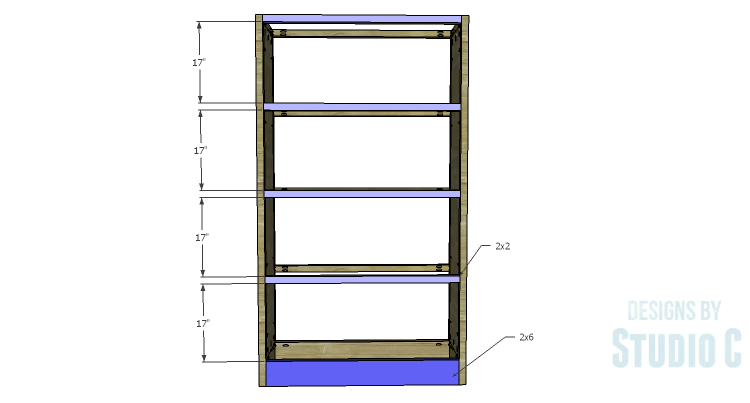
Cut the pieces for the front and back stretchers, and the lower front and back stretchers. Set the pocket hole jig for 1-1/2″ material and drill pocket holes in each end of each piece. Secure the stretchers to the legs using glue and 2-1/2″ pocket hole screws.
Step Three
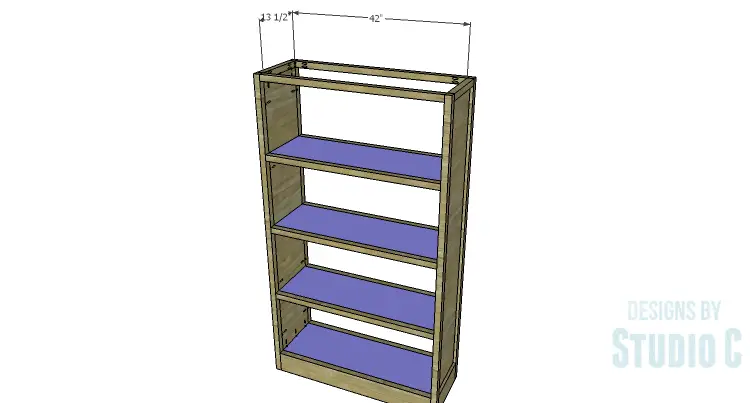
Cut the pieces for the shelves. Set the pocket hole jig for 3/4″ material and drill pocket holes in all four edges of each piece. Secure the shelves to the stretchers and the sides using glue and 1-1/4″ pocket hole screws. The top faces of the shelves will be flush with the top faces of the stretchers.
Step Four
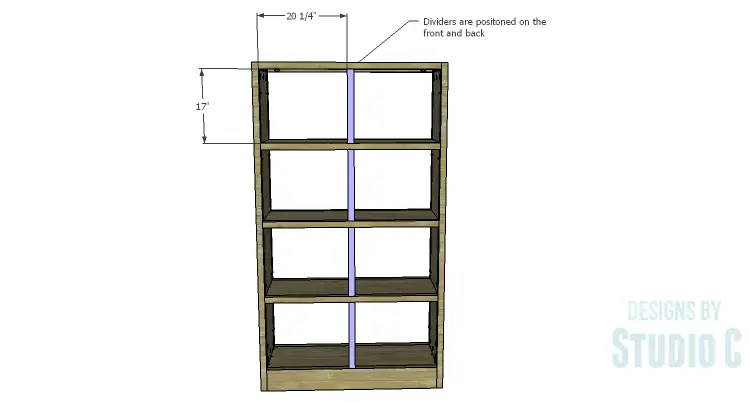
Cut the pieces for the front and back dividers. Set the pocket hole jig for 1-1/2″ material and drill pocket holes in each end of each piece. Secure the dividers to the stretchers using glue and 2-1/2″ pocket hole screws.
Step Five
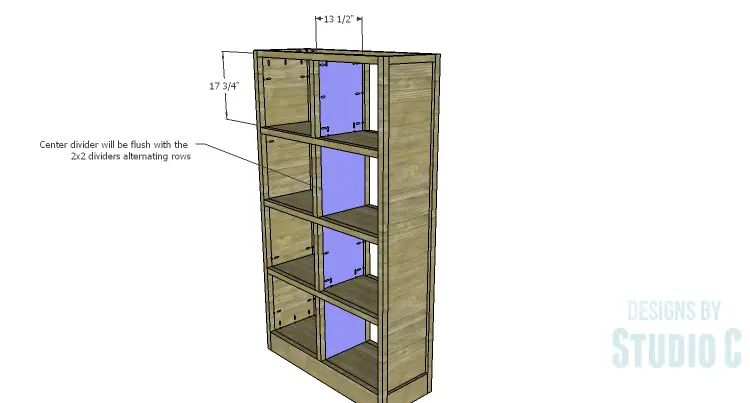
Cut the pieces for the center dividers. Set the pocket hole jig for 3/4″ material and drill pocket holes in all four edges of each piece. Secure the center dividers to the front and back dividers using glue and 1-1/4″ pocket hole screws. The outside face of each divider will be flush with the side face of the front and back dividers where the cabinet will be open. For example, if the top door will be on the left of the cabinet, the center divider will be flush with the side edge of the front and back dividers on the right side.
Step Six
Cut the pieces for the top. The front and sides will overhang by 3/4″ while the back edge will be flush with the back legs. Secure the pieces starting with the back piece using glue and countersunk 2-1/2″ screws through the top into the side framing.
Step Seven
Cut the pieces for the side and front trim. Install the side trim first, securing in place using glue and 1-1/2″ brad nails, then install the front trim.
Step Eight
Cut the piece for the back. Secure the back to the cabinet using glue and 1-1/2″ brad nails.
Step Nine
Cut the pieces for the doors. Drill pocket holes in each end of the door rails and the slats. Assemble the doors as shown using glue and 1-1/4″ pocket hole screws.
Once the door positions are determined, install the hinges on the doors, then install the doors in the cabinet. Install the cabinet pulls.
Finish as desired.
Large (locking) casters can be added to the bottom to make this cabinet portable. Have any questions about the DIY plans to build a Woodruff Cabinet? Leave a comment below!

