DIY Plans to Build a Valerie Nightstand
A Simple Nightstand to Build with a Mirrored Door
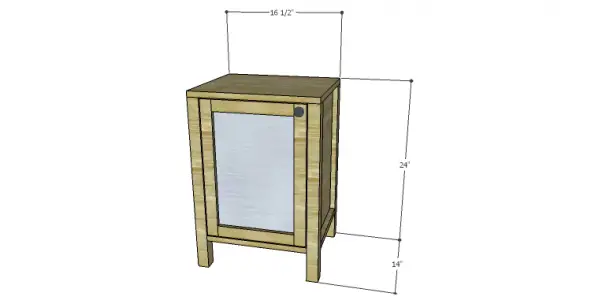
I really like the simplicity of this plan… The DIY plans to build a Valerie Nightstand feature a mirrored door and an inner shelf. The door hinges can be positioned on either side for a beautiful pair! This is a very quick and easy build that can be completed in a weekend!

Materials:
- 1-1/4″ pocket hole screws
- 1-1/2″ brad nails
- Edge banding, optional (<– affiliate link!)
- Mirror – 10-3/4″ x 15-3/4″
- Silicone for mirror installation
- 1 set of hinges
- 1 cabinet pull
- Wood glue
- Sandpaper (100, 150, 220 grits)
- Finishing supplies (primer & paint, or stain, sealer)
Lumber:
Lumber listed is for ONE nightstand
- 1 – 1×2 at 6′
- 1 – 2×2 at 8′
- 1 – 4′ x 4′ sheet of 3/4″ plywood
Cut List:
- 1 – 3/4″ plywood at 14″ x 16-1/2″ – Bottom
- 4 – 2×2 at 23-1/4″ – Legs
- 2 – 3/4″ plywood at 11″ x 18-1/2″ – Sides
- 1 – 3/4″ plywood at 13-1/2″ x 18-1/2″ – Back
- 1 – 3/4″ plywood at 11-3/4″ x 13-1/2″ – Shelf
- 1 – 3/4″ plywood at 14″ x 16-1/2″ – Top
- 2 – 1×2 at 10-1/4″ – Door Rails
- 2 – 1×2 at 18-1/4″ – Door Stiles
Step One
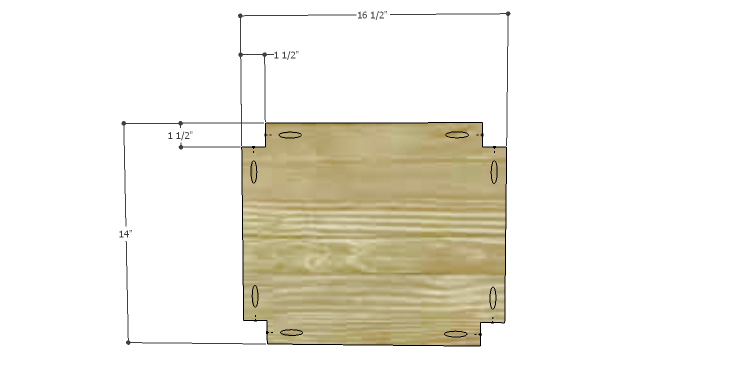
Edge banding will be applied to the exposed edges of the plywood prior to assembly.
Cut the piece for the bottom and cut the notches using a jigsaw or a bandsaw. Using a portable pocket hole jig set for 3/4″ material, drill pocket holes in the notches as shown.
Step Two
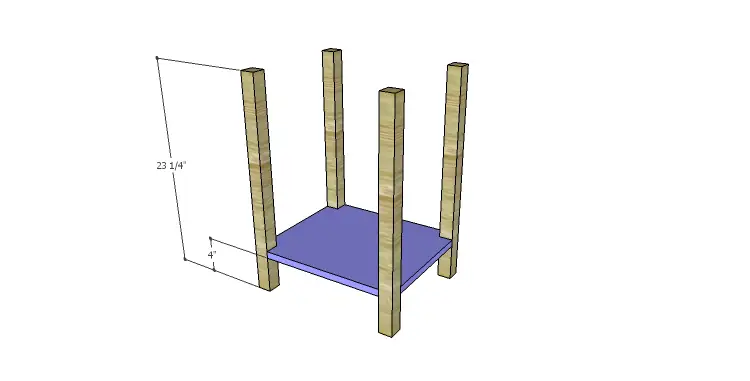
Cut the pieces for the legs. Position the bottom on the legs as shown (4″ up from the bottom of the legs) securing with glue and 1-1/4″ pocket hole screws.
Step Three
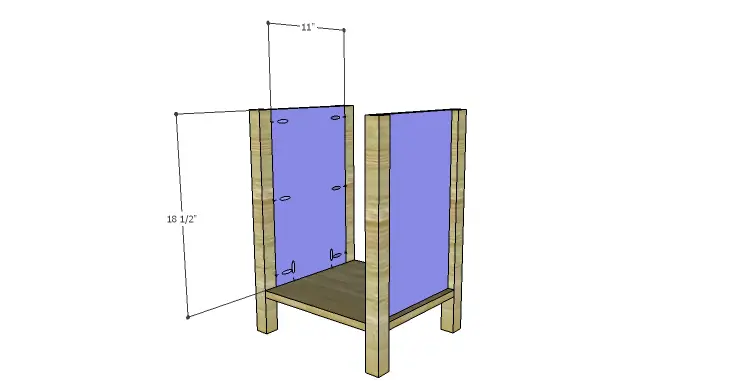
Cut the pieces for the sides. Drill pocket holes in the side and bottom edges. Secure the sides to the legs using glue and 1-1/4″ pocket hole screws. The inside face of the sides will be flush with the inside faces of the legs.
Step Four
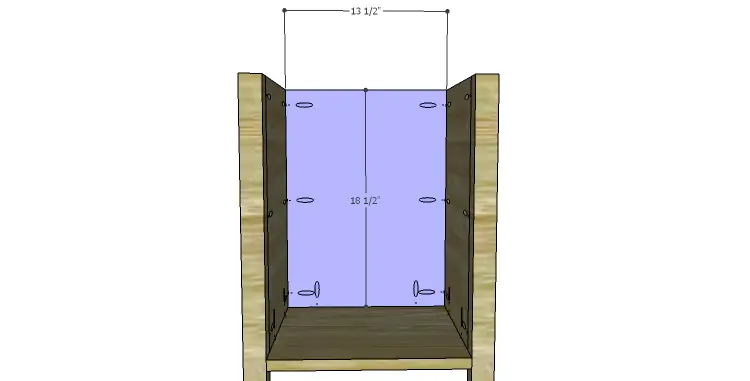
Cut the piece for the back. Drill pocket holes in the side and bottom edges. Secure the back to the legs using glue and 1-1/4″ pocket hole screws. The inside face of the back will be flush with the inside faces of the legs.
Step Five
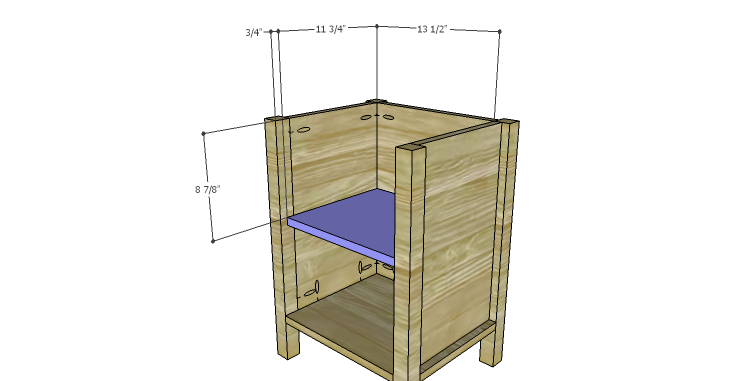
Cut the piece for the shelf. The shelf will be positioned flush with the back making it 3/4″ back from the front face of the legs to allow for the door. Drill pocket holes along the back edge of the shelf. Secure the shelf using glue and 1-1/4″ pocket hole screws into the back. Secure the sides of the shelf using 1-1/2″ brad nails through the sides into the shelf.
Step Six
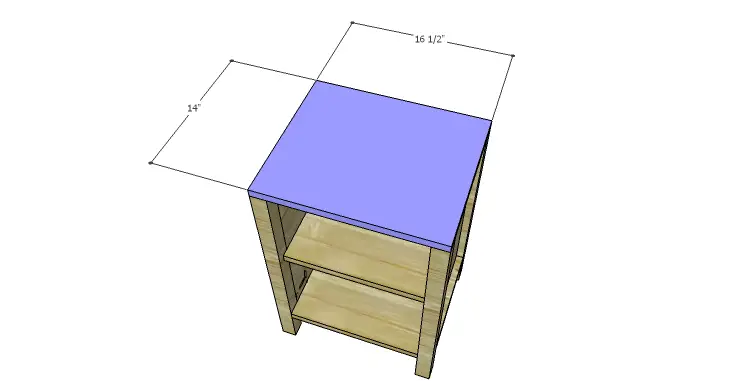
Cut the piece for the top. Secure the top using glue and 1-1/2″ brad nails.
Step Seven
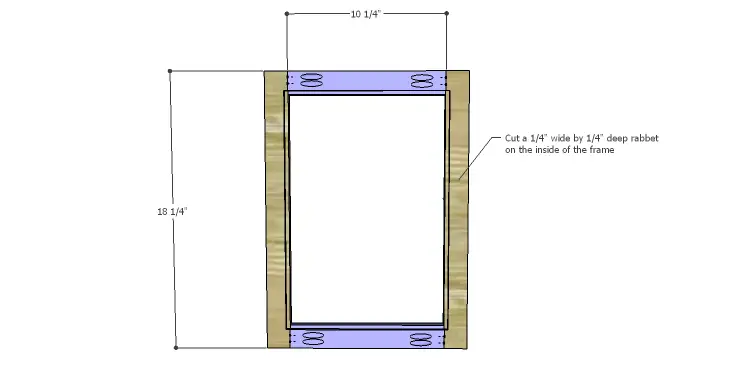
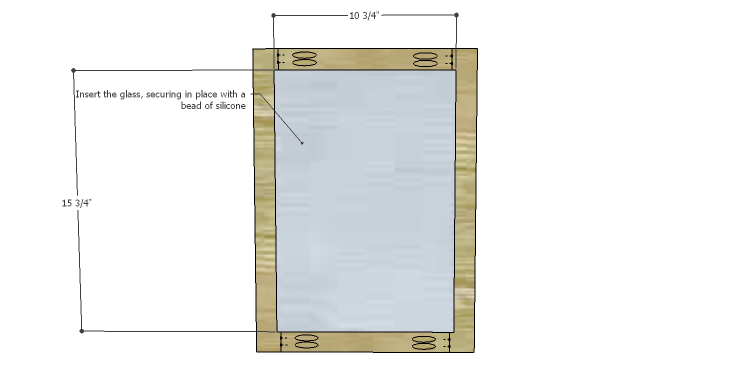
Cut the pieces for the door. Assemble the door using glue and 1-1/4″ pocket hole screws. Use a router and a 1/4″ rabbeting bit to cut a 1/4″ deep rabbet around the inside of the frame to allow for the mirror. Use a hammer and a chisel to square the corners of the rabbet.
Cut the piece of mirror to fit in the rabbet. Secure the mirror in place using a bead of silicone.
Step Eight
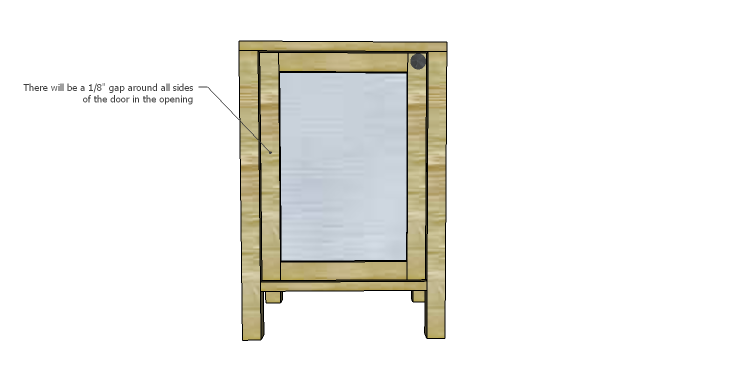
Install the hinges on the door, then install the door on the cabinet. Install the cabinet pull.
Finish as desired.
Glass, Plexiglas, or punched aluminum can be substituted for the mirror on the door. The nightstand would also make an excellent end table either alone or in a pair. Leave a comment below or contact me at cher {at} designsbystudioc {dot} com if there are questions about the DIY plans to build a Valerie Nightstand!
Originally posted 2014-10-16 08:00:26.


[…] Nightstand free building planThis night stand can be built in a weekend and features a mirrored door and an inner shelf. Here are the free woodworking plans. […]