
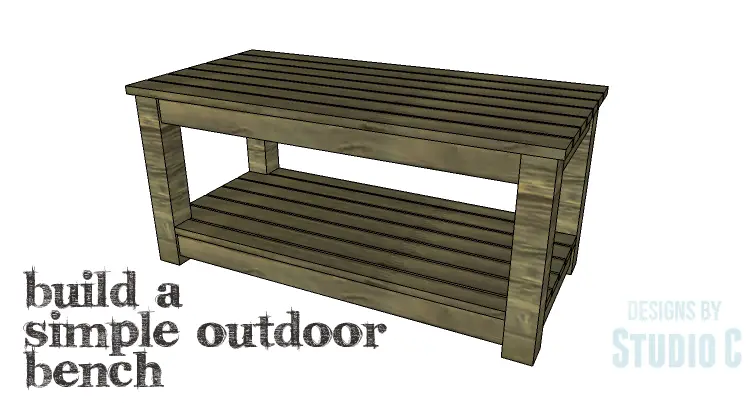
DIY Furniture Plans to Build a Simple Outdoor Bench
Easy to Build Seating for the Outdoors
I love being outdoors, especially when I have fabulous outdoor furniture upon which to enjoy the outdoors! The DIY furniture plans to build a Simple Outdoor Bench are perfect for those new to woodworking, featuring doubled stretchers and built out of off-the-shelf treated lumber. This is an easy project that can be completed in a day with no extra finishing required!
Materials:
- 1-1/4″ pocket hole screws for outdoor use (<– affiliate link!)
- 1-1/2″ screws for outdoor use
- Wood glue for outdoor use
- Sandpaper (100, 150, 220 grits)
Lumber:
- 1×3
- 3×3 posts (4×4 posts can be trimmed on the tablesaw or 2 – 2x4s glued together and trimmed on the tablesaw will also work!)
Cut List:
- 4 – 3×3 at 17-1/4″ – Legs
- 8 – 1×3 at 33″ – Side Stretchers
- 12 – 1×3 at 13″ – End Stretchers & Supports
- 2 – 1×3 (ripped to 2-1/4″ wide) at 33″ – Outer Slats
- 5 – 1×3 at 38″ – Notched & Center Slats
- 7 – 1×3 at 39″ – Seat Slats
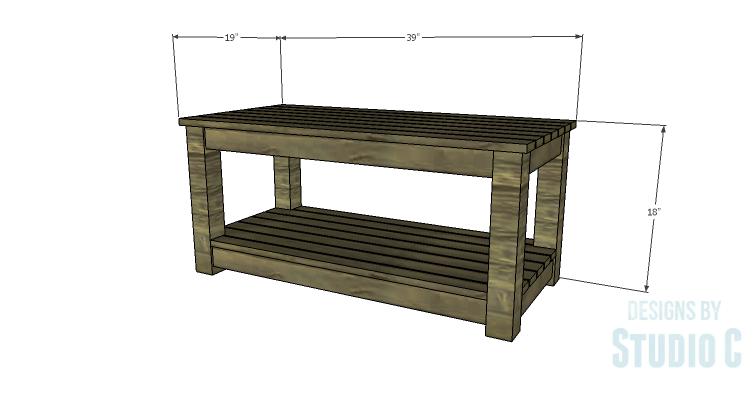
Click on the drawings for a larger view!
Step One
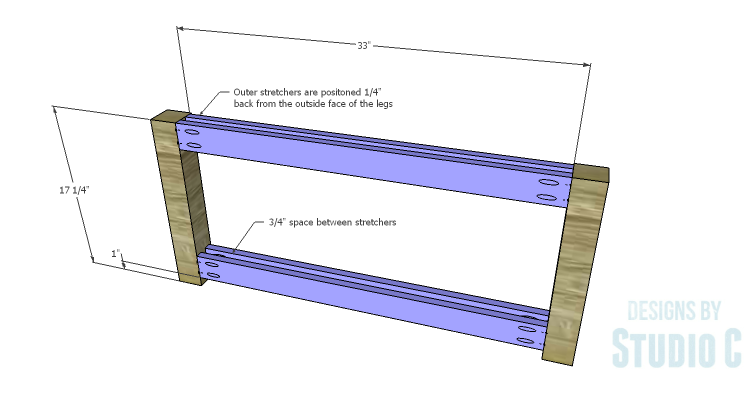
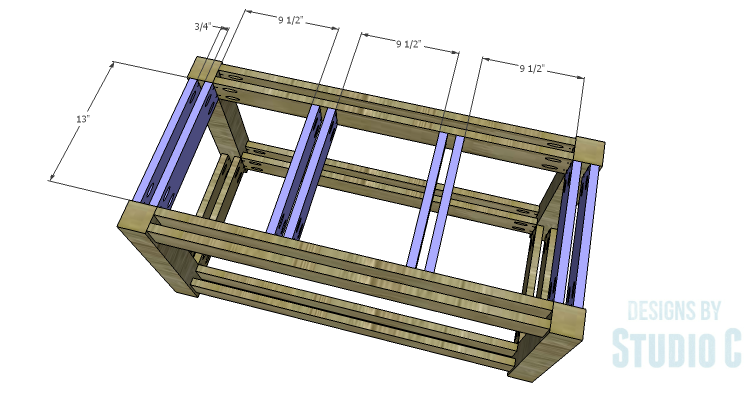
Cut the pieces for the legs and side stretchers. With the pocket hole jig set for 3/4″ material, drill pocket holes in each end of the stretcher pieces. Secure the stretchers to the legs using glue and 1-1/4″ exterior pocket hole screws.
It will be easier to start with securing the outer stretchers then moving inward. The outer stretchers are located 1/4″ in from the outside face of the legs. The inner stretchers are positioned so they are flush with the inside face of the legs, which will leave a 3/4″ space between the stretchers.
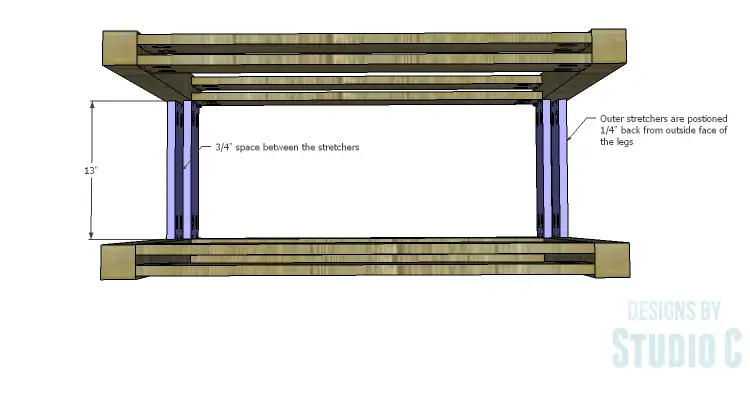
Step Two
Cut the pieces for the end stretchers and the supports, and drill pocket holes in each end. The stretchers will be secured using glue and 1-1/4″ exterior pocket hole screws in the same manner as the side stretchers – located 1/4″ back from the outside face of the legs, and flush with the inside of the legs. The supports will be positioned as shown.
Step Three
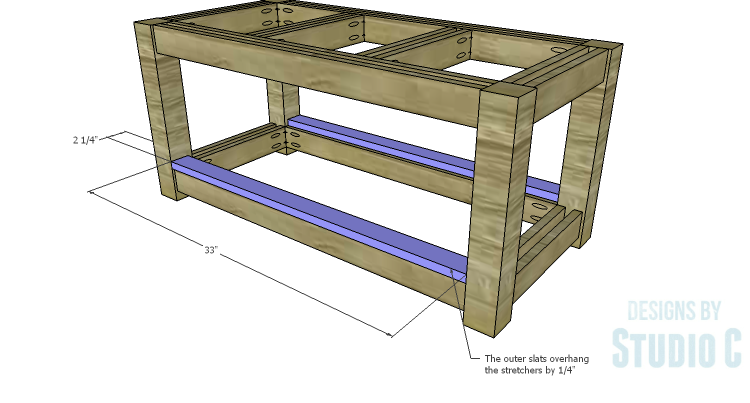
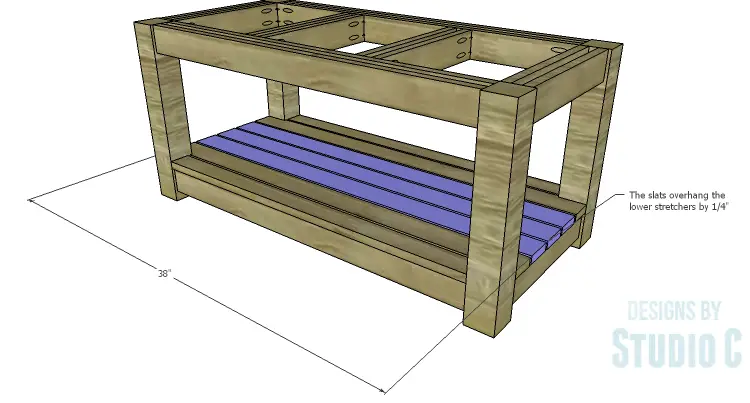
Cut the pieces for the outer slats. Secure the slats to the lower stretchers – the outside edge of the slats will be flush with the outside face of the legs – using glue and 1-1/2″ exterior screws.
Step Four
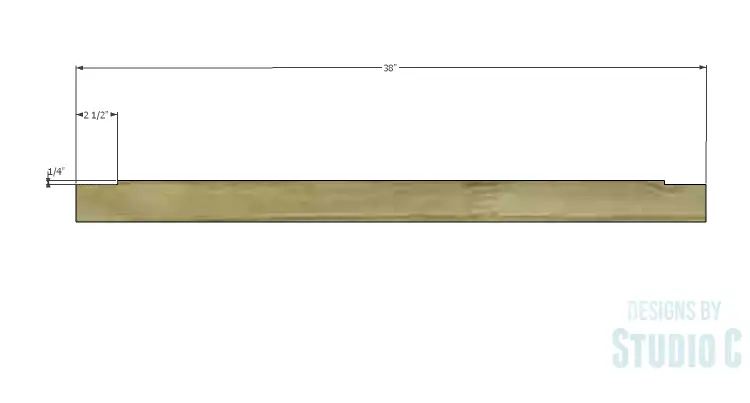
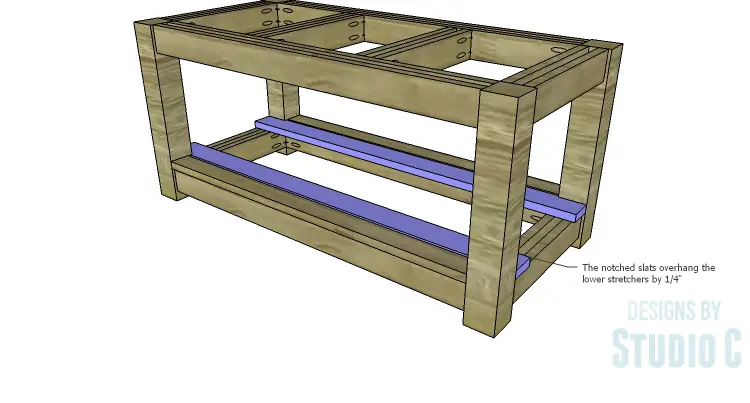
Cut the pieces for the remaining slats. Two of the slats will have notches cut in them to fit around the legs. There will be a 1/4″ space between the notched slats and the outer slats, and they will be secured to the stretchers using glue and 1-1/2″ exterior screws.
Secure the remaining slats with a 1/4″ space between them using glue and 1-1/2″ exterior screws.
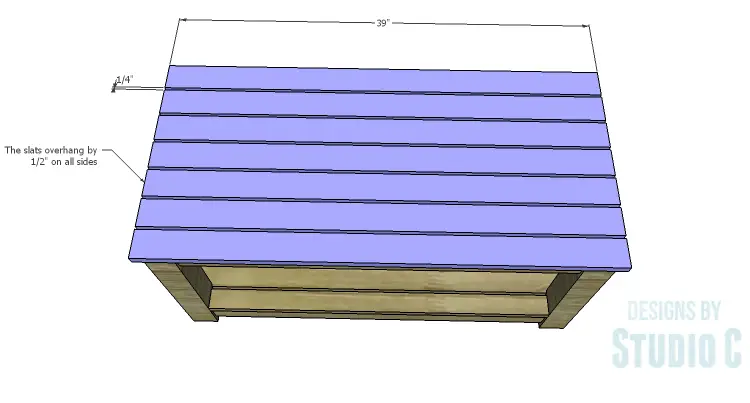
Step Five
Cut the pieces for the seat slats. The slats will overhang the seat frame by 1/2″ on all sides, and will have a 1/4″ space between each slat. Secure the slats to the stretchers and supports using glue and 1-1/2″ exterior screws.
Though this bench doesn’t need any further finishing when using treated lumber, the lumber can be painted or stained once the chemicals dry, if desired! The bench will be fabulous for warm weather entertaining or even for relaxing by a fire! Have any questions about the DIY furniture plans to build a Simple Outdoor Bench? Leave a comment below!
Originally posted 2015-02-27 08:00:26.

[…] Bench free woodworking plan.Build this bench for extra outdoor seating out of pressure treated lumber and these free step-by-step woodworking […]