
Plans to Build a Reese Nightstand Side Table
An Easy to Build Table Inspired by Ballard Designs
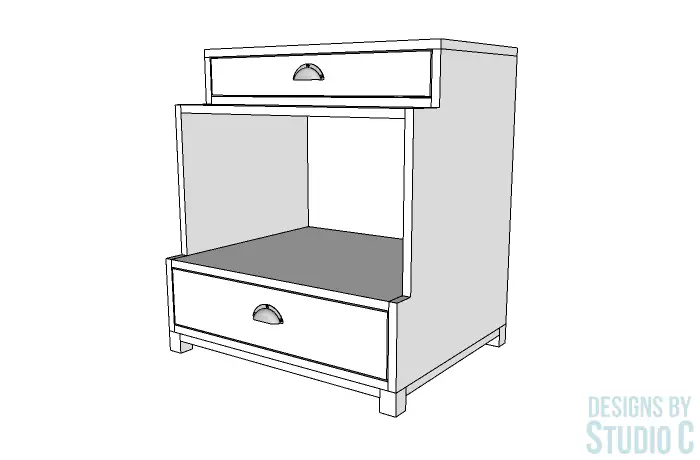
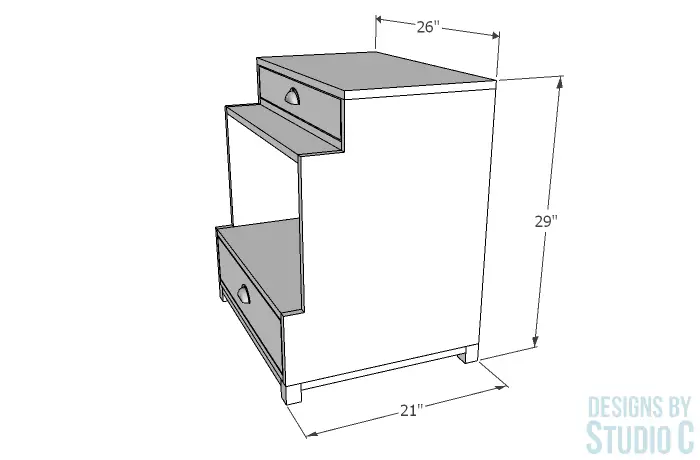
This table is such a great design and is truly perfect in any room! The table features a ton of storage and space, and the plans to build a Reese nightstand side table are inspired by Ballard Designs. There is a drawer at the top, a cubby in the middle and a larger drawer on the bottom. This little gem is mainly constructed out of plywood with a solid wood frame on the bottom making for an inexpensive build!
Materials:
- 1-1/4″ pocket hole screws
- 1-1/2″ brad nails
- Edge banding (<– affiliate link!)
- One set of 18″ drawer slides (<– affiliate link!)
- One set of 14″ drawer slides (<– affiliate link!)
- Two drawer handles
- Wood glue
- Sandpaper & Finishing Supplies
Lumber:
- 2 – 1×2 at 8′
- Scrap 1×4 at 24-1/2″
- Scrap 1×6 at 24-1/2″
- Scrap 2×2 at 9″
- 1 – 4′ x 8′ sheet of 1/4″ plywood
- 2 – 4′ x 8′ sheets of 3/4″ plywood
Cut List:
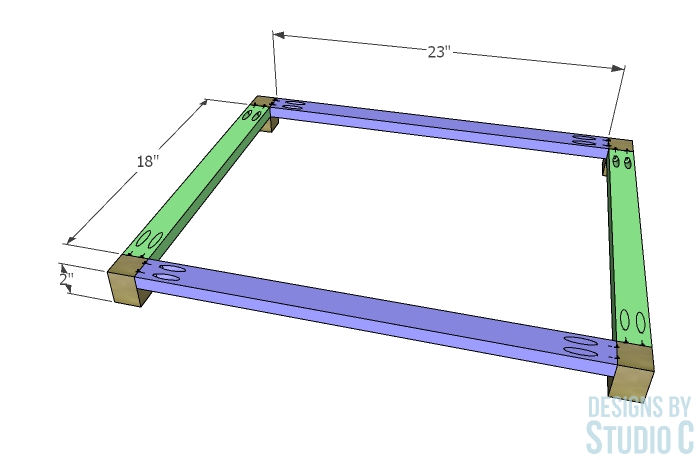
- 4 – 2×2 at 2″ – Base Feet
- 2 – 1×2 at 18″ – Base Framing
- 2 – 1×2 at 23″ – Base Framing
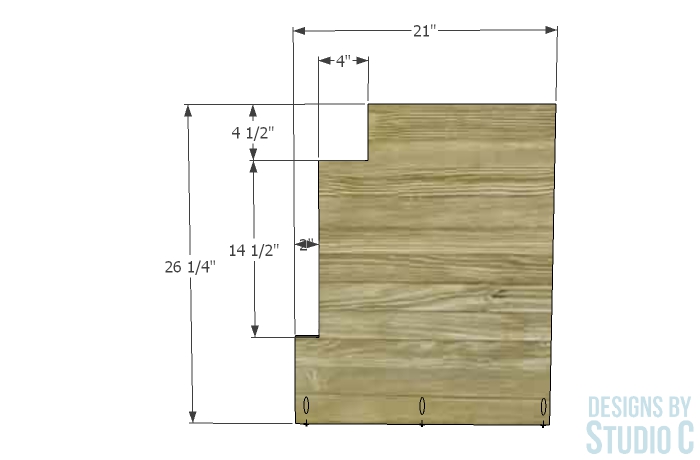
- 2 – 3/4″ plywood at 26-1/4″ x 21″ – Sides
- 2 – 3/4″plywood at 24-1/2″ x 21″ – Bottom & Lower Shelf
- 1 – 3/4″ plywood at 24-1/2″ x 19″ – Upper Shelf
- 2 – 1×2 at 24-1/2″ – Drawer Spacers
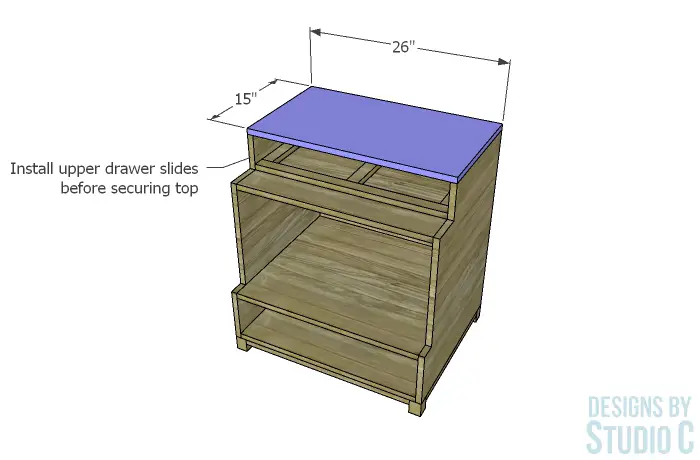
- 1 – 3/4″plywood at 26″ x 15″ – Top
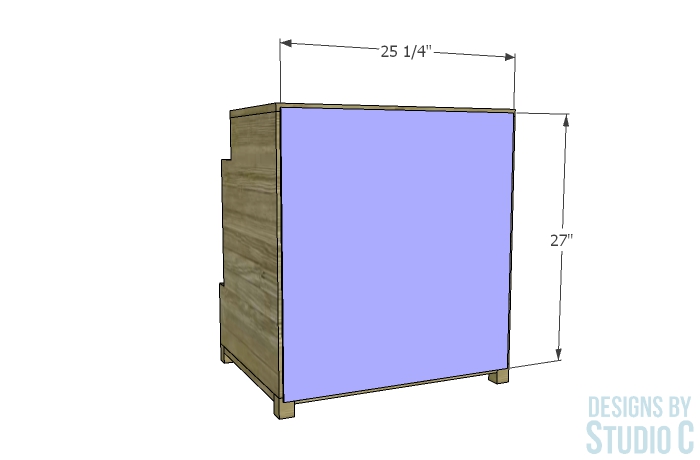
- 1 – 1/4″ plywood at 27″ x 25-1/4″ – Back
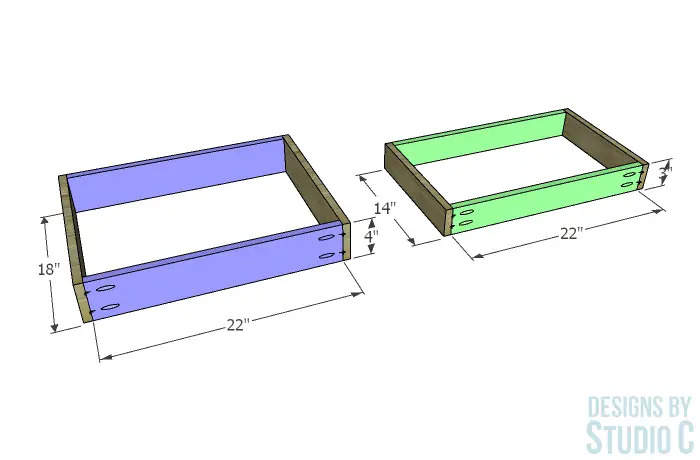
- 2 – 3/4″ plywood at 14″ x 3″ – Upper Drawer Sides
- 2 – 3/4″ plywood at 22″ x 3″ – Upper Drawer Front & Back
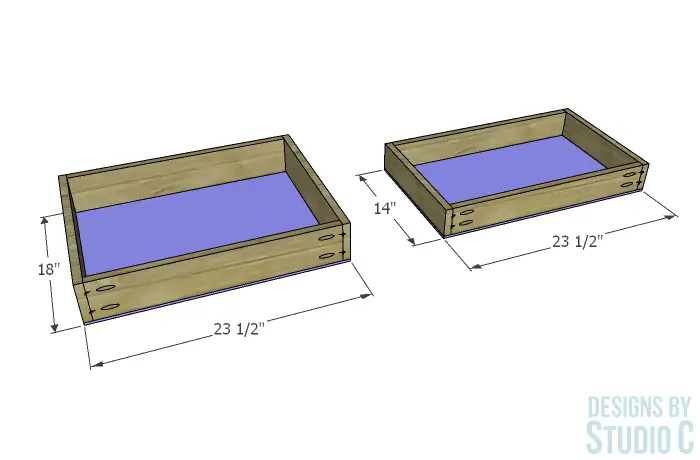
- 1 – 1/4″ plywood at 23-1/2″ x 14″ Upper Drawer Bottom
- 2 – 3/4″ plywood at 18″ x 4″ – Lower Drawer Sides
- 2 – 3/4″ plywood at 22″ x 4″ – Lower Drawer Front & Back
- 1 – 1/4″ plywood at 23-1/2″ x 18″ – Lower Drawer Bottom
- 1 – 1×4 at 24-1/4″ – Upper Drawer Front
- 1 – 1×6 at 24-1/4″ – Lower Drawer Front
Notes About the Project:
- Edge banding will be applied to the exposed edges of the plywood prior to assembly
- Sand all pieces thoroughly prior to assembly
- Either style of drawer slides can be used: ball bearing OR bottom mount
- Refer to the drawings for shelf placement and construction information
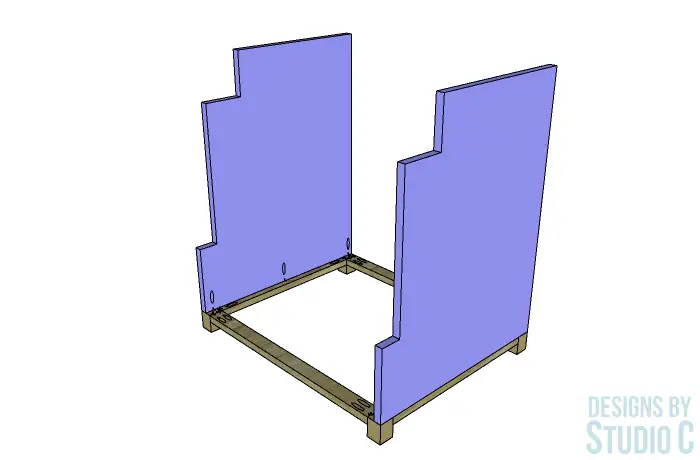
Step One
Cut the pieces for the base. With the pocket hole jig set for 3/4″ material, drill pocket holes in each end of the 1×2 pieces. Secure the 1x2s to the 2×2 feet using glue and 1-1/4″ pocket hole screws.
Step Two
Mark and cut the pieces for the sides. Drill pocket holes in the lower edge of each piece on the inside faces, and secure the sides to the base using glue and 1-1/4″ pocket hole screws. The outside faces of the sides will be flush with the outside edges of the base.
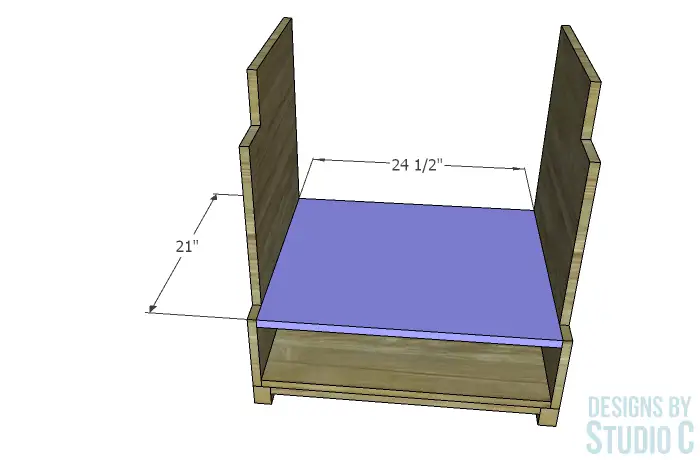
Step Three
Cut the piece for the bottom shelf. Secure the bottom shelf in place using glue and 1-1/2″ brad nails. Install the drawer slides for the lower drawer before moving on to the next step.

Step Four
Cut the piece for the lower shelf. Secure the lower shelf to the sides using glue and 1-1/2″ brad nails from the outside. (The piece can be clamped in place prior to nailing!)
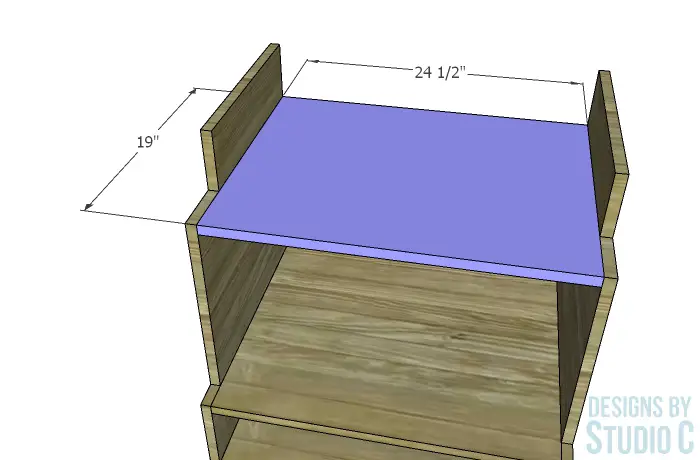
Step Five
Cut the piece for the upper shelf. Secure the upper shelf to the sides using glue and 1-1/2″ brad nails from the outside.
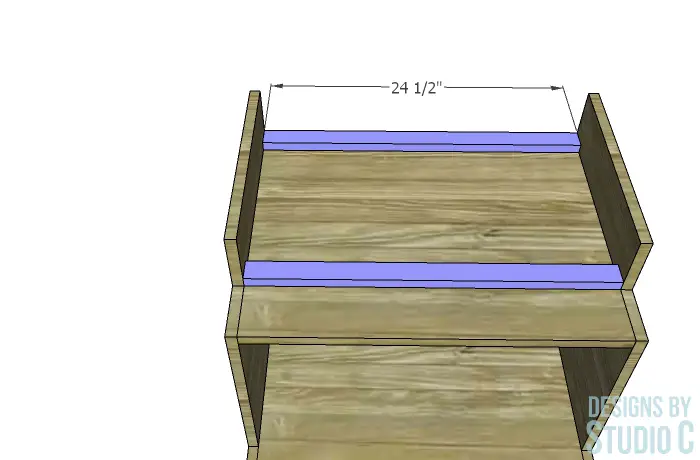
Step Six
Cut the pieces for the drawer spacers. Secure the spacers to the upper shelf, as shown, using glue and 1-1/2″ brad nails. Install the drawer slides for the upper drawer before securing the top.
Step Seven
Cut the piece for the top, and secure it to the sides using glue and 1-1/2″ brad nails.
Step Eight
Cut the piece for the back. Center the piece on the back side of the table, securing in place with 1-1/2″ brad nails.
Step Nine
Cut the pieces for the drawers. Drill pocket holes in each end of the longer drawer pieces. Assemble the drawers, as shown in the drawing, using glue and 1-1/4″ pocket hole screws.
Cut the pieces for the drawer bottoms then secure in place using glue and 1-1/2″ brad nails. Install the other half of the drawer slides on the drawer boxes. Insert the drawer boxes into the openings.
Step Ten
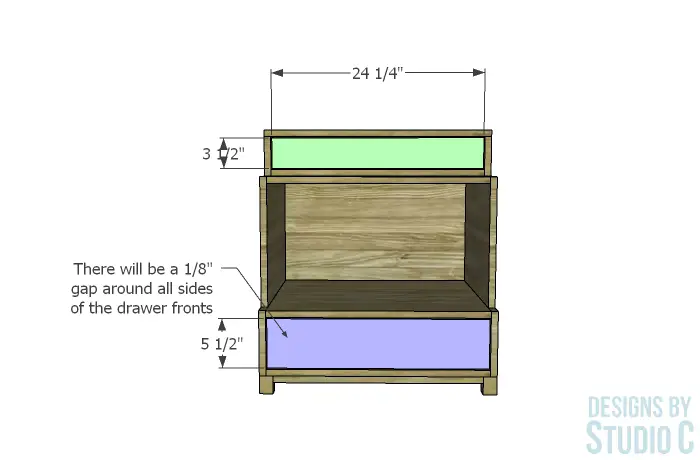
Cut the pieces for the drawer fronts. Mark the position for the handle and drill holes for placement. There will be a 1/8″ gap around all sides of the fronts in the openings. Once the drawer front is in position, drive screws through the holes for the handle then open the drawer. Secure the drawer front from the inside using 1-1/4″ screws. Remove the screws on the outside (in the holes drilled for the handle) and finish drilling the hole all the way through. Install the drawer handle.
Finish the table as desired.
Have questions about the plans to build a Reese nightstand side table? Leave a comment below!
Other Plans to Build a Side Table or Nightstand Similar to the Reese Nightstand Side Table:
Originally posted 2020-11-05 12:54:06.
