DIY Plans to Build a Door Chalkboard
Make To-Do Lists and Menus Look Fabulous with This Neat Chalkboard!
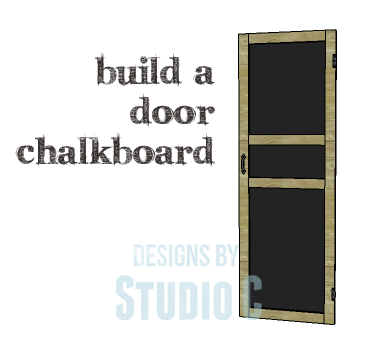
This chalkboard has to be one of the easiest builds ever! There are no fancy skills needed, and making the whole project even easier is the use of ready-made chalkboard panels! The DIY plans to build a Door Chalkboard can be completed in an afternoon and would be awesome hung on a wall!
Materials:
- 1-1/4″ pocket hole screws (<– affiliate link!)
- 5/8″ brad nails
- Decorative hinges (for decoration only)
- 1 – decorative lockset or doorknob
- Wood glue
- Sandpaper (100, 150, 220 grits)
- Finishing supplies (primer & paint, or stain, sealer)
Lumber:
- 2 – 1×3 at 6′
- 1 – 1×3 at 8′
- 2 – 2′ x 4′ chalkboard panels
Cut List:
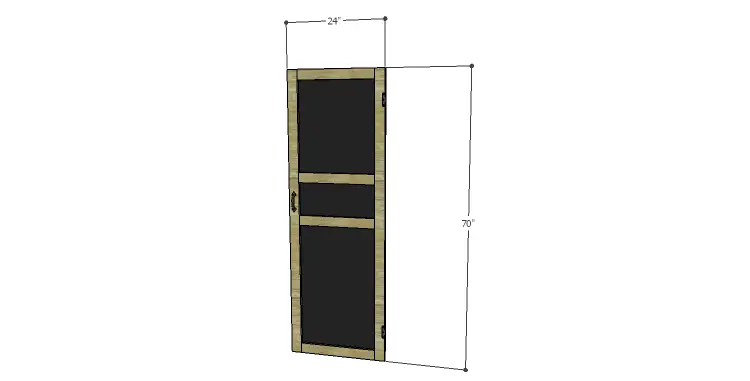
- 2 – 1×3 at 70″ – Door Frame
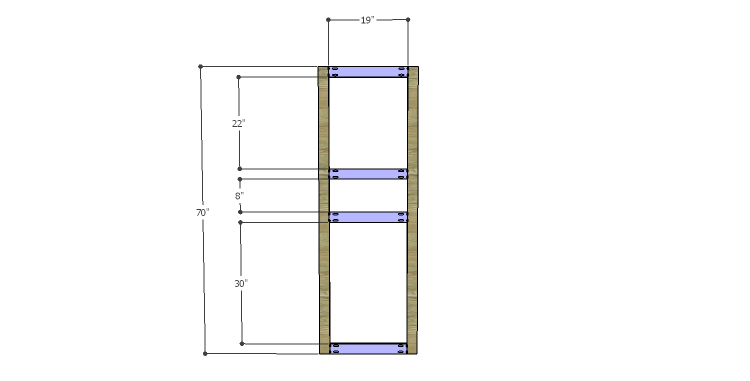
- 4 – 1×3 at 19″ – Door Frame
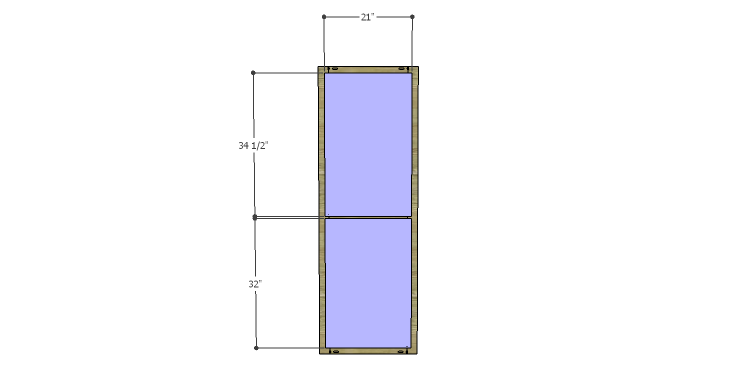
- 1 – 1/4″ chalkboard panel at 21″ x 32″ – Lower Panel
- 1 – 1/4″ chalkboard panel at 21″ x 34-1/2″ – Upper Panel
Step One
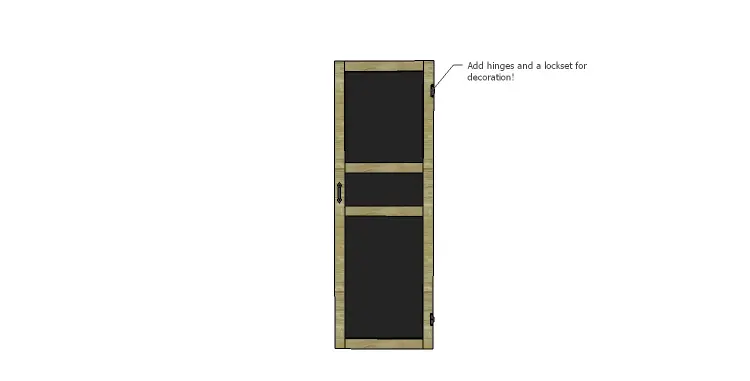
Cut the pieces for the door frame. With the pocket hole jig set for 3/4″ material, drill pocket holes in each end of the shorter pieces. Assemble the door frame using glue and 1-1/4″ pocket hole screws.
Finish the frame as desired.
Step Two
Cut the pieces for the chalkboard panels. The panels will overlap the openings by 1″ on all sides. Secure the panels using glue and 5/8″ brad nails.
Step Three
Install the decorative hinges and the lockset or doorknob.
This is a project that is perfect for those new to woodworking and the chalkboard will work well in any room – the kitchen, family room, entryway or mudroom, kids’ room! It is so easy and inexpensive, that I’m sure you’ll want to build several! Have any questions about the DIY plans to build a Door Chalkboard? Leave a comment below!

