
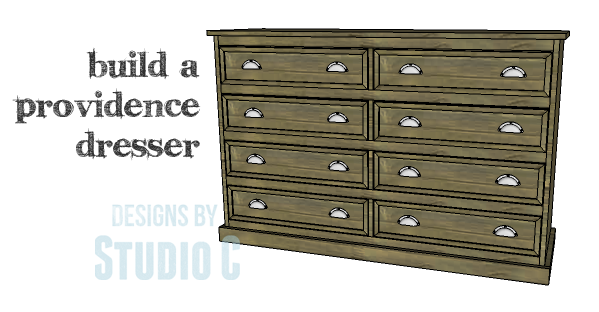
Plans to Build a Providence Dresser
DIY Furniture Plans – A Dresser with Trim Detail on the Drawers
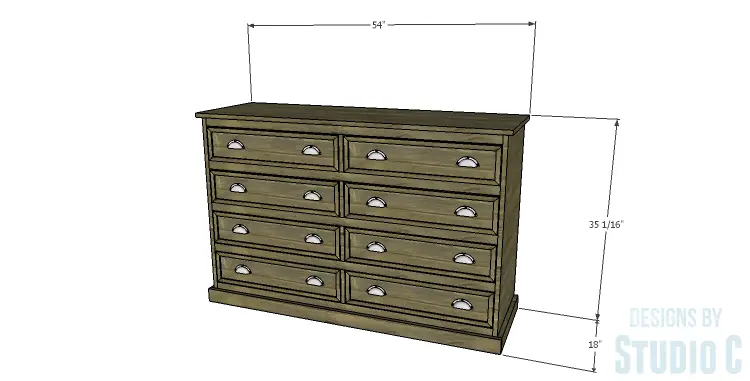
In my opinion, you can never have enough drawers in a dresser! The DIY plans for the Providence Dresser are just perfect, as they include eight drawers with lovely trim detail on each front. Building this dresser is a breeze, and it will definitely add a touch of fabulousness to any room!
Materials:
- 1-1/4″ pocket hole screws
- 5/8″ brad nails
- 1-1/4″ brad nails
- Edge banding, optional
- 8 sets of 14″ drawer slides
- Cabinet pulls
- Wood glue
- Sandpaper (100, 150, 220 grits)
- Finishing supplies (primer & paint, or stain, sealer)
Lumber:
- 1 – 1×2 at 6′
- 3 – 1×2 at 10′
- 1 – 1×3 at 8′
- 1 – 4′ x 8′ sheet of 1/4″ plywood
- 1 – 4′ x 4′ sheet of 3/4″ plywood
- 2- 4′ x 8′ sheet of 3/4″ plywood
- 1/4″ x 3/4″ stop for the trim on the doors (found in the moulding section of most home improvement stores)
Cut List:
- 2 – 3/4″ plywood at 17″ x 34-5/16″ – Sides
- 1 – 3/4″ plywood at 17″ x 51″ – Bottom
- 7 – 1×2 at 51″ – Lower Supports & Stretchers
- 1 – 3/4″ plywood at 17″ x 32-1/16″ – Divider
- 1 – 3/4″ plywood at 17-3/4″ x 54″ – Top
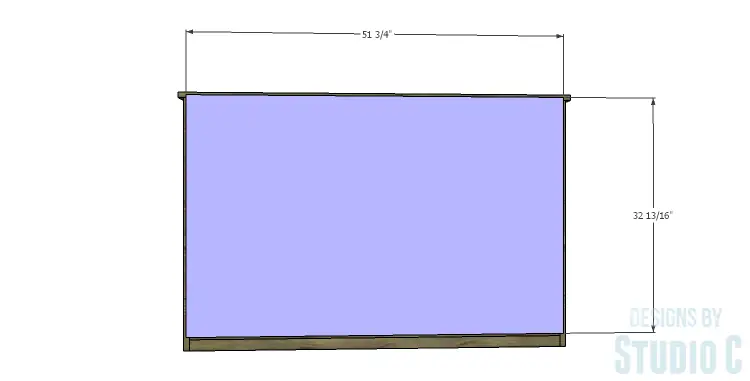
- 1/4″ plywood at 32-13/16″ x 51-3/4″ – Back
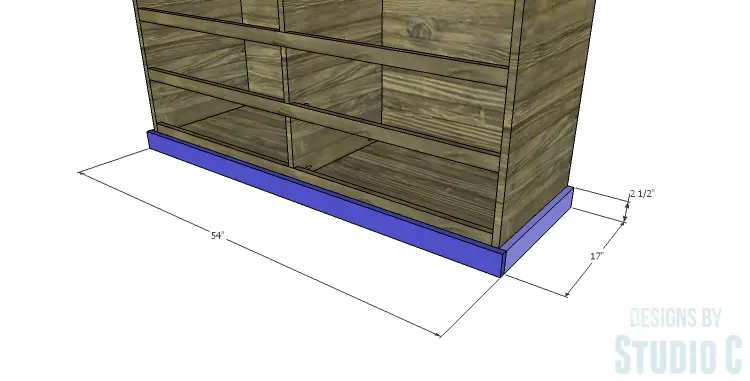
- 2 – 1×3 at 17″ – Lower Trim
- 1 – 1×3 at 54″ – Lower Trim
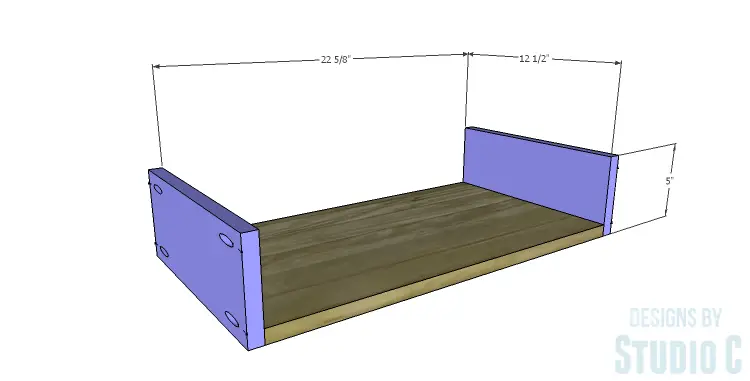
- 8 – 3/4″ plywood at 12-1/2″ x 22-5/8″ – Drawer Box Bottoms
- 16 – 3/4″ plywood at 5″ x 12-1/2″ – Drawer Box Sides
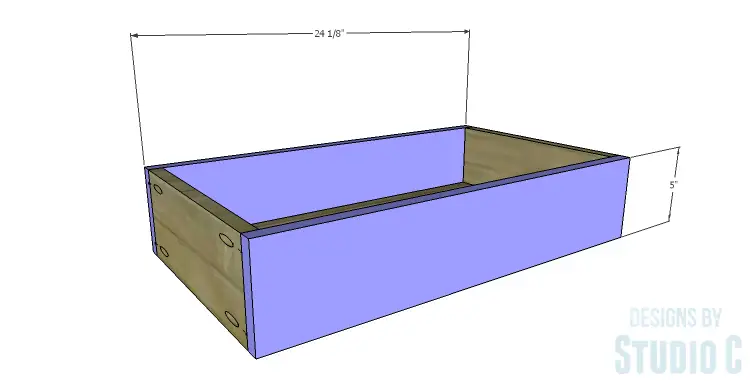
- 16 – 3/4″ plywood at 5″ x 24-1/8″ – Drawer Box Front & Back
- 8 – 3/4″ plywood at 5-7/8″ x 24-7/8″ – Drawer Front Base
- 16 – 1/4″ x 3/4″ stop at 24-7/8″ – Drawer Trim
- 16 – 1/4″ x 3/4″ stop at 5-7/8″ – Drawer Trim
Step One
Edge banding will be applied to the exposed edges of the plywood prior to assembly.
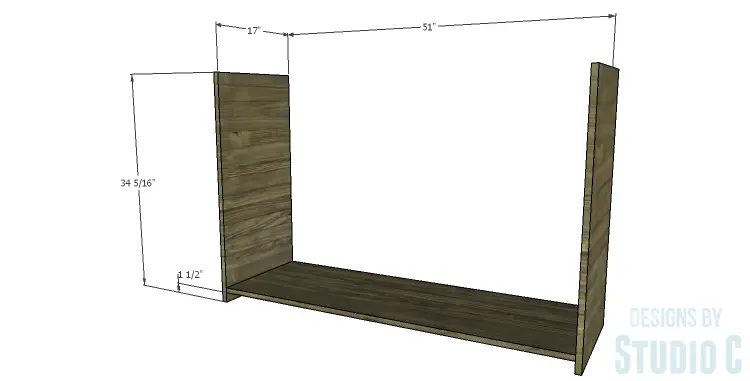
Cut the pieces for the sides and the bottom. With the pocket hole jig set for 3/4″ material, drill pocket holes in each end of the bottom piece. Secure the bottom to the sides as shown using glue and 1-1/4″ pocket hole screws.
Step Two
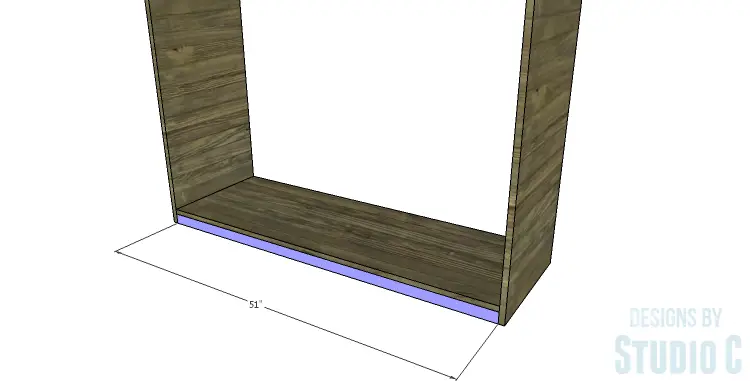
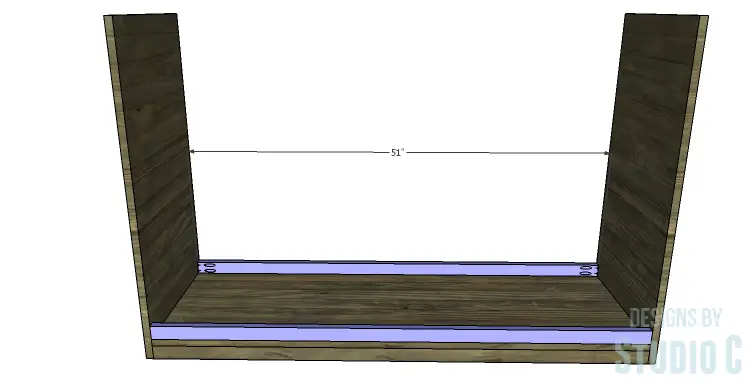
Cut the pieces for the lower supports and the stretchers. Drill pocket holes in each end. Secure two of the pieces (the lower supports) to the sides under the bottom using glue and 1-1/4″ pocket hole screws.
Secure the lower stretchers to the sides above the bottom using glue and 1-1/4″ pocket hole screws.
Step Three
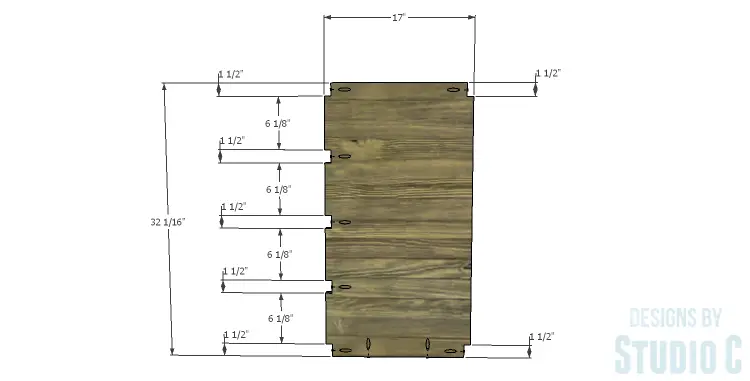
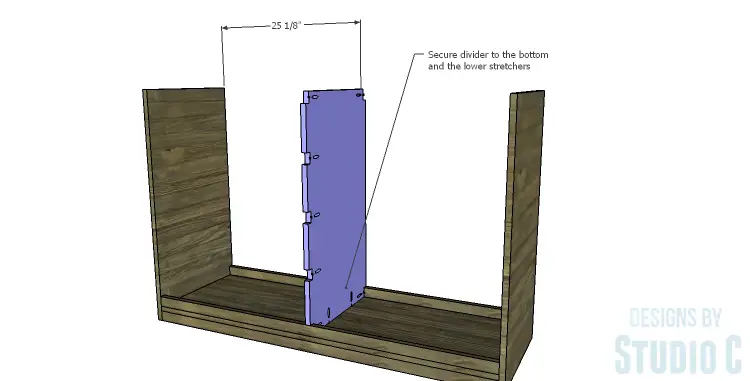
Cut the piece for the divider. Cut the notches using a jigsaw and use a portable pocket hole jig to drill the pocket holes in each notch as well as in the bottom edge of the piece. Secure the divider to the bottom between the lower stretchers using glue and 1-1/4″ pocket hole screws.
Secure the remaining stretchers to the sides and divider as shown using glue and 1-1/4″ pocket hole screws.

Step Four
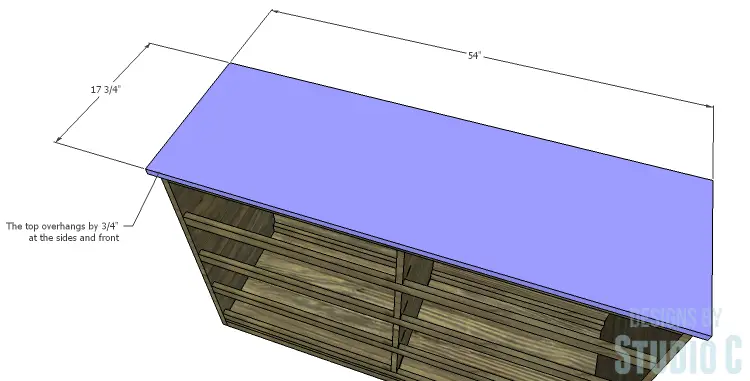
Cut the piece for the top. The sides and front of the top will overhang by 3/4″. Secure the top in place using glue and 1-1/4″ brad nails.
Step Five
Cut the piece for the back. Secure the back in place using glue and 1-1/4″ brad nails.
Step Six
Cut the pieces for the lower trim. Secure the sides first using glue and 1-1/4″ brad nails, then secure the front.
Step Seven
Cut the pieces for the drawer boxes. Drill pocket holes in all four edges of the bottom as well as each end of the sides. Assemble the drawer boxes as shown using glue and 1-1/4” pocket hole screws. Install the drawer slides according to the manufacturer’s installation instructions, locating them 1” back from the front edge of the sides. Check out this easy tutorial on installing drawer slides! Make any necessary adjustments.
Step Eight
Cut the pieces for the drawer front bases and the drawer front trim. Cut miters (45° angles) in each end of the trim pieces, securing the trim pieces to the drawer fronts using glue and 5/8″ brad nails.
Mark the position for the drawer pulls on the drawer fronts and drill the holes. Shim the drawer front in the opening – there will be a 1/8” gap around all sides – then drive screws through the holes for the drawer pulls into the drawer box. Open the drawer, and secure the drawer front using countersunk 1-1/4” screws from the inside. Remove the screws from the holes for the drawer pull then finish drilling the holes. Install the drawer pull. For guidance, check out this easy tutorial on installing drawer fronts.

Finish as desired.
This dresser would be an excellent addition to a family room as a media stand, a kid’s room, or even in a dining room to store linens! The DIY plans to build a Providence Dresser are easy to build and are definitely suitable for those new to woodworking. Have any questions about the plans? Leave a comment below!
Originally posted 2014-12-10 08:00:59.
