DIY Plans to Build a Piedmont Media Console
A Beautiful and Easy to Build Media Console
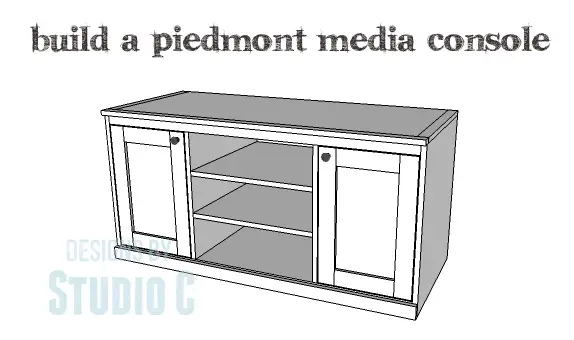
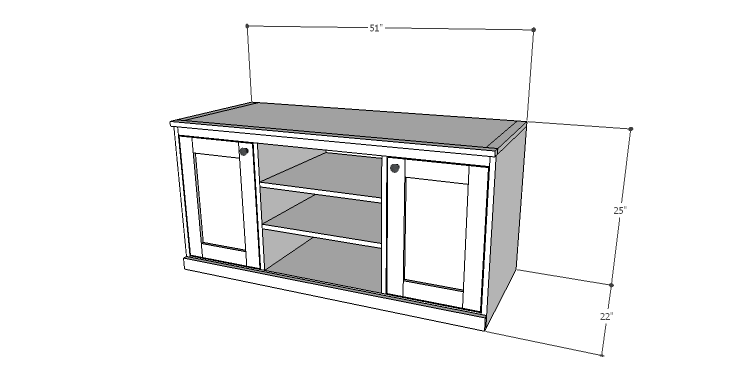
Hey there! Are you in the market for a new media console? Look no further! Our DIY plans for the Piedmont media console are just what you need. With two center shelves and a shelf behind each door, you’ll have plenty of space for all your media needs. Plus, you can choose to make the door panels out of 1/4″ plywood, decorative punched aluminum, or glass to fit your style. Best of all, these plans are super-easy to follow and you can have your new media console built in just one weekend!
Materials:
- 1-1/4″ pocket hole screws (<– affiliate link!)
- 1-1/4″ brad nails
- Edge banding, optional
- Cabinet pulls
- Wood glue
- Sandpaper (100, 150, 220 grits)
- Finishing supplies (primer & paint, or stain, sealer)
Lumber:
- 5 – 1×2 at 6′
- 3 – 1×3 at 6′
- 1 – 4′ x 8′ sheet of 1/4″ plywood or pegboard*
- 1 – 4′ x 4′ sheet of 3/4″ plywood
- 1 – 4′ x 8′ sheet of 3/4″ plywood
* If using pegboard for the back, 1 – 2′ x 4′ sheet of 1/4″ plywood will be needed for the door panels
Cut List:
- 2 – 3/4″ plywood at 21-1/4″ x 24-1/4″ – Sides
- 1 – 3/4″ plywood at 21-1/4″ x 49-1/2″ – Bottom
- 4 – 1×2 at 49-1/2″ – Upper Stretchers & Lower Supports
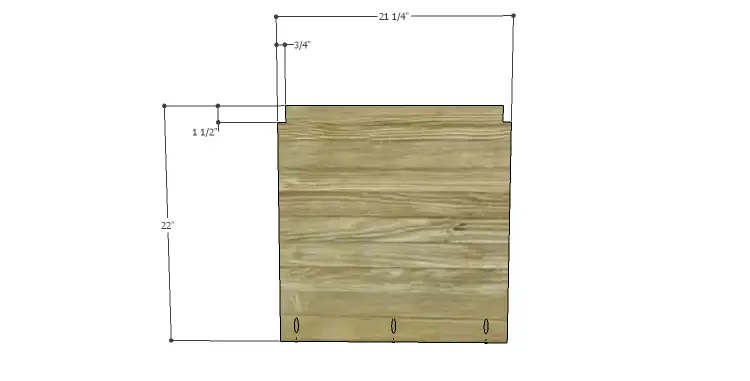
- 2 – 3/4″ plywood at 21-1/4″ x 22″ – Dividers
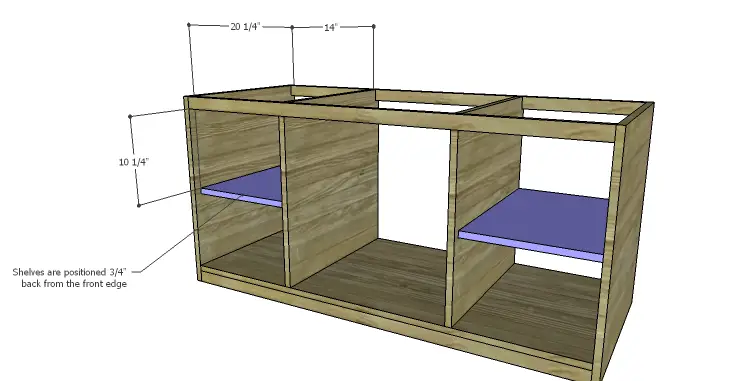
- 2 – 3/4″ plywood at 14″ x 20-1/4″ – Outer Shelves
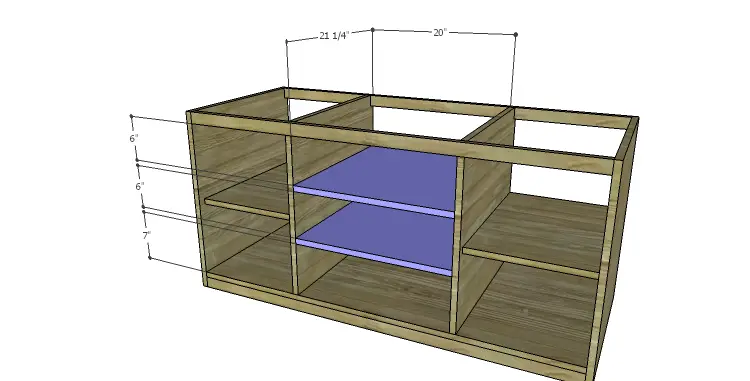
- 2 – 3/4″ plywood at 20″ x 21-1/4″ – Center Shelves
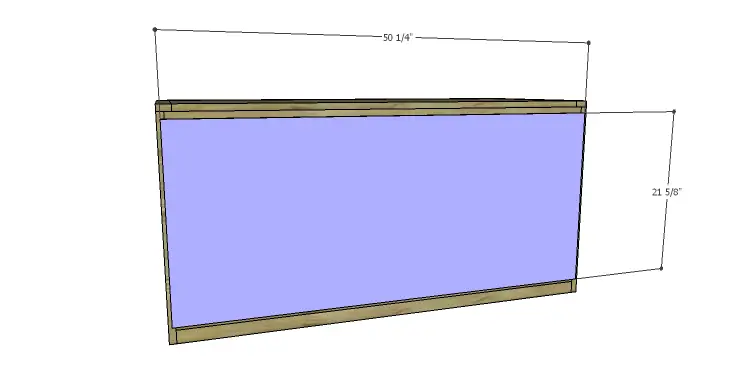
- 1 – 1/4″ plywood or pegboard at 21-5/8″ x 50-1/4″ – Back
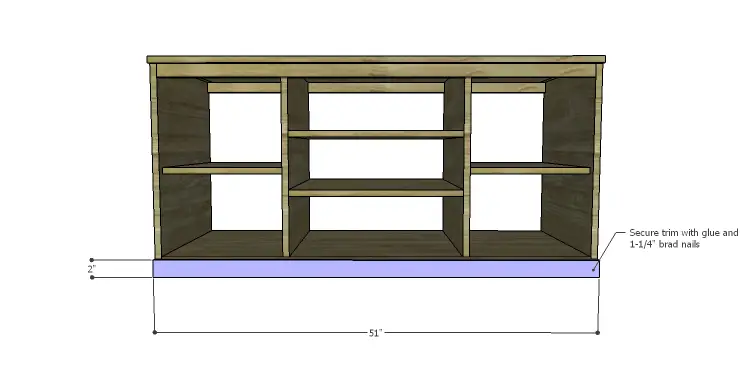
- 1 – 1×3 (ripped to 2″ wide) at 51″ – Lower Front Trim
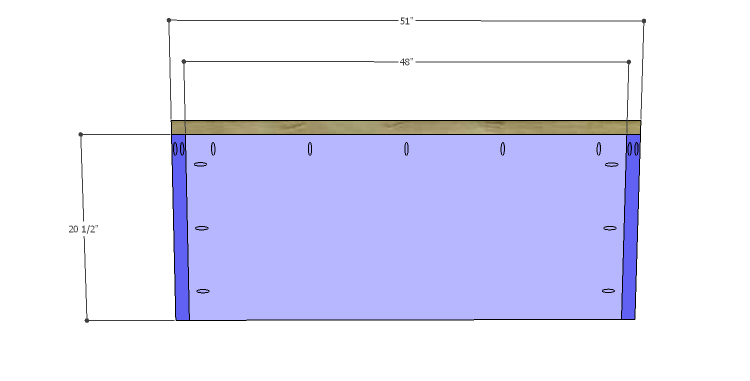
- 1 – 3/4″ plywood at 20-1/2″ x 48″ – Top Panel
- 2 – 1×2 at 20-1/2″ – Top Side Trim
- 1 – 1×2 at 51″ – Top Front Trim
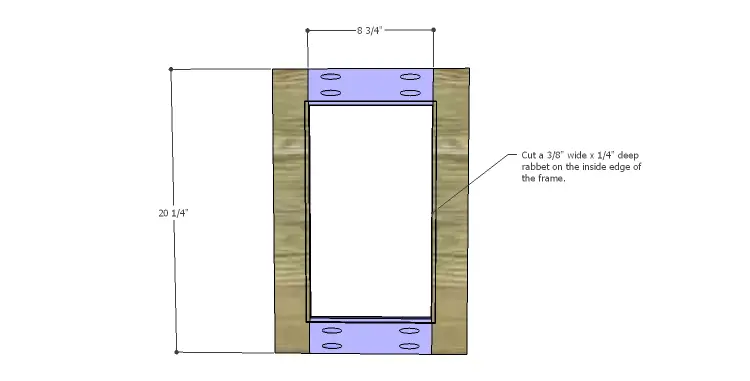
- 4 – 1×3 at 8-3/4″ – Door Rails
- 4 – 1×3 at 20-1/4″ – Door Stiles
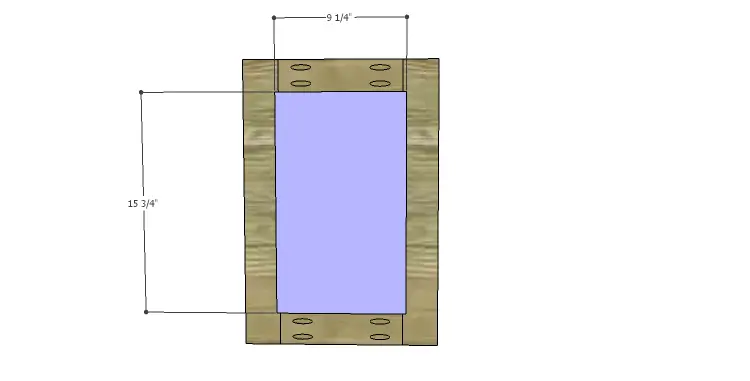
- 2 – 1/4″ plywood at 9-1/4″ x 15-3/4″ – Door Panels
Step One
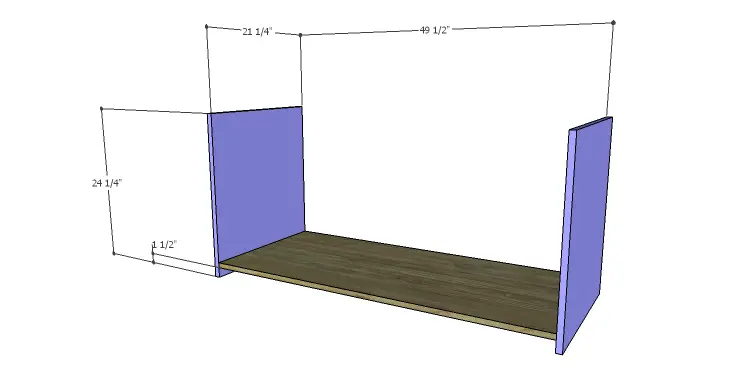
Edge banding will be applied to the exposed edges of the plywood prior to assembly!
Cut the pieces for the sides and the bottom. With the pocket hole jig set for 3/4″ material, drill pocket holes in each end of the bottom piece. Secure the bottom to the sides, locating the bottom 1-1/2″ up from the bottom edge of the sides, using glue and 1-1/4″ pocket hole screws.
Step Two
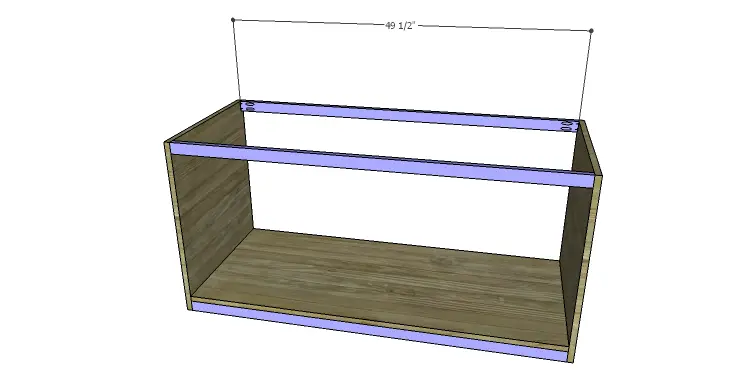
Cut the pieces for the upper stretchers and the lower supports. Drill pocket holes in each end of the pieces for the upper stretchers. Secure the stretchers to the upper edge of the sides using glue and 1-1/4″ pocket hole screws. Position the supports under the bottom, securing the supports to the bottom and sides using glue and 1-1/4″ brad nails.
Step Three
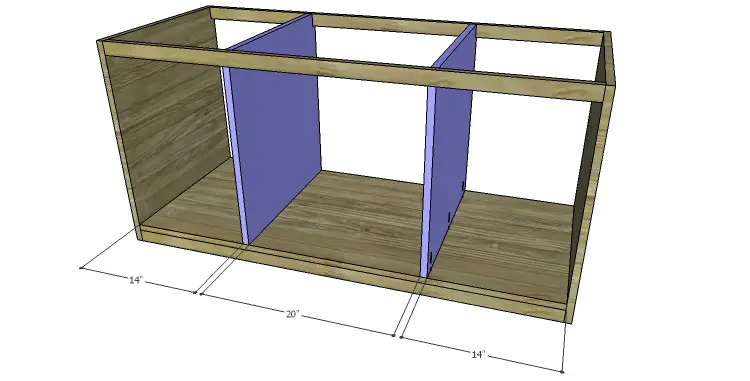
Cut the pieces for the dividers and cut the notches using a jigsaw. Drill pocket holes in the bottom edge of each divider piece. Secure the dividers to the bottom using glue and 1-1/4″ pocket hole screws. Orient the pieces so that the pocket holes face the sides – this way they won’t have to be filled.
Step Four
Cut the pieces for the outer shelves. Drill pocket holes in each side edge, as well as the back edge. Position the shelves as shown, locating the pieces 3/4″ back from the front edge of the sides and dividers, and secure in place using glue and 1-1/4″ pocket hole screws.
Step Five
Cut the pieces for the center shelves. Drill pocket holes in each side edge, as well as the back edge. Position the shelves as shown and secure in place using glue and 1-1/4″ pocket hole screws.
Step Six
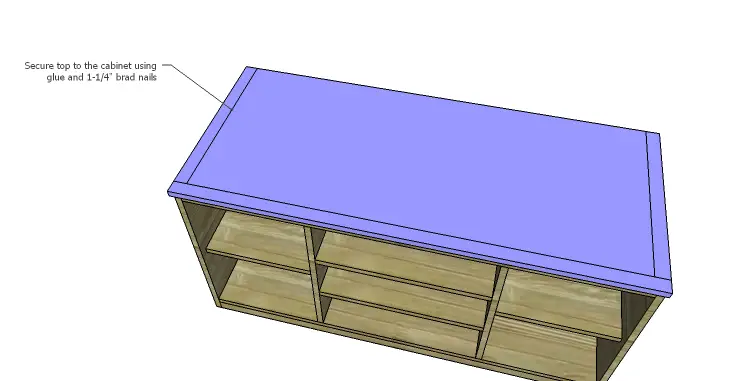
Cut the pieces for the top and the top trim. Drill pocket holes in the side edges and the front edges, as well as one end only of the side trim pieces. Secure the side trim pieces using glue and 1-1/4″ pocket hole screws, then attach the front.
Position the top so that the sides are flush with the sides of the cabinet, and the top overhangs by 3/4″. Secure in place using glue and 1-1/4″ brad nails.
Step Seven
Cut the piece for the lower trim. Secure the trim piece to the lower front of the cabinet using glue and 1-1/4″ brad nails.
Cut the piece for the back. Position the piece as shown – it will be centered between the sides, and between the bottom and upper stretcher – securing in place using glue and 1-1/4″ brad nails.
Step Eight
Cut the pieces for the doors. Drill pocket holes in each end of the rail pieces (the shorter, horizontal pieces). Assemble the door frames using glue and 1-1/4″ pocket hole screws. Use a router and a 3/8″ rabbeting bit to cut a 1/4″ deep rabbet along the inside back of the frames. Square the corners using a hammer and a wood chisel.
Cut the pieces for the door panels. Position inside the rabbet on the back side of the frame, securing in place with glue.
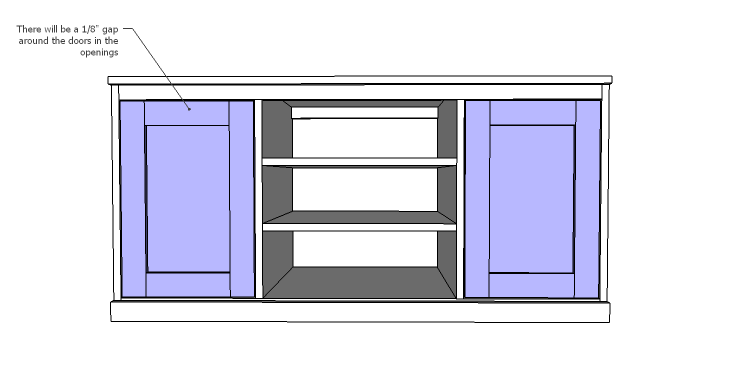
Install the hinges on the doors, then install the doors in the cabinet. Install the cabinet pulls.
Finish as desired.
The panels in the doors can be replaced with punched aluminum (which will help electronic components breathe) or glass! The media console can also be used as a sideboard in a dining room or entryway. Have any questions about the DIY plans to build a Piedmont media console? Leave a comment below or contact me at cher {at} designsbystudioc {dot} com!


[…] compact media console features two center shelves, and a shelf behind each door. Build it using these free step-by-step […]