DIY Plans to Build a Penn Outdoor Daybed
A Fabulous Daybed for the Outdoors!
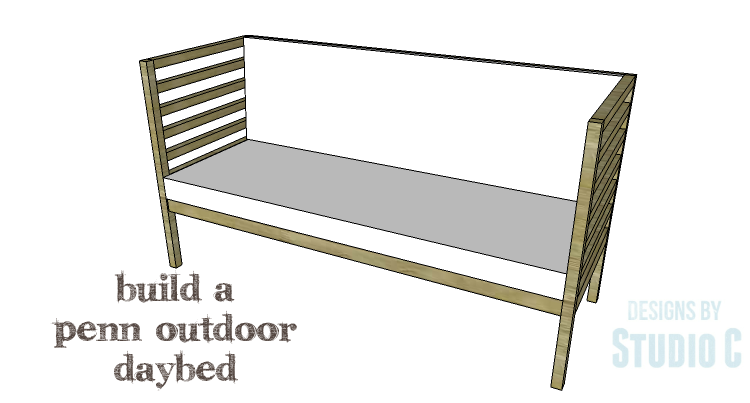
Hey there! With summer just around the corner, I bet you’re already dreaming of lounging outside on some comfy furniture. Well, have I got the perfect solution for you! The DIY plans for the Penn Outdoor Daybed are just what you need. The slatted design of the seat, back, and sides means that water won’t collect and it’s easy to keep clean. All you need is a 4″ seat cushion and a 2″ back cushion, and you can even add some throw pillows for extra coziness. Best of all, this daybed is super easy to build and can be made from cedar or treated wood for outdoor use, or any other type of wood for indoor use. Happy building!
Materials:
- 1-1/4″ pocket hole screws (rated for outdoor use) (<– affiliate link!)
- 2-1/2″ pocket hole screws (rated for outdoor use)
- 1-1/4″ brad nails (for outdoor use)
- Wood glue
- Sandpaper (100, 150, 220 grits)
- Finishing supplies (primer & paint, or stain, sealer)
Lumber:
- 12 – 1×3 at 6′
- 2 – 2×2 at 6′
- 5 – 2×2 at 8′
- 1 – 2×4 at 8′
Cut List:
- 2 – 2×4 at 38″ – Back Legs
- 2 – 2×2 at 38″ – Front Legs
- 2 – 2×2 at 25″ – Side Framing
- 2 – 2×2 at 24-11/16″ – Side Framing
- 2 – 2×2 at 24-5/16″ – Side Framing
- 2 – 2×2 at 24″ – Side Framing
- 2 – 2×2 at 23-11/16″ – Side Framing
- 2 – 2×2 at 23-5/16″ – Side Framing
- 2 – 1×3 at 23″ – Side Aprons
- 2 – 1×3 at 72″ – Front & Back Aprons
- 6 – 2×2 at 72″ – Back Framing
- 2 – 1×3 (ripped to 1-3/4″ wide) at 23″ – Slat Supports
- 3 – 1×3 (ripped to 1-3/4″ wide) at 24″ – Seat Supports
- 7 – 1×3 at 69″ – Seat Slats
Step One
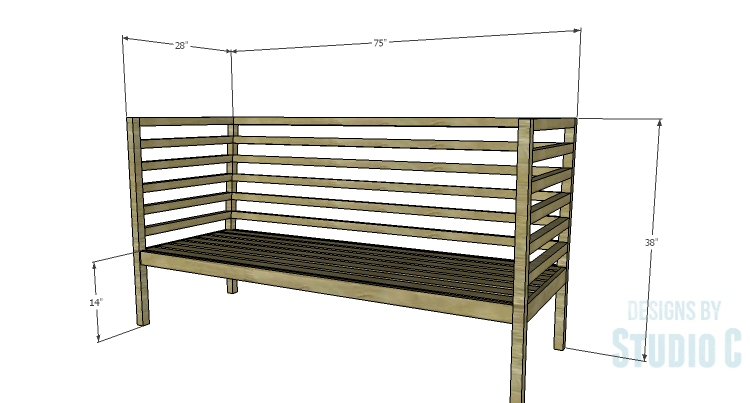
Cut the 2×4 pieces to length for the back legs. Draw the legs onto the 2×4 pieces as shown in the drawing. Cut out the legs using a jigsaw or a bandsaw.
Step Two
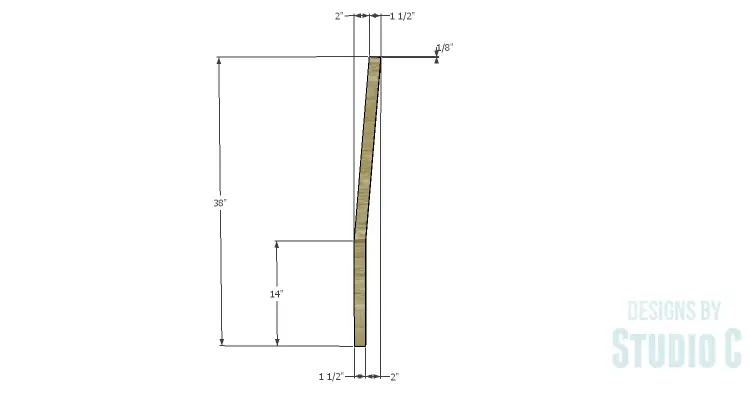
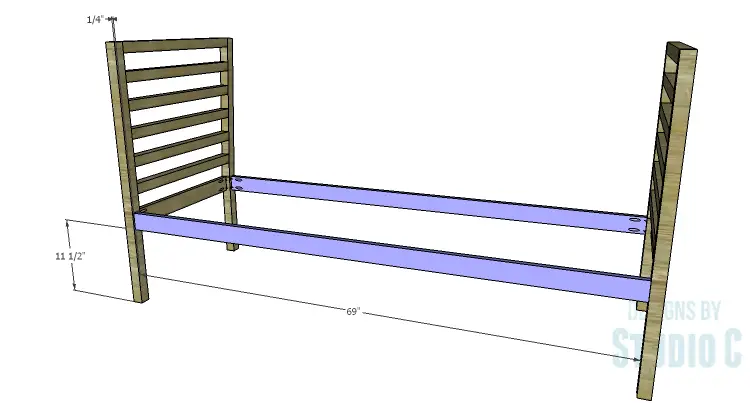
Cut the pieces for the front legs and the side framing. Each of the side framing pieces have a 5° angle cut in one edge. With the pocket hole jig set for 1-1/2″ material, drill pocket holes in each end of the framing pieces on the underside of each piece – this way the pocket holes will not have to be filled. Secure the framing pieces to the front and back legs as shown using glue and 2-1/2″ pocket hole screws.
Set the pocket hole jig for 3/4″ material and drill pocket holes in each end of the side apron. Secure the apron to the legs using glue and 1-1/4″ pocket hole screws. The front face of the apron pieces will be flush with the outside faces of the legs.
Step Three
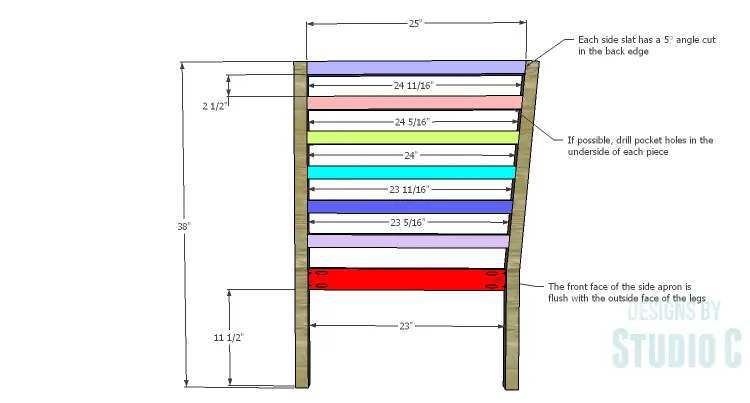
Cut the pieces for the front and back aprons. Drill pocket holes in each end. Position the aprons so they are located 1/4″ back from the front and back faces of the legs. Secure in place using glue and 1-1/4″ pocket hole screws.
Step Four
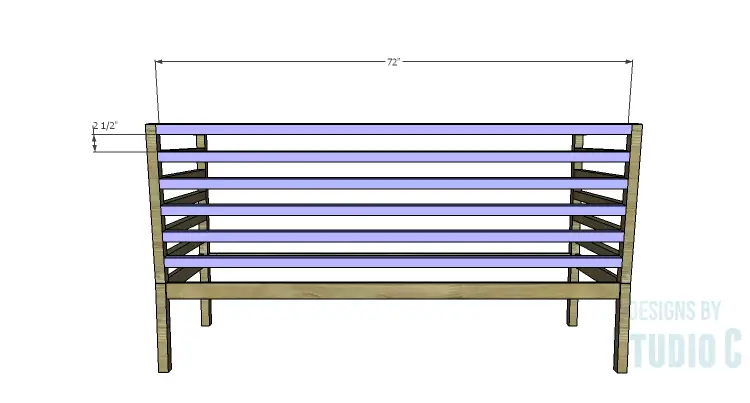
Cut the pieces for the back framing. Set the pocket hole jig for 1-1/2″ material and drill pocket holes in each end of each piece. Secure the back framing pieces to the back legs using glue and 2-1/2″ pocket hole screws. Orient the pocket holes so they face down and will not have to be filled.
Step Five
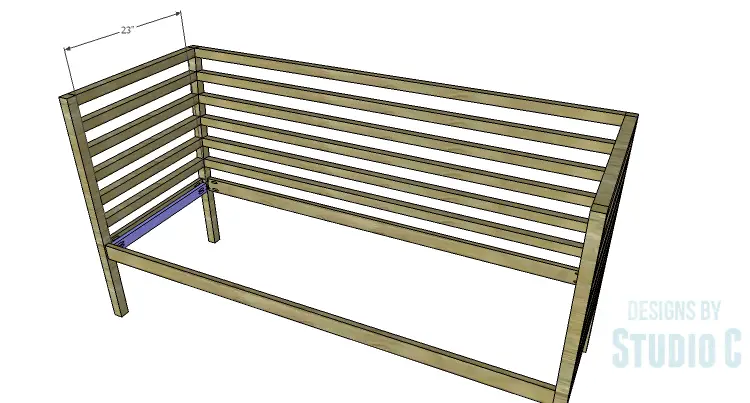
Cut the pieces for the slat supports. Set the pocket hole jig for 3/4″ material and drill pocket holes in each end of each piece. Secure each piece to the inside of the side aprons using glue and 1-1/4″ pocket hole screws. The bottom edge of each piece will be flush with the bottom of the side aprons.
Step Six
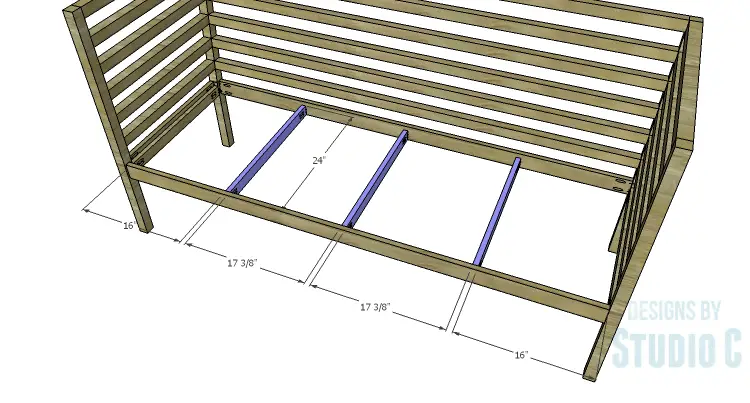
Cut the pieces for seat supports and drill pocket holes in each end. Secure the supports to the front and back aprons using glue and 1-1/4″ pocket hole screws.
Step Seven
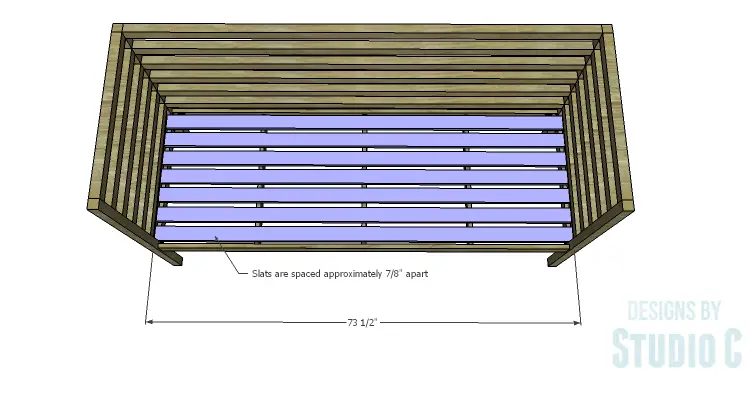
Cut the pieces for the seat slats. The seat slats are spaced approximately 7/8″ apart. Secure in place using glue and 1-1/4″ brad nails through the slats into the supports.
Finish as desired.
The cushions are easy to make using outdoor fabric and outdoor foam. Previously, I wrote a post on how to make a basic box cushion that may be helpful. Otherwise, cushions measuring 72″ long x 24″ wide x 4″ deep for the seats and 72″ long x 20″ wide x 2″ deep can be used. Three separate cushions would also be a good choice. Have any questions about the DIY plans to build a Penn Outdoor Daybed? Leave a comment below!

