DIY Plans to Build a Mesa Desk
A Desk with a Unique Feature and a Floating Top
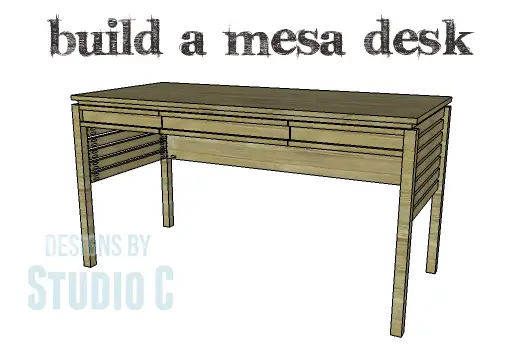
Hey there! You’re going to love this desk – it has a really cool feature with slatted sides! Plus, it has a handy center pencil drawer and a spacious, floating top. And the best part? The DIY plans to build this Mesa desk are super easy to follow and you can finish it in just one weekend!
Materials:
- 1-1/4″ pocket hole screws (<– affiliate link!)
- 1-1/4″ brad nails
- Edge banding, optional
- 1 set of 18″ drawer slides
- Wood glue
- Sandpaper (100, 150, 220 grits)
- Finishing supplies (primer & paint, or stain, sealer)
Lumber:
- 4 – 1×2 at 8′
- 1 – 1×3 at 8′
- 1 – 1×4 at 4′
- 1 – 1×4 at 6′
- 2 – sheets of 3/4″ plywood
- 4 – 3/4″ square dowel rods
Cut List:
- 4 – 2×2 at 28-1/2″ – Legs
- 14 – 1×2 at 23″ – Side Slats
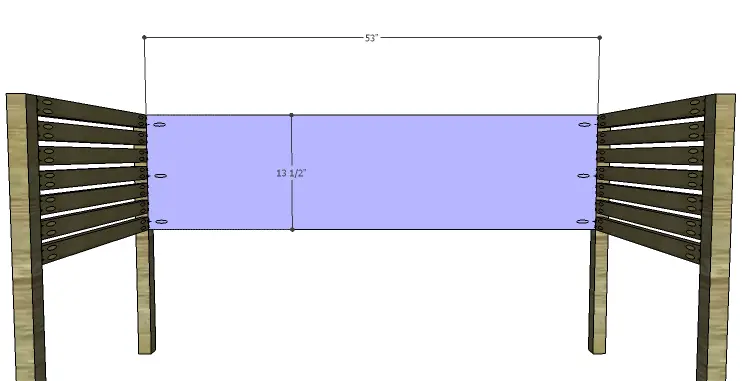
- 1 – 3/4″ plywood at 13-1/2″ x 53″ – Back
- 2 – 1×4 at 15-3/4″ – Front Aprons
- 2 – 1×4 at 23″ – Drawer Supports
- 4 – 3/4″ square dowel rods at 15-3/4″ – Apron Trim
- 1 – 1×2 at 21-1/2″ – Stretcher
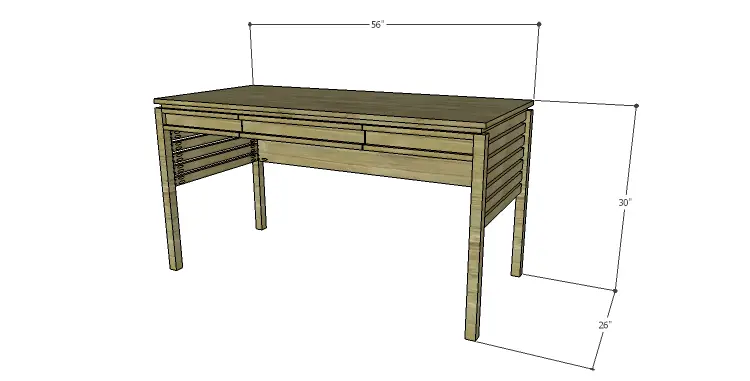
- 1 – 3/4″ plywood at 24-1/2″ x 54-1/2″ -Top 1
- 1 – 3/4″ plywood at 26″ x 56″ – Top 2
- 1 – 3/4″ plywood at 16-1/2″ x 19″ – Drawer Bottom
- 2 – 1×3 at 16-1/2″ – Drawer Box Sides
- 2 – 1×3 at 20-1/2″ – Drawer Box Front & Back
- 1 – 1×4 at 21-1/4″ – Drawer Front
- 2 – 3/4″ square dowel rods at 21-1/4″ – Drawer Front Trim
Step One
Edge banding will be applied to the exposed edges of the plywood prior to assembly!
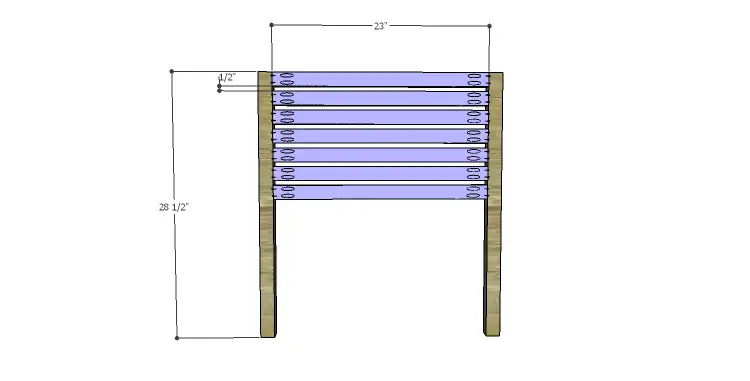
Cut the pieces for the legs and the side slats. With the pocket hole jig set for 3/4″ material, drill pocket holes in each end of the slat pieces. Secure to the legs using glue and 1-1/4″ pocket hole screws, spacing the slats about 1/2″ apart. The back face of the slats will be flush with the inside face of the legs.
Step Two
Cut the piece for the back and drill pocket holes in each side edge. Secure to the legs using glue and 1-1/4″ pocket hole screws.
Step Three
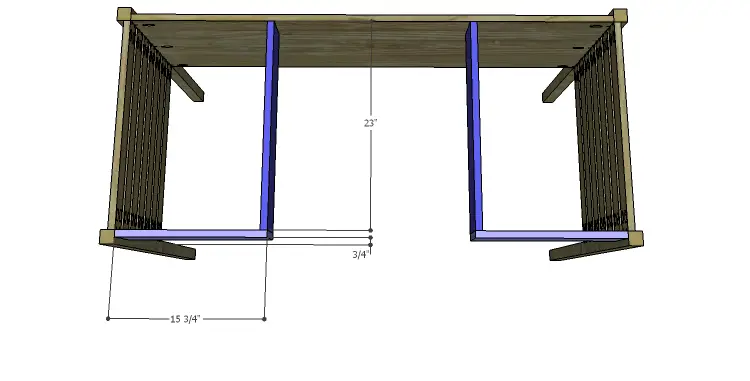
Cut the pieces for the aprons and the supports. Drill pocket holes in each end of the support pieces and one end only of the apron pieces. Secure the supports to the aprons using glue and 1-1/4″ pocket hole screws. (The assembly pieces will now be an “L” shape.) Secure the assemblies to the legs and back as shown using glue and 1-1/4″ pocket hole screws.
Step Four
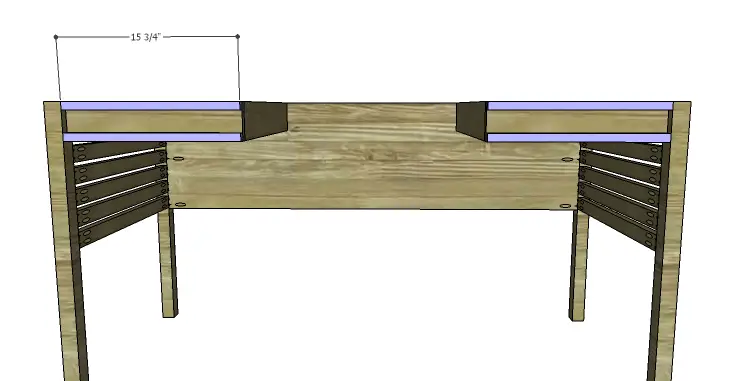
Cut the pieces for the apron trim. Secure the trim to the aprons using glue and 1-1/4″ brad nails. The trim pieces will be flush with the top and the bottom of the aprons.
Step Five
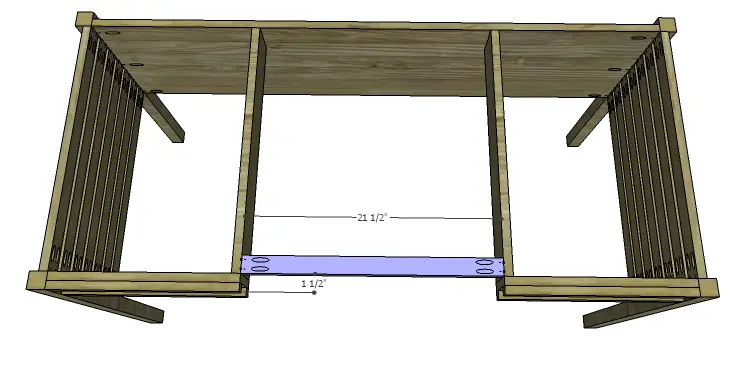
Cut the piece for the stretcher and drill pocket holes in each end. Secure to the supports as shown using glue and 1-1/4″ pocket hole screws.
Step Six
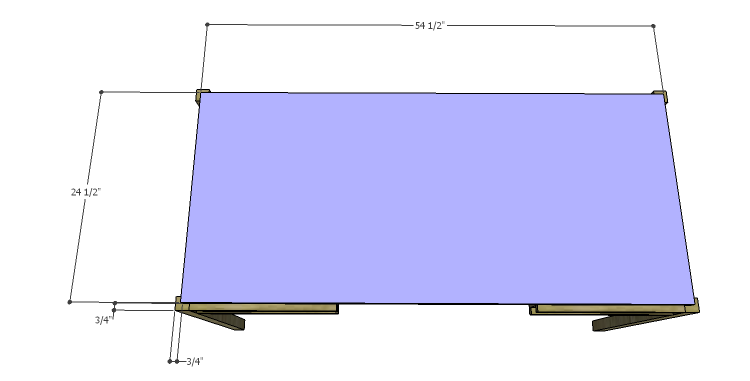
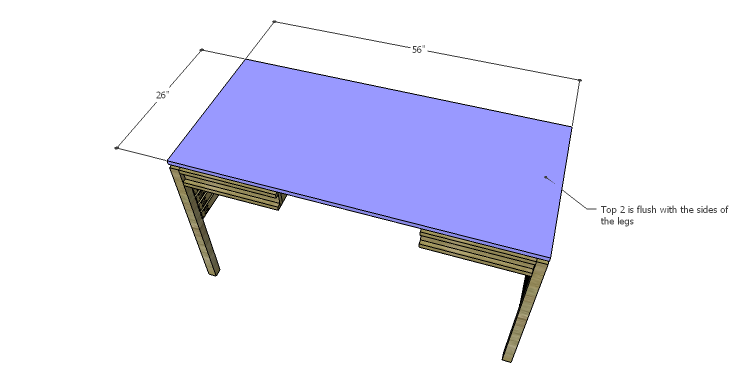
Cut the pieces for the top. The first piece will be positioned so that there is a 3/4″ border on the top of each leg. Secure in place using glue and 1-1/4″ brad nails.
Spread glue on the top, then position the second top. The edges will be flush with the sides of the legs. Secure to the first top using 1-1/4″ brad nails.
Step Seven
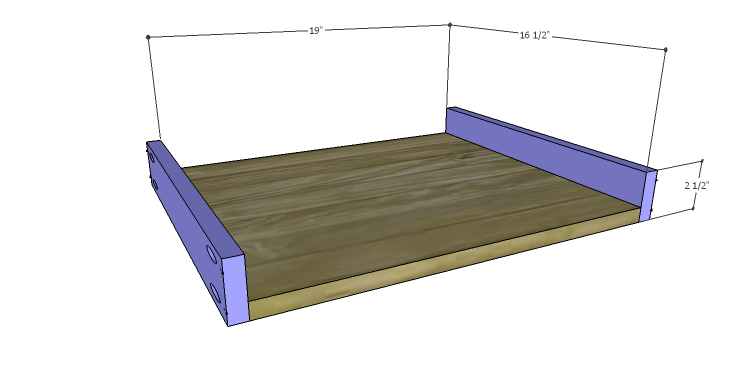
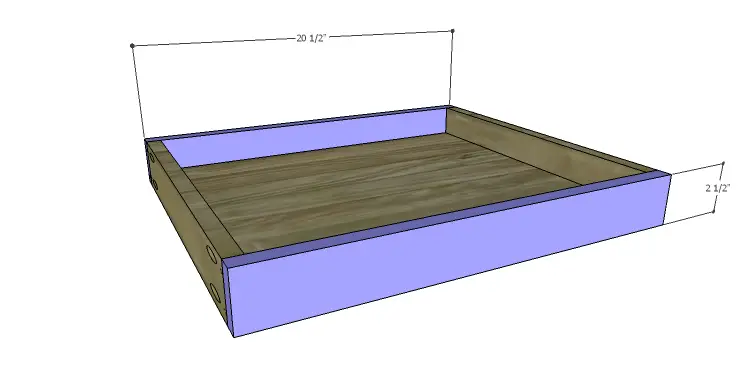
Cut the pieces for the drawer boxes. Drill pocket holes in all four edges of the bottom as well as each end of the sides. Assemble the drawer boxes as shown using glue and 1-1/4” pocket hole screws. Install the drawer slides according to the manufacturer’s installation instructions, locating them ¾” back from the front edge of the aprons (not the apron trim!) – flush with the end of the supports. This easy tutorial on installing drawer slides will be of great help! Make any necessary adjustments.
Step Eight
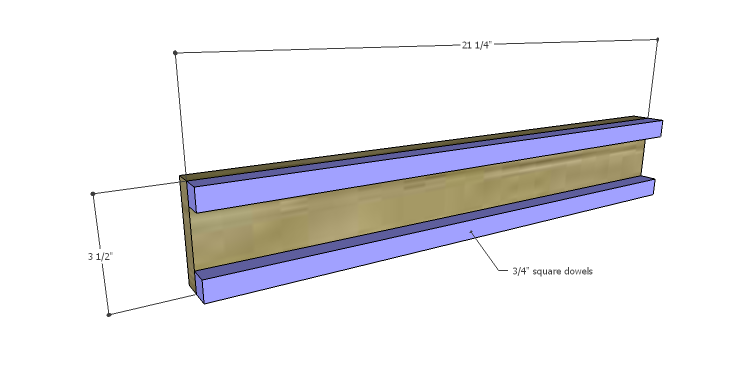
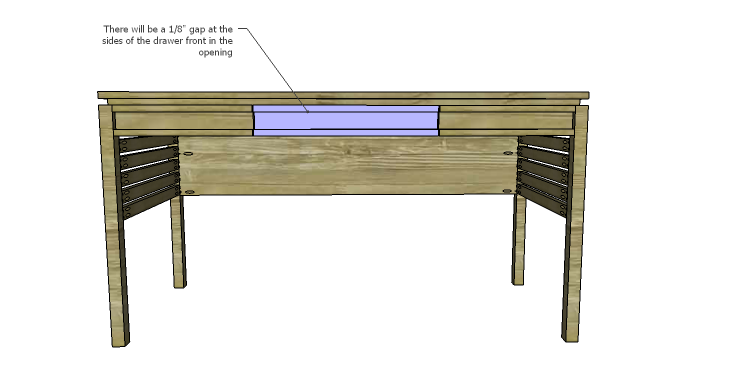
Cut the piece for the drawer front and for the drawer front trim. Secure the trim to the drawer front using glue and 1-1/4″ brad nails. There will be a 1/8″ gap between the drawer front and the aprons. Secure the drawer front to the drawer box using glue and 1-1/4″ brad nails.
Finish as desired.
The DIY plans to build a Mesa desk will help create a furniture piece that will last for years to come. Whether the piece is stained or painted, the desk will fit into any style! Have any questions about the plans? Leave a comment below or contact me at cher {at} designsbystudioc {dot} com!

