
A Stunning Table to Build Just in Time for Holiday Entertaining!
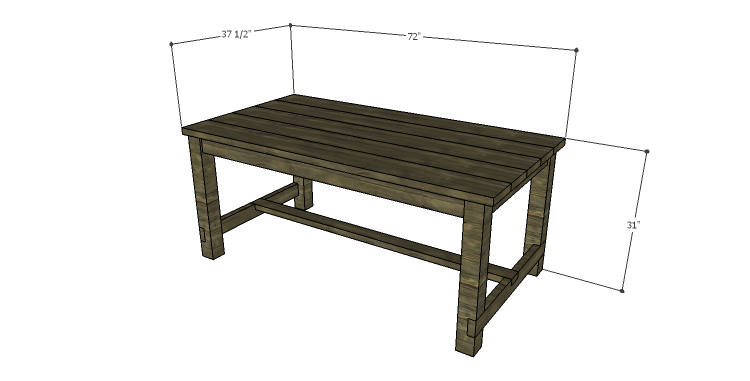
Now is the perfect time to build a project to show off during holiday entertaining events… Why not start with the DIY plans to build a Magness Dining Table? This large, rustic dining table is a relatively easy build featuring notched legs and bracing, and a planked top. The length can be easily adjusted to suit your needs or the size of your dinner party!
Materials:
- 2-1/2″ pocket hole screws (<– affiliate link!)
- 2-1/2″ screws
- Wood glue
- Sandpaper (100, 150, 220 grits)
- Finishing supplies (primer & paint, or stain, sealer)
Lumber:
- 4 – 2×4 at 6′
- 2 – 2×4 at 8′
- 5 – 2×8 at 6′
- 2 – 4×4 at 6′
Cut List:
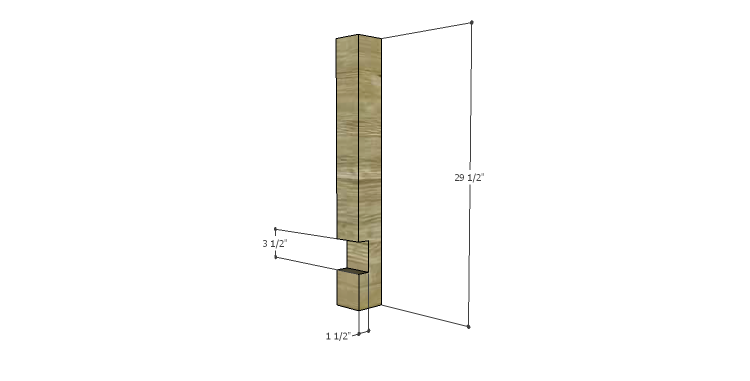
- 4 – 4×4 at 29-1/2″ – Legs
- 2 – 2×4 at 30″ – Upper Side Stretchers
- 2 – 2×4 at 37″ – Lower Side Stretchers
- 2 – 2×4 at 62″ – Longer Stretchers
- 1 – 2×4 at 69″ – Lower Brace
- 3 – 2×4 at 33″ – Top Supports
- 5 – 2×8 at 72″ – Top
Step One
Cut the pieces for the legs. Draw a line on each leg marking the position of the notches. The notches will be cut using a series of small cuts on the table saw. See this post on cutting posts for a deck for a detailed description on notching posts!
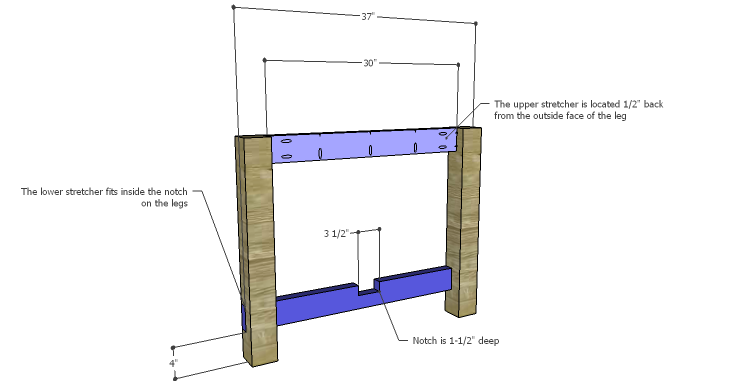
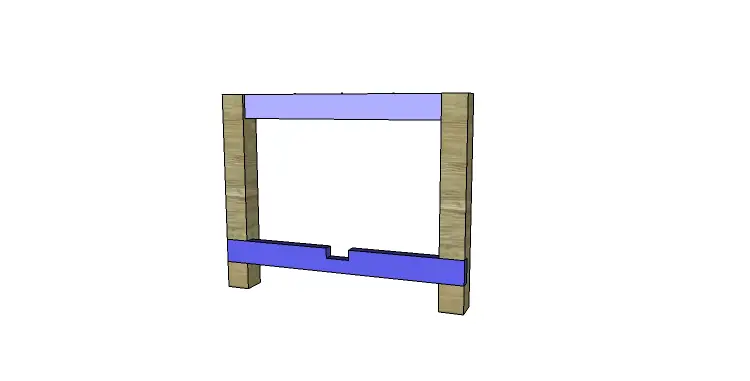
Step Two
Cut the pieces for the side stretchers. The lower side stretchers will also have a notch cut in the center. The upper stretchers will have pocket holes drilled in them.
Set the pocket hole jig for 1-1/2″ material, and drill pocket holes in each end of the upper stretcher pieces, as well as one long edge of each piece (to attach the top boards). Secure the upper stretchers to the legs using glue and 2-1/2″ pocket hole screws. The outside face of the upper stretchers will be flush with the outside faces of the legs.
The lower stretcher will fit into the notches. Secure the lower stretchers using glue and 2-1/2″ screws. Lag screws and washers can also be used for an industrial look.
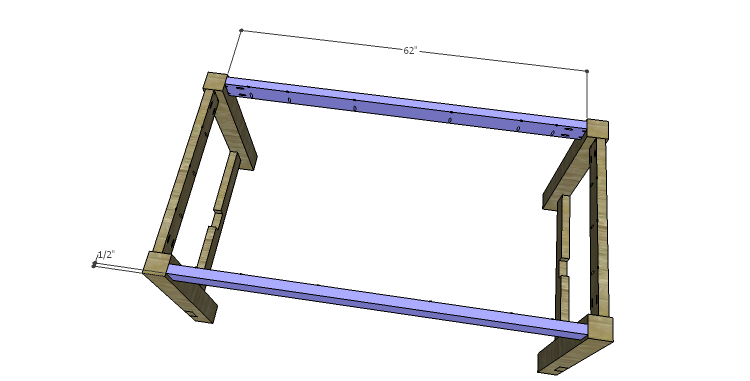
Step Three
Cut the pieces for the longer stretchers and the lower brace. Drill pocket holes in each end of the stretchers, as well as one long edge of each piece. Secure the longer stretchers to the legs using glue and 2-1/2″ pocket hole screws. The outside face of the longer stretchers will be flush with the outside faces of the legs.
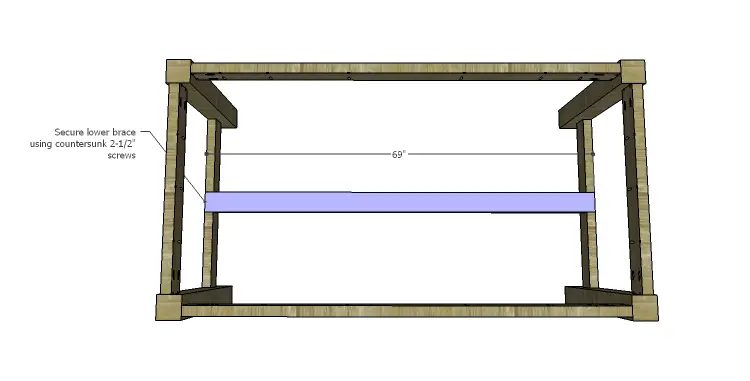
The lower brace piece will fit into the notches on the side lower stretchers. Secure the brace to the lower stretcher using glue and 2-1/2″ screws.
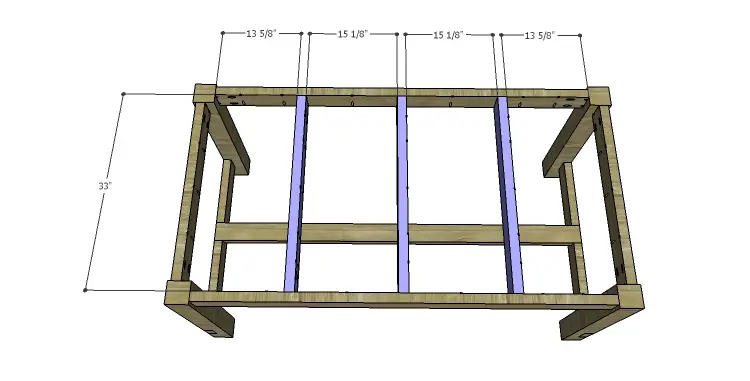
Step Four
Cut the pieces for the top supports. Drill pocket holes in each end as well as one long edge of each piece. Secure the supports to the longer side stretchers using glue and 2-1/2″ pocket hole screws.
Step Five
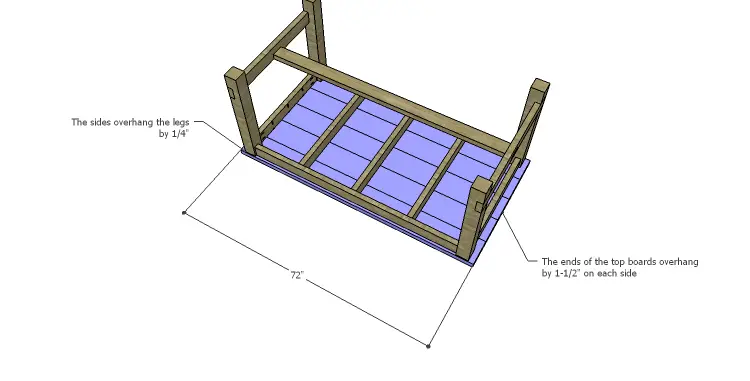
Cut the pieces for the top. The ends will overhang by 1-1/2″ and the sides will overhang the legs by about 1/4″. Secure the top boards using glue and 2-1/2″ pocket hole screws through the stretchers and supports.
Finish as desired.
The table would look fabulous with any finish – rustic, distressed, painted, etc. The DIY plans to build a Magness Dining Table are suitable for beginners, as well! Have any questions about the plans? Leave a comment below, or contact me at cher {at} designsbystudioc {dot} com!


Comments are closed.