
A Large Pantry Cabinet Perfect for Dry Food Storage
Hey there! So, I’ve been busy sprucing up my dining room and kitchen, but I couldn’t help but notice that my trusty armoire-turned-pantry is starting to show its age. I think it’s time for a new addition to my kitchen, and a cabinet like this would be absolutely perfect!
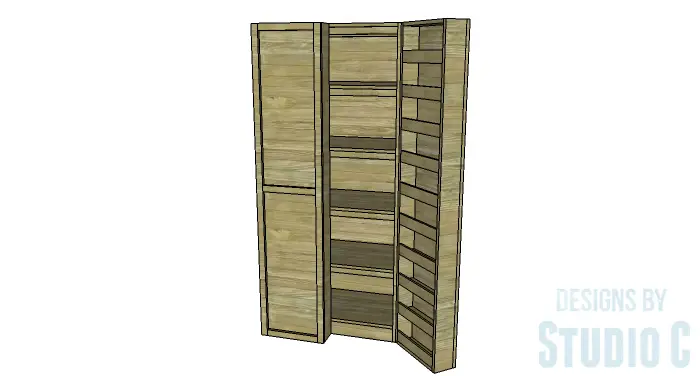
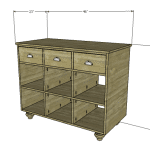
These awesome DIY furniture plans for a Rustic Pantry Cabinet caught my eye. Not only does it have shelves on the doors for organizing boxes and cans, but it also has plenty of shelf space inside for all sorts of goodies. Plus, the doors have these cool face frames on the outside, giving it a stylish touch. Oh, and the best part is that you can easily make it wider with just a few adjustments. How cool is that?
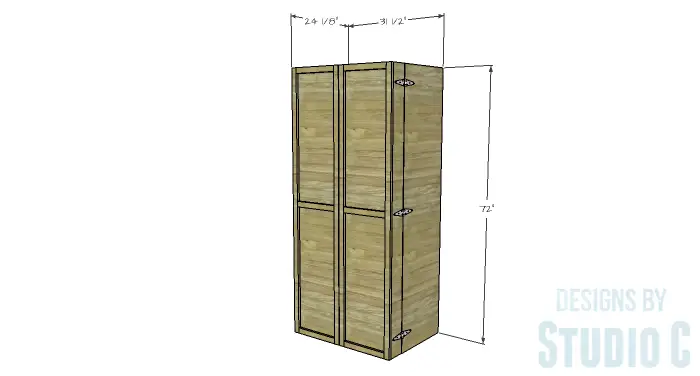
The DIY furniture plans to build a Rustic Pantry Cabinet are suitable for all skill levels and a great weekend project!
Materials:
- 1-1/4″ pocket hole screws (<– affiliate link!)
- 1-1/4″ brad nails
- 1-3/4″ brad nails
- Edge banding
- Heavy duty strap hinges (<– affiliate link!)
- Wood glue
- Sandpaper (100, 150, 220 grits)
- Finishing supplies (primer & paint, or stain, sealer)
Lumber:
- 10 – 1/2″ x 2-1/2″ craft boards, in 3 ft. lengths
- 6 – 1×2 at 8′
- 3 – 1×4 at 8′
- 5 – 1×6 at 6′
- 1 – 4′ x 4′ sheet of 3/4″ plywood
- 3 – 4′ x 8′ sheets of 3/4″ plywood
Cut List:
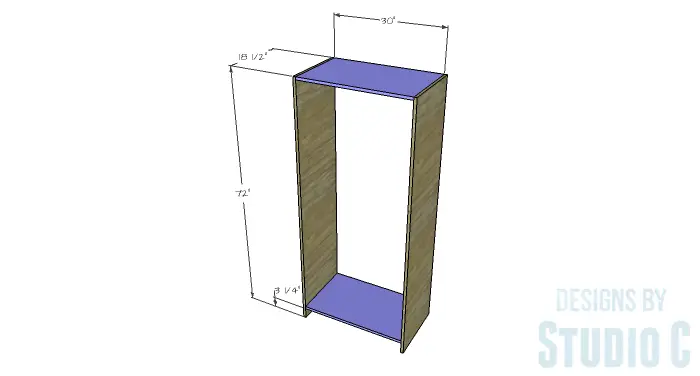
- 2 – 3/4″ plywood at 18-1/2″ x 72″ – Sides
- 2 – 3/4″ plywood at 18-1/2″ x 30″ – Top & Bottom
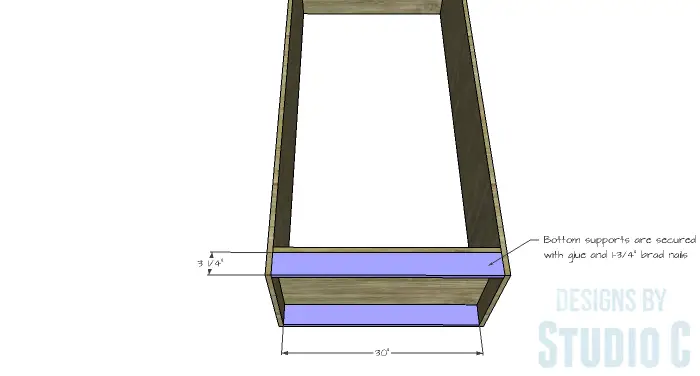
- 2 – 3/4″ plywood at 3-1/4″ x 30″ – Bottom Supports
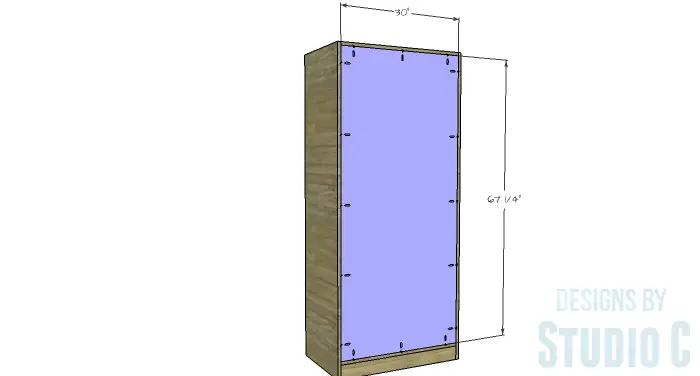
- 1 – 3/4″ plywood at 30″ x 67-1/4″ – Back
- 10 – 1×2 at 30″ – Front & Back Stretchers
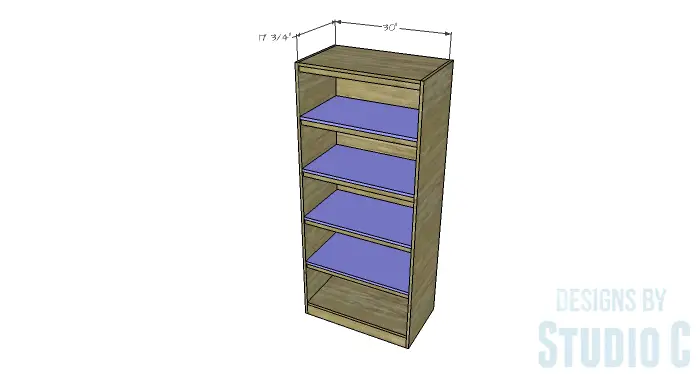
- 4 – 3/4″ plywood at 17-3/4″ x 30″ – Shelves
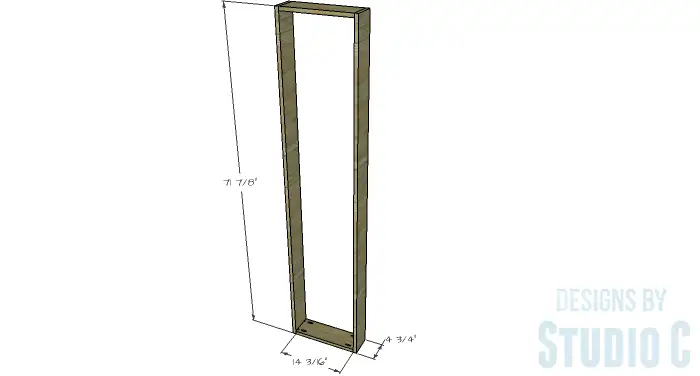
- 4 – 1×6 (ripped to 4-3/4″ wide) at 14-3/16″ – Door Frame Top & Bottom
- 4 – 1×6 (ripped to 4-3/4″ wide) at 71-7/8″ – Door Frame Sides
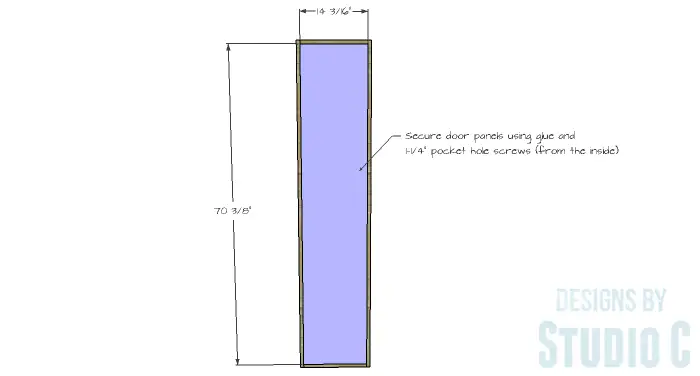
- 2 – 3/4″ plywood at 14-3/16″ x 70-3/8″ – Door Panel
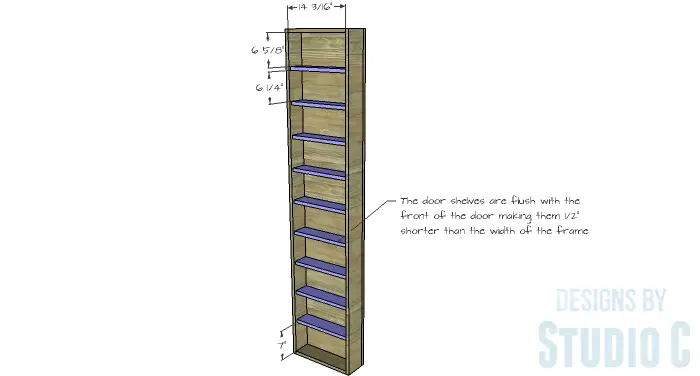
- 18 – 1×4 at 14-3/16″ – Door Shelves
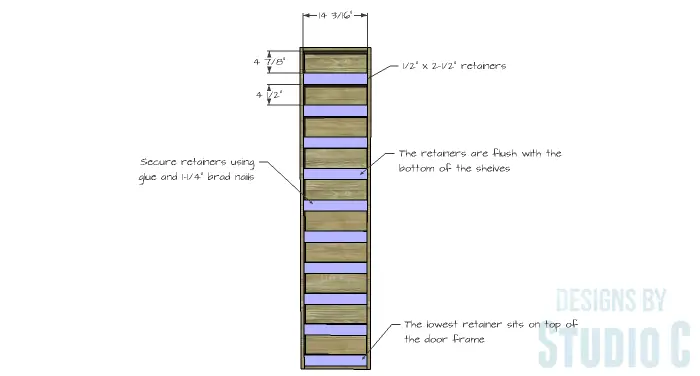
- 20 – 1/2″ x 2-1/2″ craft boards at 14-3/16″ – Door Shelf Retainers
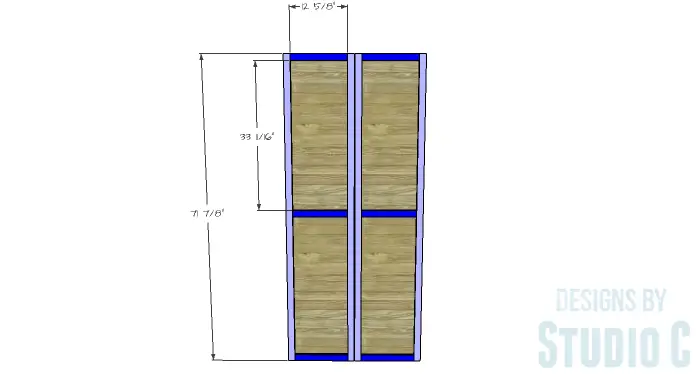
- 4 – 1×2 at 71-7/8″ – Door Face Frames
- 6 – 1×2 at 12-5/8″ – Door Face Frames
Edge banding will be applied to the exposed edges of the plywood prior to assembly.
Step One
Cut the pieces for the sides, top and bottom. With the pocket hole jig set for 3/4″ material, drill pocket holes in each end of the top and bottom pieces. Secure the top and bottom to the sides using glue and 1-1/4″ pocket hole screws.
Step Two
Cut the pieces for the bottom supports. Secure the supports under the bottom shelf using glue and 1-3/4″ brad nails through the sides and top of the bottom into the supports.
Step Three
Cut the piece for the back and drill pocket holes in all four edges. Secure the back to the sides, top and bottom using glue and 1-1/4″ pocket hole screws.
Step Four
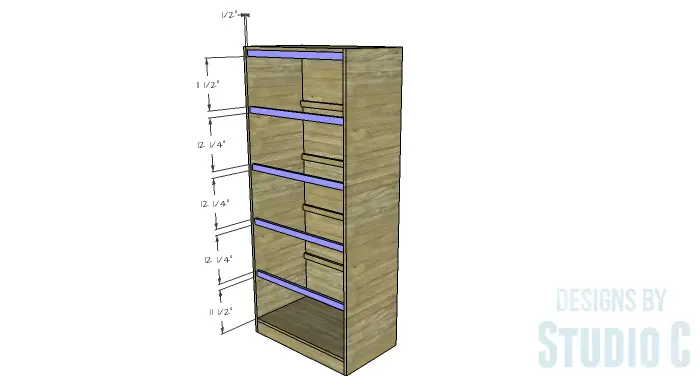
Cut the pieces for the front and back stretchers. The back stretchers will be secured directly to the sides and back using glue and 1-1/4″ brad nails.
The front stretchers are secured to the sides – located 1/2″ back from the front edge of the sides – using glue and 1-3/4″ brad nails through the sides into the ends of the stretchers. Pocket holes can also be drilled in each end and the stretchers secured using glue and 1-1/4″ pocket hole screws.

Step Five
Cut the pieces for the shelves. Rest the shelves on the stretchers and secure in place using glue and 1-3/4″ brad nails.
Step Six
Cut the pieces for the door frames. Drill pocket holes in each end of the shorter pieces. Assemble the door frame using glue and 1-1/4″ pocket hole screws.
Step Seven
Cut the pieces for the door panels and drill pocket holes in all four edges. Secure the panels to the frames using glue and 1-1/4″ pocket hole screws. The outside face of the panel will be flush with the front edge of the door frames.
Step Eight
Cut the pieces for the door shelves. Secure the shelves to the door frame sides and panel using glue and 1-3/4″ brad nails. The shelves are flush with the back which positions them 1/2″ back from the edge of the door frame to allow for the retainers.
Step Nine
Cut the pieces for the door shelf retainers. Secure the retainers to the front of the shelves with the bottom edges flush using glue and 1-1/4″ brad nails.
Step Ten
Cut the pieces for the face frames. Secure the face frames to the front of the doors using glue and 1-1/4″ brad nails.
Step Eleven
Install the hinges. These doors will be heavy and will require heavy-duty hinges like strap hinges. (Plain strap hinges can be spray painted to match your decor.) Don’t forget to pre-drill the holes for the screws!
A barrel-bolt can also be used on the front of the doors to keep them closed!
Fill all of the holes and finish as desired.
This armoire would also be a great piece in a craft room for supply storage or as an alternative to a dresser to store clothes. Here are a few other plans that are similar to the DIY furniture plans to build a Rustic Pantry Cabinet:
Have any questions about the plans? Leave a comment below!
Originally posted 2016-02-24 08:00:49.


5 Comments
Hi Cher. Love your plans! A great resource for sure. These look like they were done in Sketchup. Any chance you ever share the Sketchup files?
Hi, there! I’m sorry but I don’t normally share the files… Is there a particular plan you may have a question about? Have a great day! 🙂