A Quick and Easy to Build Kitchen Island
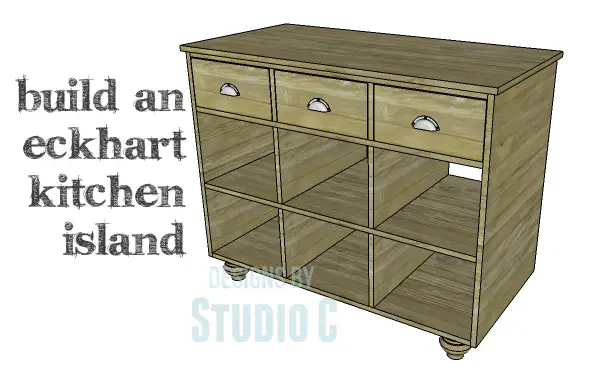
In my opinion, a kitchen is not complete without an island! The DIY plans to build an Eckhart Kitchen Island feature three drawers that open from either side and six cubbies for plenty of storage in a small space! Adding casters can give the island portability, making it an excellent piece to use outdoors on a patio or deck. This fabulous piece can be finished in a weekend!
Materials:
- 1-1/4″ pocket hole screws (<– affiliate link)
- 1-1/4″ brad nails
- Edge banding, optional (<– affiliate link)
- 4 – 4″ furniture feet with mounting plates
- Cabinet pulls
- Wood glue
- Sandpaper (100, 150, 220 grits)
- Finishing supplies (primer & paint, or stain, sealer)
- Paste Wax
Lumber:
- 3 – 1×2 at 4′
- 2 – 4′ x 8′ sheets of 3/4″ plywood
Cut List:
- 2 – 3/4″ plywood at 22″ x 32″ – Sides
- 1 – 3/4″ plywood at 22″ x 43-1/2″ – Bottom
- 3 – 1×2 at 43-1/2″ – Stretchers
- 2 – 3/4″ plywood at 22″ x 43-1/2″ – Shelves
- 4 – 3/4″ plywood at 11″ x 22″ – Shelf Dividers
- 2 – 3/4″ plywood at 7-3/4″ x 22″ – Drawer Dividers
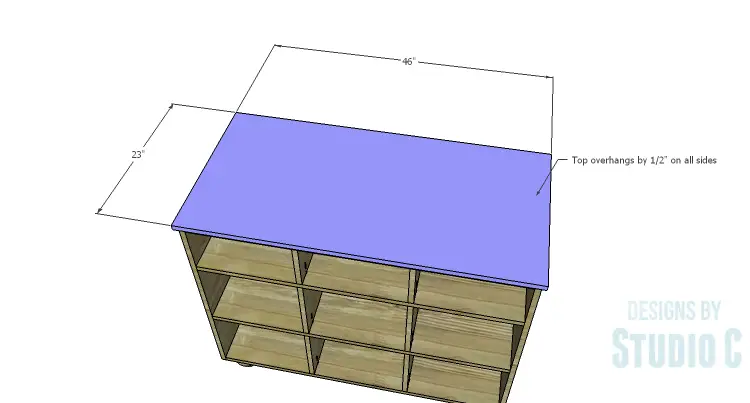
- 1 – 3/4″ plywood at 23″ x 46″ – Top
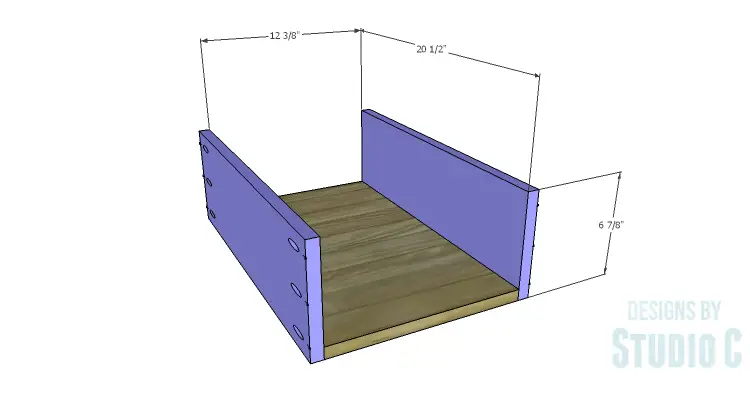
- 3 – 3/4″ plywood at 12-3/8″ x 20-1/2″ – Drawer Box Bottoms
- 6 – 3/4″ plywood at 6-7/8″ x 20-1/2″ – Drawer Box Sides
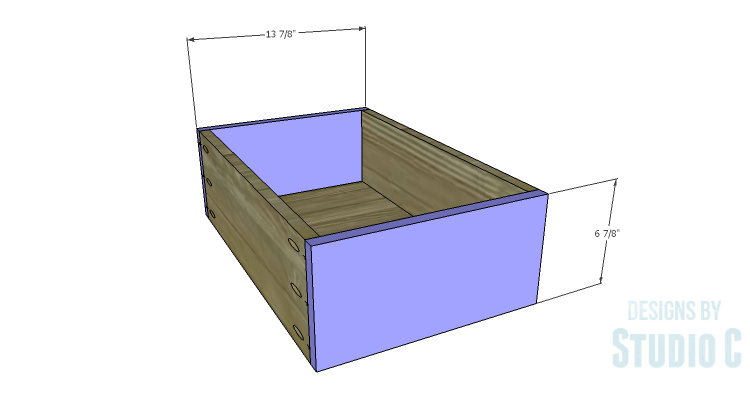
- 6 – 3/4″ plywood at 6-7/8″ x 13-7/8″ – Drawer Box Front & Back
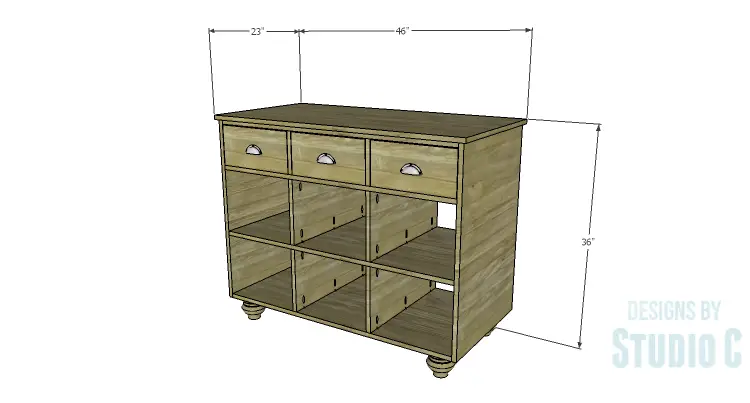
Click on the drawings for a larger view!
Step One
Edge banding will be applied to the exposed edges of the plywood prior to assembly.
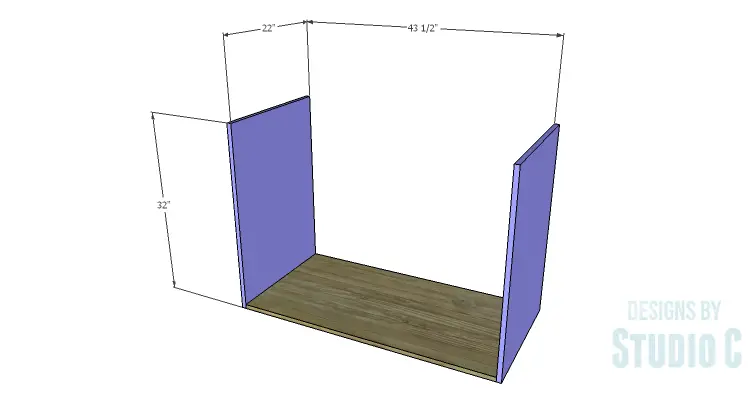
Cut the pieces for the sides and the bottom. With the pocket hole jig set for 3/4″ material, drill pocket holes in each end of the bottom. Secure the sides to the bottom using glue and 1-1/4″ pocket hole screws.
Step Two
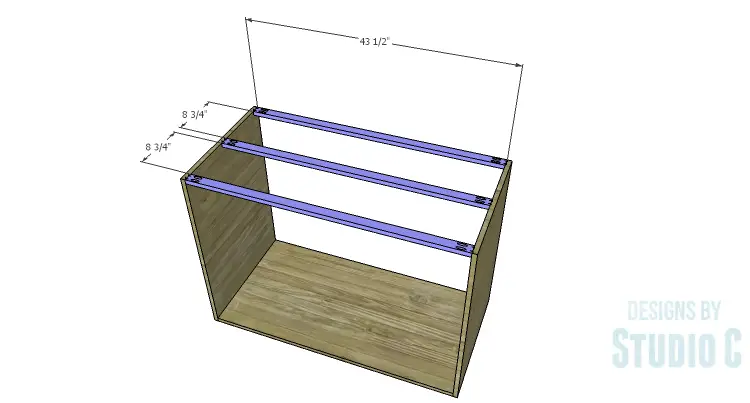
Cut the pieces for the stretchers and drill pocket holes in each end. Secure the stretchers to the sides as shown using glue and 1-1/4″ pocket hole screws.
Step Three
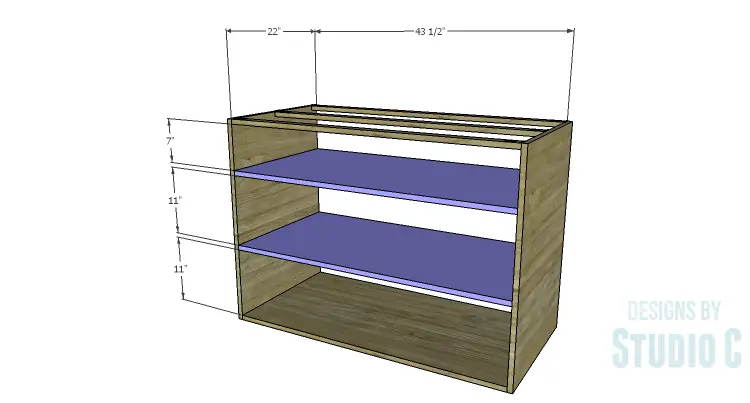
Cut the pieces for the shelves and drill pocket holes in each end. Secure the shelves to the sides using glue and 1-1/4″ pocket hole screws.
Step Four
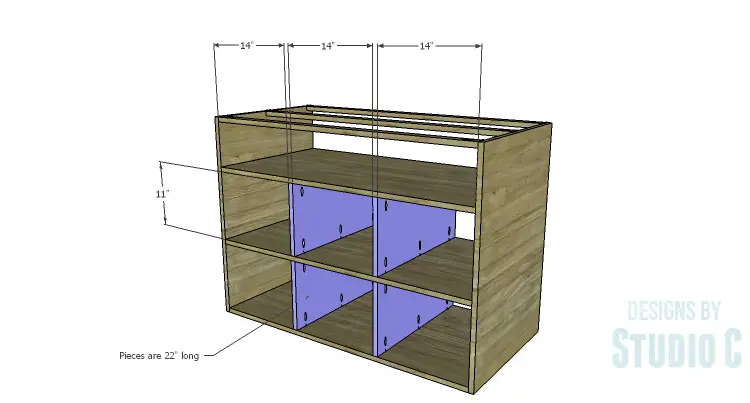
Cut the pieces for the shelf dividers and drill pocket holes in each of the longer edges. Secure the shelf dividers to the shelves and bottom using glue and 1-1/4″ pocket hole screws. A close-quarter drill or a right angle drill attachment may be necessary!
Step Five
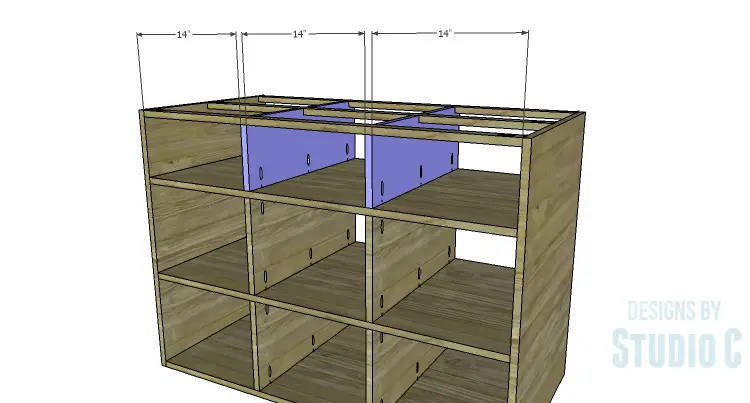
Cut the pieces for the drawer dividers. Cut the notches using a jigsaw, then drill pocket holes in the lower edge of each piece. Secure the drawer dividers to the upper shelf using glue and 1-1/4″ pocket hole screws. Add a few 1-1/4″ brad nails through the top of the stretchers into the drawer dividers at the notches.

Step Six
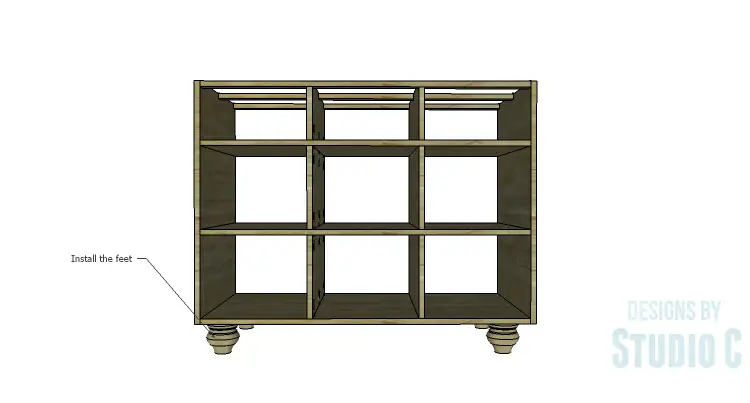
Attach the feet to the bottom of the cabinet according to the manufacturer’s installation instructions.
Cut the piece for the top. The top will overhang by 1/2″ on all sides. Secure the top in place using glue and 1-1/4″ brad nails.
Step Seven
Cut the pieces for the drawers. Drill pocket holes in all four edges of the drawer box bottoms as well as each end of the drawer box sides. Assemble the drawers by securing the sides to the bottom first, using glue and 1-1/4″ pocket hole screws, then secure the front and back pieces.
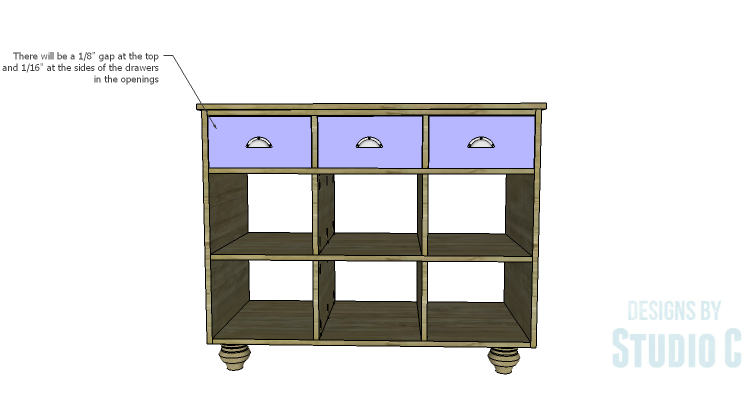
Finish as desired. Drill the holes for the cabinet pulls, then apply a coat of paste wax to the sides and bottom of the drawers to help them slide smoothly in the openings.
The open layout of the island makes it ideal in a number of spaces. The shelves are easily accessible, as are the drawers since they will open from either side! Have any questions about the DIY plans to build an Eckhart Kitchen Island? Leave a comment below!
Originally posted 2015-03-06 08:00:22.


Comments are closed.