
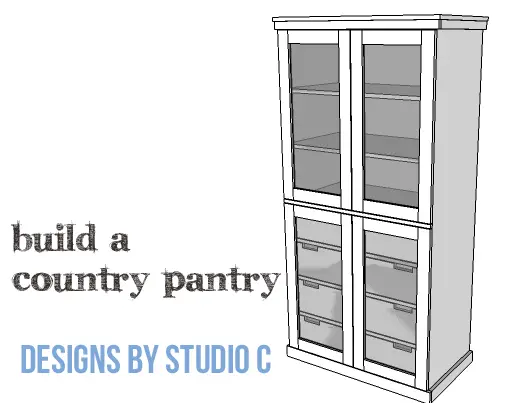
An Easy to Build Simple Country-Style Pantry
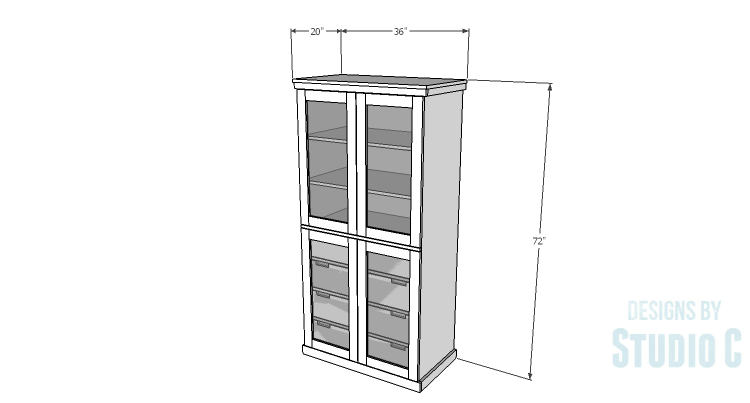
This pantry has a lot of storage and will work well in any room for any purpose. The DIY plans to build a Country Pantry feature an upper section with three shelves, a lower section with four drawers, and doors on each section with glass. There is trim under the top and at the bottom which can be altered in case two units are built as side-by-side storage!
Materials:
- 1-1/4″ pocket hole screws (<– affilaite link!)
- 1-1/4″ brad nails
- 1-1/4″ screws
- Edge banding
- 4 sets of 16″ drawer slides
- 2 sets of hinges
- Picture framing tabs or turn buttons (for the glass in the doors)
- Cabinet pulls for the doors
- Wood glue
- Sandpaper (100, 150, 220 grits)
- Finishing supplies (primer & paint, or stain, sealer)
Lumber:
- 2 – 1×2 at 6′
- 1 – 1×2 at 8′
- 8 – 1×3 at 8′
- 7 – 1×8 at 8′
- 1 – 4′ x 4′ sheet of 1/4″ plywood
- 1 – 4′ x 84′ sheet of 1/4″ plywood
- 2 – 4′ x 8′ sheets of 3/4″ plywood
Cut List:
- 2 – 3/4″ plywood at 19″ x 71-1/4″ – Sides
- 1 – 3/4″ plywood at 19″ x 32-1/2″ – Bottom
- 2 – 1×3 (ripped to 2-1/4″ wide) at 32-1/2″ – Bottom Supports
- 2 – 1×3 at 31-1/2″ – Upper Stretchers
- 1 – 3/4″ plywood at 19-3/4″ x 34″ – Middle Shelf
- 1 – 1×2 at 32-1/2″ – Lower Back Stretcher
- 3 – 1×2 at 32-1/2″ – Lower Front Stretchers
- 2 – 3/4″ plywood at 19″ x 32-1/2″ – Upper Shelves
- 1 – 3/4″ plywood at 20″ x 36″ – Top
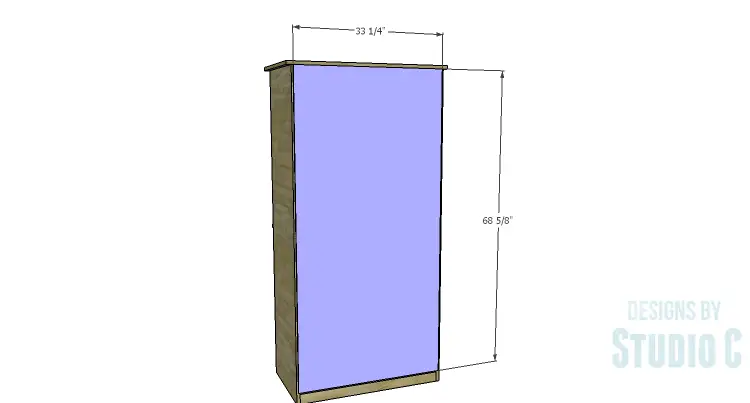
- 1 – 1/4″ plywood at 33-1/4″ x 68-5/8″ Back
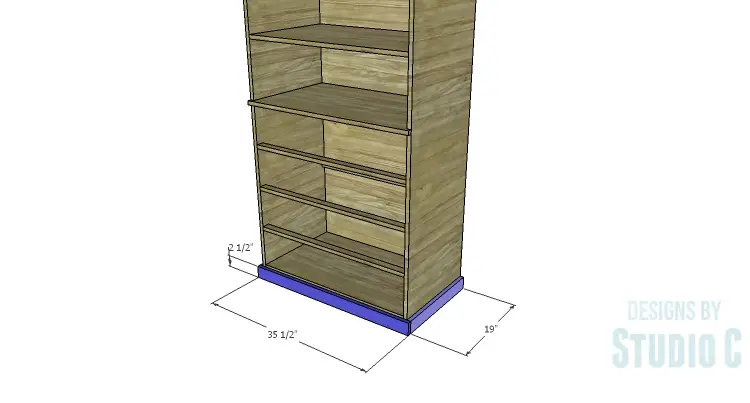
- 2 – 1×3 at 19″ – Lower Trim
- 1 – 1×3 at 35-1/2″ – Lower Trim
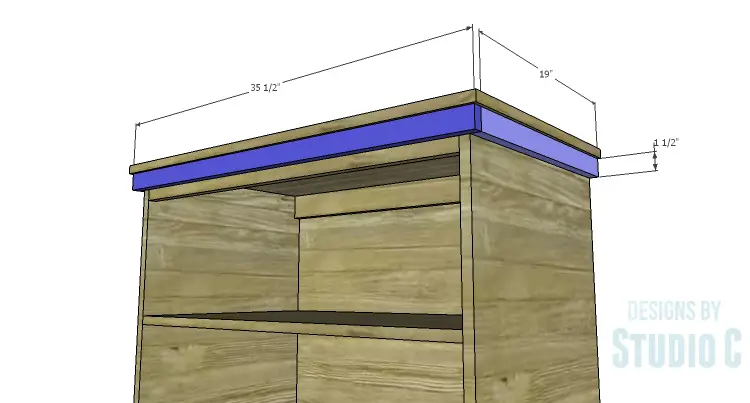
- 2 – 1×2 at 19″ – Top Trim
- 1 – 1×2 at 35-1/2″ – Top Trim
- 8 – 1×8 (ripped to 6″ wide) at 16″ – Drawer Box Sides
- 8 – 1×8 (ripped to 6″ wide) at 30″ – Drawer Box Front & Back
- 4 – 1/4″ plywood at 15″ x 30-1/2″ – Drawer Box Bottom
- 4 – 1×8 (ripped to 7-1/4″ wide) at 32-1/4″ – Drawer Fronts
- 4 – 1×3 at 33-1/2″ – Upper Door Stiles
- 4 – 1×3 at 32-1/2″ – Lower Door Stiles
- 8 – 1×3 at 11-15/16″ – Door Rails (both doors)
Edge banding will be applied to the exposed edges of the plywood prior to assembly.
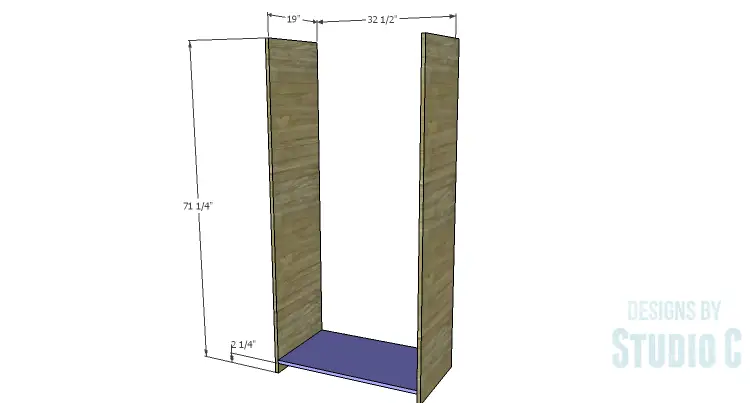
Step One
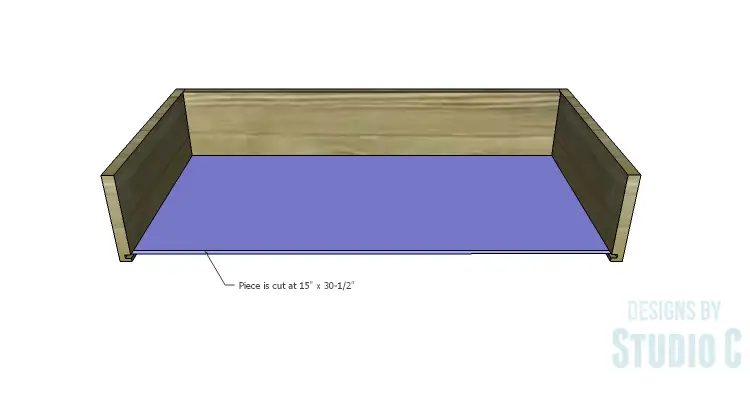
Cut the pieces for the sides and the bottom. With the pocket hole jig set for 3/4″ material, drill pocket holes in each end of the bottom piece. Secure the bottom to the sides (as shown in the drawing) using glue and 1-1/4″ pocket hole screws.
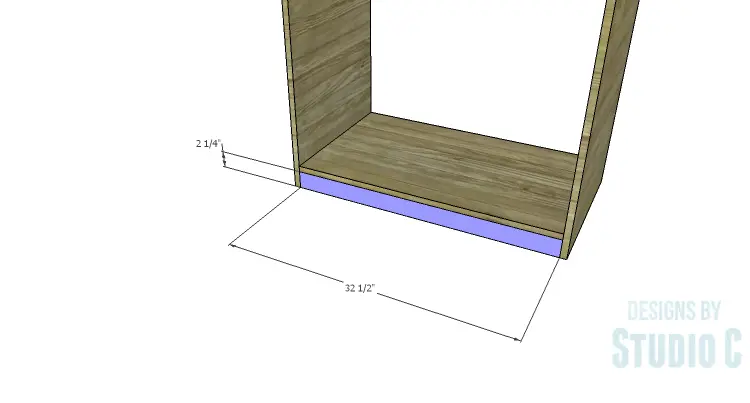
Step Two
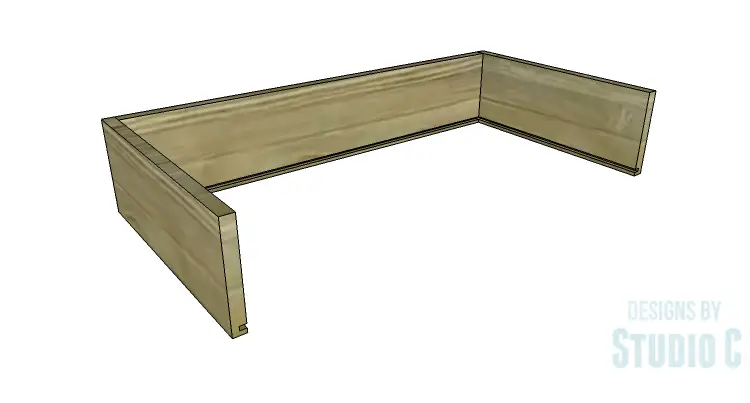
Cut the pieces for the bottom supports. Secure the supports under the bottom using glue and 1-1/4″ brad nails through the bottom and sides into the support pieces.
Step Three
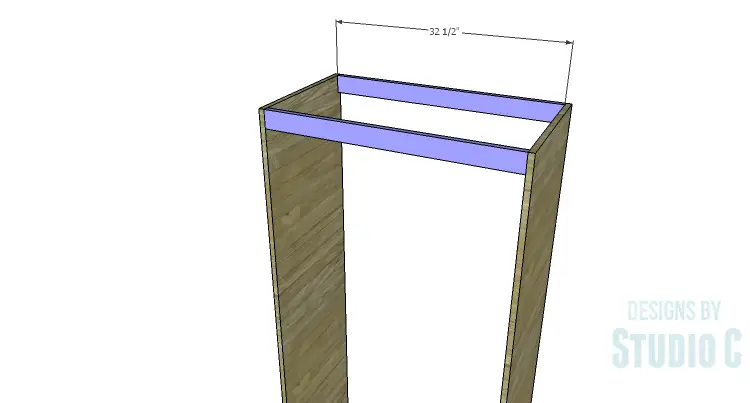
Cut the pieces for the upper stretchers and drill pocket holes in each end. Secure the stretchers to the sides using glue and 1-1/4″ pocket hole screws. Turn the back stretcher so that the pocket holes face to the back.
Step Four
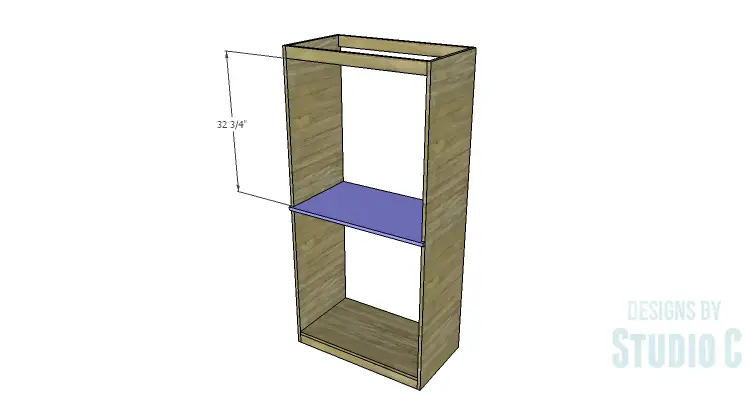
Cut the piece for the middle shelf. The middle shelf is 3/4″ wider than the sides. Cut the notch in the sides of the middle shelf using a jigsaw or a bandsaw. Drill pocket holes in each of the side edges of the shelf, and secure the shelf to the sides using glue and 1-1/4″ pocket hole screws.

Step Five
Cut the piece for the lower back stretcher and drill pocket holes in each end. Secure the stretchers to the sides using glue and 1-1/4″ pocket hole screws.

Step Six
Cut the pieces for the front stretchers and drill pocket holes in each end. Secure the stretchers to the sides using glue and 1-1/4″ pocket hole screws.

Step Seven
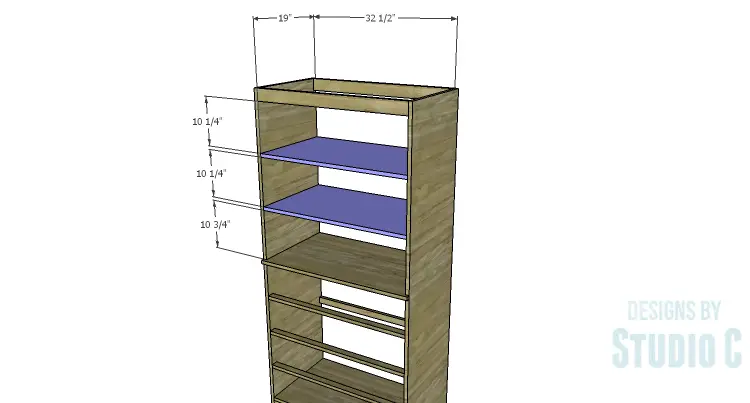
Cut the pieces for the shelves and drill pocket holes in each end. Secure the shelves to the sides using glue and 1-1/4″ pocket hole screws.
Step Eight
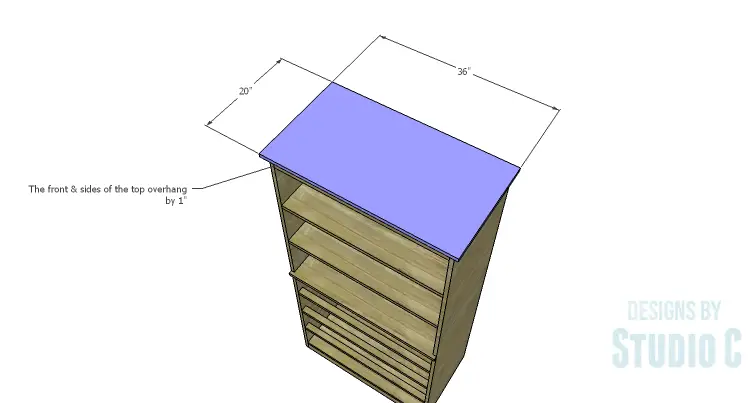
Cut the piece for the top. The sides and front will overhang the top by 1″. Secure in place using glue and 1-1/4″ brad nails.
Step Nine
Cut the piece for the back. Position the back, securing in place using glue and 1-1/4″ brad nails.
Step Ten
Cut the pieces for the lower trim. Secure the side trim pieces first using glue and 1-1/4″ brad nails, then secure the front in the same manner.
Step Eleven
Cut the pieces for the upper trim. Secure the side trim pieces first using glue and 1-1/4″ brad nails, then secure the front in the same manner.
Step Twelve
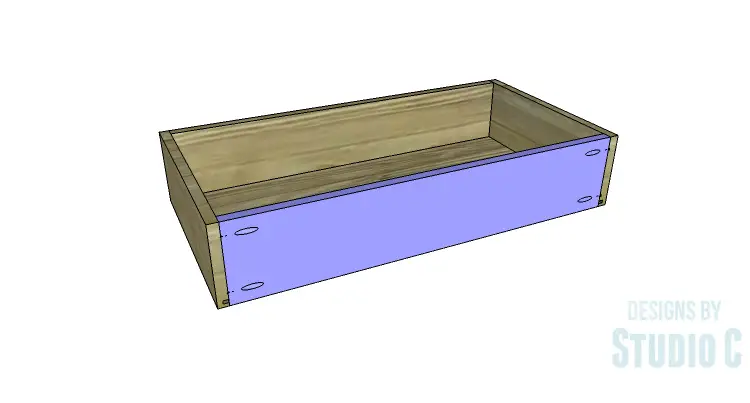
Cut the pieces for the drawer box sides, front, and back. Cut the groove in the bottom edge of each piece at 1/4″ wide by 1/4″ deep using a table saw or a router and a straight bit. Set the pocket hole jig for 3/4″ material and drill pocket holes in each end of the drawer box sides on the opposite side as the groove. Make sure that the pocket holes will not interfere with the groove. Secure the sides to the back using glue and 1-1/2″ pocket hole screws.

Step Thirteen
Cut the piece for the drawer bottom. Slide the bottom into the grooves in the sides and back. The piece should fit snugly but not too tight.
Step Fourteen
Insert the front edge of the drawer box bottom into the groove on the drawer box front. Secure the drawer box sides to the drawer box front using glue and 1-1/2″ pocket hole screws. Install the drawer slides according to the manufacturer’s installation instructions.
Step Fifteen
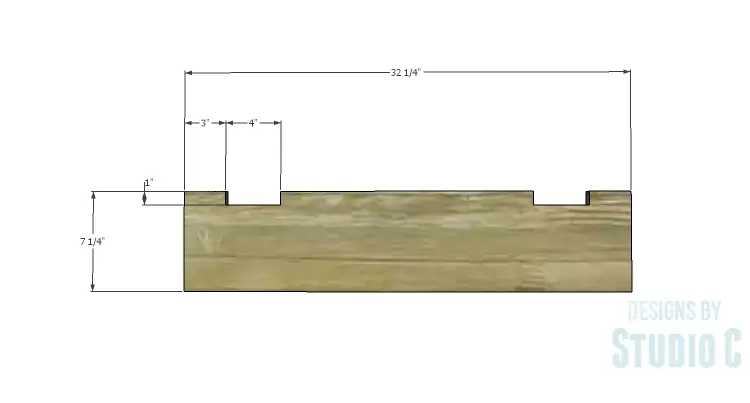
Cut the pieces for the drawer fronts. Cut the notches using a jigsaw. Shim the drawer front in the opening – there will be a 1/8” gap around all sides – securing in place with 1-1/4″ brad nails. Open the drawer, and secure the drawer front using countersunk 1-1/4” screws from the inside.
Step Sixteen
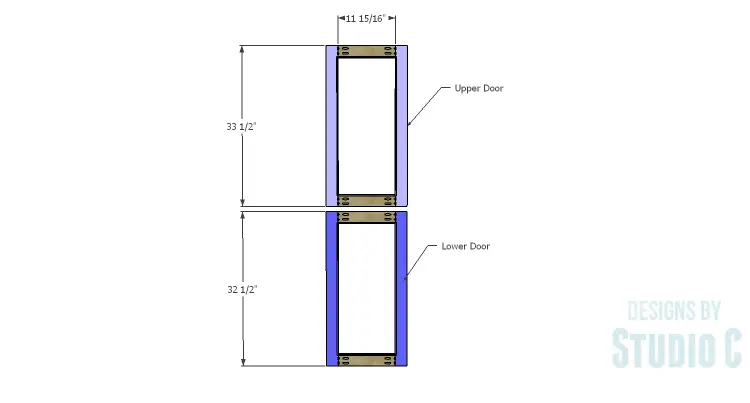
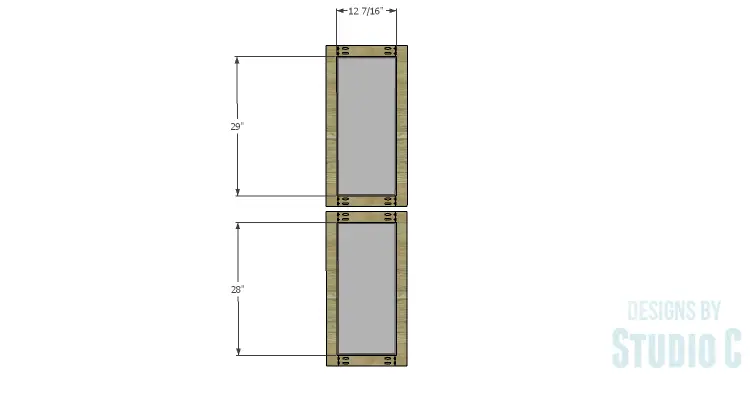
Cut the pieces for the doors and drill pocket holes in each end of the rail pieces. Assemble the doors using glue and 1-1/4″ pocket hole screws. Using a router and a 1/4″ rabbeting bit, cut a 1/4″ rabbet along the inside edge of each door frame.
Finish as desired. Cut the glass (or Plexiglas) to fit in the openings of the doors. Install the hinges on the doors, then install the doors in the cabinets. Install the cabinet pulls.
This pantry would be a fabulous addition to a dining room to store (and display) china and linens, or even in a bathroom to store towels and toiletries. Have any questions about the DIY plans to build a Country Pantry? Leave a comment below!


Comments are closed.