An Easy Project for Storing Weights
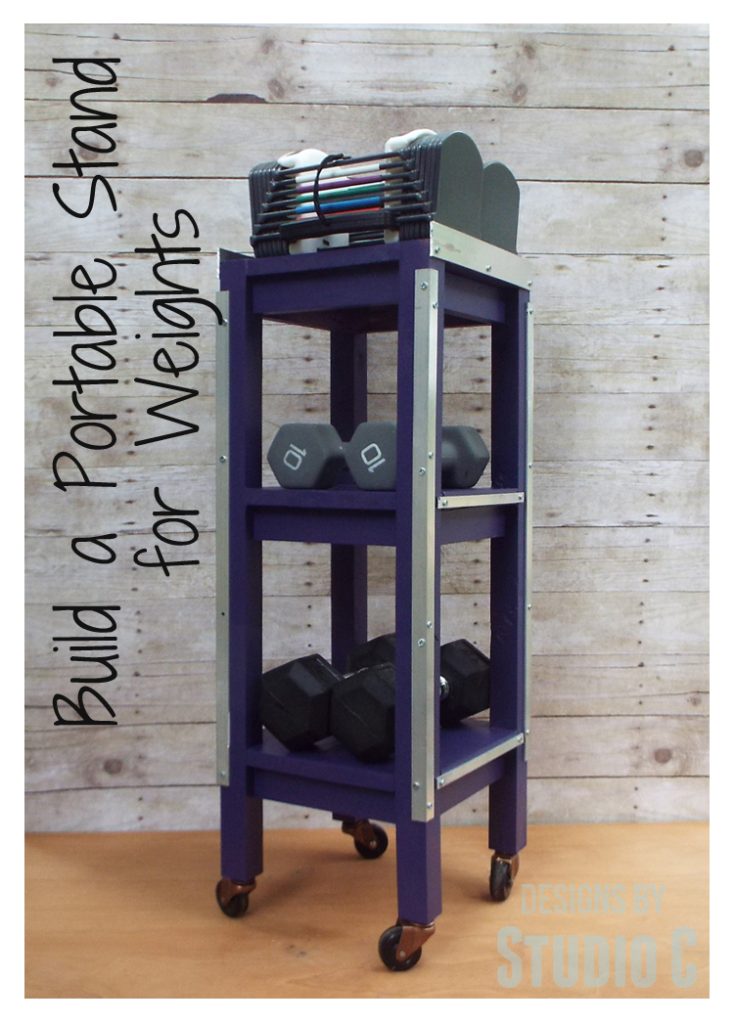
I created the DIY furniture plans to build a portable stand for weights and PowerBlocks specifically to organize the many weights I have accumulated! I was tired of tripping over them because there truly was no good place to store them. This easy to build stand works great to keep my weights out of the way!
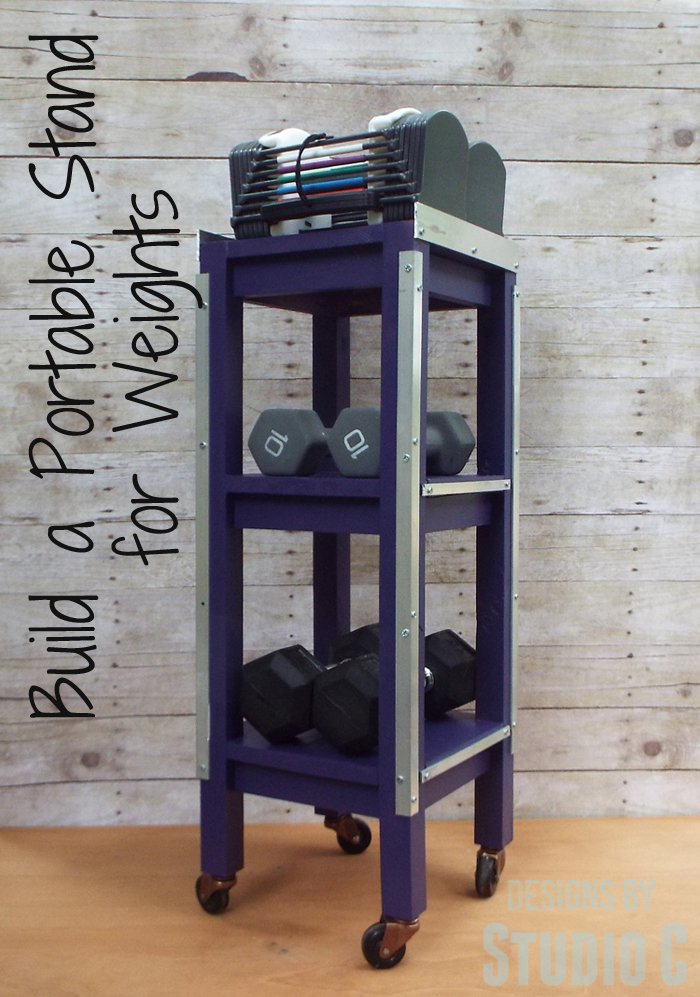
The easy to build portable weight stand is on casters with three tiers and is a compact size to organize weights with PowerBlocks (adjustable weights) sitting on the top. I used aluminum bar and angle accents to give the stand a more “sporty” look and it is easy to move out of the way after my workout!
Materials:
- 1-1/4″ pocket hole screws
- 2″ brad nails
- 2″ heavy duty casters (<– affiliate link!)
- 3/4″ aluminum angle at 4′ long (2)
- 1″ aluminum flat bar at 4′ long (1)
- 1/2″ aluminum flat bar at 3′ long (2), optional
- #8 x 3/4″ wood screws or self-tapping sheet metal screws
- Wood glue
- Sandpaper (100, 150, 220 grits)
- Finishing supplies (primer & paint, or stain, sealer)
Lumber:
- 2 – 1×2 at 6′
- 1 – 1×12 at 4′
- 2 – 2×2 at 6′
Cut List:
- 4 – 2×2 at 30″
- 6 – 1×2 at 8-1/4″ – Stretchers
- 6 – 1×2 at 9″ – Stretchers
- 3 – 1×12 at 12″ – Shelves
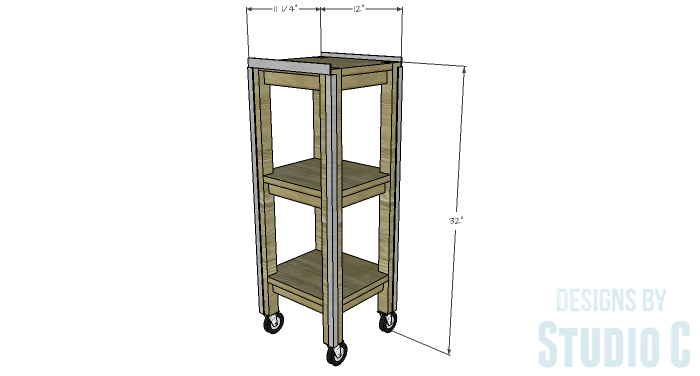
Notes about the project:
Secure the shorter stretcher pieces to the legs first, then secure the longer stretcher pieces. A close-quarter drill (<– affiliate link!) may be needed!
Step One
Cut the pieces for the legs and the stretchers. With the pocket hole jig set for 3/4″ material, drill pocket holes in each end of the stretchers.
Step Two
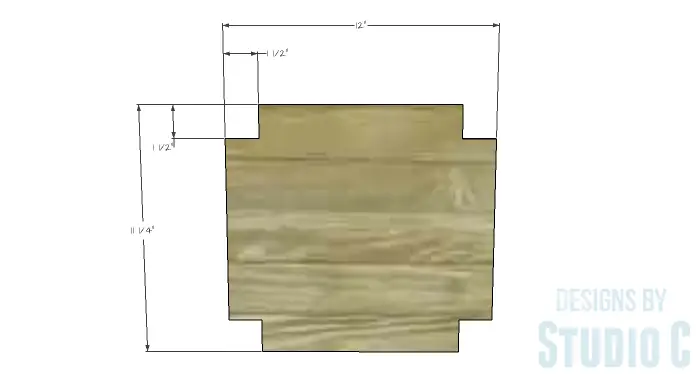
Cut the pieces for the shelves. Cut a 1-1/2″ x 1-1/2″ notch in the corner of each shelf for the legs. Set the shelves aside.
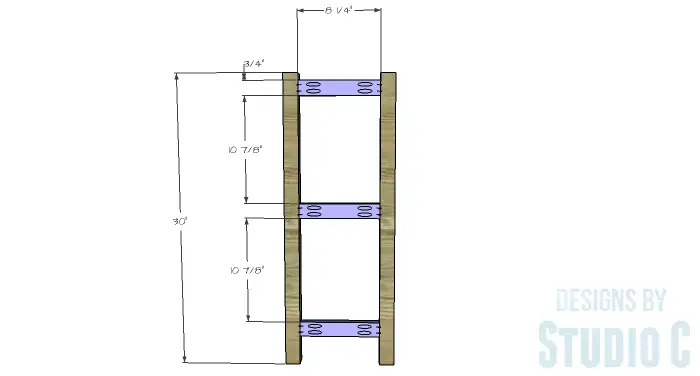
Step Three
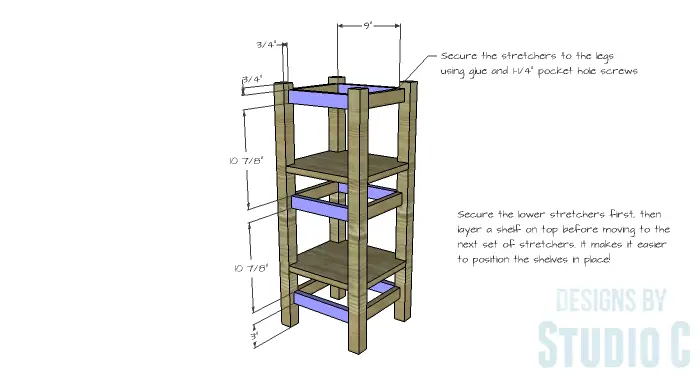
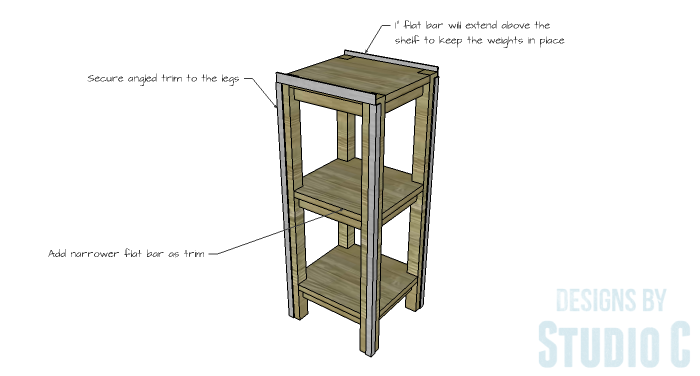
Secure the stretchers to the legs as shown in the drawing. The top stretcher will be positioned 3/4″ down from the top of the leg to accommodate the top shelf. Secure the stretchers using glue and 1-1/4″ pocket hole screws.
Step Four
Secure the remaining stretchers to the legs using glue and 1-1/4″ pocket hole screws. Start with the lower stretchers, then layer a shelf on top of the stretchers without securing it (in case adjustments have to be made!). Then secure the center stretchers and ending with the top stretchers.
Step Five
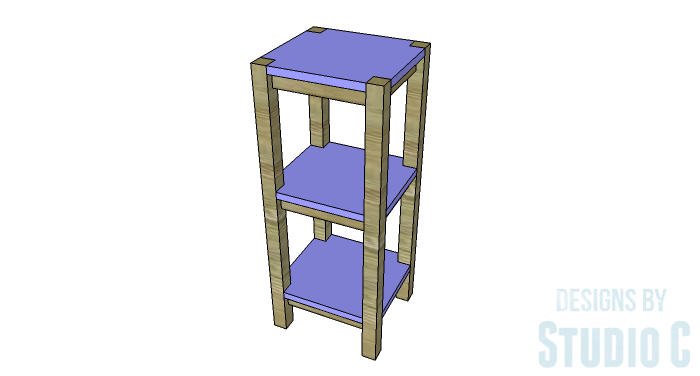
Secure the shelves to the stretchers using glue and 2″ brad nails through the top of the shelf into the stretchers below. Position the upper shelf on the stretchers and secure in the same manner.
Step Six
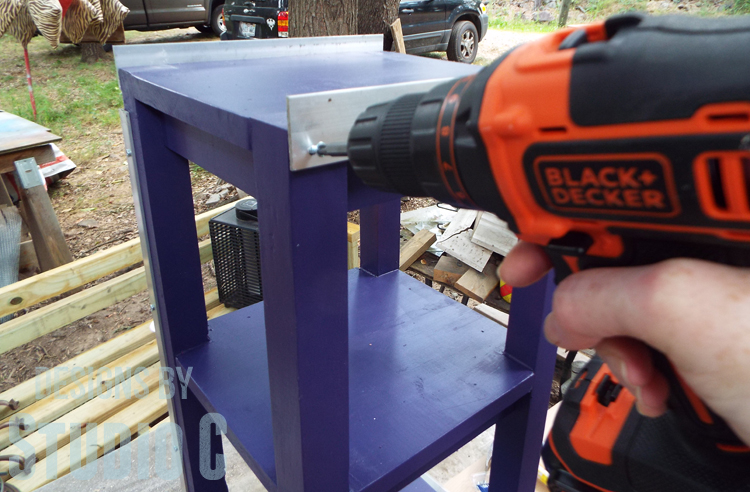
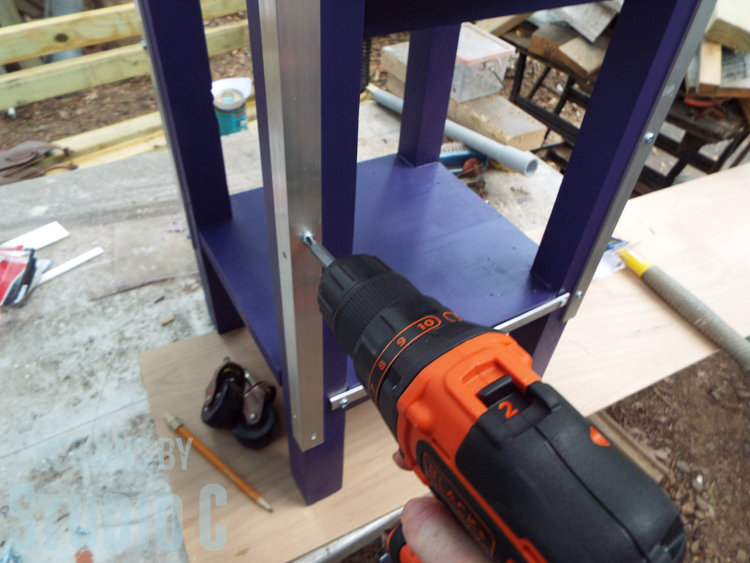
Finish as desired. If using the aluminum angle and bar as trim, cut the angle pieces in half (mine were 48″ overall, and 24″ when cut in half). Drill holes spaced evenly along each side of the angle, staggered so the screws won’t interfere with each other, then secure the angle to the legs using the #8 screws. Cut the pieces of flat bar to length and drill holes along each piece. The holes will be drilled along the lower edge of the 1″ flat bar. Secure the flat bar along the edge of each shelf securing in place with the #8 screws.
Step Seven
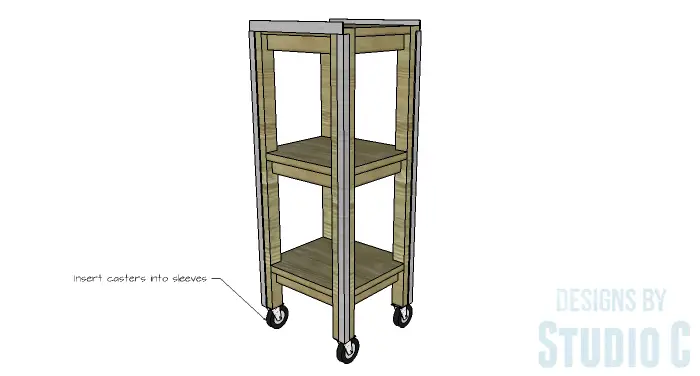
Drill a 3/8″ hole at 1-1/2″ deep in the bottom of each leg to accommodate the caster sleeves (see the manufacturer’s instructions for details). Insert the caster sleeves into the hole and tap in place with a hammer, then insert the casters.
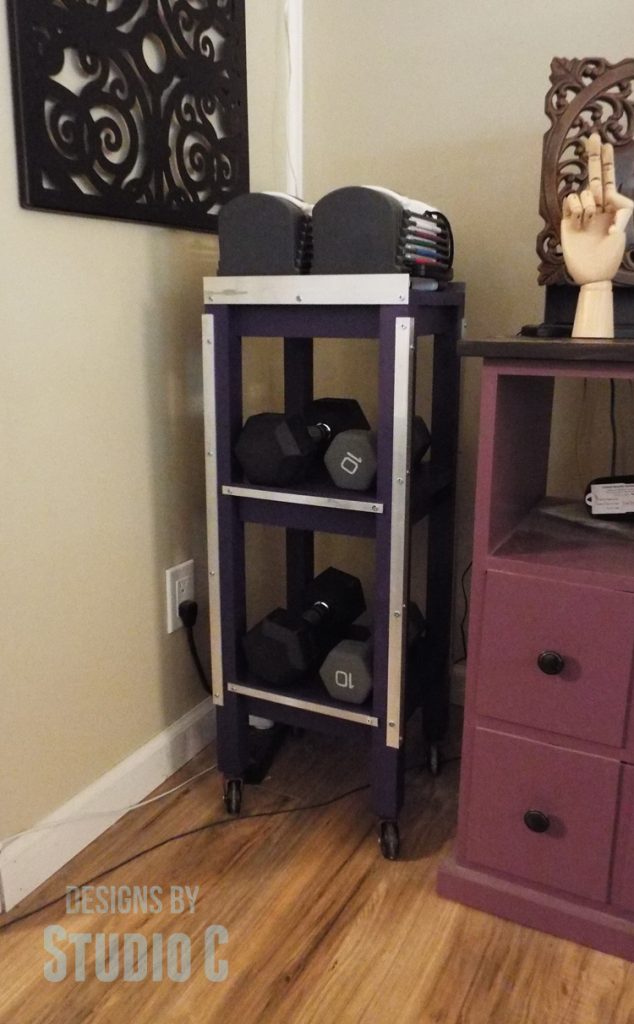
With this stand for weights and PowerBlocks, I can keep everything organized, off of the floor and out of the way until my next workout!
Have any questions about the DIY furniture plans to build a portable stand for weights and PowerBlocks? Leave a comment below!
Originally posted 2016-06-13 08:00:02.

9 Comments
I love how compact this drill is! I’d use it to hang my gallery wall. Our walls are cement board and we have to drill small pilot holes for nails to hang anything. This would make the job much easier!
i would use it to replace my crappy nimh drill that i use for work and the neverending misc projects around the house
Love the wood and metal look of your weight stand! Oh man,
the projects I could tackle with this compact Black & Decker drill… I wish I
had it this weekend when I was building a plant stand and my cordless drill
wouldn’t fit inside to attach the legs. I ended up having to use a tiny screw driver
and now my hand is killing me! This compact drill would have been perfect for
those tight spaces.
Love your workout storage! I’ve got some outdoor projects planned for this fall and an office makeover this summer where this drill would be perfet!
I love the addition of the aluminum pieces Cher! And the color? perfect!
what would I use these tools for? Anything and everything, most likely some easy diy projects I have been working on. A gal can never have too many drills and saws, right?
gail
What a practical piece for your home gym! I love how you added the metal to the sides. A drill is something that we can always use. I’d like to have my own so that I could hide it from my husband and not have to look for his when I need to use one.
I have a cordless Black and Decker drill that I have had forever. I love it. I also have a corded drill (not B & D) that weighs a ton. I keep telling myself I am going to get another cordless drill so I can have one for drilling and one for fastening. This one would be perfect.
I have always wanted to have some TV trays for those times when we eat
dinner in the living room, so I would use these tools to make that.
Ideally I would make folding tables, but my skill level may not be ready
for that.