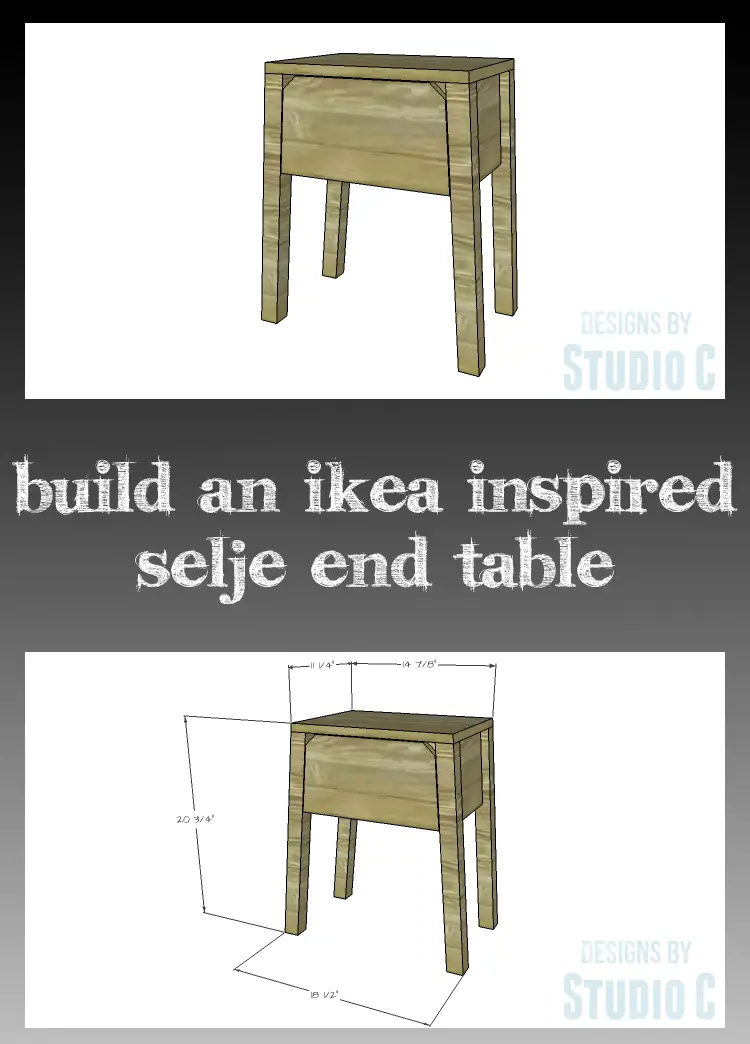
Build an IKEA Inspired Selje End Table
DIY Furniture Plans – A New Knock-Off End Table Plan
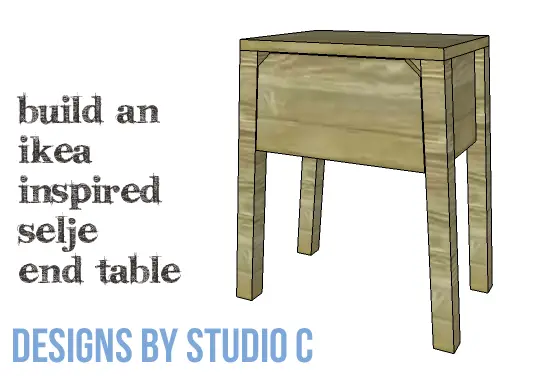
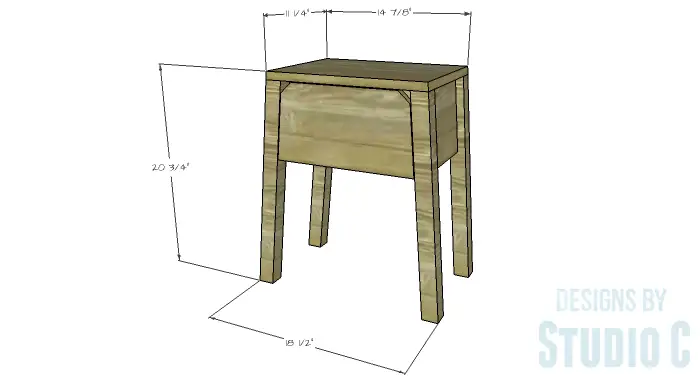
When I saw this table on the IKEA website, I fell in love with it! I love the angled lines and the angled notch in the drawer front – it is so modern! The price for the table is super cheap but as I’ve mentioned before, unless an IKEA store is right next door, the cost of shipping will be a killer! My version can be made for approximately the same price! The DIY furniture plans to build an IKEA inspired Selje End Table feature the same angled legs and drawer as the original except that my version has a deeper drawer, and is a little taller and narrower. Don’t let all of the angles fool you because this table is a really easy build and is one I plan on adding to my list!
Materials:
- 1-1/4″ pocket hole screws (,– affiliate link!)
- 1-1/4″ brad nails
- 2″ brad nails
- Wood glue
- Sandpaper (100, 150, 220 grits)
- Finishing supplies (primer & paint, or stain, sealer)
- Paste Wax
Tools Needed:
- Miter saw or Circular saw
- Table saw
- Drill
- Pocket hole jig
- Pneumatic brad nailer with compressor
- Sander
Lumber:
- 1 – 1×6 at 4′
- 1 – 1×12 at 8′
- 1 – 2×2 at 8′
Cut List:
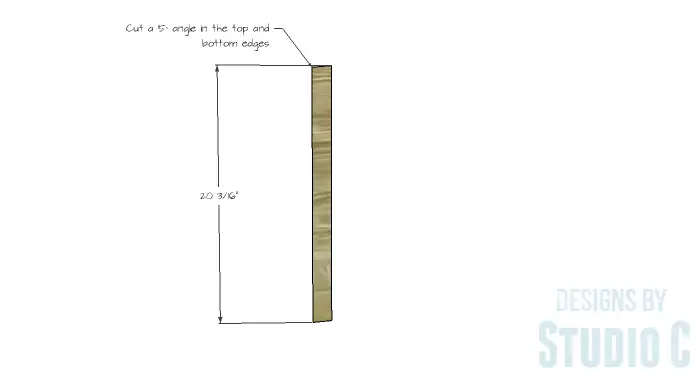
- 4 – 2×2 at 20-3/16″ – Legs
- 2 – 1×12 (ripped to 7-1/4″ wide) at 8-1/4″ – Sides
- 1 – 1×12 (ripped to 7-1/4″ wide) at 13-1/4″ – Back
- 1 – 1×12 (ripped to 9″ wide) at 13-1/4″ – Bottom
- 1 – 1×12 at 15″ – Top
- 2 – 1×6 at 11-1/2″ – Drawer Box Front & Back
- 2 – 1×6 at 9″ – Drawer Box Sides
- 1 – 1×12 (ripped to 7-1/2″ wide) at 11-1/2″ – Drawer Box Bottom
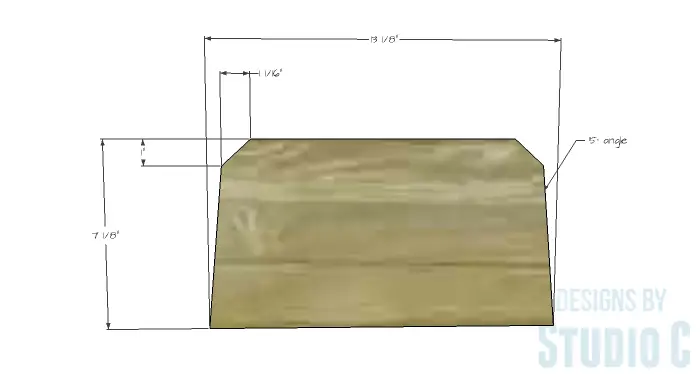
- 1 – 1×12 (ripped to 7-1/8″ wide) at 13-1/8″ – Drawer Front
Notes about the project:
The angles and bevels are all cut at 5°. The bevels can be cut by setting the blade angle on a table saw at 5° and running the pieces through. In some pieces like the bottom and the drawer box bottom, the angles will face each other while in the legs, sides and drawer box sides, the angles or bevels will face the same direction. When cutting the angles or bevels in the same direction, make a pass through the table saw cutting a bevel on one edge, then turn the piece to cut the bevel in the opposite edge. When cutting angles or bevels that face the same direction, make a pass through the table saw cutting a bevel on one edge, then flip the piece upside down to cut the bevel in the opposite edge.
Step One
Cut the pieces for the legs and cut 5° angles in the top and bottom of each piece.
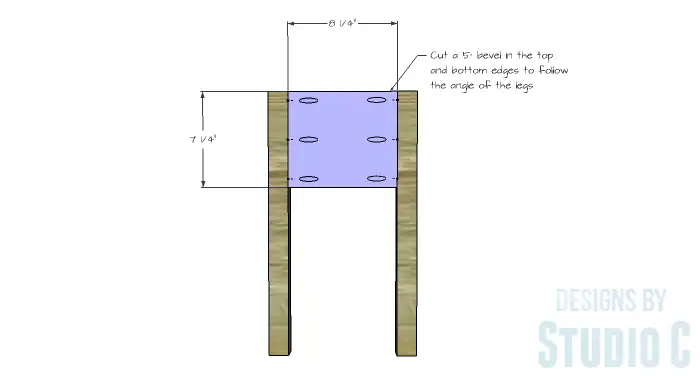
Cut the pieces for the sides and cut a 5° bevel along the top and bottom. The bevels will face the same direction. With the pocket hole jig set for 3/4″ material, drill pocket holes in each side edge of the side pieces. Secure the sides to the legs using glue and pocket hole screws with the back faces of the sides flush with the inside faces of the legs.
Step Two
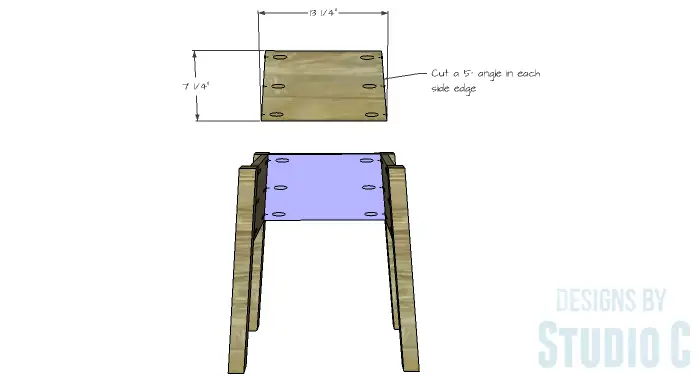
Cut the piece for the back and cut 5° angles in each side edge (the angles will face each other). Drill pocket holes in the side edges along the angles securing the piece to the legs using glue and 1-1/4″ pocket hole screws. The back face will be flush with the inside faces of the legs.
Step Three
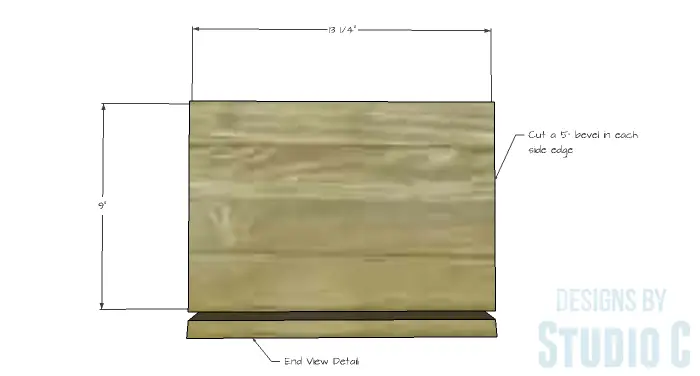
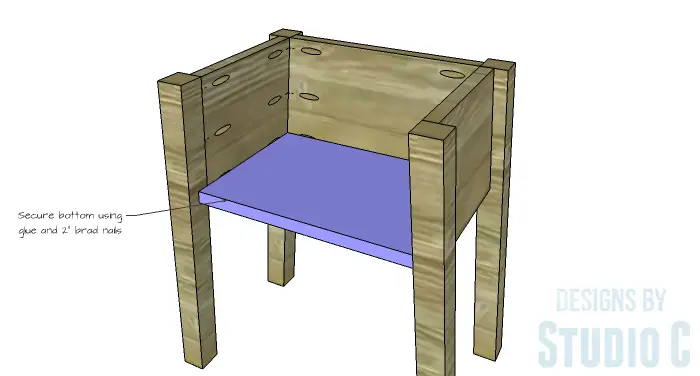
Cut the piece for the bottom, cutting 5° bevels along the side edges of the piece. (This way the bottom piece will fit correctly against the sides and legs.) Secure the bottom to the sides and legs using glue and 2″ brad nails.
Step Four
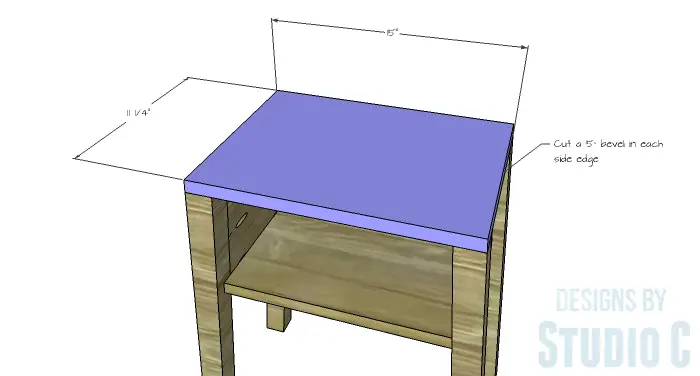
Cut the piece for the top, cutting 5° bevels along the side edges of the piece. Secure the top to the legs, sides and back using glue and 2″ brad nails.
Step Five
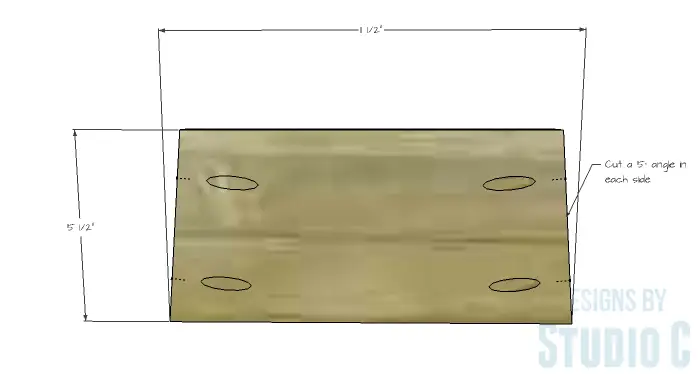
Cut the pieces for the drawer box front and back, and cut 5° angles in each side edge (the angles will face each other). Drill pocket holes in the side edges along the angles.
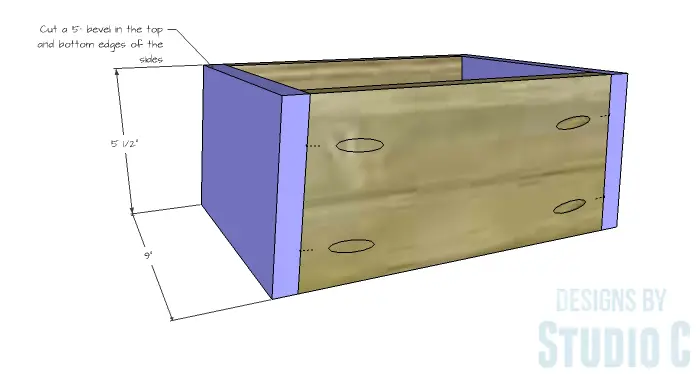
Cut the pieces for the drawer box sides and cut a 5° bevel along the top and bottom. The bevels will face the same direction. Secure the drawer box front and back pieces to the sides using glue and 1-1/4″ pocket hole screws.
Step Six
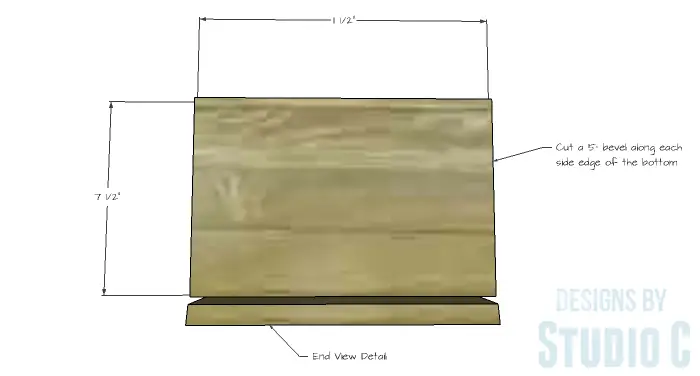
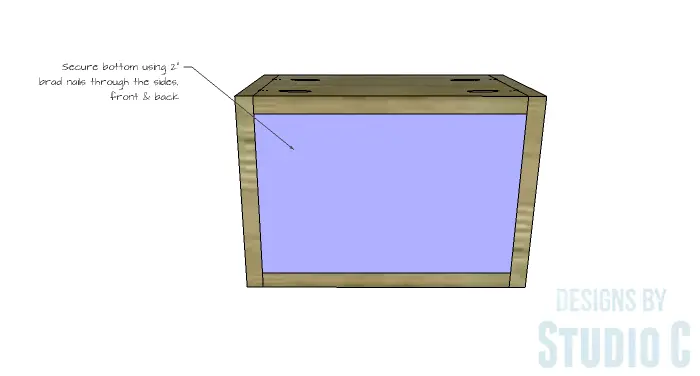
Cut the piece for the drawer box bottom, cutting 5° bevels along the side edges of the piece. (This way the bottom piece will fit correctly against the sides, front and back of the drawer box.) Secure the bottom to the sides and legs using glue and 2″ brad nails.
Step Seven
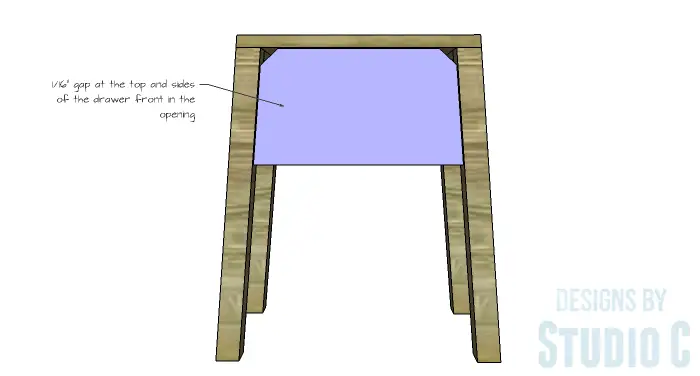
Cut the piece for the drawer front, and cut 5° angles in each end (the angles will face each other). Cut a 1″ x 1″ angled notch out of each side of the top edge of the piece. Insert the drawer box in the opening. There will be a 1/16″ gap at the sides and top of the drawer front in the opening, with the bottom edge of the drawer front overlapping the cabinet bottom. Secure the drawer front to the drawer box using glue and 1-1/4″ brad nails.
Finish the end table and drawer as desired. Apply a coat of paste wax to the bottom of the drawer and inside the cabinet where the drawer rests so the drawer will slide smoothly in the opening.
This table is the perfect addition to a living room or entryway, and built as a pair, the table would be excellent nightstands! Have any questions about the DIY furniture plans to build an IKEA inspired Selje End Table? Leave a comment below!

