Easy to Make Knockoff Shelves
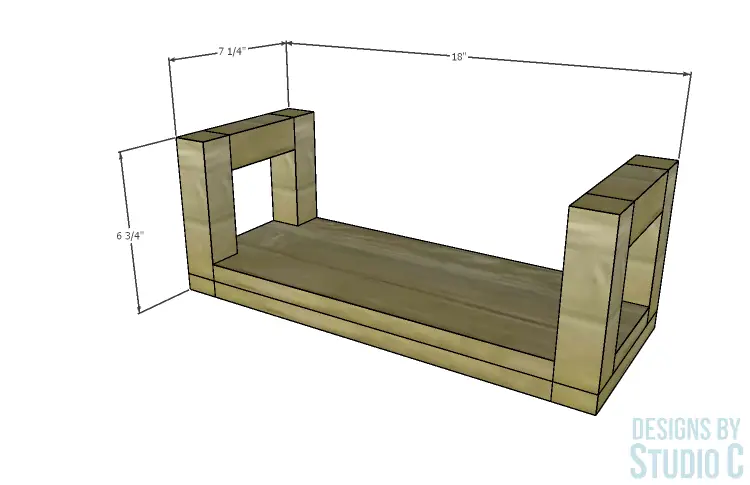
I spied this shelf on the Anthropologie website… The shelves are easy to replicate for a fraction of the cost of the originals! The DIY furniture plans to build the Carson Shelves use 2x2s, 1x2s and 1×8 material, plus the plans can easily be adjusted for the length or the width of a different board and are suitable for all skill levels!
Materials:
- 1-1/2″ screws (<– affiliate link!)
- 2-1/2″ screws (<– affiliate link!)
- Wood glue
- Wood plugs (to fit in the countersunk screw hole to cover the screw) (<– affiliate link!)
- Sandpaper
- Finishing Supplies
- Hanging Hardware (D Rings, Keyhole Hangers or Auger Anchors)
Tools Needed:
- Handsaw and Miter Box OR
- Jigsaw
- Drill with a Countersink Bit (<– affiliate link!)
- Clamps
Lumber:
**ONE 8ft. board in each size with make two to three shelves, depending on length **
- 1 – 1×2 at 8′
- 1 – 1×8 at 8′
- 1 – 2×2 at 8′
Cut List:
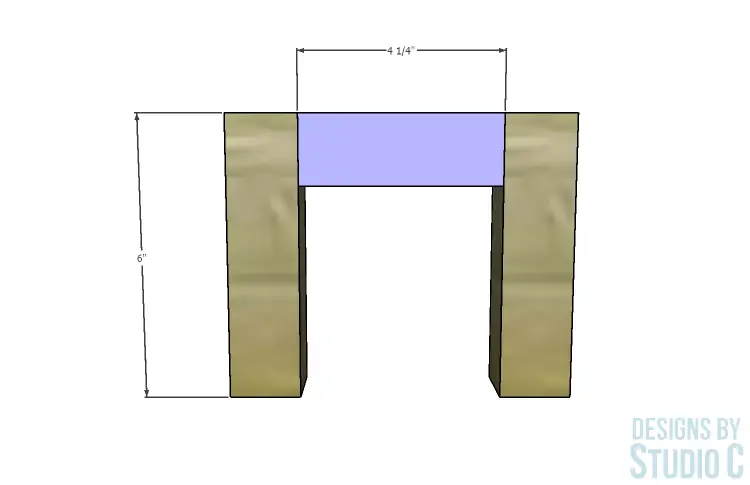
- 4 – 2×2 at 6″ – Side Frames
- 2 – 2×2 at 4-1/4″ – Side Frames
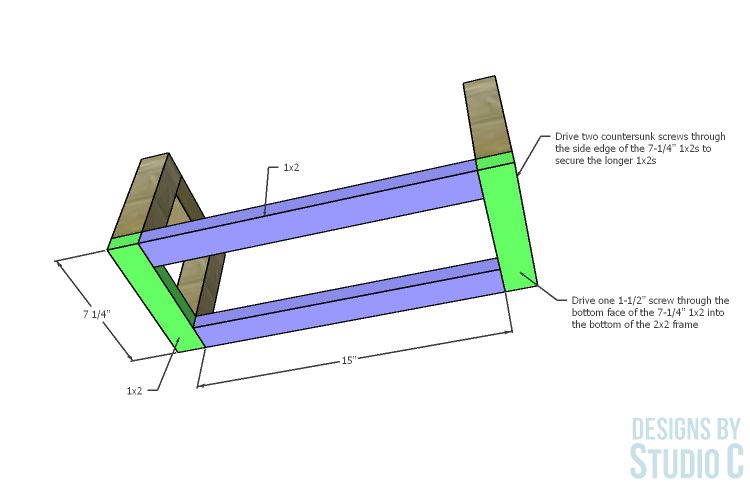
- 2 – 1×2 at 7-1/4″ – Lower Frame
- 2 – 1×2 at 15″ – Lower Frame
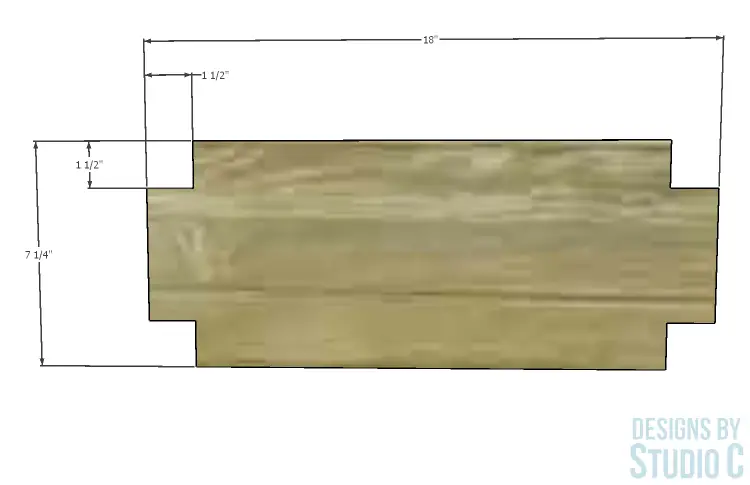
- 1 – 1×8 at 18″ (based on actual width of 7-1/4″) – Shelf
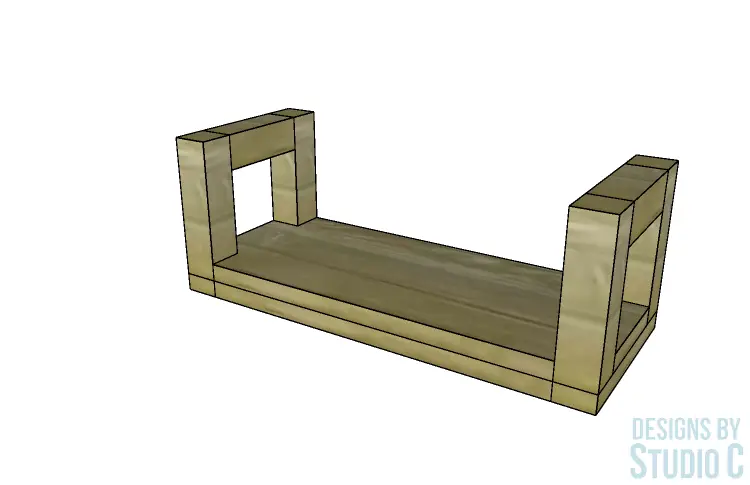
Click on the drawings for a larger view!
Notes about the project:
- Sand all pieces before assembling – this makes things so much easier!
Step One
Cut the pieces for the side frames from the 2×2 material. Glue one of the 4-1/4″ pieces between two of the 6″ pieces and clamp together. Drill the countersunk holes for the 2-1/2″ screws, then drive the screws and plug the holes.
Step Two
Cut the pieces for the lower frame. Apply glue to the bottom edge of the side frames and clamp the 7-1/4″ 1×2 pieces to the bottom edge. Once the glue dries, Apply glue to the ends of the 15″ 1×2 pieces and clamp to the side frames as shown in the drawing. Drill countersunk holes through the side edges of the 7-1/4″ 1×2 pieces into the ends of the 15″ 1×2 pieces, then drive the 2-1/2″ screws and plug the holes. There should be enough space between the 2-1/2″ screws to drive a 1-1/2″ screw through the bottom of the 7-1/4″ 1×2 pieces into the ends of the 2×2 pieces.
Step Three
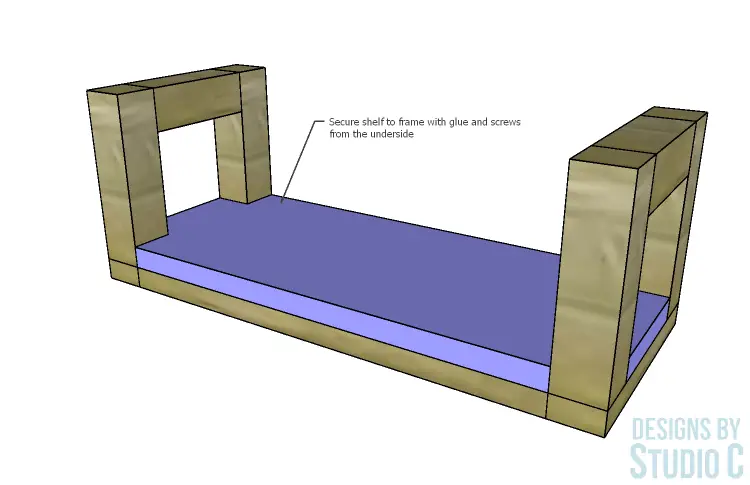
Cut the 1×8 piece for the shelf and cut the notches using a handsaw or a jigsaw. Secure the shelf to the frame using glue and screws driven through the bottom edge of the 1×2 frame pieces into the bottom of the shelf.
Step Four
Finish as desired. Install the hanging hardware according to the manufacturer’s instructions. If the shelves are going to hold a lot of weight, position the shelf with at least one side frame over a wall stud and use an auger anchor on the other side.
Have questions about the DIY furniture plans to build the Carson Shelves? Leave a comment below!


Comments are closed.