An Easy to Build Linen Tower to Match a Custom Vanity
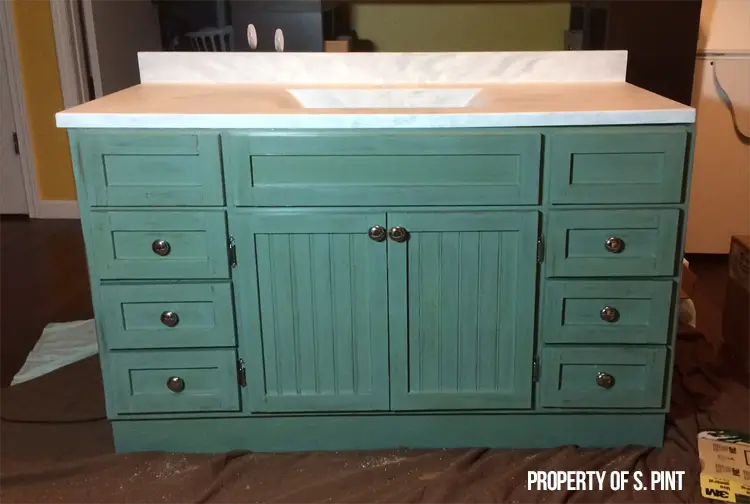
Hey there! I had some lovely readers reach out to me before, asking if I could design a unique bath vanity for their space. After completing the vanity, they even requested a custom DIY linen cabinet to go along with it. They were so kind and generous that they allowed me to share the DIY furniture plans to build a bathroom linen tower on DbSC, along with a stunning photo of their amazing bath vanity!
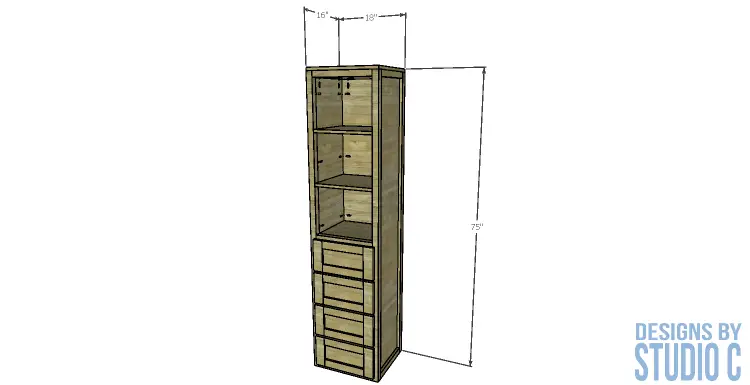
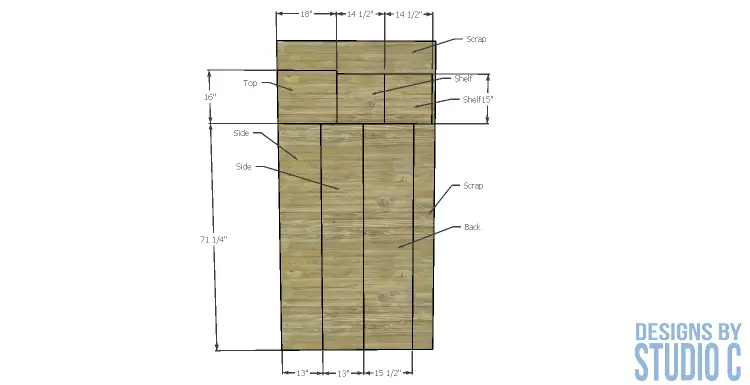
The linen cabinet woodworking plans feature a narrow profile with four drawers and two shelves. It sits just over 6′ tall, and is the perfect place to store towels and other bath toiletries. It is an easy build that can be completed in a couple of weekends and can be finished however you choose! I’ve also included a cutting diagram for the plywood to maximize the sheet with minimal scrap!
Materials:
- 1-1/4” pocket hole screws
- 2-1/2” pocket hole screws
- 2” brad nails
- 1-1/4” screws
- Edge banding, optional (for the top) (<– affiliate link!)
- Four sets of 12” drawer slides (<– affiliate link!)
- Four drawer pulls
- Wood glue (<– affiliate link!)
- Sandpaper (<– affiliate link!)
- Finishing Supplies
Lumber:
- 3 – 1×3 at 8’
- 3 – 1×6 at 8’
- 7 – 2×2 at 8’
- 1 – 4’ x 4’ sheet of ¼” plywood
- 1 – 4’ x 8’ sheet of ¾” plywood
Tools Needed:
- Table Saw or Circular Saw
- Miter Saw or Jigsaw
- Router with 1/4” rabbeting bit and 1/4” dado bit
- Pneumatic brad nailer with compressor (or battery powered nailer)
- Drill with a close-quarter attachment
- Pocket hole jig
- Phillips head screwdriver
- Drawer slide jig, optional
Cut List:
- 4 – 2×2 at 74-1/4” – Side Framing
- 4 – 2×2 at 13” – Side Framing
- 2 – ¾” plywood at 13” x 71-1/4” – Side Panels
- 4 – 2×2 at 15” – Front & Back Stretchers
- 1 – ¾” plywood at 15” x 71-1/4” – Back Panel
- 1 – ¾” plywood at 16” x 18” – Top
- 1 – 2×2 at 15” – Drawer Shelf
- 1 – ¾” plywood at 13” x 15” – Drawer Shelf
- 3 – 2×2 at 15” – Drawer Framing
- 2 – ¾” plywood at 14-1/2” x 15” – Shelves
- 8 – 1×6 at 12-1/2” – Drawer Box Front & Back
- 8 – 1×6 at 12” – Drawer Box Sides
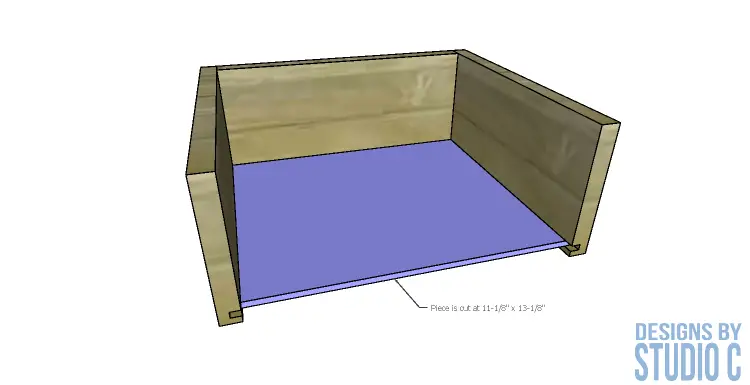
- 4 – ¼” plywood at 11-1/8” x 13-1/8” – Drawer Box Bottom
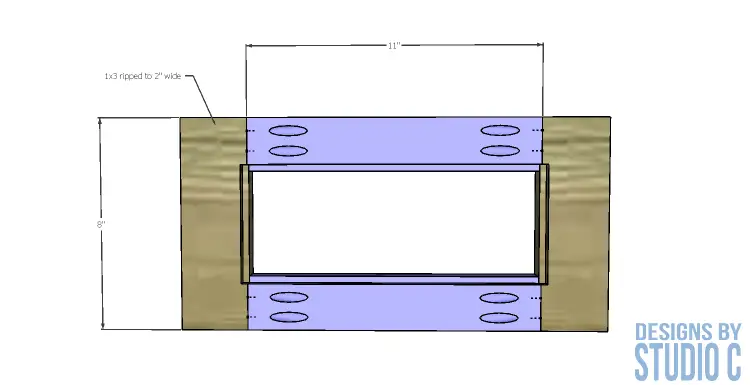
- 8 – 1×3 (ripped to 2” wide) at 8” – Drawer Front Stiles
- 8 – 1×3 (ripped to 2” wide) at 11” – Drawer Front Rails
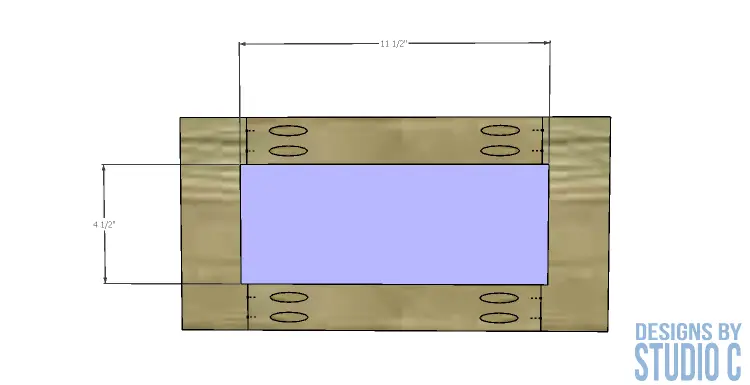
- 4 – ¼” plywood at 4-1/2” x 11-1/2” – Drawer Front Panel
Notes about the project:
Edge banding will be applied to the exposed edges of the top and shelves prior to securing it to the framing.
A close-quarter drill attachment may be needed to drive the pocket hole screws in tight spaces.
Step One
Cut the pieces for the side framing and the side panels. With the pocket hole jig set for 1-1/2” material, drill pocket holes in each end of the shorter 2×2 framing pieces. Assemble the frames using glue and 2-1/2” pocket hole screws.
Set the pocket hole jig for ¾” material and drill pocket holes in all four edges of the side panels. Secure the panels inside the framing, with the back faces flush, using glue and 1-1/4” pocket hole screws.
Step Two
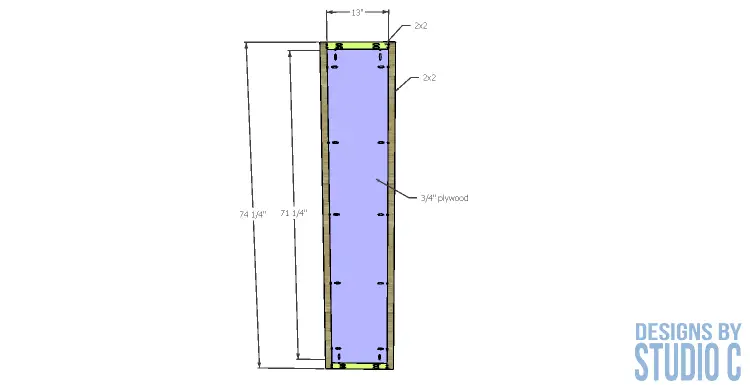
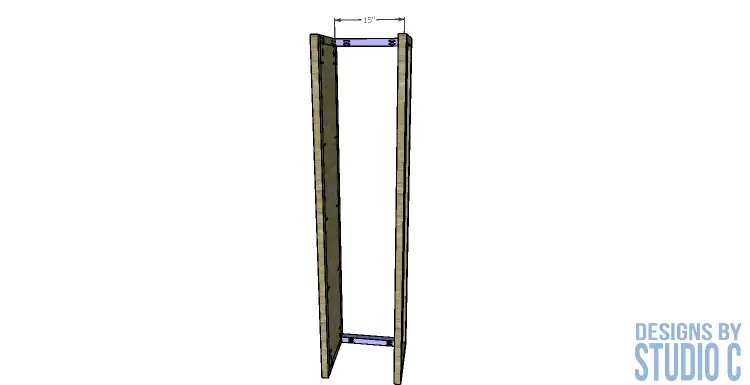
Cut the 2×2 pieces for the front and back stretchers. Set the pocket hole jig for 1-1/2” material and drill pocket holes in each end. Secure two of the pieces to the back edges of the side frames at the top and bottom using glue and 2-1/2” pocket hole screws.
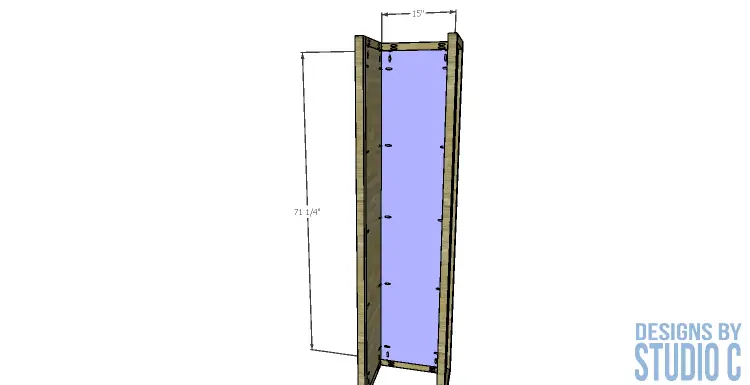
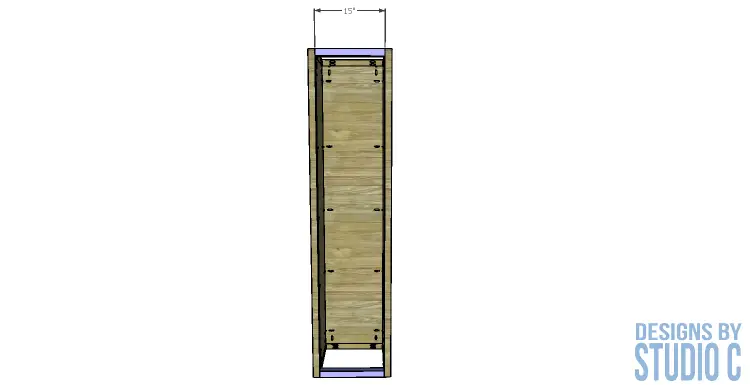
Set the pocket hole jig for ¾” material and drill pocket holes in all four edges of the back panel. Secure the panel inside the side and back framing, with the back faces flush, using glue and 1-1/4” pocket hole screws.
Secure the remaining 2×2 pieces to the front of the side panels at the top and bottom using glue and 2-1/2” pocket hole screws.
Step Three
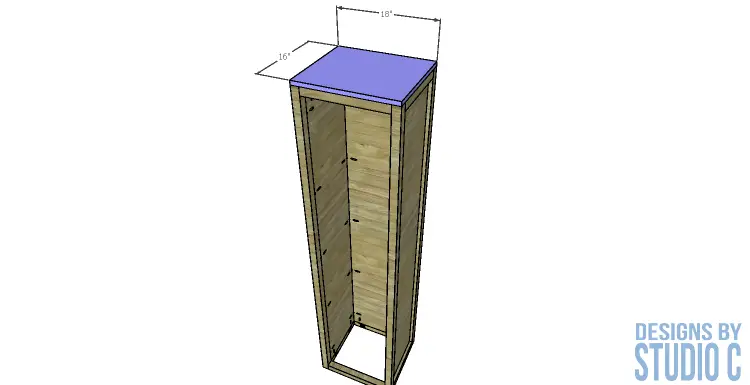
Cut the piece for the top. Apply edge banding to the exposed edges, then secure the top in place using glue and 2” brad nails.
Step Four
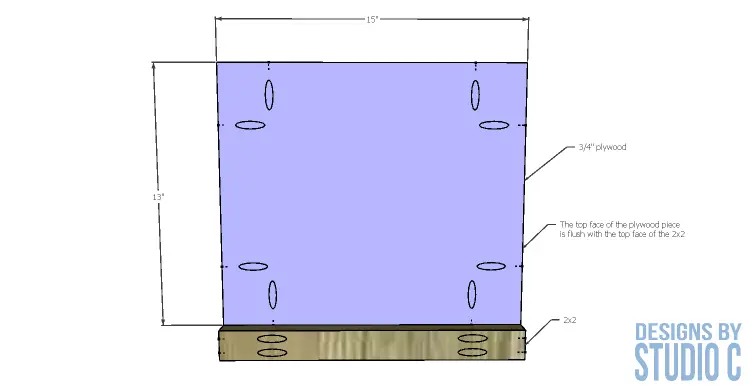
Cut the pieces for the drawer shelf. Set the pocket hole jig for 1-1/2” material and drill pocket holes in each end of the 2×2 piece.
Set the pocket hole jig for ¾” material and drill pocket holes in all four edges of the plywood piece.
Secure the plywood piece to the 2×2 piece, with the top faces flush, using glue and 1-1/4” pocket hole screws.
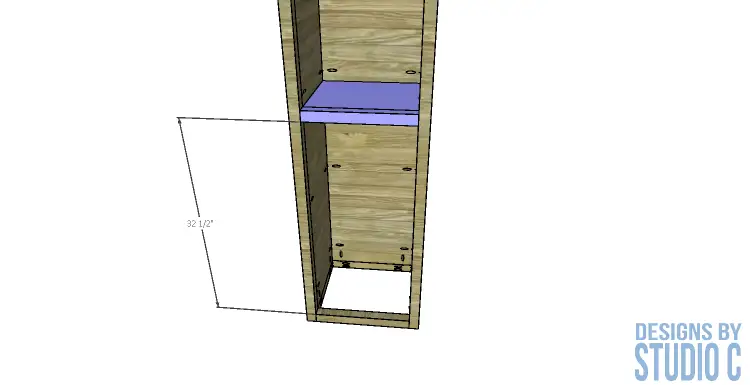
Secure the drawer shelf to the sides and back of the cabinet using 1-1/4” pocket hole screws through the plywood piece into the side and back panels, and 2-1/2” pocket hole screws through the 2×2 piece into the front 2x2s of the side framing.
Step Five
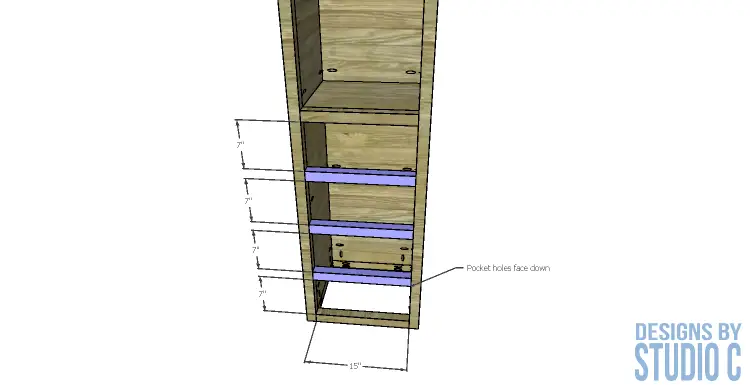
Cut the pieces for the drawer framing. Set the pocket hole jig for 1-1/2” material and drill pocket holes in each end of the pieces. Secure the pieces to the front opening, with the pocket holes facing down, using glue and 2-1/2” pocket hole screws.
Step Six
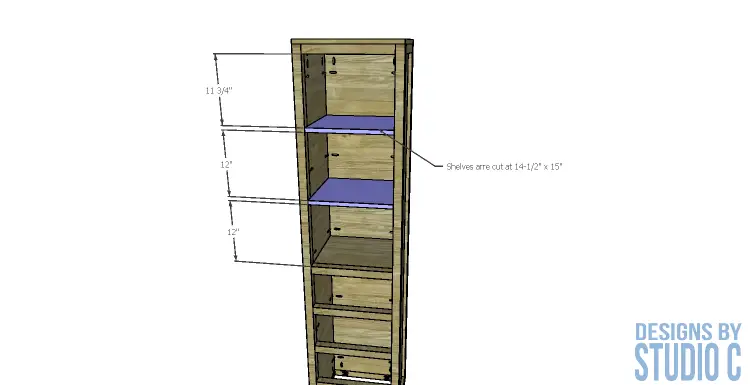
Cut the pieces for the shelves. Apply edge banding to the front edge of each shelf. Set the pocket hole jig for ¾” material and drill pocket holes in the side and back edges. Secure the shelves to the cabinet sides and back using glue and 1-1/4” pocket hole screws.
Step Seven
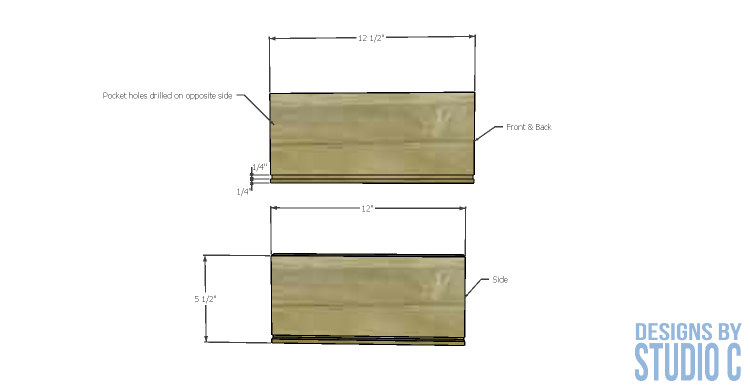
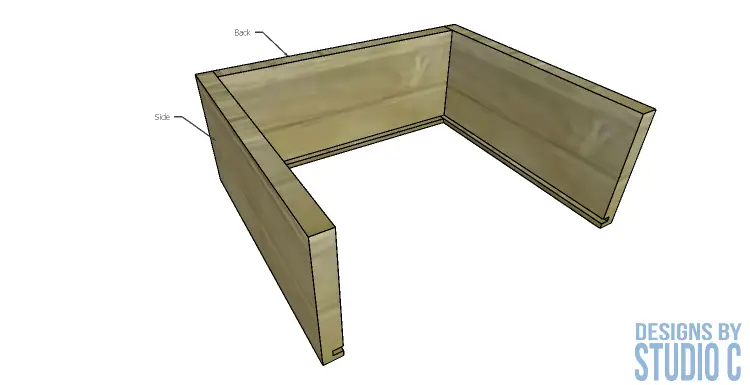
Cut the pieces for the drawer box sides, front, and back. Cut the groove in the bottom edge of each piece at 1/4″ wide by 1/4″ deep using a table saw or a router and a straight bit. Set the pocket hole jig for 3/4″ material and drill pocket holes in each end of the drawer box sides on the opposite side as the groove. Make sure that the pocket holes will not interfere with the groove. Secure the sides to the back using glue and 1-1/4″ pocket hole screws.
Step Eight
Cut the piece for the drawer bottom. Slide the bottom into the grooves in the sides and back. The piece should fit snugly but not too tight.
Step Nine
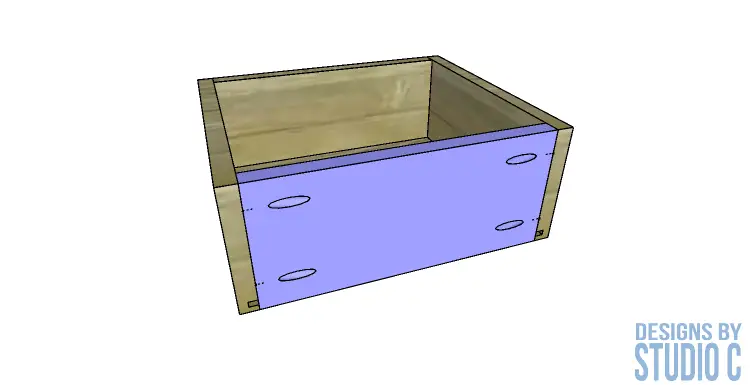
Insert the front edge of the drawer box bottom into the groove on the drawer box front. Secure the drawer box sides to the drawer box front using glue and 1-1/4″ pocket hole screws.
Install the drawer slides according to the manufacturer’s installation instructions positioning them as indicated in the drawings.
Step Ten
Cut the pieces for the drawer fronts. Set the pocket hole jig for ¾” material. Drill pocket holes in each end of the rail pieces and assemble the frames using glue and 1-1/2” pocket hole screws.
Using a router with a 1/4” rabbeting bit, cut a rabbet to accommodate the 1/4” panel along the inside edge of the back of the frame. The corners of the rabbet can be squared using a hammer and a chisel.
Step Eleven
Cut the pieces for the drawer front panels. Insert the panels in the frame and secure using glue.
Step Twelve
Mark the position of the handles on the drawer fronts. Drive screws through the holes for the drawer pulls into the drawer box to temporarily hold the drawer front in place. Open the drawer, and secure the drawer front using countersunk 1-1/4” screws from the inside. Remove the screws from the holes for the drawer pull then finish drilling the holes. Install the drawer pull. Take a look at this super-easy tutorial on installing drawer fronts.
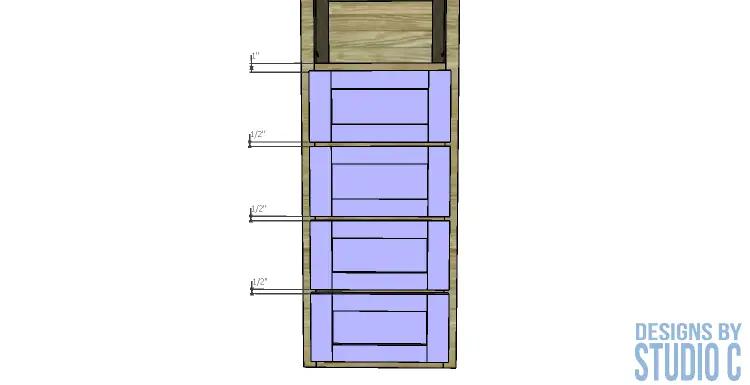
There will be a 1/2” gap between the drawer fronts, with the very top drawer front located 1” down from the drawer shelf.
Finish as desired.
Like the built in linen cabinet plans? Here are a few more projects to build:
Have you built this DIY linen cabinet? Send a photo to me at cher@designsbystudioc.com! For questions on the DIY furniture plans to build a bathroom linen tower, leave a comment below!


Comments are closed.