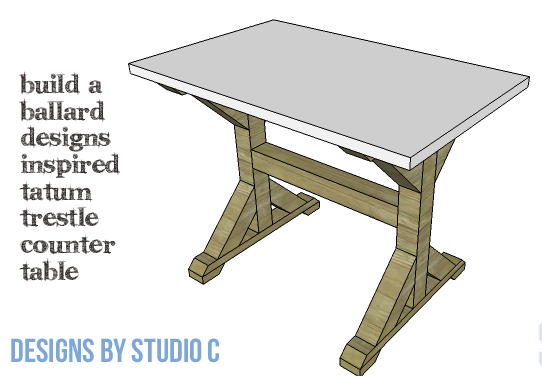
Build a Ballard Designs Inspired Tatum Trestle Counter Table
A New Knock-Off Dining Table – DIY Furniture Plans
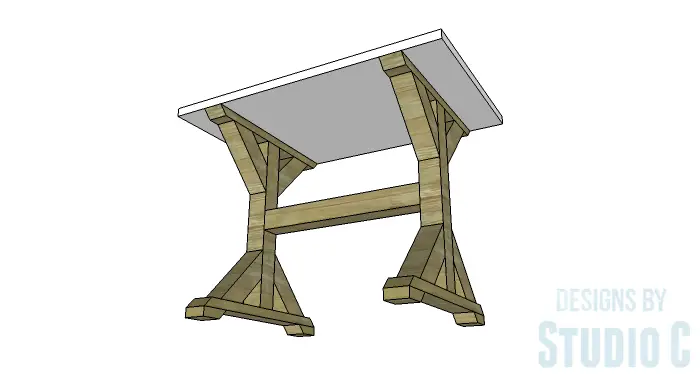
Hey there! Looking to show off your amazing building skills? Well, we’ve got just the thing for you! Our quick and affordable table is the perfect way to showcase your talent. With our DIY furniture plans, you can easily build a beautiful Ballard Designs Inspired Tatum Trestle Counter Table using simple materials like 2x4s, 4x4s, and plywood. The best part? It’s a super fabulous counter-height table! Even if you’re new to furniture building, don’t worry. This project is perfect for beginners and can be completed in just one weekend. So why wait? Let’s get started on creating your dream table!
Materials:
- 2-1/2″ screws (<– affiliate link!)
- 3″ screws
- 4 – 5″ x 3/8″ lag screws
- 2″ wide edge banding
- Contact cement
- Wood glue
- Sandpaper (100, 150, 220 grits)
- Finishing supplies (primer & paint, or stain, sealer)
Tools Needed:
- Miter saw or circular saw
- Table saw (to rip plywood – most home improvement centers will do this for you)
- Drill
- 3/8″ drill bit for the lag screws
- 3/8″ socket wrench for the lag screws
- Iron and cutter for edge banding
- Sander
Lumber:
- 2 – 2×4 at 6′
- 2 – 4×4 at 8′
- 1 – 4′ x 8′ sheet of 3/4″ plywood
Cut List:
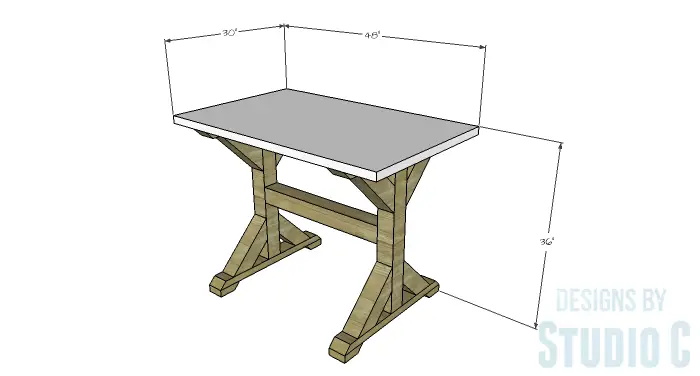
- 4 – 2×4 at 30″ – Top & Bottom Supports
- 4 – 2×4 at 5″ – Bottom Support Feet
- 1 – 4×4 at 30″ – Leg
- 8 – 4×4 at 13-13/16″ – Bracing
- 1 – 4×4 at 29″ – Center Bracing
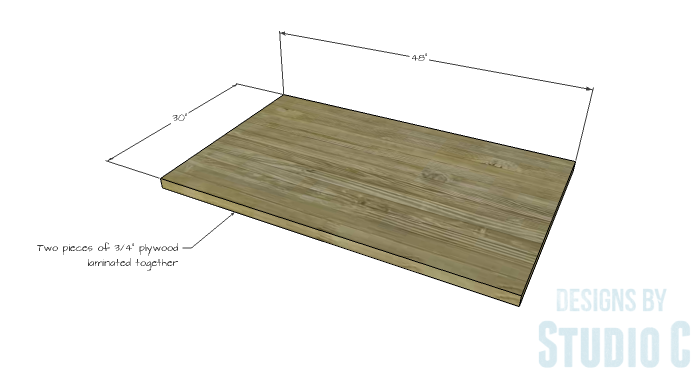
- 2 – 3/4″ plywood at 30″ x 48″ – Top
Notes About the Project:
Mending plates can be used on the outside of the joints of each leg assembly for a more industrial look to the table!
Step One
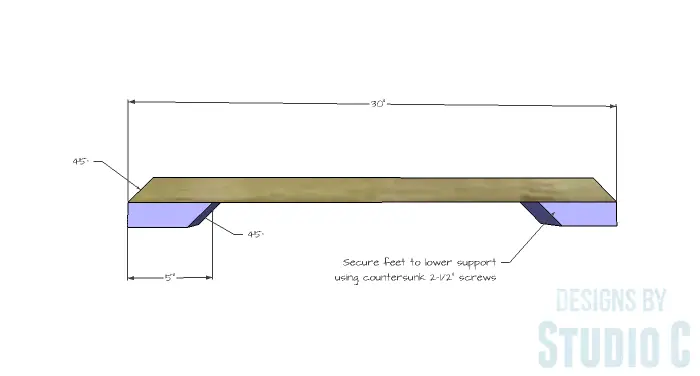
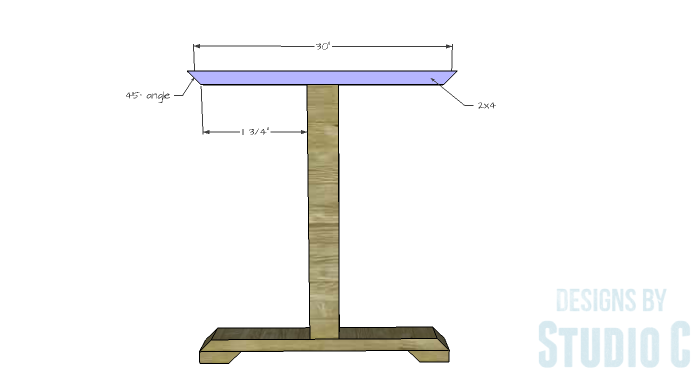
Cut the pieces for the top and bottom supports, as well as the bottom support feet. Cut a 45° bevel in each end of the support pieces as well as one end of each support foot.
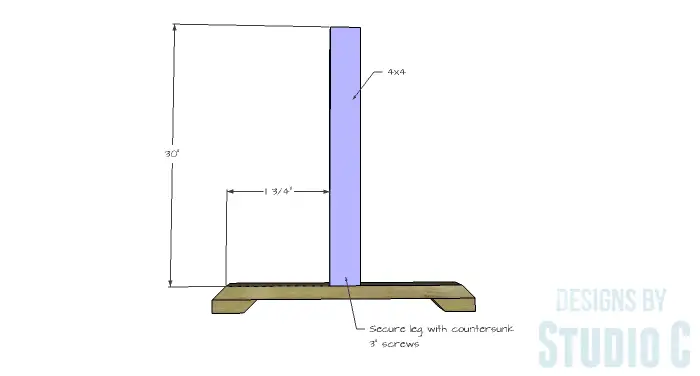
Secure the feet to the bottom support using glue and countersunk 2-1/2″ screws. Refer to the drawing for placement.
Step Two
Cut the pieces for the legs. Secure the legs to the center of each bottom support using glue and countersunk 3″ (or longer, if desired) screws.
Secure the top support to the top of the leg as indicated in the drawing using glue and countersunk 3″ (or longer, if desired) screws.
Step Three
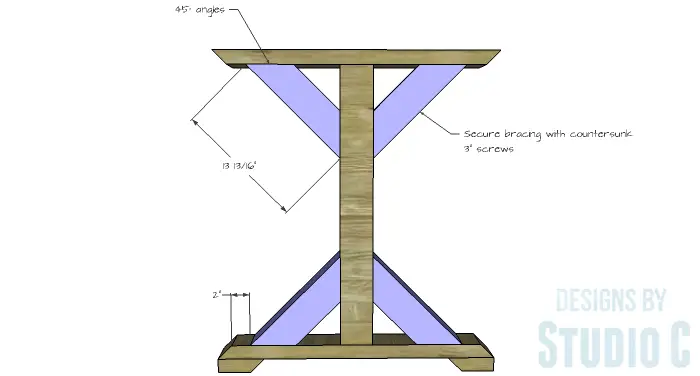
Cut the pieces for the bracing and cut 45° angles in each end. Secure the bracing pieces to the top and bottom supports, and legs as shown in the drawing securing in place using glue and toenailed 3″ screws.
Step Four
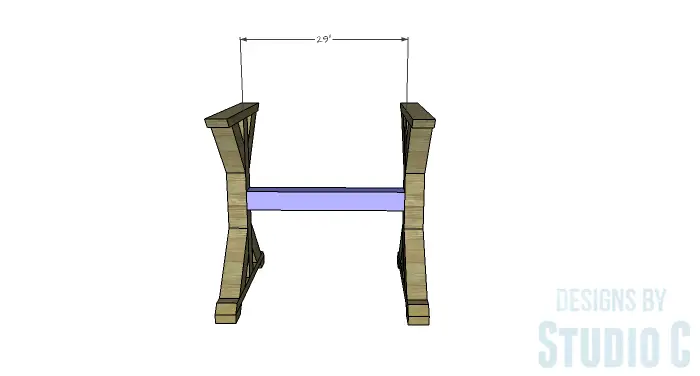
Cut the piece for the center brace. Mark the position for the center brace on the legs and pre-drill the holes for the lag screws using a 3/8″ drill bit. Insert the lag screws and secure the center brace using the 3/8″ socket wrench. The lag screws can be spray painted prior to securing them to the leg assemblies.
Finish the leg base as desired.
Step Five
Cut the plywood pieces for the top. Apply contact cement to one face of each piece and let it dry. With a helper, flip one piece over and position on top of the other piece. Make sure the pieces line up before letting the contact cement surfaces touch. Press down on the pieces to make sure the surfaces make contact. Apply edge banding to the exposed edges of the plywood.
Finish the top as desired.
Step Six
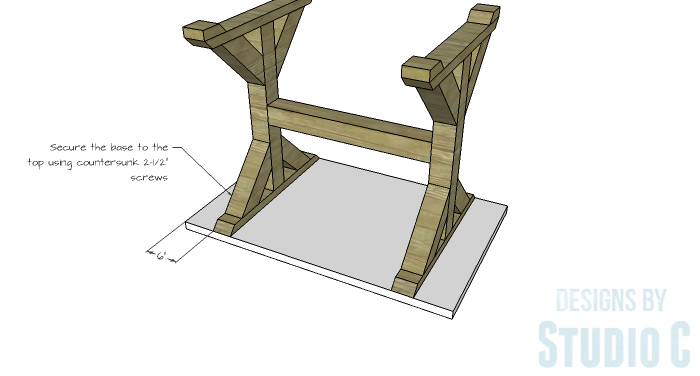
Position the top face down on a flat surface. Position the the leg base assembly upside down, on the underside of the table top then secure in place using glue and countersunk 2-1/2″ screws.
With the holidays coming up, this table is a quick solution to adding extra table space for entertaining! Have any questions about the DIY furniture plans to build a Ballard Designs Inspired Tatum Trestle Counter Table? Leave a comment below!
Originally posted 2016-10-19 08:00:47.


[…] Tatum Trestle Counter Table […]