
Build a Wall Mounted Corner Desk
A Fabulous Corner Desk Inspired by Pottery Barn
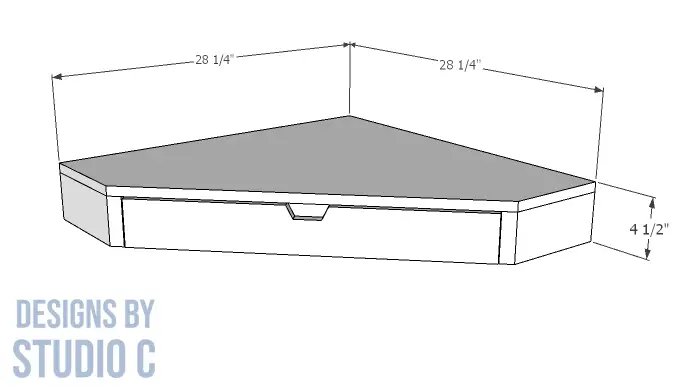
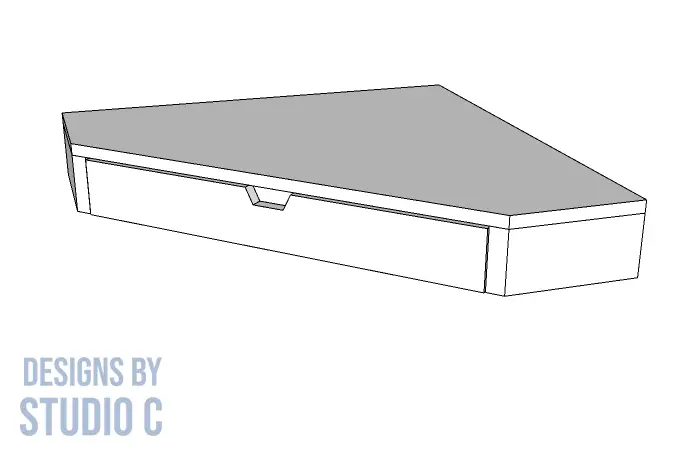
I built a wall mounted desk for myself several years ago and I still love it! This desk is made to mount in the corner of a room which makes it perfect for a small space. The plans to build a wall mounted corner desk feature a center drawer with a handhold cut out of the front so there’s no hardware sticking out.
This desk will be mounted to the wall through the back from the underside into a wall stud. This makes it sturdy and secure!
Materials:
-
- 1″ brad nails
- 1-1/2″ brad nails
- 2″ brad nails
- 1-1/2″ pocket hole screws
- 3-1/2″ SPAX® Powerlags (<– affiliate link!)
- Edge banding, optional
- Wood glue
- Sandpaper (80, 120, 220 grits)
- Finishing supplies
Lumber:
- 1 – 2′ x 4′ sheet of 1/4″ plywood
- 1 – 4′ x 8′ sheet of 3/4″ plywood
Cut List:
- 1 – 3/4″ plywood at 3-3/4″ x 27-1/2″ – Back
- 1 – 3/4″ plywood at 3-3/4″ x 26-3/4″ – Back
- 2 – 3/4″ plywood at 3-3/4″ x 8-3/4″ – Sides
- 2 – 3/4″ plywood at 3-3/4″ x 11-5/16″ – Drawer Runner Support
- 2 – 3/4″ plywood at 1/2″ x 10-9/16″ – Drawer Runners
- 1 – 3/4″ plywood at 3″ x 24-5/8″ – Drawer Box Back
- 2 – 3/4″ plywood at 3″ x 10-1/4″ – Drawer Box Sides
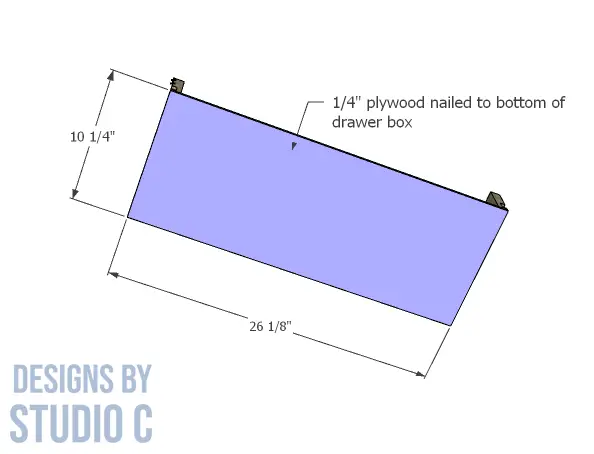
- 1 – 1/4″ plywood at 10-1/4″ x 26-1/8″ – Drawer Box Bottom
- 1 – 3/4″ plywood at 3-5/8″ x 26-3/8″ – Drawer Front
- 1 = 3/4″ plywood at 3/4″ x 24-5/8″ – Drawer Support
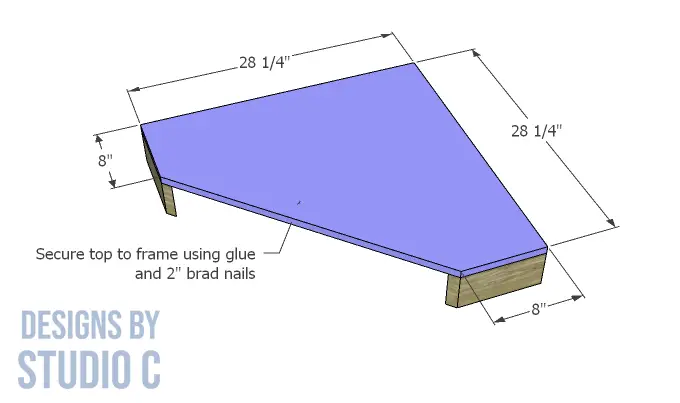
- 1 – 3/4″ plywood at 28-1/4″ x 28-1/4″ – Top
Notes About the Project:
- Apply edge banding to the exposed edges of the plywood prior to assembly
- Sand all pieces before putting the desk together
- Apply a coat of paste wax to the runners so the drawer slides smoothly
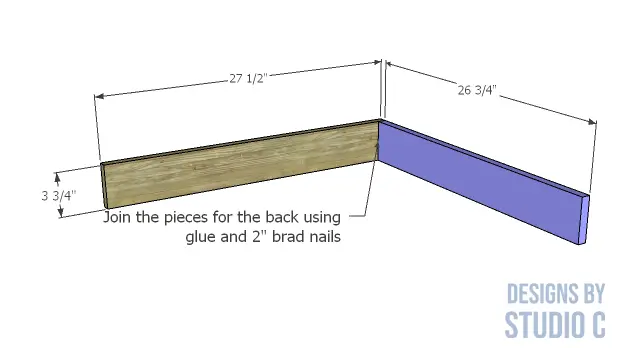
Step One
Cut the pieces for the back. Secure the longer piece to the shorter piece using glue and 2″ brad nails.
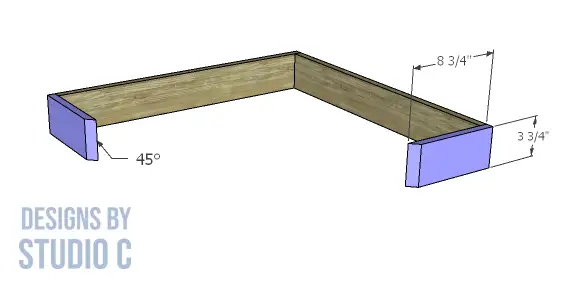
Step Two
Cut the pieces for the sides. Cut a 45° bevel in one end of each piece. Secure the sides to the back using glue and 2″ brad nails.
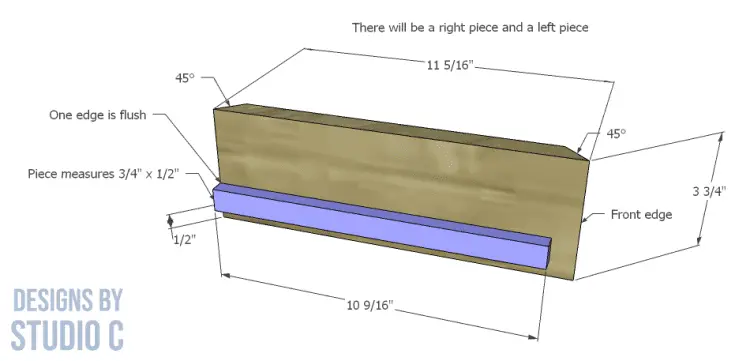
Step Three
Cut the pieces for the drawer runners and the supports. Cut a 45° bevel in each end of the support pieces. Secure the runners to the supports with one edge flush and 1/2″ up from the bottom. The other piece will be a mirror copy. There will be a right and a left.
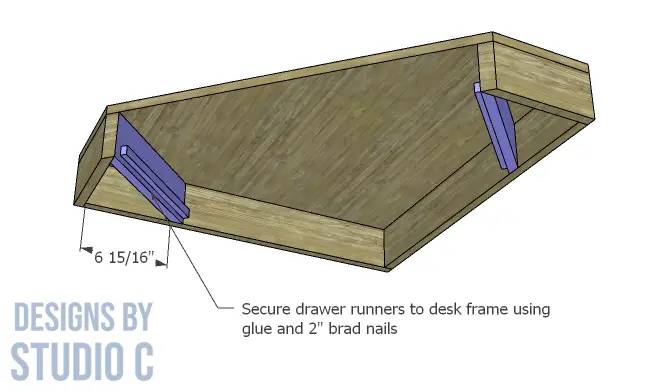
Secure the supports to the sides and back using glue and 2″ brad nails.
Step Four
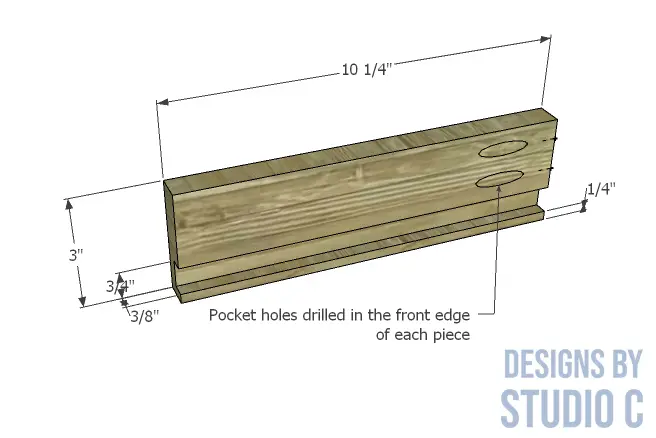
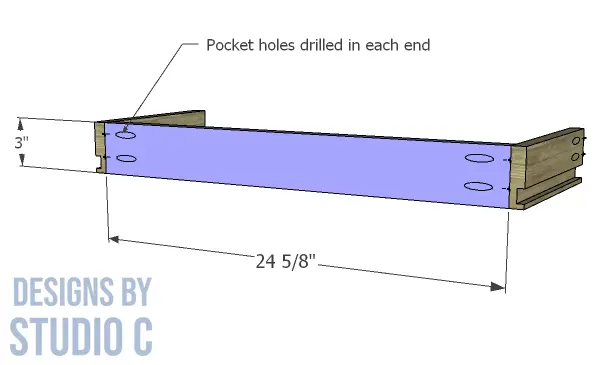
Cut the piece for the drawer box back. With the pocket hole jig set for 3/4″ material, drill pocket holes in each end. Next, cut the pieces for the sides and cut a 3/4″ wide by 3/8″ deep channel located 1/4″ up from the bottom edge using a router table or a table saw. Drill pocket holes in one end of each piece making them mirror copies (a right and a left). Secure the back to the sides as shown in the drawing using glue and 1-1/2″ pocket hole screws.
Step Five
Cut the piece for the drawer box bottom. Secure the bottom to the drawer box back and sides using glue and 1-1/2″ brad nails.
Step Six
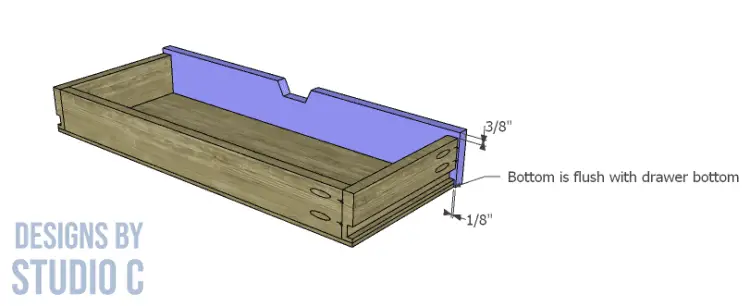
Cut the piece for the drawer front. Cut the notch in the front as shown in the drawing.
Secure the front to the sides using glue and 1-1/2″ pocket hole screws. The bottom of the drawer front will be flush with the drawer box bottom. It will overhang the sides of the drawer box by 1/8″ and stand 3/8″above the sides of the drawer box.
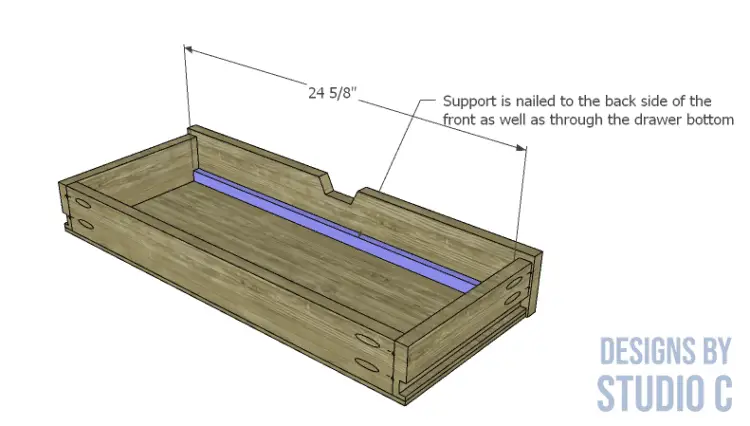
Step Seven
Cut the piece for the drawer support. Position it where the bottom meets the front and secure in place using glue and 1″ brad nails.
Check the fit of the drawer on the runners and make adjustments as necessary.
Step Eight
Cut the piece for the top. The top will be flush with the frame on all sides. Secure the top using glue and 2″ brad nails.
Finish as desired.
To Mount the Desk on the Wall:
Locate the wall studs and mark the position with masking tape. Mount the desk to the wall studs at least 30″ from the floor to the top by driving the Powerlags through the back pieces on the underside of the desk into the studs.
Have questions about the plans to build a wall mounted corner desk? Leave a comment below!
Originally posted 2022-03-03 08:00:04.
