Build a Simple Student Desk
An Easy to Build Desk with Drawers
This desk is a truly easy build and can be used by more than just “students”… It would make a great craft desk or console table, in an entryway or as a media stand! The plans to build a simple student desk feature three large drawers with the back and sides enclosed leaving a blank canvas for a stencil or funky paint job!
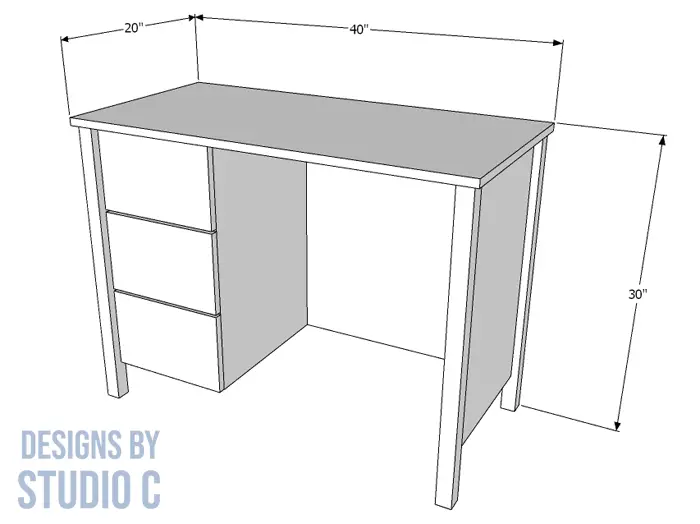
This great desk is a fabulous weekend project, and the plans are suitable for all skill levels!
Materials:
- 1-1/4″ pocket hole screws
- 1-1/4″ brad nails
- 2″ brad nails
- 3 sets of 16″ drawer slides (<– affiliate link!)
- Edge banding, optional
- Wood glue
- Sandpaper (80 grit, 120 grit, 220 grit)
- Finishing supplies
Lumber:
- 2 – 1×6 at 8′
- 2 – 2×2 at 6′
- 1 – 2′ x 4′ sheet of 1/4″ plywood
- 1 – 4′ x 8′ sheet of 3/4″ plywood
Cut List:
- 4 – 2×2 at 29-1/4″ – Legs
- 2 – 3/4″ plywood at 16-1/2″ x 25-1/4″ – Side Panels
- 1 – 3/4″ plywood at 25-1/4″ x 36″ – Back
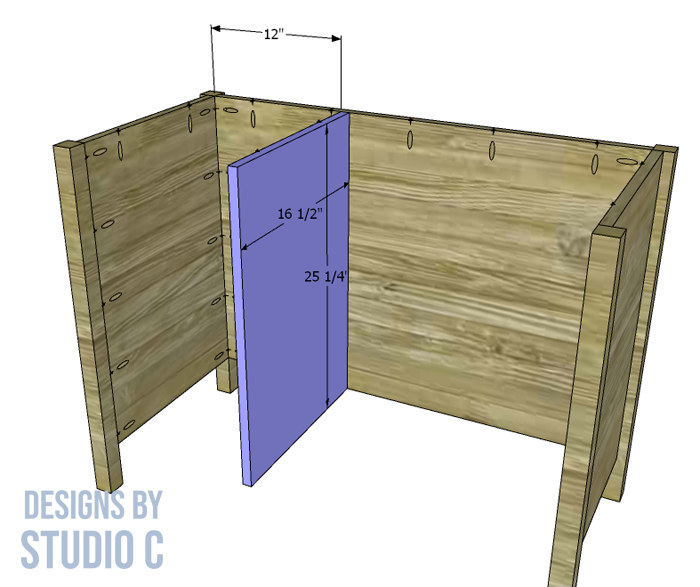
- 1 – 3/4″ plywood at 16-1/4″ x 25-1/4″ – Drawer Divider
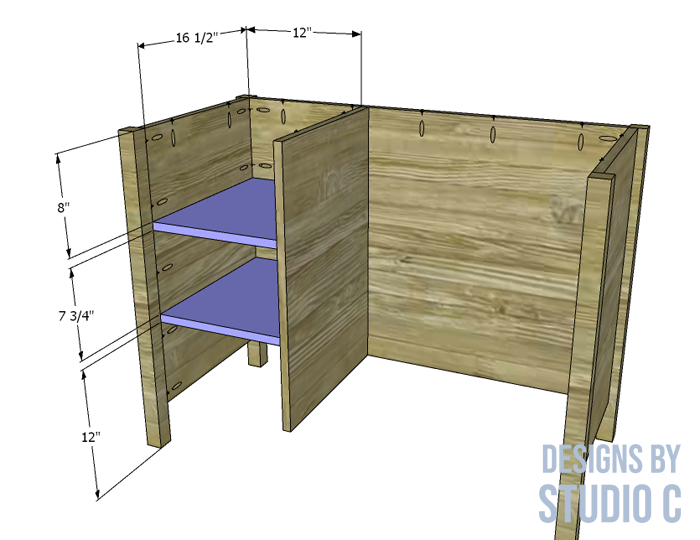
- 2 – 3/4″ plywood at 12″ x 16-1/2″ – Drawer Shelves
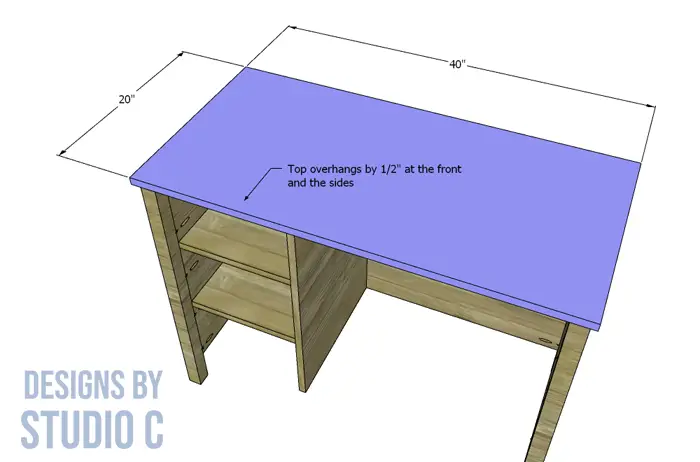
- 1 – 3/4″ plywood at 20″ x 40″ – Top
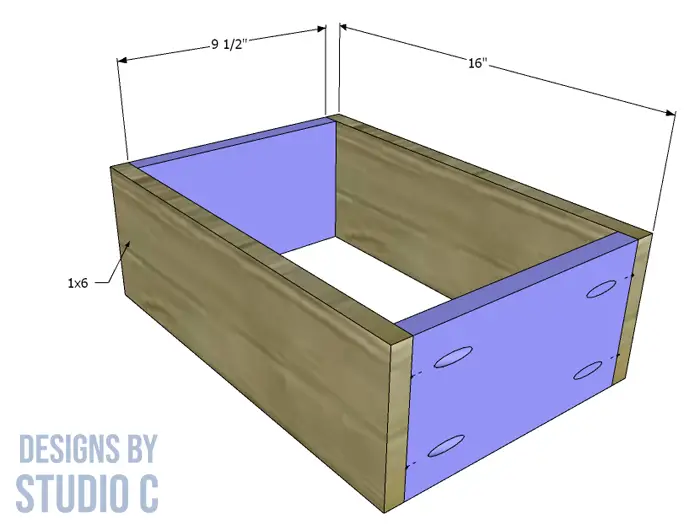
- 6 – 1×6 at 9-1/2″ – Drawer Boxes
- 6 – 1×6 at 16″ – Drawer Boxes
- 3 – 1/4″ plywood at 11″ x 16″ – Drawer Box Bottom
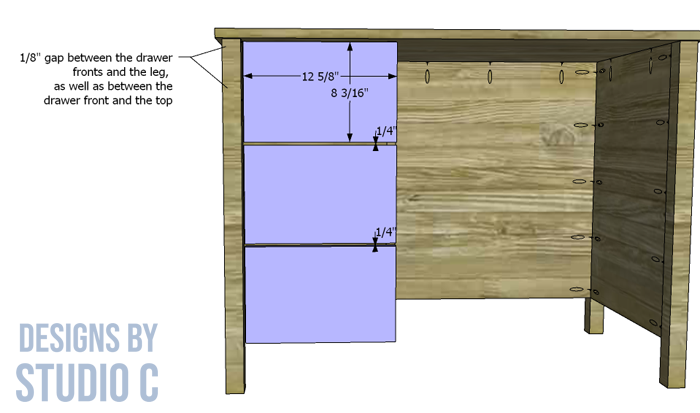
- 3 – 3/4″ plywood at 8-3/16″ x 12-5/8″ – Drawer Fronts
Notes About the Project:
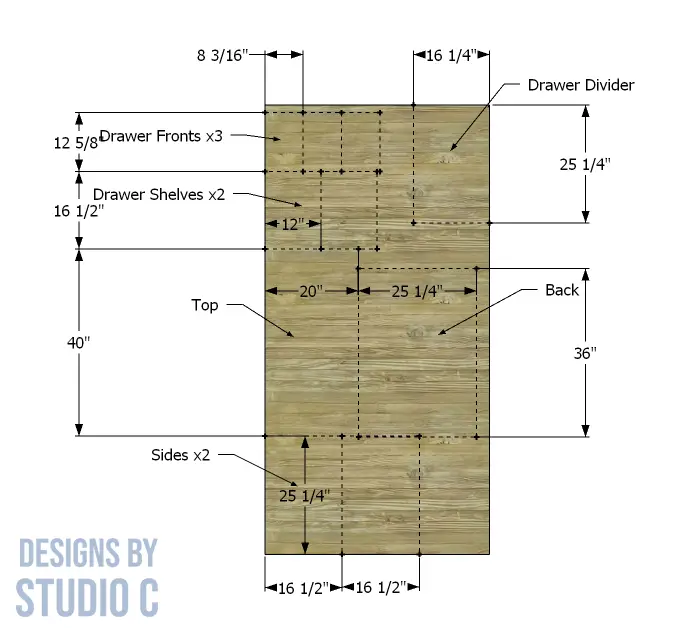
- See plywood cutting layout (cuts are drawn to scale!)
- Sand all pieces prior to assembly
- Apply edge banding to the exposed edges of the plywood before assembly
- The glue resist technique would be a great accent under stain!
Step One
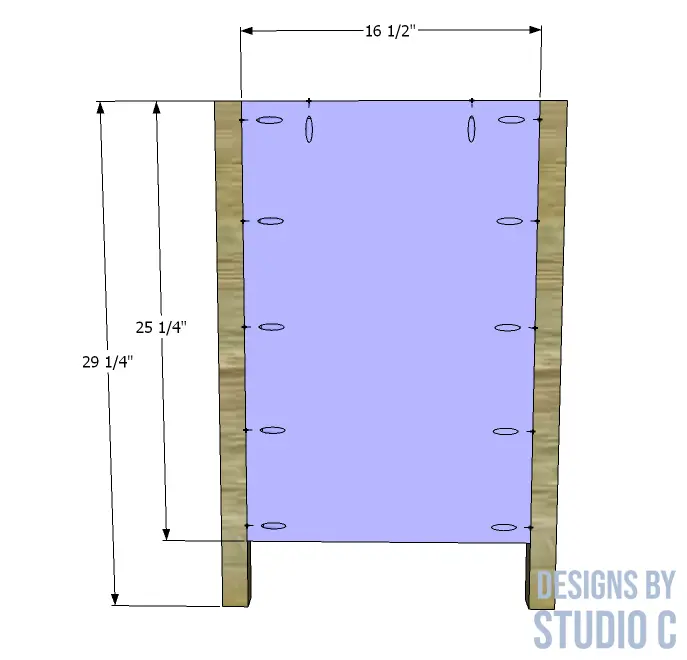
Cut the pieces for the legs and the sides. With the pocket hole jig set for 3/4″ material, drill pocket holes in each side panel as shown. Secure the side panels to the legs using glue and 1-1/4″ pocket hole screws. The back face of the panels will be flush with the inside faces of the legs.
Step Two
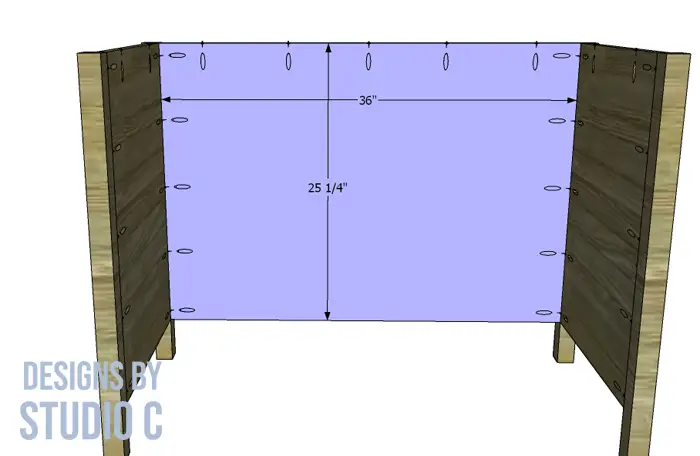
Cut the piece for the back and drill pocket holes as shown. Secure the back panel to the legs using glue and 1-1/4″ pocket hole screws. The back face of the panel will be flush with the inside faces of the legs.
Step Three
Cut the piece for the drawer divider. Drill pocket holes in one long edge and secure to the back using glue and 1-1/4″ pocket hole screws.
Step Four
Cut the pieces for the drawer shelves. Drill pocket holes in each long edge then secure to the side panel and drawer divider as shown using glue and 1-1/4″ pocket hole screws.
Step Five
Cut the piece for the top. The sides and the front of the top will overhang the legs by 1/2″. Secure the top to the legs, side panels and back panel using glue and 2″ brad nails through the top.
Step Six
Cut the pieces for the drawer boxes and drill pocket holes in each end of the shorter pieces. Assemble the drawer boxes using glue and 1-1/4″ pocket hole screws.
Step Seven
Cut the pieces for the drawer bottoms. Secure the bottoms to the drawer boxes using glue and 1-1/4″ brad nails.
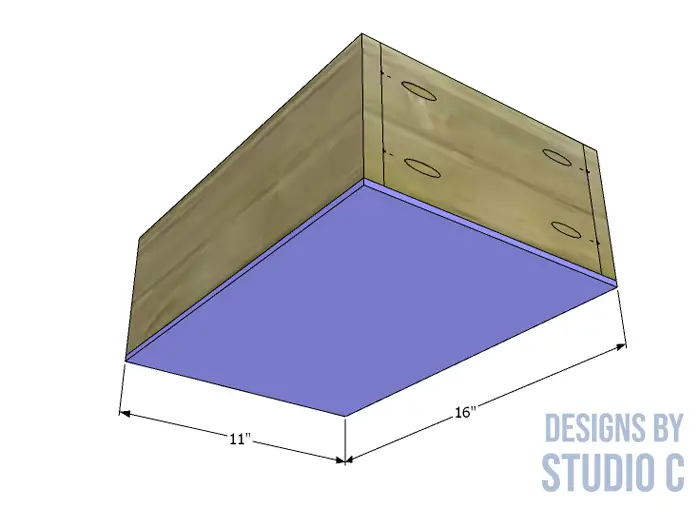
Install the drawer slides according to the manufacturer’s installation instructions. For a quick tutorial on installing drawer slides, click here.
Step Eight
Cut the pieces for the drawer fronts. Mark the placement of the drawer handles or knobs, and drill the holes. Check out this easy tutorial on installing drawer fronts! When the fronts are installed, there will be a 1/8″ gap between the fronts and the legs, and a 1/4″ gap between each front (make sure the bottom of the lowest drawer front is flush with the bottom of the drawer divider!).
Finish as desired!
Have questions about the plans to build a simple student desk? Leave a comment below!

