
A Fabulous Side Table with a Curved Drawer Front
This end table, inspired by a catalog retailer, is another super-easy build. The plans to build a Sienna end table feature a curved face frame (including templates to make the cuts), a drawer with a curved front and a shelf at the bottom. This table is a great weekend project, and can be finished in so many ways!

Materials:
- 1-1/4″ pocket hole screws (<– affiliate link!)
- 1-1/4″ brad nails
- 2″ brad nails
- Spray adhesive
- 14″ Drawer Slides (<– affiliate link!)
- Drawer knob or handle
- Edge banding, optional
- Wood glue
- Sandpaper (80, 120,220 grits)
- Finishing supplies
Lumber:
- 1 – 1×2 at 4′
- 1 – 1×3 at 4′
- 1 – 2′ x 4′ sheet of 1/4″ plywood
- 1 – 4′ x 8′ sheet of 3/4″ plywood
Cut List:
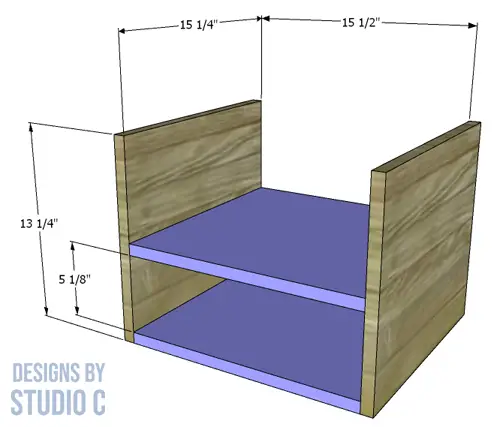
- 2 – 3/4″ plywood at 13-1/4″ x 15-1/4″ – Sides
- 2 – 3/4″ plywood at 15-1/4″ x 15-1/2″ – Shelves
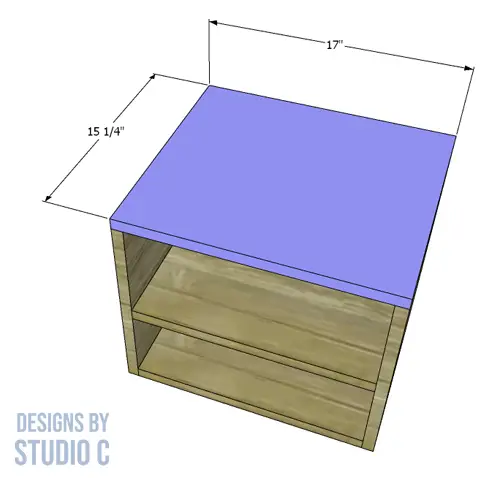
- 1 – 3/4″ plywood at 15-1/4″ x 17″ – Top
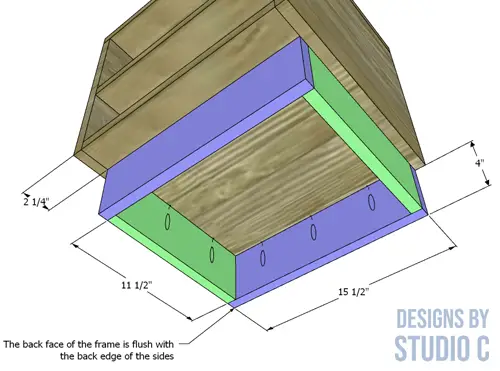
- 2 – 3/4″ plywood at 4″ x 11-1/2″ – Base
- 2 – 3/4″ plywood at 4″ x 15-1/2″ – Base
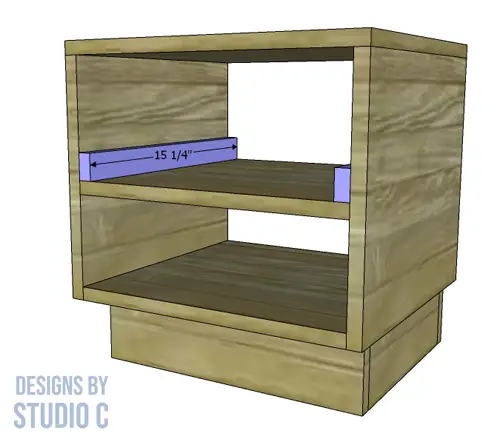
- 2 – 1×2 at 15-1/4″ – Drawer Slide Spacers
- 1 – 1/4″ plywood at 13-1/4″ x 16-1/4″ – Back
- 2 – 1×3 at 14″ – Face Frame
- 1 – 1×3 at 17″ – Face Frame
- 2 – 3/4″ plywood at 4″ x 11-1/2″ – Drawer Box
- 2 – 3/4″ plywood at 4″ x 15″- Drawer Box
- 1 – 1/4″ plywood at 13″ x 15″ – Drawer Box Bottom
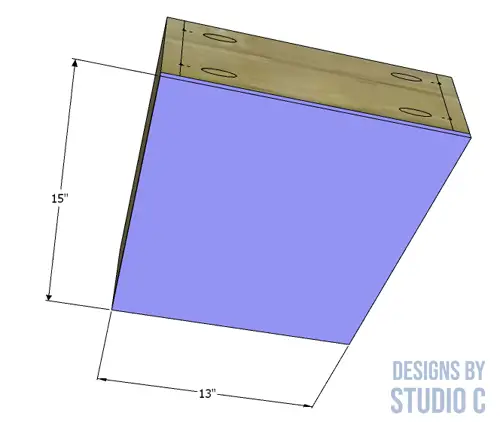
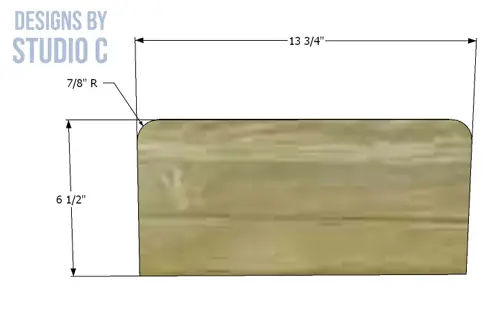
- 1 – 3/4″ plywood at 6-1/2″ x 13-3/4″ – Drawer Front
Notes About the Project:
- Edge banding will be applied to the exposed edges of the top and drawer front, if desired
- Sand all pieces prior to assembly

Step One
Cut the pieces for the sides and the shelves. With the pocket hole jig set for 3/4″ material, drill pocket holes in the shorter edges of the shelf pieces. Secure the shelves to the sides, as shown in the drawing, using glue and 1-1/4″ pocket hole screws.
Step Two
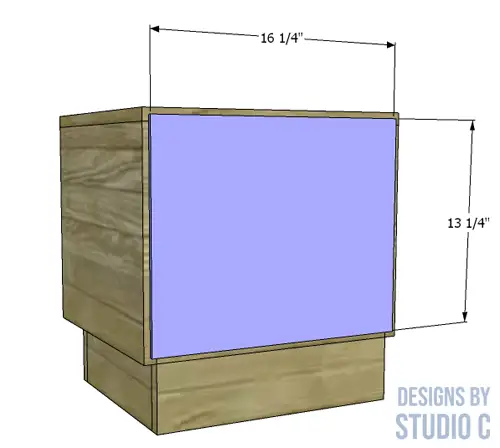
Cut the piece for the top. Secure the top to the sides using glue and 2″ brad nails.
Step Three
Cut the pieces for the base. Drill pocket holes in each end of the shorter pieces, and in one long edge of each of the four pieces. Assemble the base frame using glue and 1-1/4″ pocket hole screws. Flip the cabinet upside down and position the base on the bottom of the lower shelf (see the drawing). Secure the base in place using glue and 1-1/4″ pocket hole screws.
Step Four
Cut the pieces for the drawer slide spacers. Secure to the sides, above the top shelf, using glue and 1-1/4″ brad nails.
Step Five
Cut the piece for the back. Secure the back to the top, sides and shelves using glue and 1-1/4″ brad nails.
Step Six
Print the pieces for the templates. Align the registration marks on the sheets and tape the sheets together.
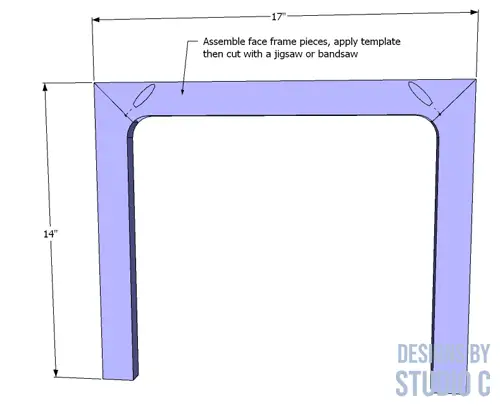
Cut the pieces for the face frame. Cut 45° angles in each end of the piece for the top of the frame, and one end of each of the pieces for the sides of the frame. Drill pocket holes in the mitered (angled) edges of the top piece and assemble the frame with glue and 1-1/4″ pocket hole screws.
Cut out the template and apply a light coat of spray adhesive on the back. Position the template on the frame and cut out the frame using a jigsaw or a band saw.
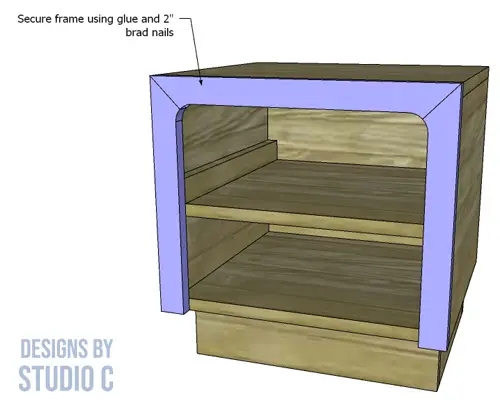
Sand any rough edges, then secure the face frame to the sides and top of the cabinet using glue and 2″ brad nails. The side and top edges of the frame will be flush with the side and top faces of the cabinet.
Step Seven
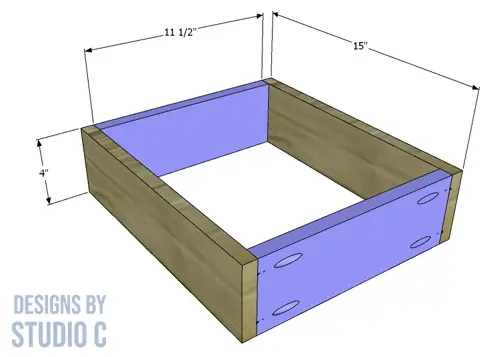
Cut the pieces for the drawer box. Drill pocket holes in each end of the front and back pieces. Assemble the drawer box using glue and 1-1/4″ pocket hole screws.
Cut the piece for the drawer bottom and secure it to the drawer box frame using glue and 1-1/4″ brad nails.
Install the drawer slides according to the manufacturer’s instructions. for an easy tutorial, see this post!
Step Eight
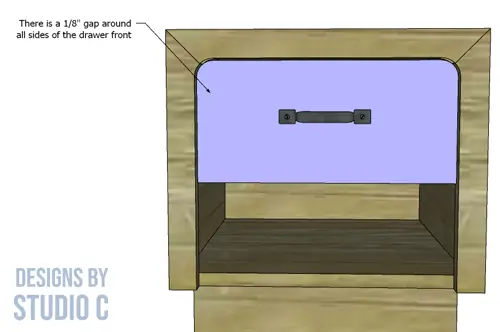
Cut the piece for the drawer front. There will be a 1/8″ gap between the face frame and the drawer front. For an easy tutorial on installing drawer fronts, see this post!
Finish as desired.
These modern end table plans are suitable for all skill levels. Have questions about the plans to build a Sienna end table? Leave a comment below!
Originally posted 2022-05-12 08:00:13.


Comments are closed.