
Build a Lynette Queen Bed
A Beautiful Bed with a Sculpted Headboard
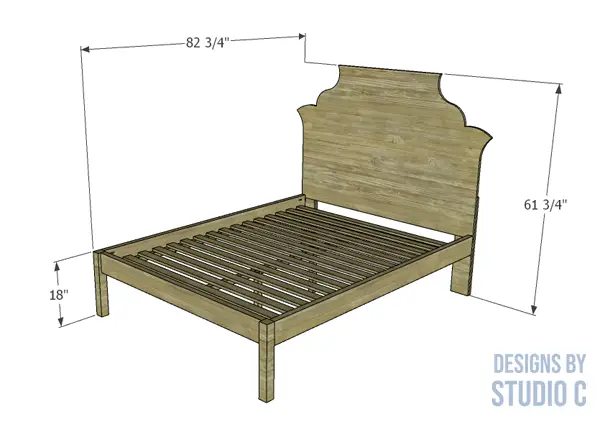
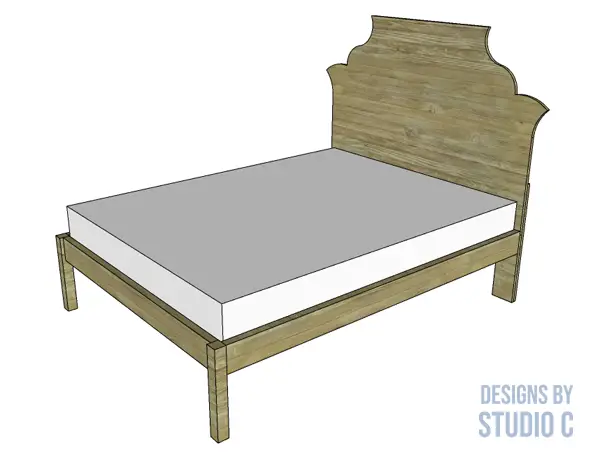
This easy to build bed features a curvy, sculpted headboard suitable for paint, stain or upholstery. The plans to build a Lynette queen bed has a plywood headboard with 2x lumber framing and 1x lumber slats. The legs are stacked 1x3s that are glued then ripped on a table saw. The templates for the headboard are included (see below!), and can easily be cut with a jigsaw.
Materials:
- 2-1/2″ pocket hole screws (<– affiliate link!)
- 1-1/4″ screws
- 2-1/2″ screws
- Edge banding, optional (<– affiliate link!)
- Wood glue
- Sandpaper (80, 120, 220 grits)
- Finishing Supplies
Lumber:
- 1 – 4′ x 8′ sheet of 3/4″ plywood
- 2 – 1×3 at 6′
- 2 – 1×6 at 8′
- 4 – 2×2 at 8′
- 3 – 2×6 at 8′
Cut List:
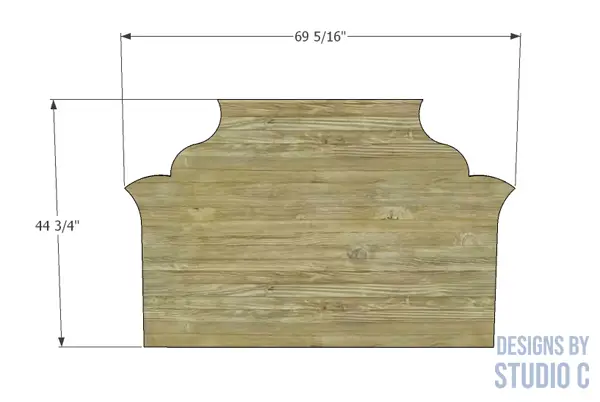
- 1 – 3/4″ plywood at 44-3/4″ x 69-5/16″ – Headboard
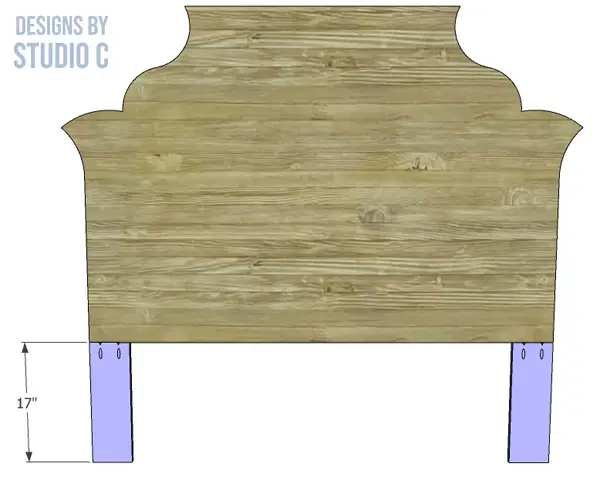
- 2 – 1×6 at 17″ – Headboard Legs
- 2 – 1×6 at 29″ – Headboard Back
- 1 – 1×6 at 59-1/2″ – Headboard Back
- 6 – 1×3 at 18″ – Legs
- 1 – 2×6 at 59″ – Footboard
- 2 – 2×6 at 80-1/2″ – Side Rails
- 2 – 2×2 at 76-1/2″ – Slat Supports
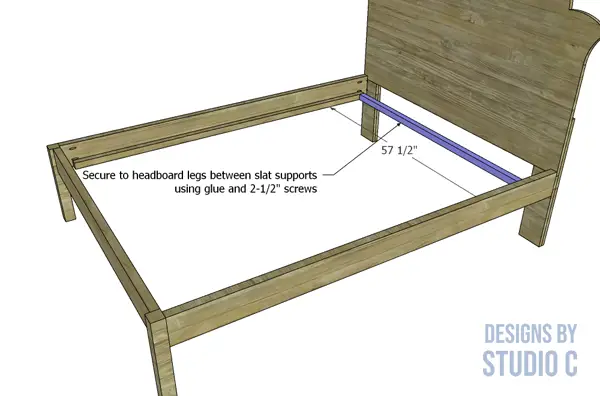
- 1 – 2×2 at 57-1/2″ – Center Support Stretcher
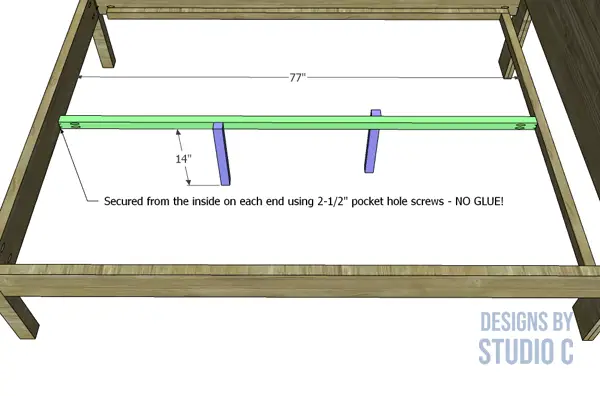
- 2 – 2×2 at 14″ – Center Support Legs
- 1 – 2×2 at 77″ – Center Support
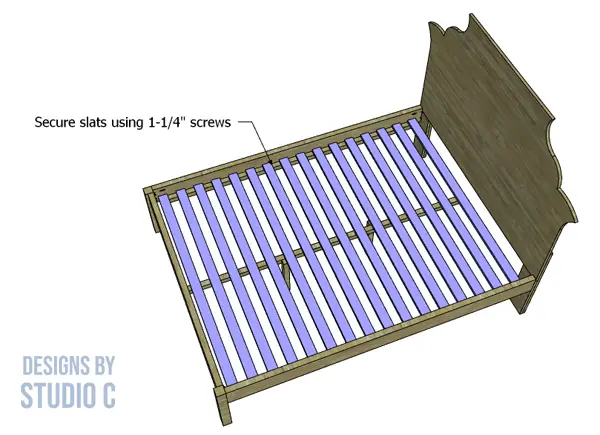
- 16 – 1×3 at 60-1/2″ – Slats
Notes About the Project:
- Sand all pieces prior to assembly
- Use edge banding on the edges of the exposed plywood on the headboard
- DO NOT use glue to secure the side rails and the center support to the headboard and footboard
Step One
Print the templates: Template A, Template B, Template C and Template D. Align the registration marks and tape the sheets together. Secure the template to the plywood using a light tack spray adhesive, then cut out using a jigsaw. Sand the edges, and apply edge banding if desired.
Step Two
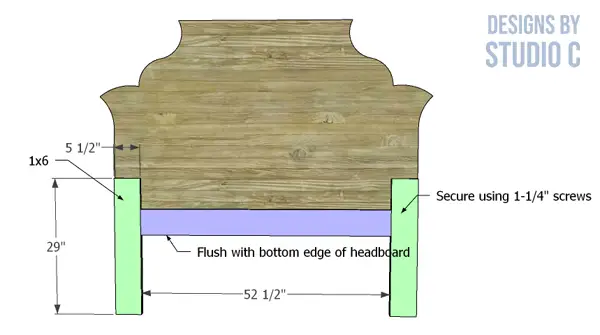
Cut the 1x6s for the headboard legs. Set the pocket hole jig for 3/4″ material and drill pocket holes in one end of each leg. Secure the legs to the headboard as shown using glue and 1-1/4″ pocket hole screws.
Step Three
Cut the pieces for the back of the headboard. Secure the pieces to the headboard legs first, using glue and 1-1/4″ screws, then secure the center piece with the edge flush with the lower edge of the headboard.
Step Four
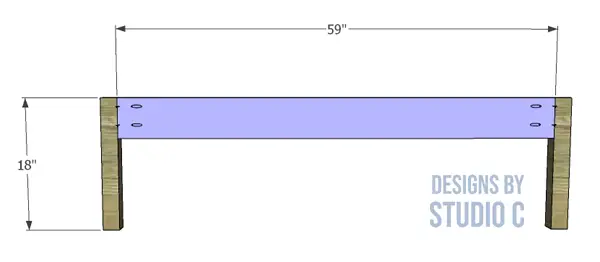
Cut the pieces for the footboard legs. Glue the pieces together in sets of three, then rip to 2-1/4″ on the table saw. (See this post for reference.)
Cut the piece for the footboard. Set the pocket hole jig for 1-1/2″ material, and drill pocket holes in each end of the footboard piece. Secure the footboard to the legs using 2-1/2″ pocket hole screws making sure that the inside face is flush with the inside face of the legs.
Step Five
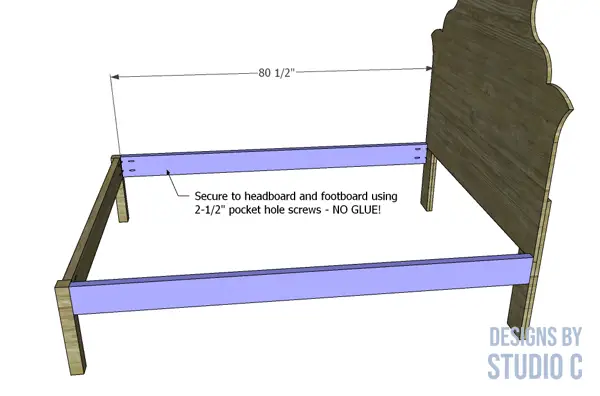
Cut the pieces for the side rails and drill pocket holes in each end. Secure the side rails to the footboard and the headboard using 2-1/2″ pocket hole screws. Do not use glue so that the bed can be disassembled and moved as needed.
Step Six
Cut the pieces for the slat supports. Secure the slat supports to the side rails using glue and 2-1/2″ screws. The bottom edge of the supports will be flush with the bottom edge of the side rails.
Step Seven
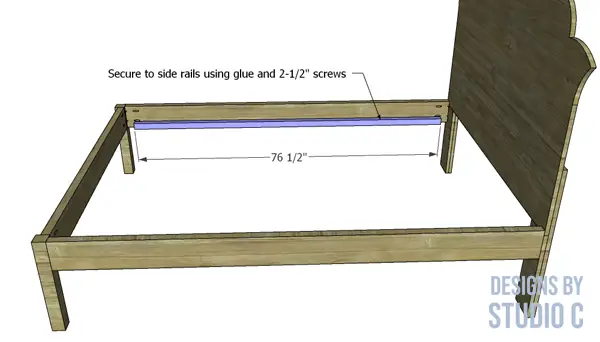
Cut the piece for the center support stretcher. Fit it between the slat supports at the headboard end and secure it to the headboard legs using glue and 2-1/2″ screws.
Step Eight
Cut the pieces for the center support and the center support legs. Drill pocket holes in each end of the center support. Secure the legs to the support piece using glue and 2-1/2″ screws. Secure the center support to the footboard and to the center support stretcher using glue and 2-1/2″ pocket hole screws. The bottom edge of the support will be flush with the bottom edge of the footboard.
Step Nine
Cut the pieces for the slats. Secure the slats to the slat supports using 1-1/4″ screws.
Finish as desired!
Have questions about the plans to build a Lynette queen bed? Leave a comment below!
Originally posted 2022-07-21 08:00:18.
