
Quick and Easy Storage Inspired by a Catalog Retailer
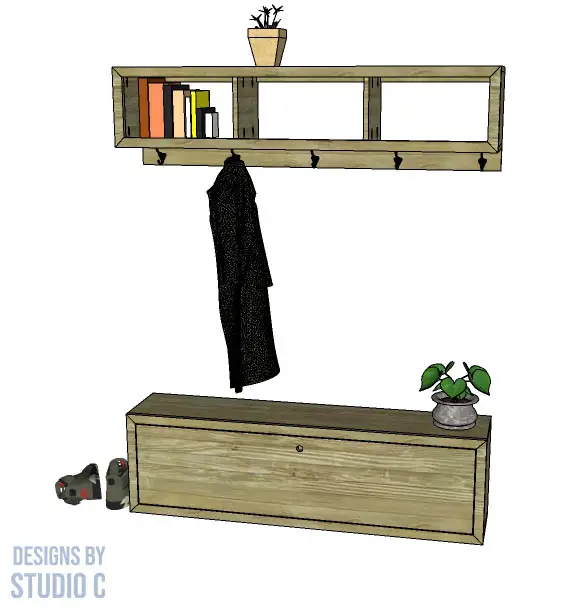
Everyone can use storage pieces for organization, right? The plans to build a Folsom bench and wall shelf (inspired by the set at Pottery Barn) are quick and easy, and perfect for any skill level.
The plus is that the plans use off the shelf lumber with no super fancy cutting, and this project can be completed in a weekend!
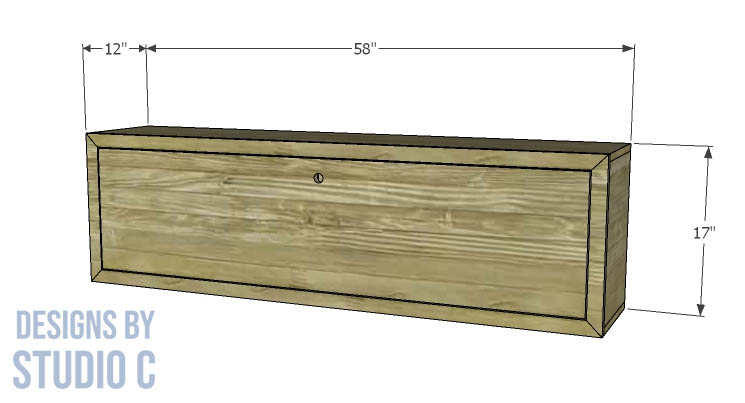
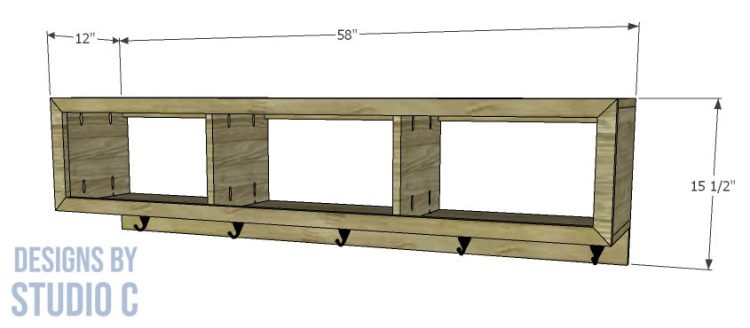
Both the wall shelf and bench are basically a box with dividers and a face frame. The bench has a door on the front with a thumb hole for opening and is kept closed by magnetic catches or clip locks. The wall shelf has a hook rail mounted to the bottom with the number of hooks determined by you!
Materials:
- 1-1/2″ pocket hole screws
- 2″ brad nails
- Continuous hinge for the door on the bench (<– affiliate link!)
- Magnetic catches or roller catch (<– affiliate link!)
- Stick-on felt pads for the bench
- 3″ screws for mounting
- Hooks
- Wood glue
- Sandpaper (80, 120, 220 grits)
- Finishing supplies
Lumber:
- 5 – 1×2 at 8′
- 1 – 1×3 at 6′
- 1 – 1×4 at 6′
- 4 – 1×12 at 8′
- 1 – 4′ x 8′ sheet of 1/4″ plywood (or TWO 2′ x 4′ sheets – see notes below!)
Cut List:
- 2 – 1×12 at 58″ – Bench Base
- 3 – 1×12 at 15-1/2″ – Bench Base and Divider
- 2 – 1×2 at 58″ – Face Frame
- 2 – 1×2 at 17″ – Face Frame
- 1 – 1×4″ plywood at 16-1/4″ x 57-1/4″ – Back
- 1 – 1×12 at 54-3/4″ – Door
- 1 – 1×3 at 24-3/4″ – Door
- 2 – 1×12 at 58″ – Shelf Base
- 4 – 1×12 at 10-1/2″ – Shelf Base and Dividers
- 2 – 1×2 at 58″ – Face Frame
- 2 – 1×2 at 12″ – Face Frame
- 2 – 1×2 at 18″ – Hanging Cleat
- 1 – 1×2 at 19″ – Hanging Cleat
- 1 – 1×4 at 58″ – Hook Rail
Notes About the Project:
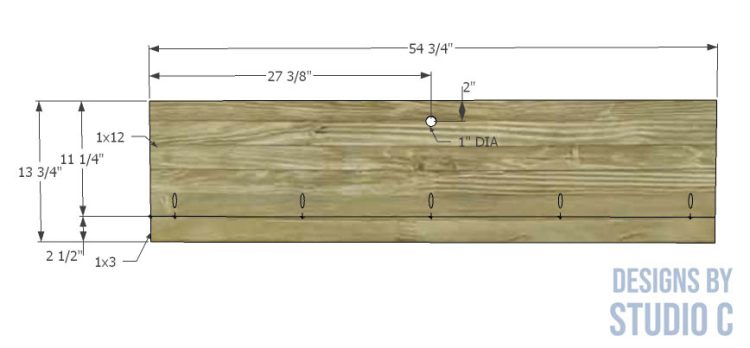
- The door on the bench is a 1×12 with a 1×3 secured to it (it was cheaper to do it this way than to buy an entire sheet of plywood for a narrow piece!)
- The back piece on the bench can be two pieces cut from a 2′ x 4′ sheet rather than one long piece (the seam can be positioned over the divider)
- Sand all pieces prior to putting everything together
- A miter box (<– affiliate link!) can be used to cut the face frame miters by hand if you don’t have a miter saw
Step One
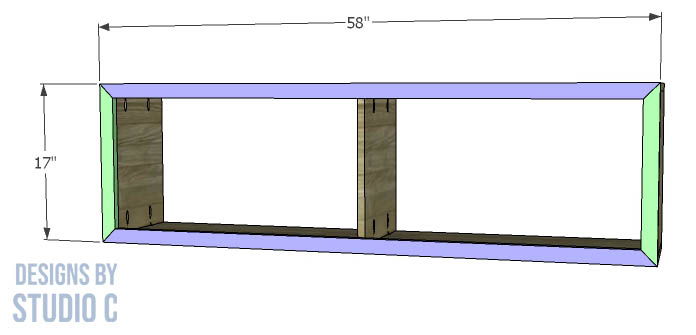
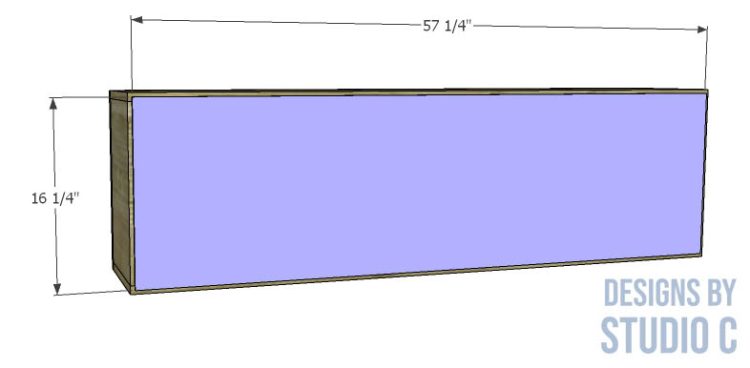
Starting with the bench: Cut the pieces for the base. With the pocket hole jig set for 3/4″ material, drill pocket holes in the top and bottom edges of the sides and divider. Assemble the base using glue and 1-1/2″ pocket hole screws.

Step Two
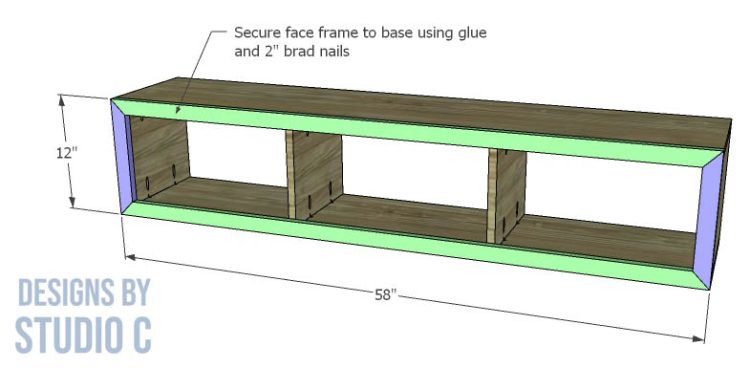
Cut the pieces for the face frame. Cut a 45° miter in each end of each piece. Secure the sides of the face frame first, using glue and 2″ brad nails, then install the top and bottom pieces adjusting as necessary. The outside edges of the face frame will be flush with the outside faces of the base.
Step Three
Cut the piece (or pieces) for the back. Secure it to the back of the cabinet using glue and brad nails.
Step Four
Cut the pieces for the door. Drill pocket holes along one long edge of the 1×12 piece. Assemble the door using glue and 1-1/2″ pocket hole screws. Next, use a 1″ paddle bit or hole saw to drill the thumb hole.
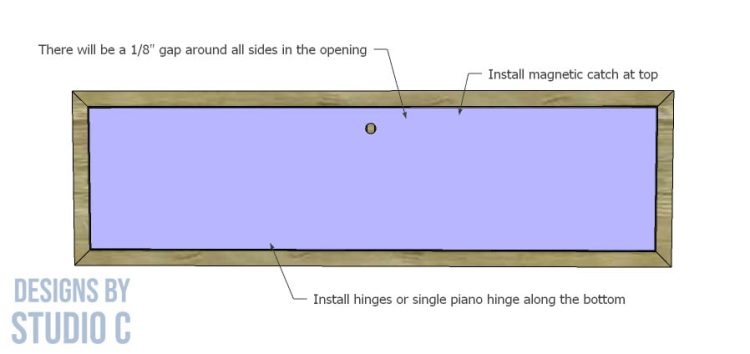
Install the hinge on the door, then install the door in the base. There will be a 1/8″ gap around all sides of the door in the opening. Then install the magnetic catches or roller catches.
Finish as desired, then place the stick-on felt pads on the bottom to protect the floor.
Step Five
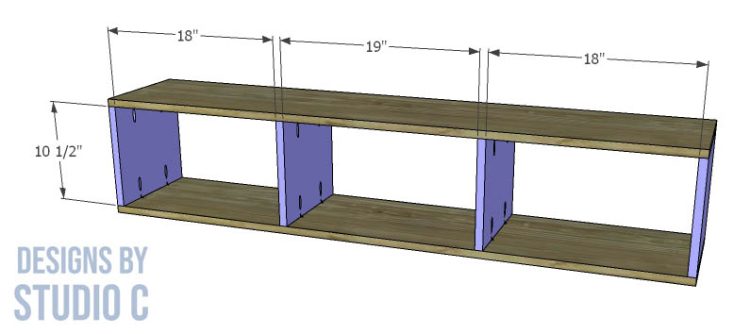
For the wall shelf: Cut the pieces for the base. With the pocket hole jig set for 3/4″ material, drill pocket holes in the top and bottom edges of the sides and dividers. Assemble the base using glue and 1-1/2″ pocket hole screws.
Step Six
Cut the pieces for the face frame. Cut a 45° miter in each end of each piece. Secure the sides of the face frame first, using glue and 2″ brad nails, then install the top and bottom pieces adjusting as necessary. The outside edges of the face frame will be flush with the outside faces of the base.
Step Seven
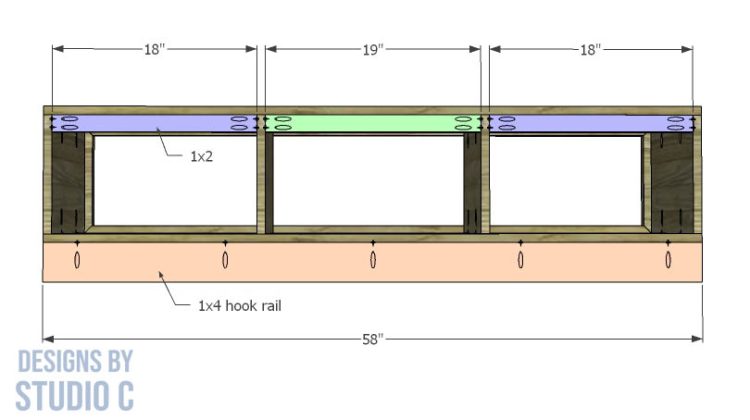
Cut the pieces for the hanging cleats and the hook rail. Drill pocket holes in each end of the cleats and in one long edge of the hook rail. Secure the cleats to the back between the sides and dividers using glue and 1-1/2″ pocket hole screws.
Install the hook rail to the bottom of the base, aligned with the back, using glue and 1-1/2″ pocket hole screws.
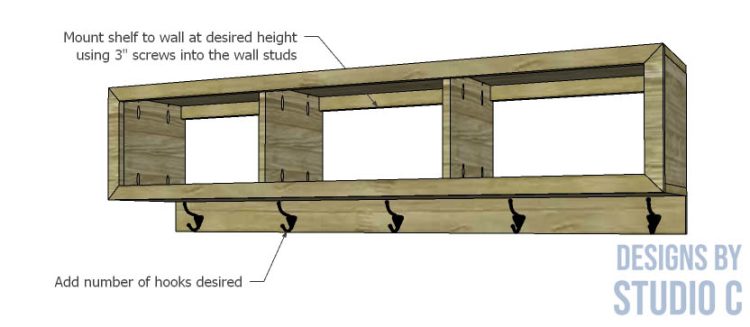
Finish as desired and mount to the wall using 3″ screws through the hanging cleats into the wall studs. Install however many hooks you want on the hook rail!
Have questions about the plans to build a Folsom bench and wall shelf? Leave a comment below!
Originally posted 2022-02-17 08:00:21.


Comments are closed.