Build the Dillon Tall Bookcase
A Bookshelf Inspired by Pottery Barn
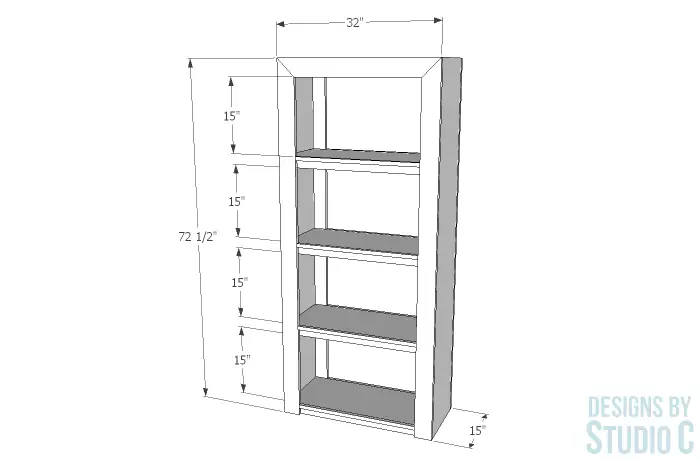
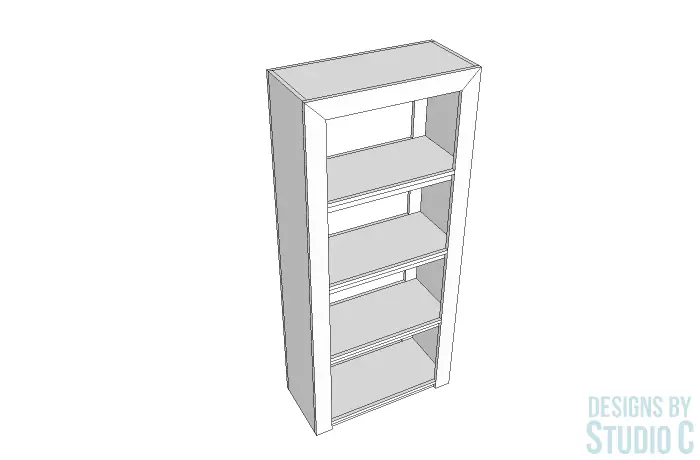
This bookshelf is a really great piece with simple lines that transforms well into a knock-off furniture plan suitable for all skill levels! The plans to build the Dillon tall bookcase use off-the-shelf lumber and simple materials requiring few tools in the process. This bookcase is constructed using pocket holes with plain or fancy trim along the edges of the plywood shelves. The face frames can be attached using brad nails and a nailer, or attached using pocket holes from the inside.
Materials:
- 1-1/4″ pocket hole screws (<– affiliate link!)
- 1-1/4″ screws
- 1-1/2″ brad nails
- Wood glue
- Sandpaper (80, 120, 220 grits)
- Finishing supplies
Lumber:
- 4 – 1×2 at 6′
- 1 – 1×4 at 6′
- 4 – 1×4 at 8′
- 1 – 4′ x 4′ sheet of 3/4″ plywood
- 1 – 4′ x 8′ sheet of 3/4″ plywood
- 3/4″ to 1″ wide trim for the front of the shelves
Cut List:
- 4 – 1×4 at 72-1/2″ – Face Frames
- 2 – 1×4 at 32″ – Face Frames
- 2 – 3/4″ plywood at 13-1/2″ x 72-1/2″ – Sides
- 8 -1×2 at 30-1/2″ – Shelf Supports
- 5 – 3/4″ plywood at 13-1/2″ x 30-1/2″ – Top & Shelves
- Trim cut to fit exposed edges of plywood shelves
Notes About the Project:
- Most home improvement stores will cut the plywood to size for a small fee, just ask!
- The trim for the edges of the shelves should be no more than 3/4″ thick (pieced trim would look fabulous!)
- Sand the pieces prior to assembly
- The bookcase can be finished however you desire!
Step One
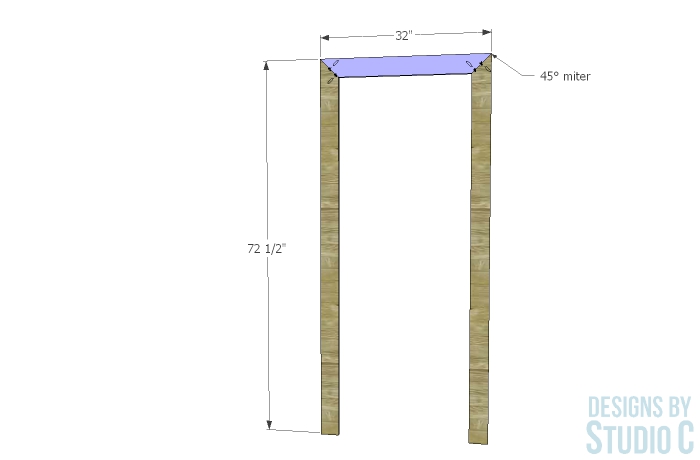
Cut the pieces for the face frame. Cut a 45° miter in the top edges of the longer framing pieces, and a miter in each end of the shorter pieces. Set the pocket hole jig for 3/4″ material, and drill pocket holes as shown in the drawing. Assemble the frame using glue and 1-1/4″ pocket hole screws.
Step Two
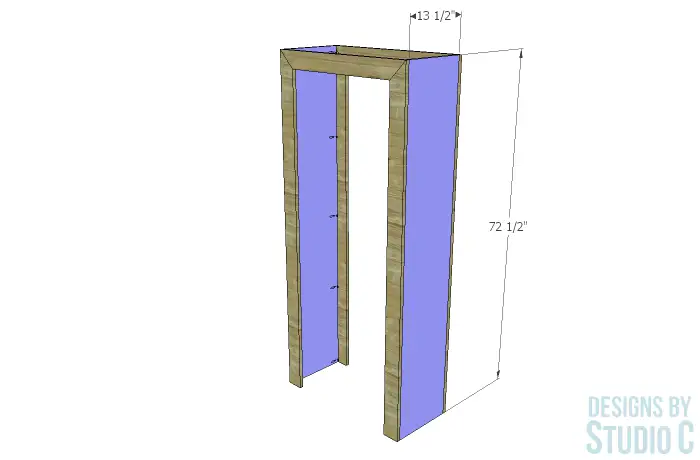
Cut the pieces for the sides and drill pocket holes along each long edge. Secure the sides to the face frames using glue and 1-1/4″ pocket hole screws. The outside edges of the frames will be flush with the outside faces of the sides.
Step Three
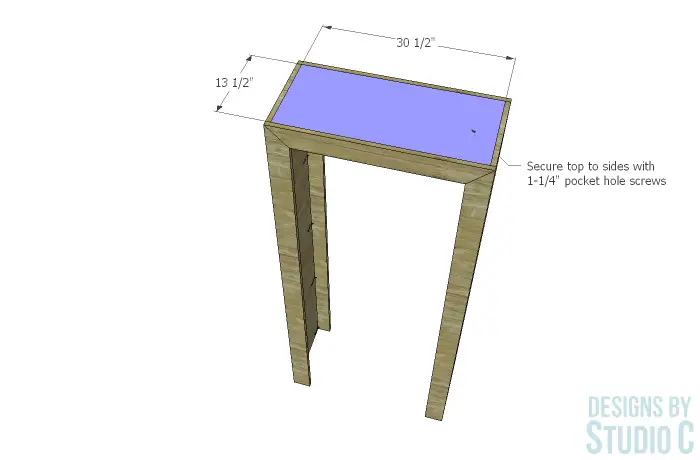
Cut the piece for the top and drill pocket holes in all four edges. Secure the top to the top edges of the face frames, as well as to the top of the sides using glue and 1-1/4″ pocket hole screws.
Step Four
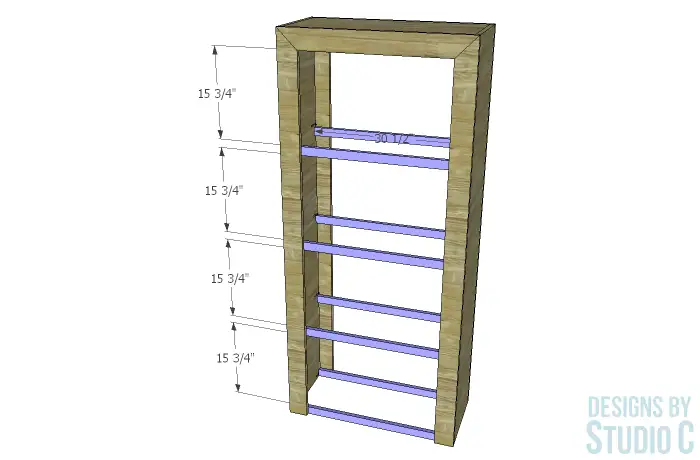
Cut the pieces for the shelf supports. Mark the placement for the supports on the inside of the face frames, and secure the supports to the face frames using glue and 1-1/4″ screws.
Step Five
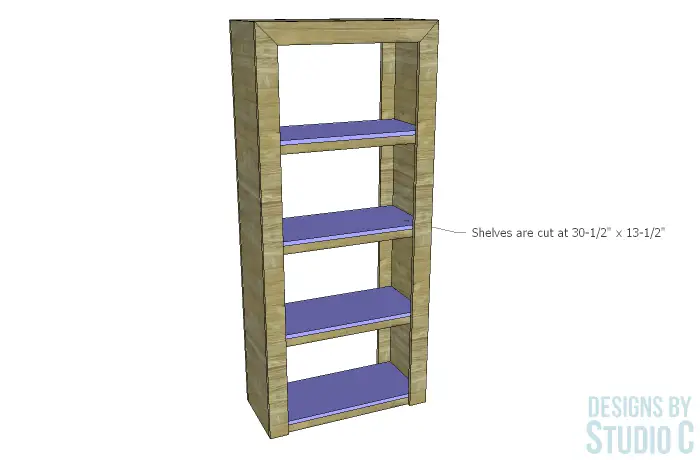
Cut the pieces for the shelves. Position the shelves on top of the supports and secure in place using glue and 1-1/2″ brad nails. (This is where a brad nailer comes in handy! <– affiliate link!)
Step Six
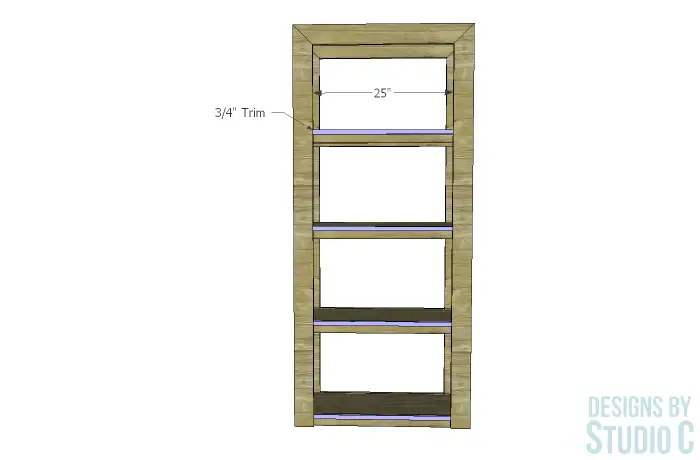
Cut the pieces of trim to cover the exposed edges of the shelves between the legs of the face frame. Secure in place using glue and brad nails.
Finish the bookcase as desired!
Here are a couple of other plans to build bookcases, in case you’re interested:
Have questions about how to build the Dillon tall bookcase? Leave a comment below!
Originally posted 2021-01-01 10:11:42.

