
Build an Indoor Outdoor Canopy Daybed
A Fabulous Daybed That Uses a Twin Mattress
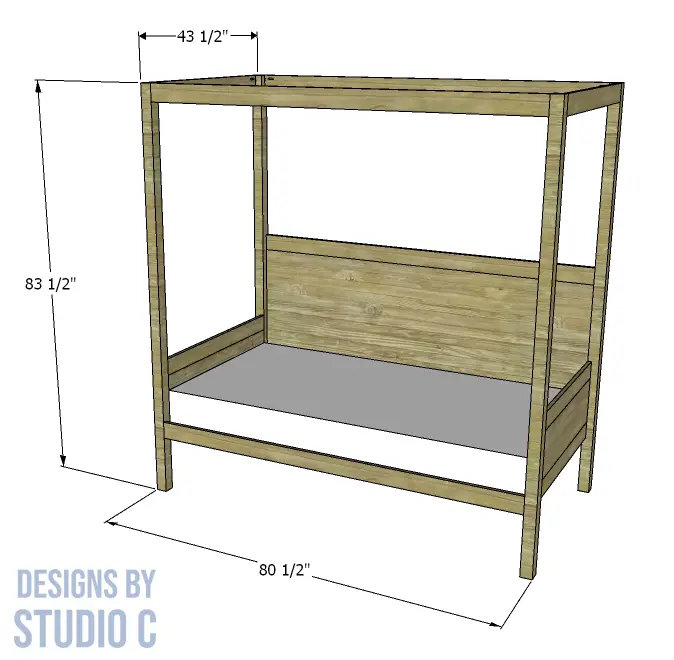
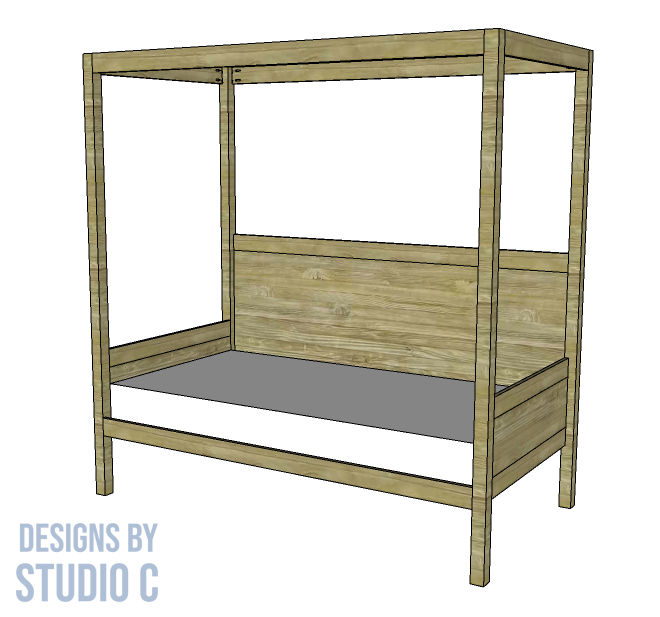
Years ago, I built an outdoor daybed using a crib mattress for the seat. I still have it, and still use it. But now when I want to lay outside, I want to stretch out a little further… The plans to build an indoor-outdoor canopy daybed use a twin mattress for the seat. The daybed is constructed using stacked 1x3s for legs, 1x3s for the framing and plywood for the sides and back. This easy build can be completed in a weekend with plenty of time left over to test it out!
Materials:
- 1-1/4″ pocket hole screws
- 1-1/2″ screws
- Wood glue (<– affiliate link!)
- Sandpaper (80, 120, 220 grits)
- Finishing supplies
Lumber:
- 2 – 1×2 at 8′
- 12 – 1×3 at 8′
- 16 – 1×4 at 8′
- 1 – 4′ x 8′ sheet of 3/4″ plywood
Cut List:
- 12 – 1×3 at 83-1/2″ – Legs
- 5 – 1×4 at 76″ – Framing
- 6 – 1×4 at 39″ – Framing
- 2 – 3/4″ plywood at 9-1/2″ x 39″ – Sides
- 1 – 3/4″ plywood at 28-1/2″ x 76″ – Back
- 2 – 1×2 at 76″ – Slat Support
- 15 – 1×4 at 42″ – Slats
Notes About the Project:
- Sand all pieces prior to assembly
- Fill all visible pocket holes
- The plywood panels could be stenciled or painted a contrasting color
- The top framing could be draped with gauze or decorative lights for a romantic look!
Step One
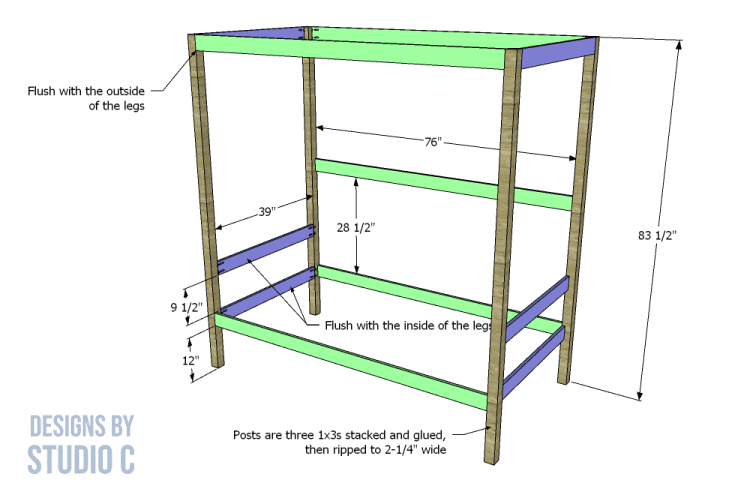
Cut the pieces for the legs. Laminate the pieces together in sets of three (see this post on building tapered furniture legs for reference), then rip the assemblies to 2-1/4″ wide on a table saw.
Step Two
Cut the pieces for the framing. With the pocket hole jig set for 3/4″ material, drill pocket holes in each end of the framing pieces. Each of the upper framing pieces at the top will be flush with the outside faces of the legs while the lower pieces for the sides and back will be a bit different. The longer pieces will be flush with the outside faces of the legs like the top and the shorter pieces will be flush with the inside faces of the legs.
Secure the framing pieces to the legs using glue and 1-1/4″ pocket hole screws.
Step Three
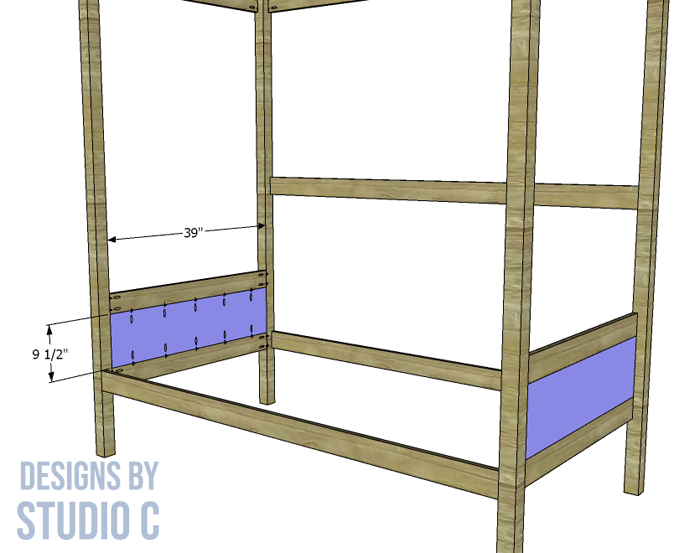
Cut the pieces for the side panels, and drill pocket holes along each long edge. Secure the panels between the lower framing pieces for the sides using glue and 1-1/4″ pocket hole screws.
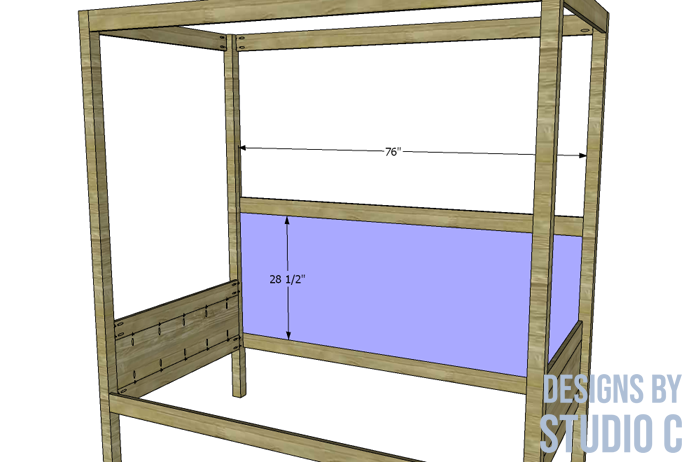
Step Four
Cut the piece for the back panel and drill pocket holes in each long edge. Secure the panel between the longer framing pieces for the back using glue and 1-1/4″ pocket hole screws.
Pro tip: If the pocket holes in the panel face to the back, they won’t necessarily have to be filled!
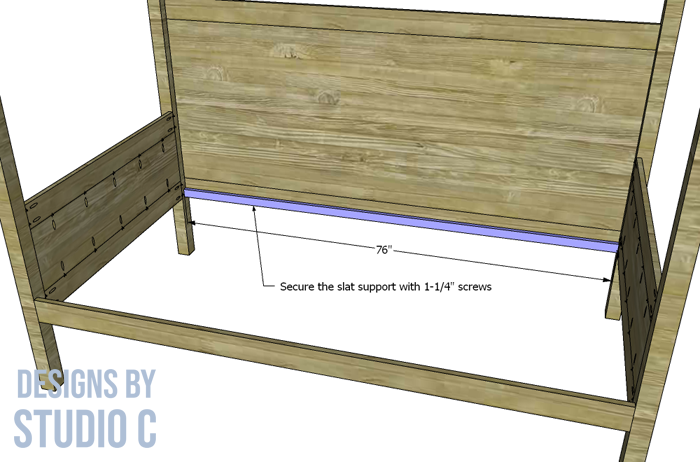
Step Five
Cut the pieces for the slat supports. Secure the supports to the lower framing pieces, with the bottom edges flush, using glue and 1-1/4″ screws.
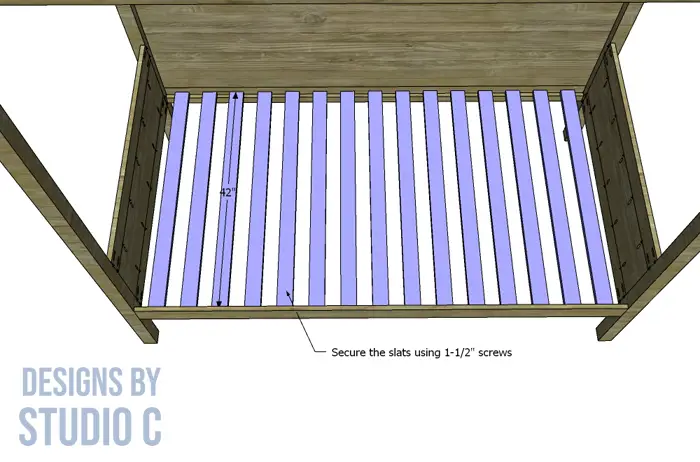
Step Six
Cut the pieces for the slats. Secure the slats to the supports using 1-1/4″ screws.
Fill the visible pocket holes and finish as desired!
If using outdoors, the daybed would be best used in a covered area using proper materials rated for outdoor use.
Have questions about the plans to build an indoor-outdoor canopy daybed? Leave a comment below!
Originally posted 2022-06-20 08:00:02.

[…] plans detail how to build an indoor-outdoor canopy daybed using a twin mattress for the seat. The daybed’s construction involves stacked 1x3s for legs, […]