
Build a Sawhorse Leg Desk
A Fabulous Desk in a Modern Style
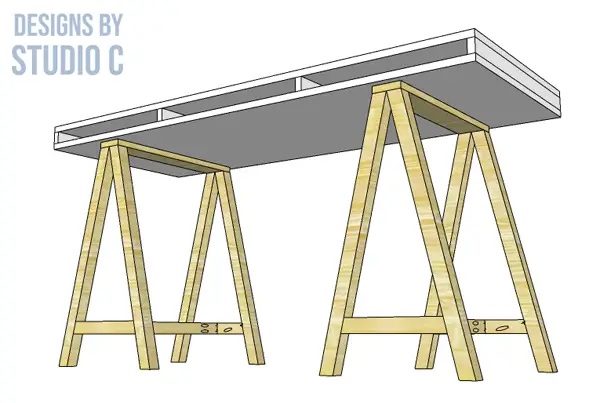
This desk is a really cool and super-simple build. The plans to build a sawhorse leg desk feature 2×2 leg assemblies and a plywood top with spacers between the layers.
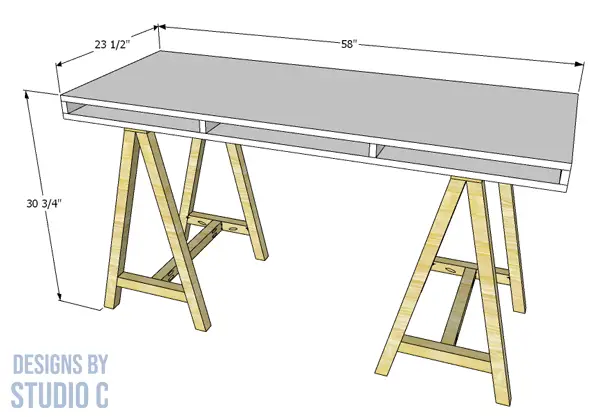
The top can be customized however you desire, and the plan is suitable for all skill levels!
Materials:
- 2-1/2″ pocket hole screws
- 2″ brad nails
- 1-1/2″ screws (SPAX® is an excellent choice -<– affiliate link!)
- Edge banding
- Wood glue
- Sandpaper (80, 120, 220 grits)
- Finishing supplies
Lumber:
- 1 – 1×2 at 8′
- 1 – 1×4 at 4′
- 4 – 2×2 at 8′
- 1 – 4′ x 8′ sheet of 3/4″ plywood
Cut List:
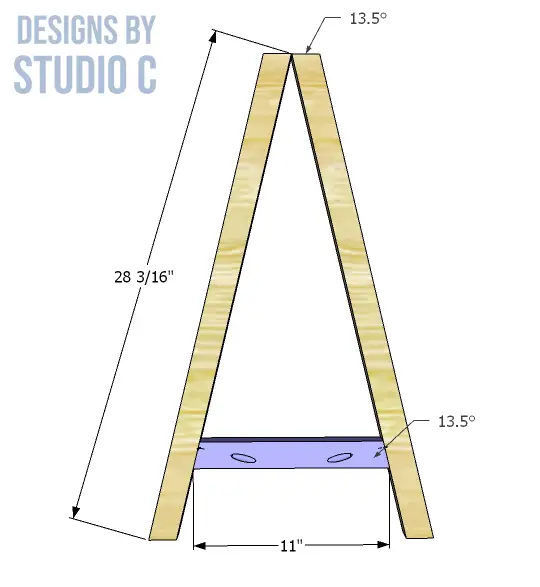
- 8 – 2×2 at approx. 28-1/2″ – Legs
- 4 – 2×2 at 11″ – Leg Stretchers
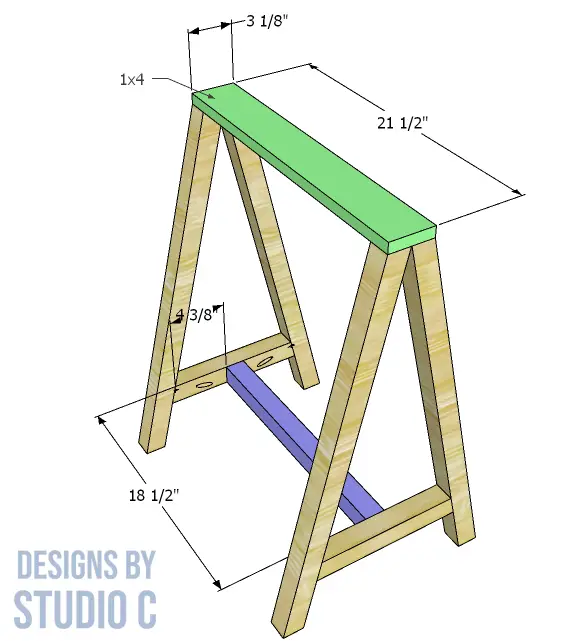
- 2 – 2×2 at 18-1/2″ – Leg Assembly Stretchers
- 2 – 1×4 at 21-1/2″ – Leg Assembly Top
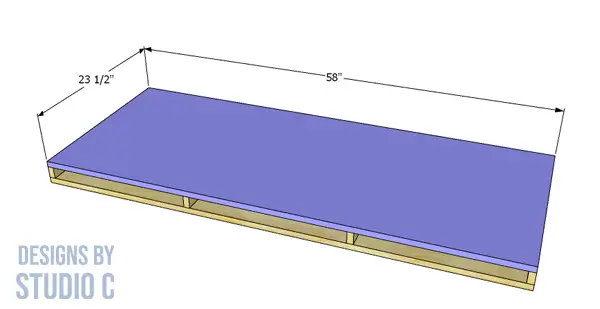
- 2 – 3/4″ plywood at 23-1/2″ x 58″ – Top and Bottom
- 4 – 1×2 at 23-1/2″ – Center Spacers
Notes About the Project:
- Edge banding will be applied to the exposed edges of the plywood
- Sand all of the pieces before assembly
Step One
Cut the pieces for the legs and the leg stretchers. Cut a 13.5° angle in the top and bottom of the legs, as well as each end of the leg stretcher. Set the pocket hole jig for 1-1/2″ material and drill a pocket hole in each end. Secure the legs to the stretcher using glue and 2-1/2″ pocket hole screws.
Step Two
Cut the pieces for the leg assembly stretcher, and drill pocket holes in each end. Also, cut the 1×4 piece for the top of the legs. Secure it to the legs using glue and 1-1/4″ screws.
Step Three
Cut the pieces for the top, bottom and center spacers. Secure the spacers to the bottom using glue and 2″ brad nails, then secure the top.

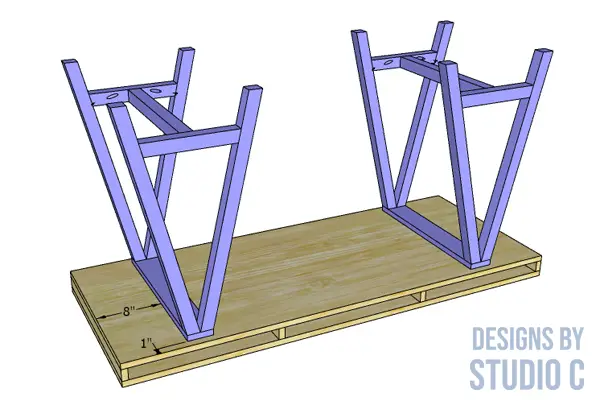
Step Four
Place the top assembly on a flat surface and position the legs upside down. Secure the legs as shown using glue and 1-1/2″ screws.
Finish the desk as desired.
Have questions about the sawhorse leg desk? Leave a comment below!
