Free Furniture Plans to Build a Tessa Ottoman
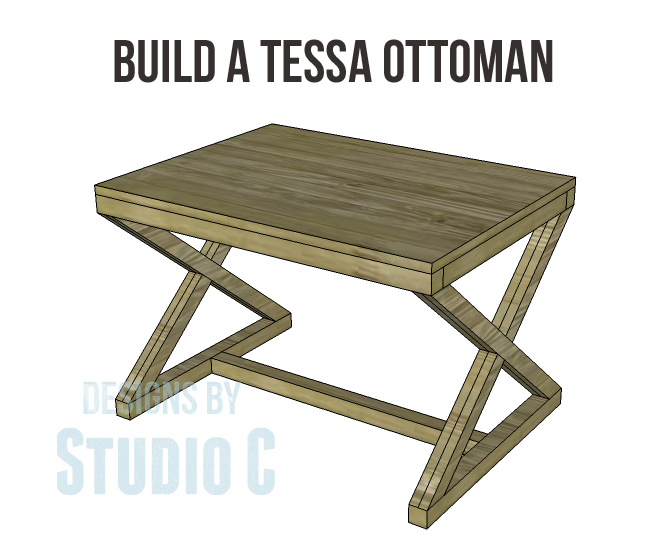
Everyone needs a place to put their feet up and relax, right? These free furniture plans to build a Tessa Ottoman fit that bill perfectly! This ottoman is easy to construct with a top that can be upholstered and X-shaped sides that are right on trend!
Materials:
- 1-1/4″ pocket hole screws (<– affiliate link!)
- 2-1/2” pocket hole screws
- 1-1/4″ brad nails
- 2” brad nails or 2″ screws (<– affiliate link!)
- Edge banding, optional
- Wood glue
- Sandpaper (100, 150, 220 grits)
- Finishing supplies (primer & paint, or stain, sealer)
Lumber:
- 3 – 1×2 at 8′
- 2 – 2×2 at 8′
- 1 – 2′ x 4′ sheet of 3/4″ plywood
Cut List:
- 2 – 2×2 at 19″ – Top Frame
- 2 – 2×2 at 30″ – Top Frame
- 4 – 1×2 at 13″ – X Sides
- 4 – 1×2 at 13-1/16″ – X Sides
- 4 – 1×2 at 27-5/16″ – X Sides
- 2 – 2×2 at 22″ – Feet
- 1 – 2×2 at 27″ – Stretcher
- 1 – 2×2 at 19″ – Top Support
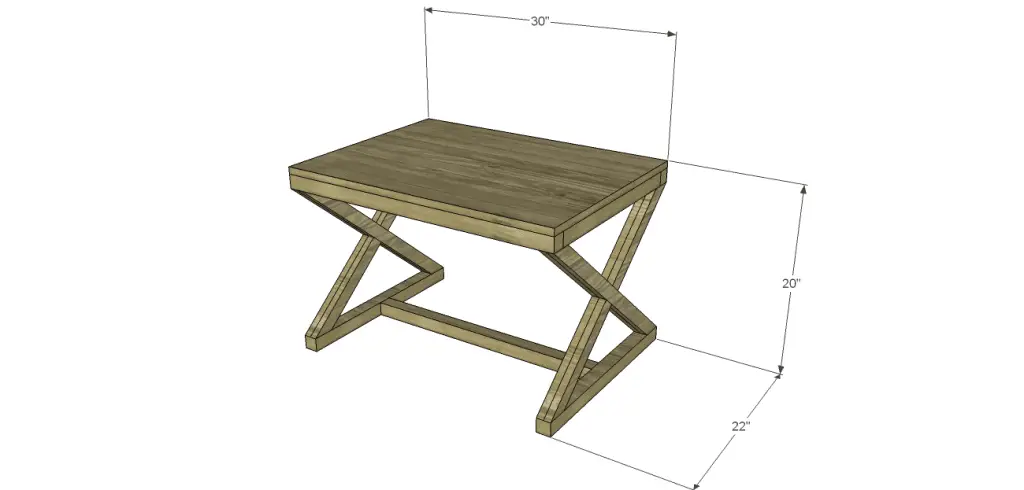
- 1 – 3/4″ plywood at 22″ x 30″ – Top
Notes:
Edge banding will be applied to the exposed edges of the plywood prior to assembly.
Step One
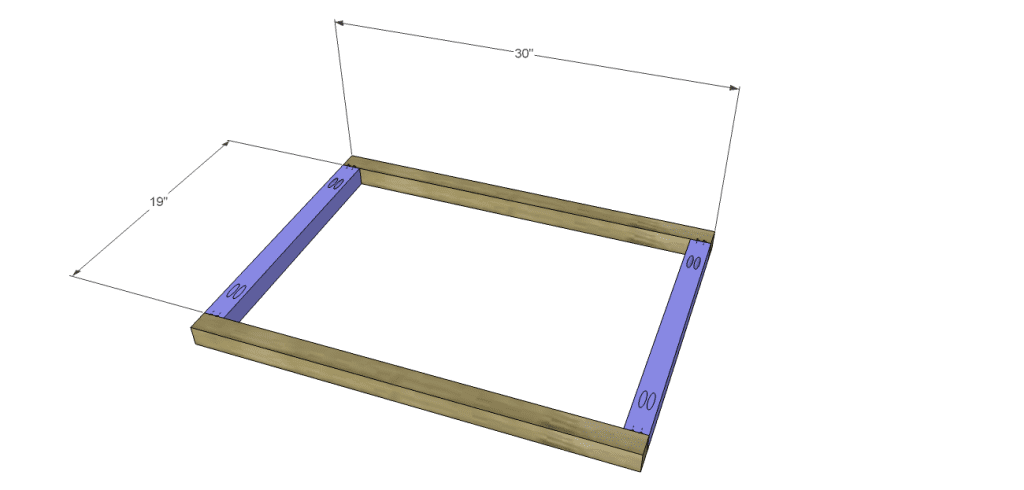
Cut the pieces for the top frame. With the pocket hole jig set for 1-1/2″ material, drill pocket holes in each end of the shorter pieces. Assemble the frame as shown using glue and 2-1/2″ pocket hole screws.
Step Two
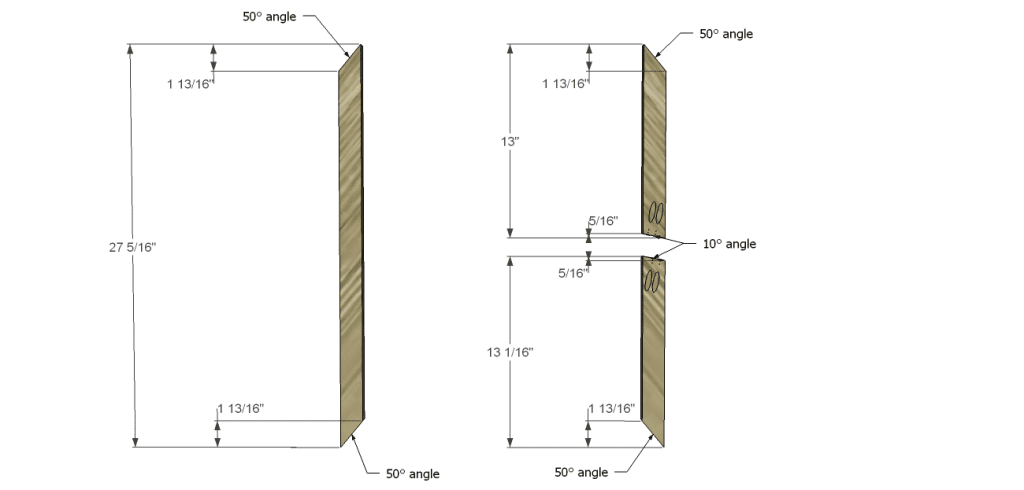
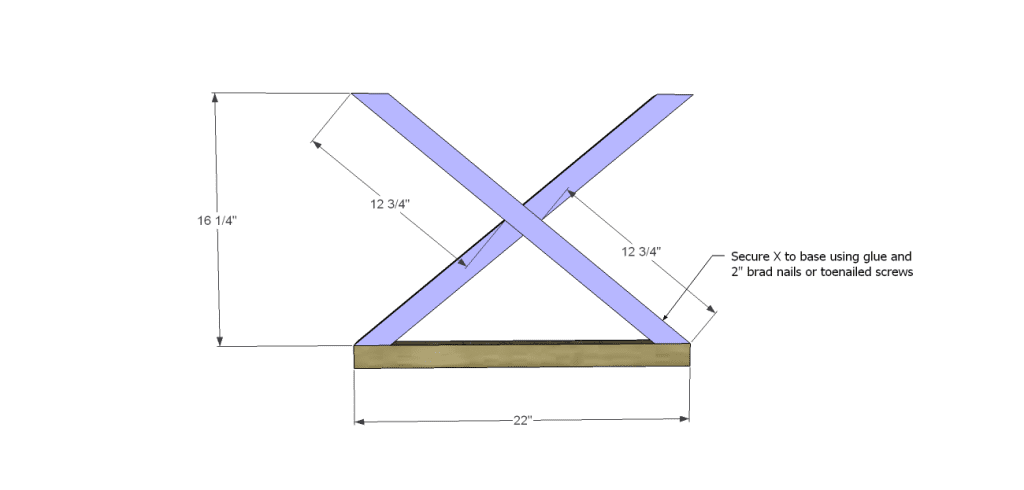
Cut the pieces for the X sides. I have listed the degree of each angle as well as the measurement. Assemble the Xs as shown using glue and 1-1/4″ pocket hole screws maintaining the dimensions shown. Spread glue on the faces of two of the X assemblies the position the remaining X assemblies on each of them. Clamp and secure using 1-1/4″ brad nails.
Attach each X assembly to a 2×2 foot piece using glue and 2″ brad nails or toenailed 2″ screws.
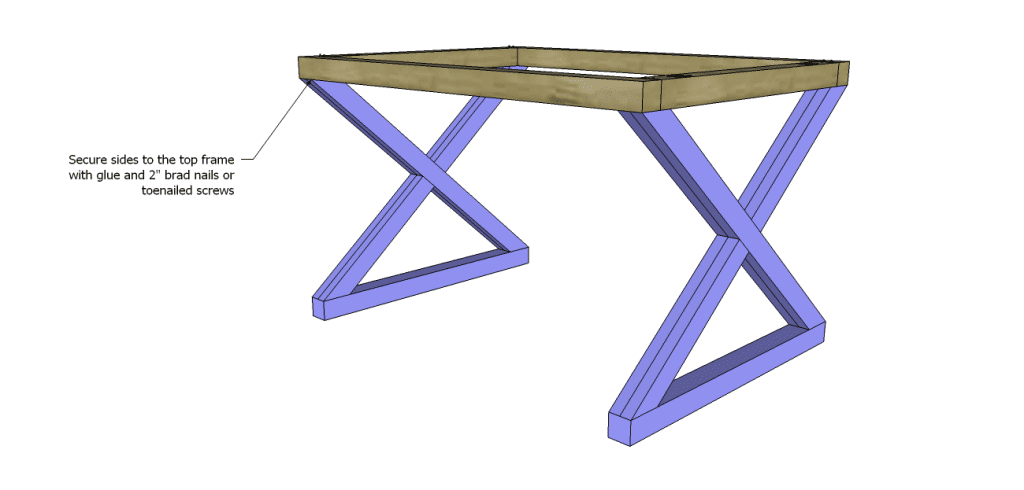
Attach each X side to the lower edge of the top frame using glue and 2″ brad nails or toenailed 2″ screws.
Step Three
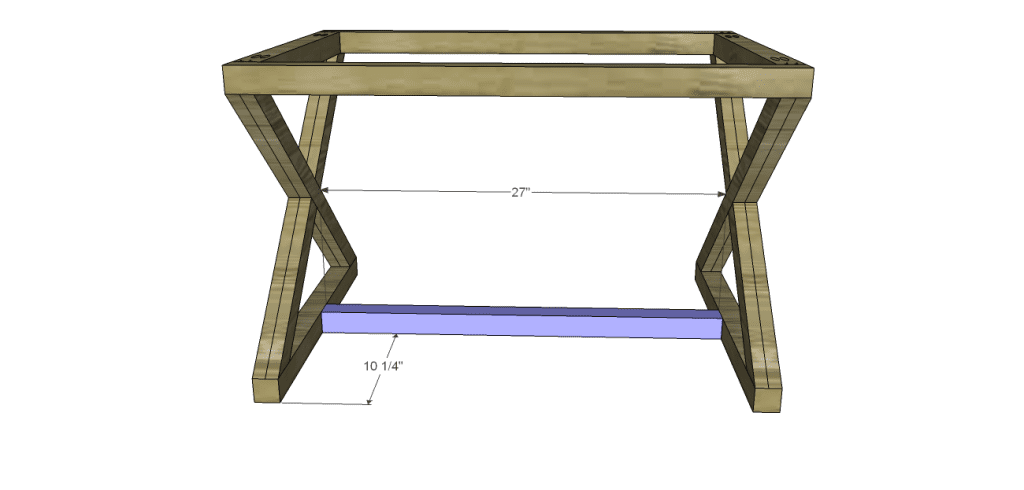
Cut the piece for the stretcher and drill pocket holes in each end. Secure to the feet using glue and 2-1/2″ pocket hole screws. Position the pocket holes so they face down and won’t have to be filled.
Step Four
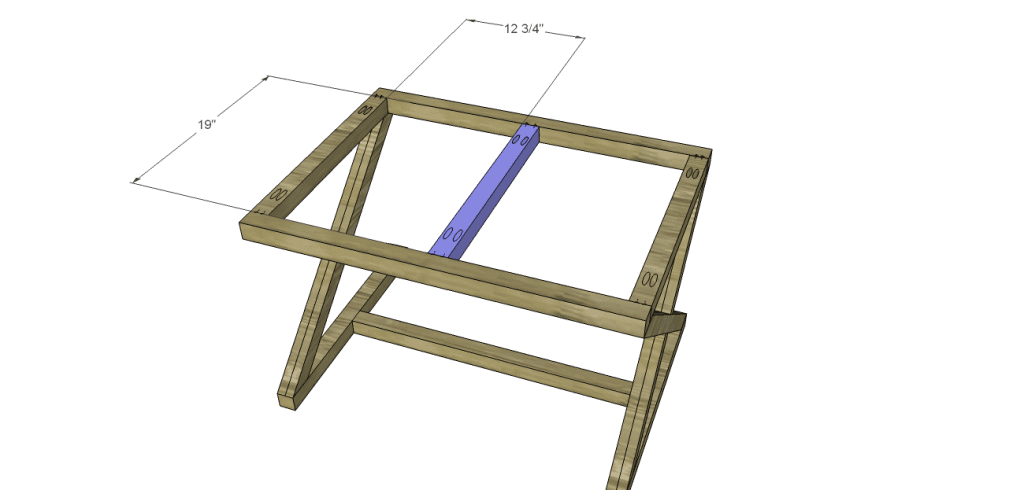
Cut the piece for the top support and drill pocket holes in each end. Secure to the top frame using glue and 2-1/2″ pocket hole screws.
Step Five
Cut the piece for the top. If upholstering the top, cover with a piece of 1″ foam, a layer of upholstery batting, and the fabric of choice. Pull the batting and fabric tight securing it to the bottom using staples. Secure the top to the frame using glue and countersunk 2″ screws.
If not upholstering the top, secure it to the frame using glue and 1-1/4″ brad nails.
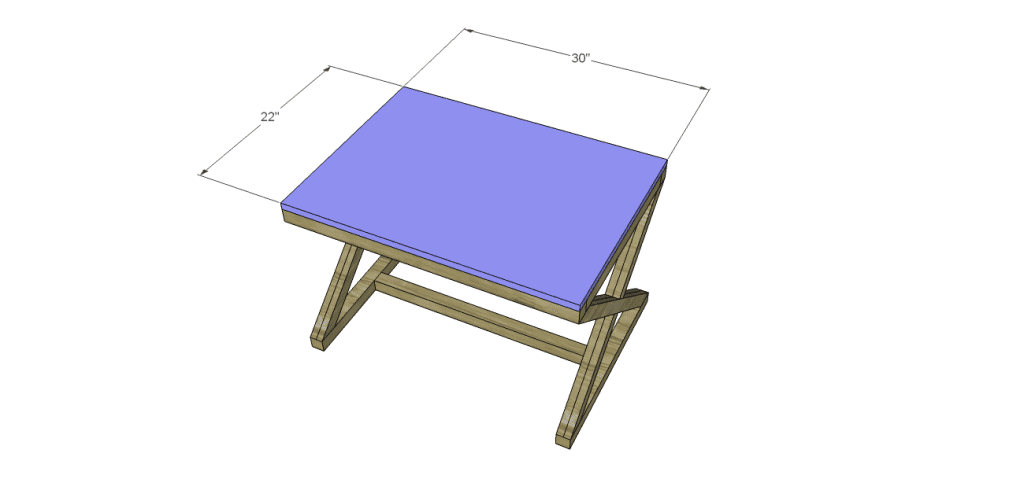
Finish as desired.
Constructed out of lumber rated for exterior use, these free furniture plans to build a Tessa Ottoman would be perfect to construct for outdoor use! Have a request for plans? Let me know at cher {at} designsbystudioc {dot} com!
Disclaimer:
This post contains links to a site of which I am an affiliate. What that means is if the link is clicked and a purchase is made, I will get a commission of that sale. Rest assured I would only direct my readers to sites I shop at myself!
Originally posted 2014-01-22 08:00:41.

3 Comments
My recliner would be jealous to know how easily it could be replaced…
LOL, Linda!!
😀 Had one as a child, Cher. Loved it. It was the perfect height as a table.