DIY Plans to Build a Mosaic Cabinet
A Neat Cabinet with Pieced Doors
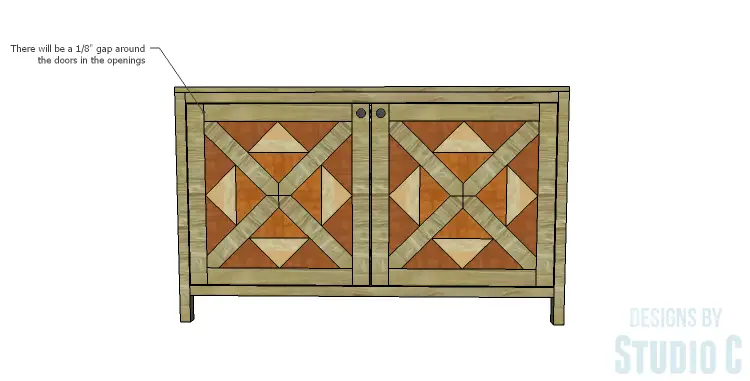
Do you like cabinets that are simple and easy to build with a little twist? The DIY plans to build a Mosaic Cabinet feature two doors with a pieced mosaic detail on the front with a large shelf on the inside. The piece would be a great addition to any room and can also be completed in a weekend.
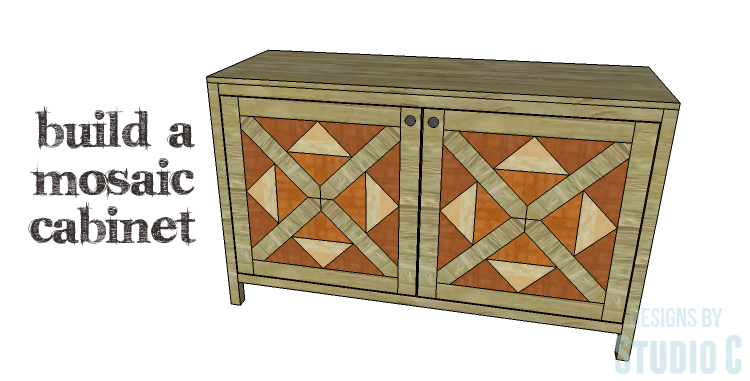 The door panels are constructed using 1/4″ plywood pieces secured to a 1/2″ base. They are then inserted into a 3/4″ frame.
Materials:
- 1″ pocket hole screws (<– affiliate link!)
- 1-1/2″ pocket hole screws (<– affiliate link!)
- 2-1/2″ pocket hole screws (<– affiliate link!)
- 1-1/4″ screws
- 1-1/4″ brad nails
- Edge banding, optional (<– affiliate link!)
- Cabinet pulls
- Wood glue
- Sandpaper (100, 150, 220 grits)
- Finishing supplies (primer & paint, or stain, sealer)
Lumber:
- 2 – 1×3 at 8′
- 6 – 2×2 at 6′
- 1 – 4′ x 4′ sheet of 1/4″ plywood
- 1 – 2′ x 4′ sheet of 1/2″ plywood
- 2 – 4′ x 8′ sheets of 3/4″ plywood
Cut List:
- 4 – 2×2 at 33-1/2″ – Legs
- 4 – 2×2 at 17″ – Side Framing
- 2 – 3/4″ plywood at 17″ x 26-1/2″ – Side Panels
- 4 – 2×2 at 53″ – Stretchers
- 1 – 3/4″ plywood at 26-1/2″ x 53″ – Back Panel
- 1 – 3/4″ plywood at 17″ x 53″ – Bottom
- 2 – 1×2 at 15-1/2″ – Shelf Framing
- 2 – 1×2 at 53″ – Shelf Framing
- 1 – 3/4″ plywood at 17″ x 53″ – Shelf
- 1 – 3/4″ plywood at 20″ x 56″ – Top
- 4 – 1×3 at 21-3/16″ – Door Rails
- 4 – 1×3 at 26-3/16″ – Door Stiles
- 2 – 1/2″ plywood at 21-3/16″ x 21-3/16″ – Door Panel
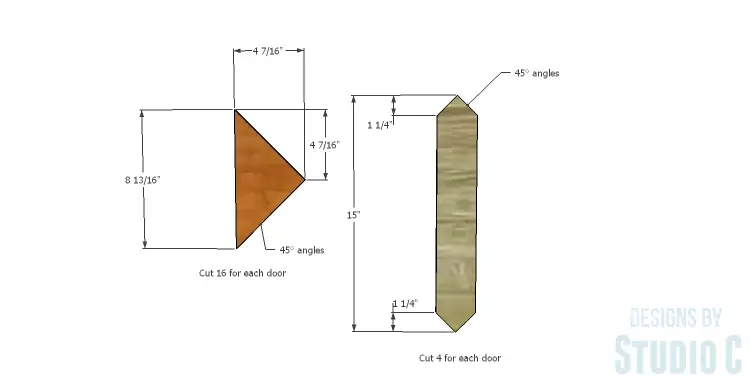
- 8 – 1/4″ plywood at 2-1/2″ x 15″ – Door Mosaic
- 32 – 1/4″ triangles at 4-7/16″ x 8-13/16″ – Door Mosaic
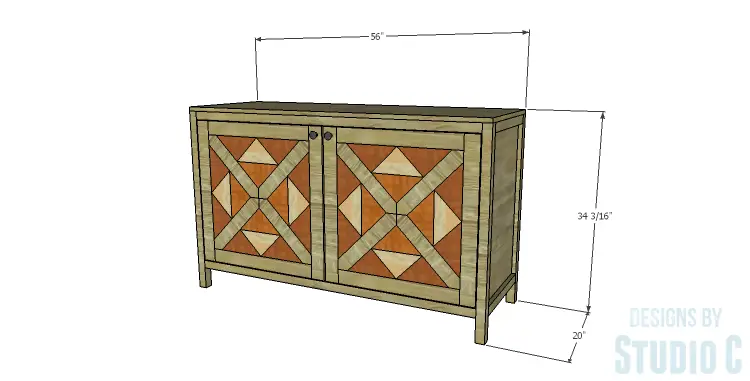
Click on the drawings for a larger view!
Step One
Edge banding will be applied to the exposed edges of the plywood prior to assembly.
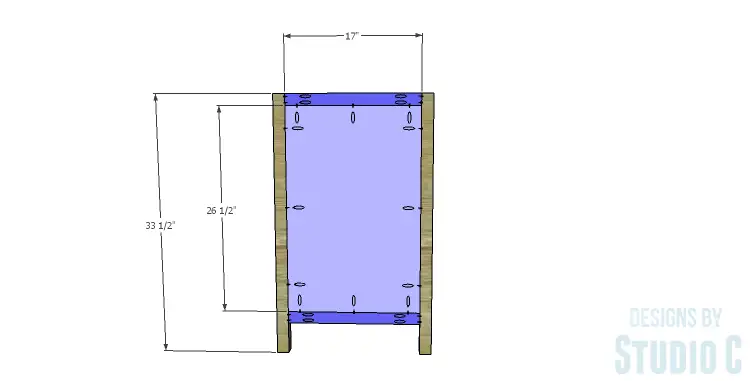
Cut the pieces for the legs, the side framing, and the side panels. With the pocket hole jig set for 1-1/2″ material, drill pocket holes in each end of the framing pieces. Attach the framing pieces to the legs using glue and 2-1/2″ pocket hole screws.
Set the pocket hole jig for 3/4″ material and drill pocket holes in all four edges of the panels. Secure the panels inside the side framing using glue and 1-1/4″ pocket hole screws. The back face of the panel will be flush with the back face of the frame.
Step Two
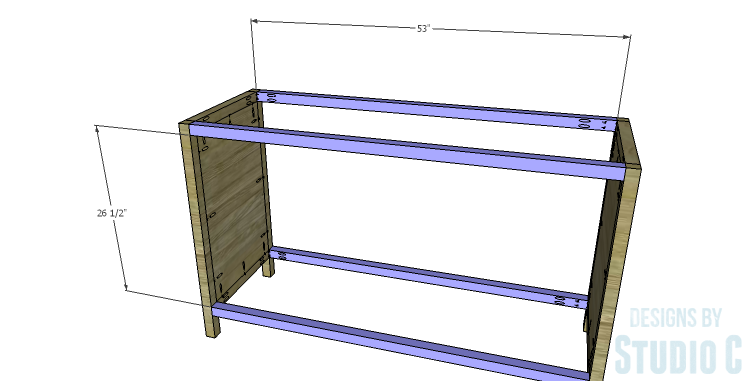
Cut the pieces for the stretchers. Set the pocket hole jig for 1-1/2″ material and drill pocket holes in each end of the stretchers. Secure the stretchers to the legs as shown using glue and 2-1/2″ pocket hole screws.
Step Three
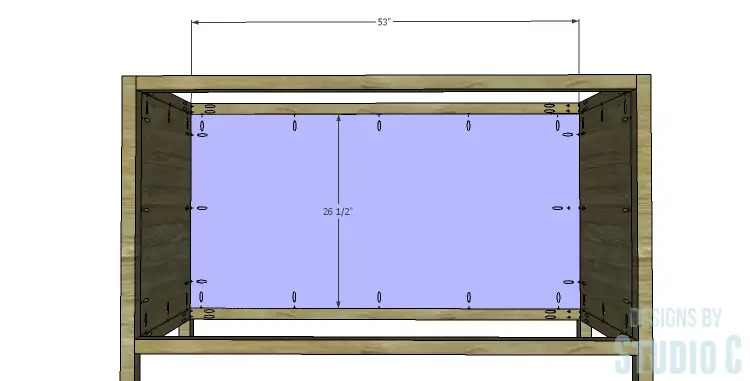
Cut the piece for the back panel. Set the pocket hole jig for 3/4″ material and drill pocket holes in all four edges of the panel. Secure the panel to the back legs and stretchers using glue and 1-1/4″ pocket hole screws. The back face of the panel will be flush with the inside face of the stretchers.
Step Four
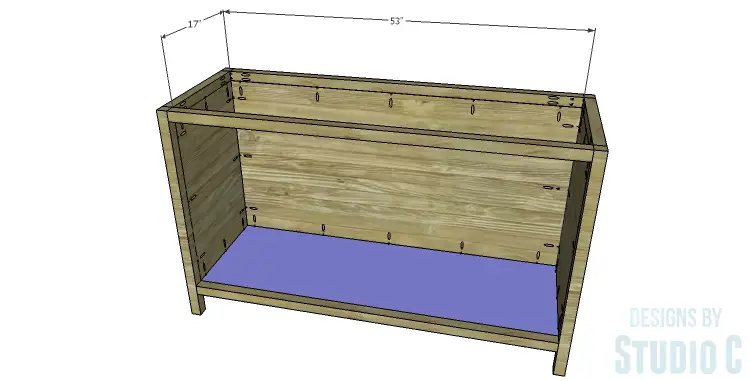
Cut the piece for the bottom and drill pocket holes in all four edges. Secure the bottom to the lower stretchers using glue and 1-1/4″ pocket hole screws. The top face of the bottom panel will be flush with the top face of the lower stretcher.
Step Five
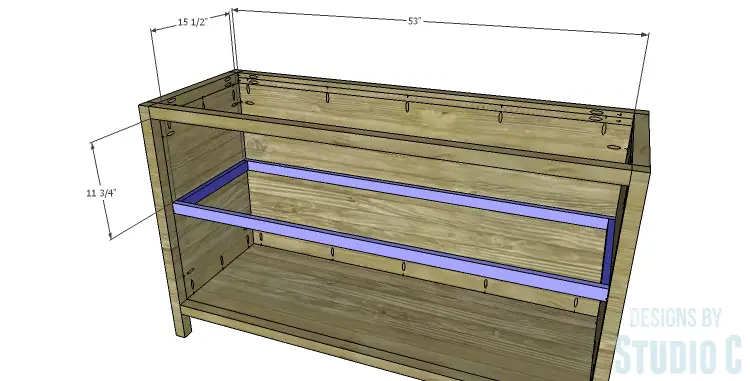
Cut the pieces for the shelf frame and drill pocket holes in each end of the shorter pieces. Assemble the frame using glue and 1-1/4″ pocket hole screws with the pocket holes facing out. This way, the pocket holes will be hidden when the frame is secured inside the cabinet!
Secure the frame inside the cabinet using glue and countersunk 1-1/4″ screws. (The frame will be secured to the back which will set it 1-1/2″ back from the front face of the legs.)
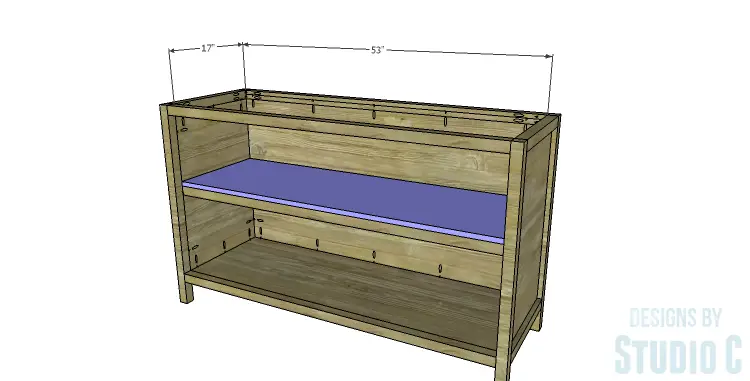
Cut the piece for the shelf. Secure the shelf to the top of the frame using glue and 1-1/4″ brad nails.
Step Six
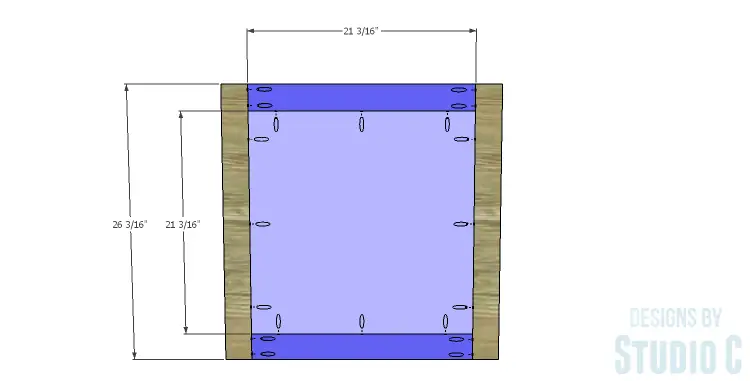
Cut the pieces for the door frames and the door panels. Drill pocket holes in each end of the door rail pieces. Assemble the frames using glue and 1-1/4″ pocket hole screws.
Set the pocket hole screws for 1/2″ material and drill pocket holes in all four edges of the panels. Secure the panel to the frame using glue and 1″ pocket hole screws. The back face of the panel will be flush with the back face of the frame.
Step Seven
It would be easier to pre-finish the doors and the mosaic pieces prior to setting the mosaic pieces in place. The mosaic pieces can be finished in different colors of stain, or all in one color!
Cut the pieces, cutting the angles at 45°. Dry fit the pieces on the door panels, trimming as necessary. Secure the mosaic pieces in place using glue. Lay a piece of wax paper over the top, then clamp a board over the wax paper until the glue cures.
Install the hinges on the doors, then install the doors in the opening.

The Mosaic Cabinet would look fabulous in a dining room or an entryway. It would also be a great media cabinet! Have any questions about the DIY plans to build a Mosaic Cabinet? Leave a comment below!
Originally posted 2014-12-01 08:00:27.


[…] Cabinet Free Woodworking PlansThis cabinet would be beautiful with its mosaic doors featuring different species of wood or stain colors. Not […]