Build a Lucia Bookshelf
Easy to Build Book Storage Inspired by a Catalog Retailer
This is the perfect project for one who is new to woodworking or one just looking for something quick and easy! The actual inspiration piece uses glass clips to hold the glass dividers in place but when I researched them, they were expensive! I created an alternative for the free plans to build a Joss & Main inspired Lucia bookshelf that would be easy (and much more cost effective) to make and still hold the dividers in place!
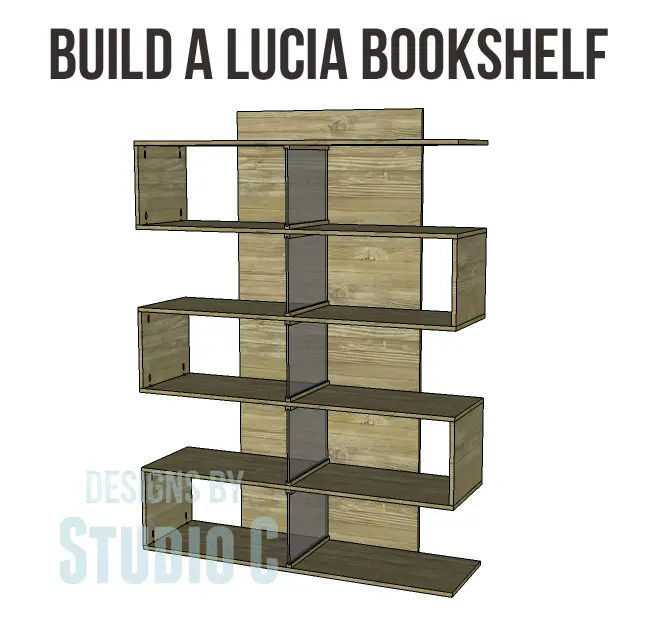
Glass, plexiglass, or acrylic sheets can be used for the dividers. I did find that the acrylic comes in colors and would be a fun alternative to clear or frosted – just sayin’…
Materials:
- 5 pieces of 3/8″ glass, plexiglass, or acrylic measuring 13″ x 16-1/2″
- 1-1/4″ pocket hole screws (<– affiliate link!)
- 1″ screws
- 1-1/4″ screws
- Edge banding, if desired (<– affiliate link!)
- 8 – Nail-on furniture glides
- Finishing supplies (sandpaper, paint or stain plus sealer) (<– affiliate link!)
Lumber:
- 4 sheets of 3/4″ plywood
- 1 – 1×12 at 3′
Cut List:
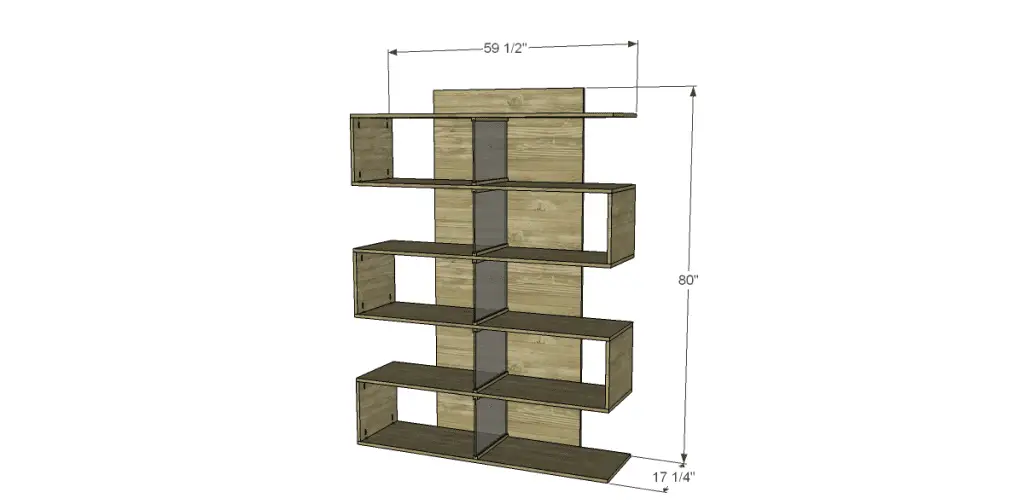
- 5 – 3/4″ plywood at 14″ x 16-1/2″ – Ends
- 6 – 3/4″ plywood at 16-1/2″ x 58-3/4″ – Shelves
- 1 – 1×12 at 16-1/2″ – Divider Pieces (will cut into 10 – 3/4″ x 1″ at 16-1/2″)
- 1 – 3/4″ plywood at 36″ x 80″ – Back
Step One
Cut the pieces for the shelves. Apply edge banding if desired.
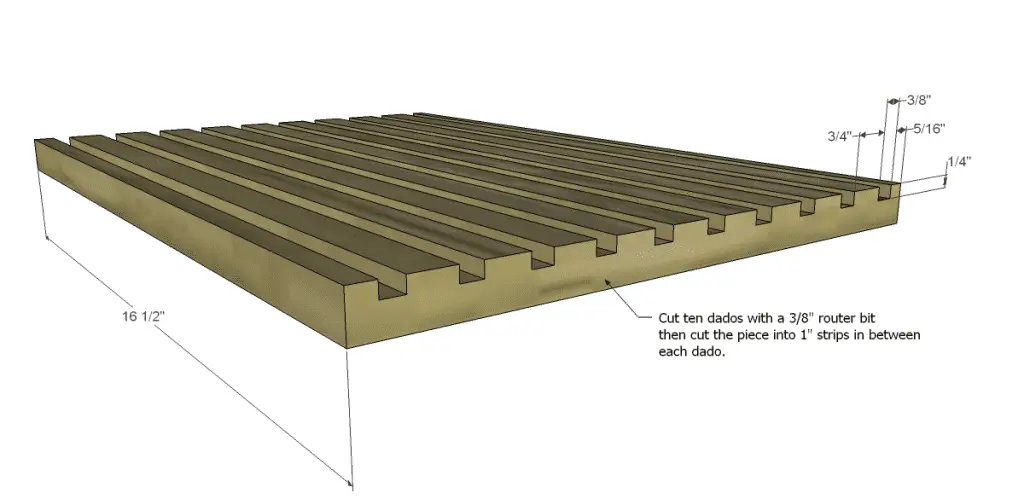
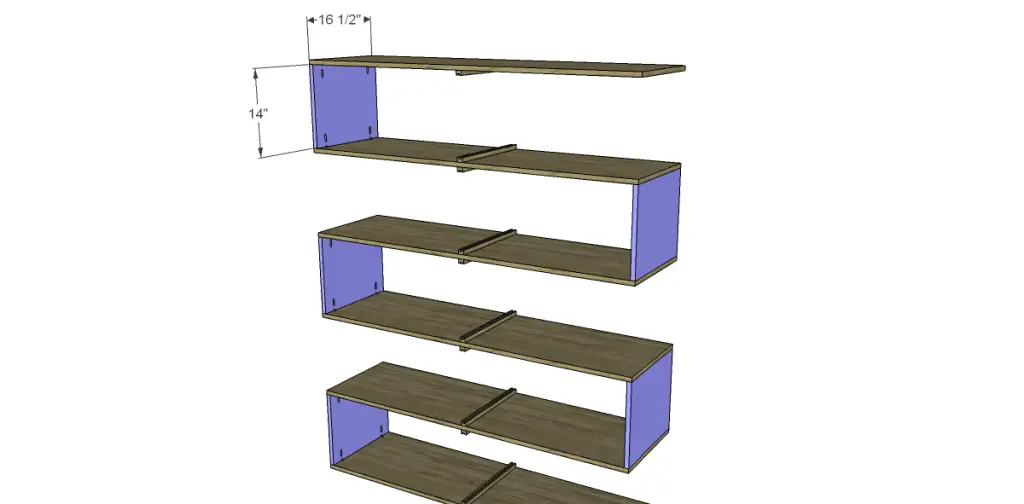
Cut the piece for the divider pieces. Use a router with a 3/8″ straight bit to cut the grooves in the 1×12 as shown in the drawing. Cut the pieces apart on the table saw. The dimensions allow for the kerf of the blade in between each piece.
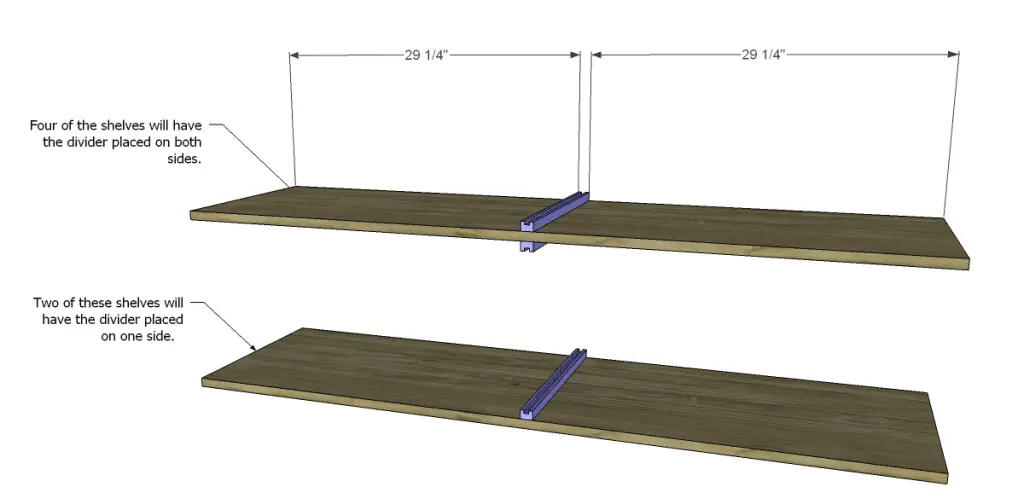
Attach the dividers to the shelves as shown using glue and countersunk 1″ screws. EDIT: The channels for the Plexiglas can also be made by using square dowels secured to the shelves with the height of the Plexiglas adjusted to fit.
Step Two
Cut the pieces for the ends. Drill pocket holes in the 16-1/2″ ends then attach to the shelves as shown using glue and 1-1/4″ pocket hole screws.
Step Three
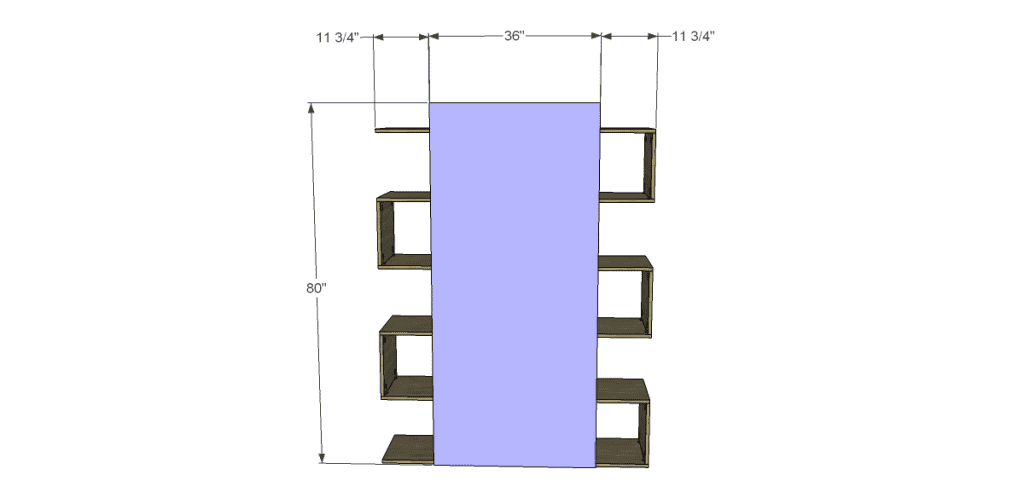
Cut the piece for the back. Apply edge banding, if desired. Attach to the back of the bookshelf as shown using glue and countersunk 1-1/4″ screws through the back into the shelves. Add nail-on furniture glides to the bottom of the lowest shelf.
Finish as desired!
A reader has suggested that as the bookshelf is currently designed, the shelves don’t feel sturdy. Angle brackets or shelf brackets can be added under the shelves (and attached to the back) to support the shelves. The brackets can be spray painted to match the color of the stain or paint. Have any questions about the free plans to build a Joss & Main Inspired Lucia bookshelf? Leave a comment below or contact me at cher {at} designsbystudioc {dot} com!
Originally posted 2012-11-19 08:00:55.
