Step-by-Step Guide: How to Craft an Easy Hexagon Wall Shelf
This project has been a long time coming… I saw the inspiration piece at Target several years ago, and drew it up once I got home. However, it sat on the back burner until I had a chance to work on it, so here it is: an easy to build hexagon wall shelf! The wall shelf is constructed out of 1/2 x 3-1/2 walnut (from North Castle Hardwoods!) with cork on one side of the backing and decorative paper on the other side. Follow along as I share how to make hexagon wall shelves in a way that anyone can make!

The inspiration piece is actually supposed to have a mirror in the larger opening but due to my lack of mirror cutting skills, I chose to go with the cork because it’s easy for everyone. If your mirror cutting skills are worthy, go for it!
The angled pieces were cut on the miter saw with a technique I saw on Instagram which was a total game changer, and I’ll demonstrate it below (but I totally can’t take credit for it!).
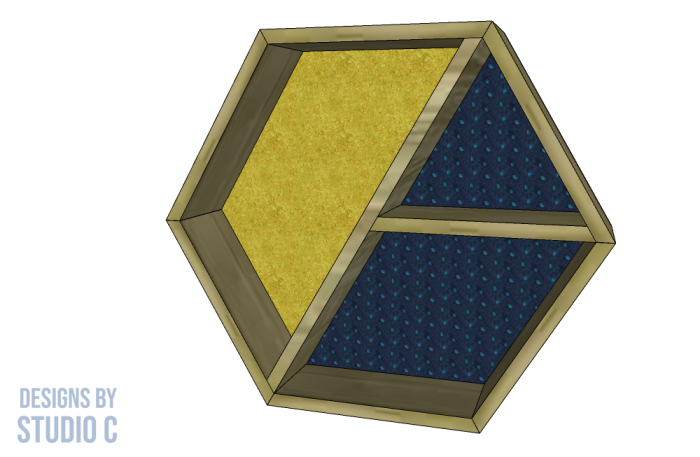
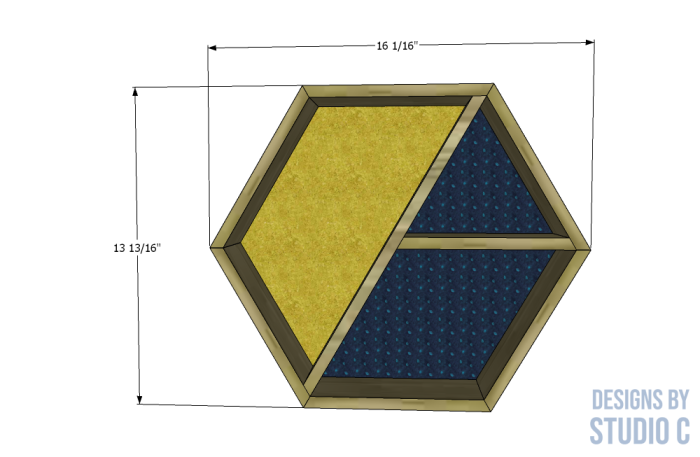
The photo below shows my sketch (along with a sketch of the house number plaque I made for my son!). I thought their shelf was upside down so I rotated it to have two shelves for plants or small trinkets. It was supposed to have hooks on the bottom but I decided not to install those (though you totally could, if you want!!)

Materials:
- 1-1/4″ brad nails
- 2 – 1/2 x 3-1/2 x 48 pieces of walnut hardwood
- Wood glue
- Masking tape
- Clear polyurethane sealer
- Scrap piece of 1/4″ plywood for the back
- Scrap pieces of corrugated board from a box
- Cork sheet (<– affiliate link!)
- Decorative scrapbook paper
- Spray adhesive
- D-ring picture hangers (<– affiliate link!)
Notes About the Project:
- If quality hardwood boards are used, there is no need to sand. Otherwise, sand all pieces prior to assembly.
Step One
Start by cutting the pieces for the outer frame, each with a 30° bevel at each end. The easiest way to do this is by using a stop block on the miter saw.
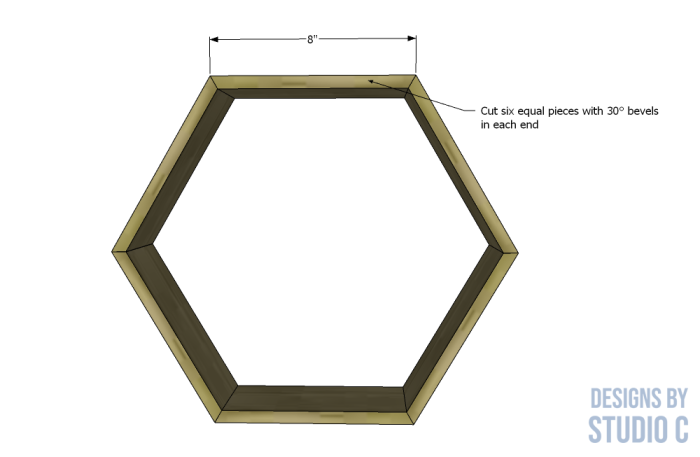
Set the miter saw to cut a 30° angle, and cut a piece off of one of the boards for the frame at about 3-4″ long. Take the piece and flip it over so the angle is in the opposite direction of the saw blade. Measure 8″ from the blade to the longer portion of the angle on the scrap piece (see the photo below) and clamp the scrap piece to the fence.


Slide the working board (the uncut piece used for the frame) so that the previous angle already cut on the board mates with the angle on the scrap piece and make the cut. Cut the remaining pieces by flipping the working board, mating the angles with the scrap piece, and making the cuts. So EASY!

Step Two
Place the pieces in a line, outside facing up (angles facing down), and apply masking tape to join the pieces. Flip the entire assembly over, and apply glue to the angles. Fold the pieces into the hexagon shape closing the ends with masking tape.

Step Three
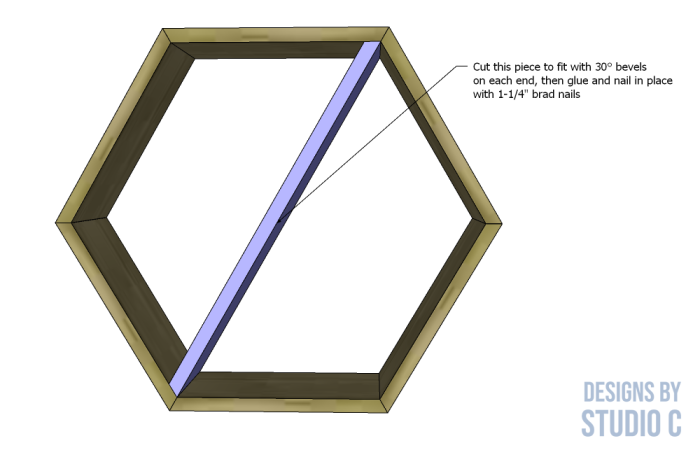
Once the outer frame has dried, measure and cut the piece for the divider with 30° bevels at each end. No dimensions are provided for this piece because it is cut to fit. Secure the divider using glue and 1-1/4″ brad nails from the outside.

Step Four
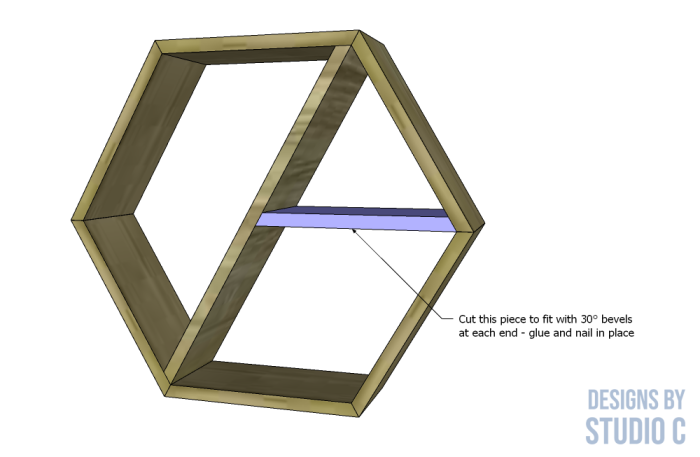
Next, measure and cut the piece for the shelf, also with 30° bevels at each end. Secure the shelf piece as shown using glue and 1-1/4″ brad nails.

Seal the entire shelf assembly as desired. I used Varathane Triple Thick Polyurethane in Matte.
Step Five
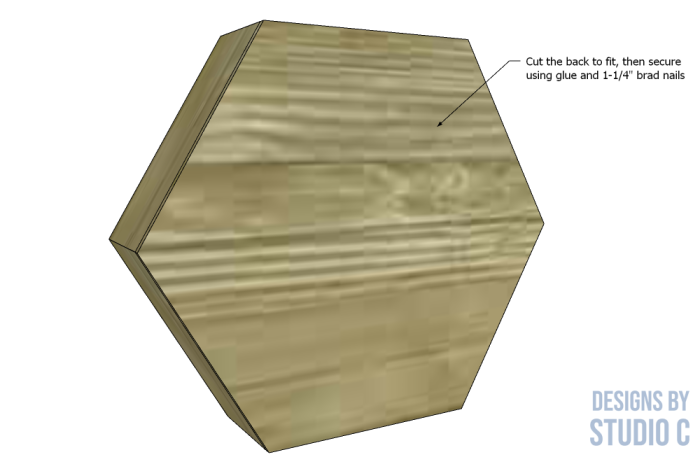
Cut the piece for the back. I placed the frame on the piece of 1/4″ plywood, drew around the outside of the frame, and cut the piece using the bandsaw.
Step Six
Before securing the back, trace the inside of the larger opening of the shelf onto a scrap piece of corrugated board or a box. Cut two pieces to fit inside this opening, under the cork, to act as a spacer and allow pushpins to be inserted into the cork a little better. (Cork sheets are sometimes thin and the corrugated board will add stability.)
Step Seven
Apply spray adhesive to the back piece, then apply a decorative piece of scrapbook paper that will show through the smaller openings on the shelf. Position the back on the frame, then secure in place using glue and 1-1/4″ brad nails.
Step Eight
Apply spray adhesive to the corrugated piece, then apply the cork and trim to fit. Push the piece into the larger opening until it rests on the back piece.
Step Nine
Install the d-ring picture hangers to the back positioning them so the screws for the hangers will be driven into the frame of the shelf. Then hang the shelf on the wall.

Hang or display as desired! The DIY hexagon shelf is a great statement piece in any room, and would look beautiful in any wood species. Have questions? Leave a comment below!

